Doc publique
- Configuration de votre écran USB-C
- How to configure a USB-C monitor / screen
- Installation d'un écran externe pour le télétravail
Configuration de votre écran USB-C
L'UNIL se dote de nouveaux écrans
Avec l'arrivée des nouveaux ordinateurs ayant des connectiques USB-C, l'UNIL renouvelle ses périphériques en se dotant d'écrans adaptés.
Ces nouveaux écrans présentent plusieurs bénéfices comparés aux anciens :
-
-
- Un seul câble branché sur votre ordinateur qui assure la sortie de l'image, la connexion de votre clavier et souris externe ainsi que le chargement de votre ordinateur. Vous pouvez ainsi garder le chargeur de votre laptop à la maison, sans rester à sec sur le campus !
- Une meilleure résolution pour une netteté d'image supérieure et un meilleur confort pour les yeux
- Une meilleure fiabilité de connexion
- Un air de modernité
-
Mise en route
Si un nouvel écran vous a été attribué, il vous sera livré par un technicien du Helpdesk. Le technicien effectuera les branchements initiaux pour votre écran et le périphérique sera prêt à l'emploi.
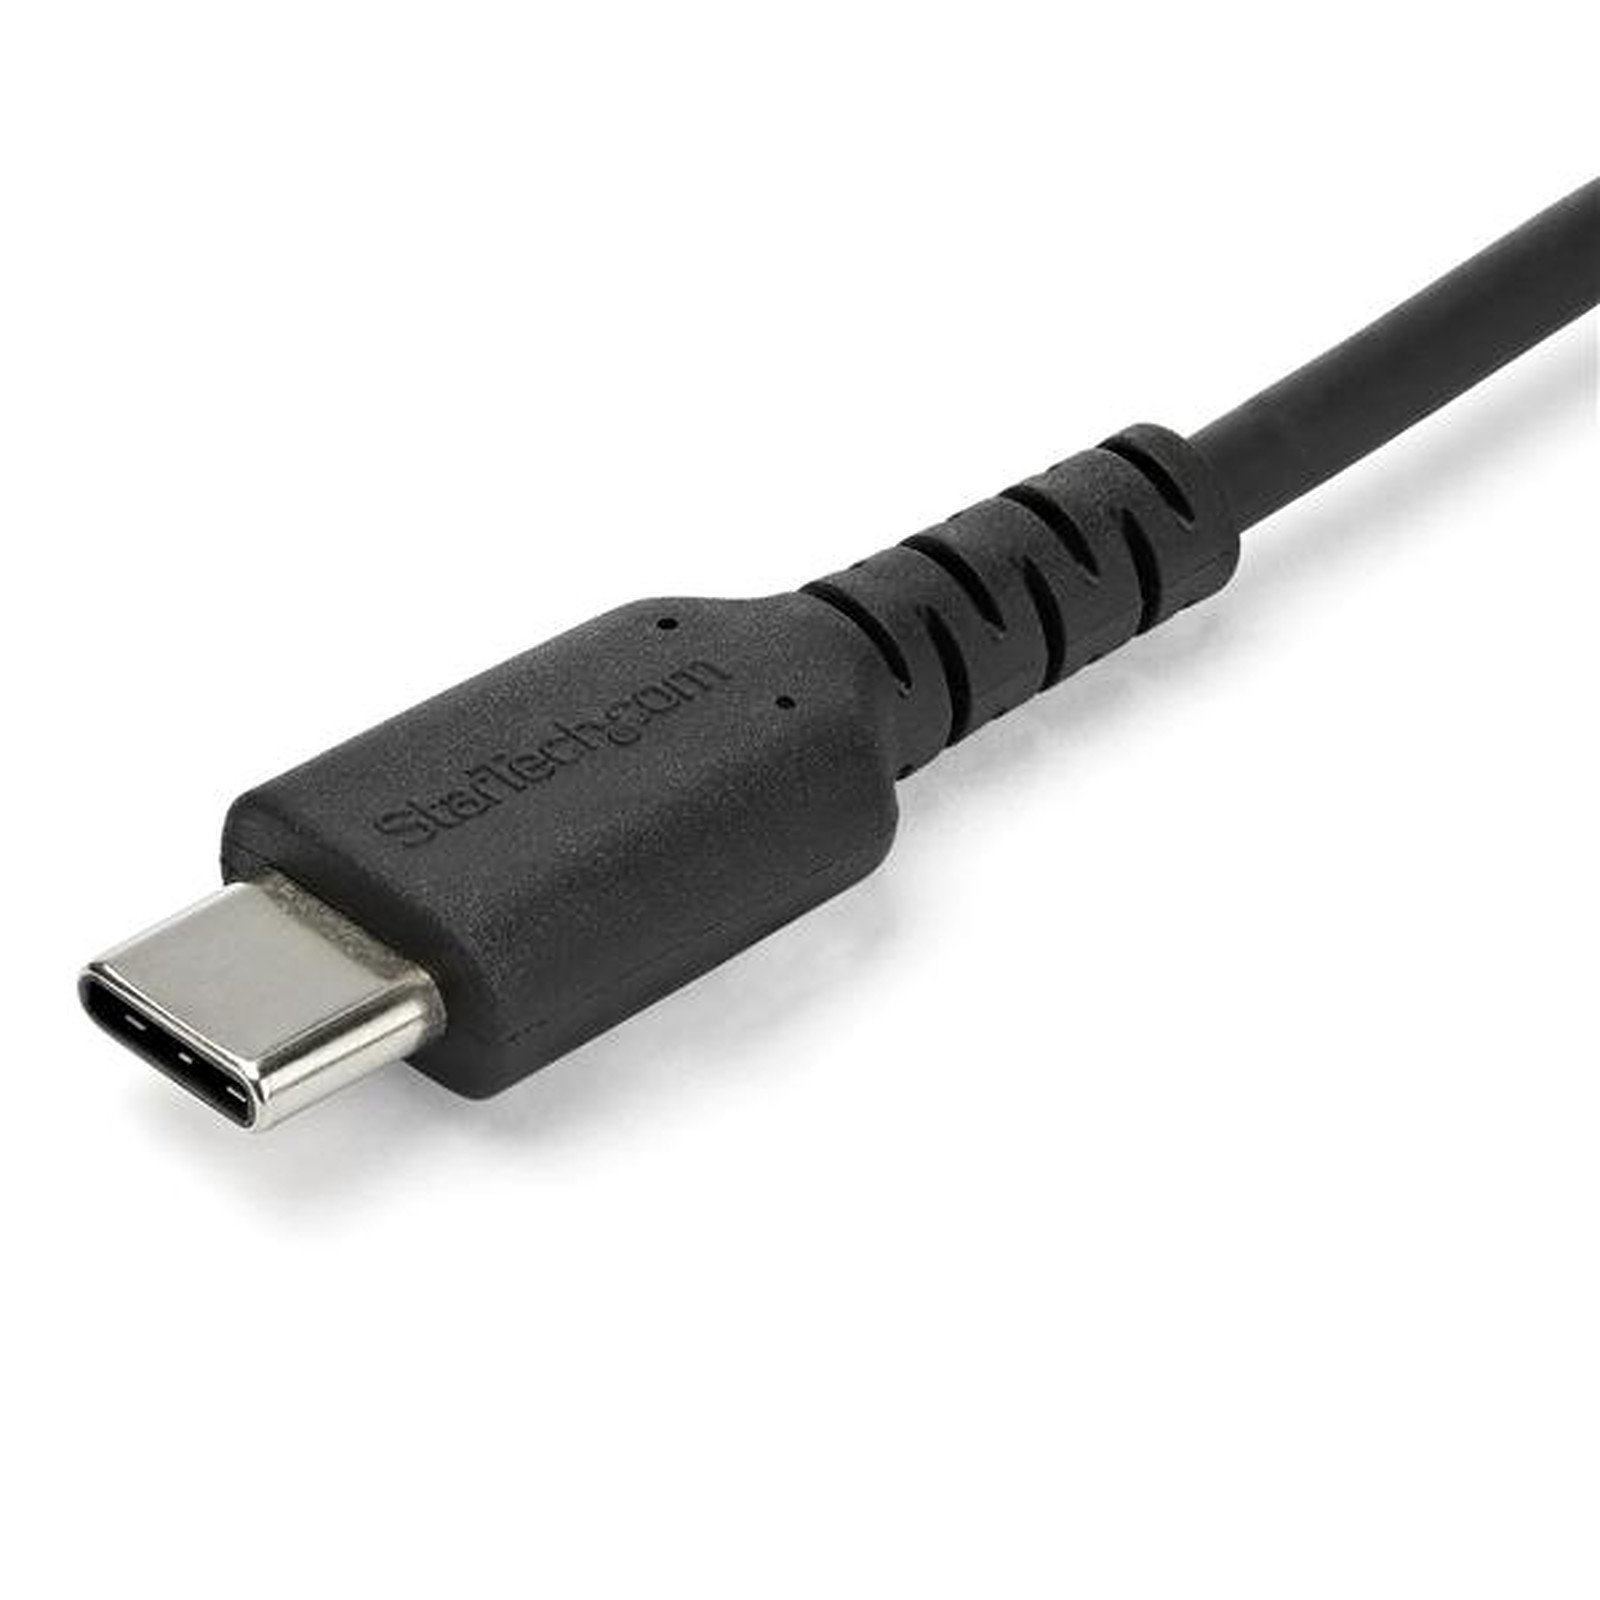
Vous trouverez sur votre bureau un seul câble USB-C, branché à votre écran, qui ressemble au câble ci-dessous :
 Vous pourrez brancher ce câble sur votre machine et l'écran fonctionnera automatiquement.
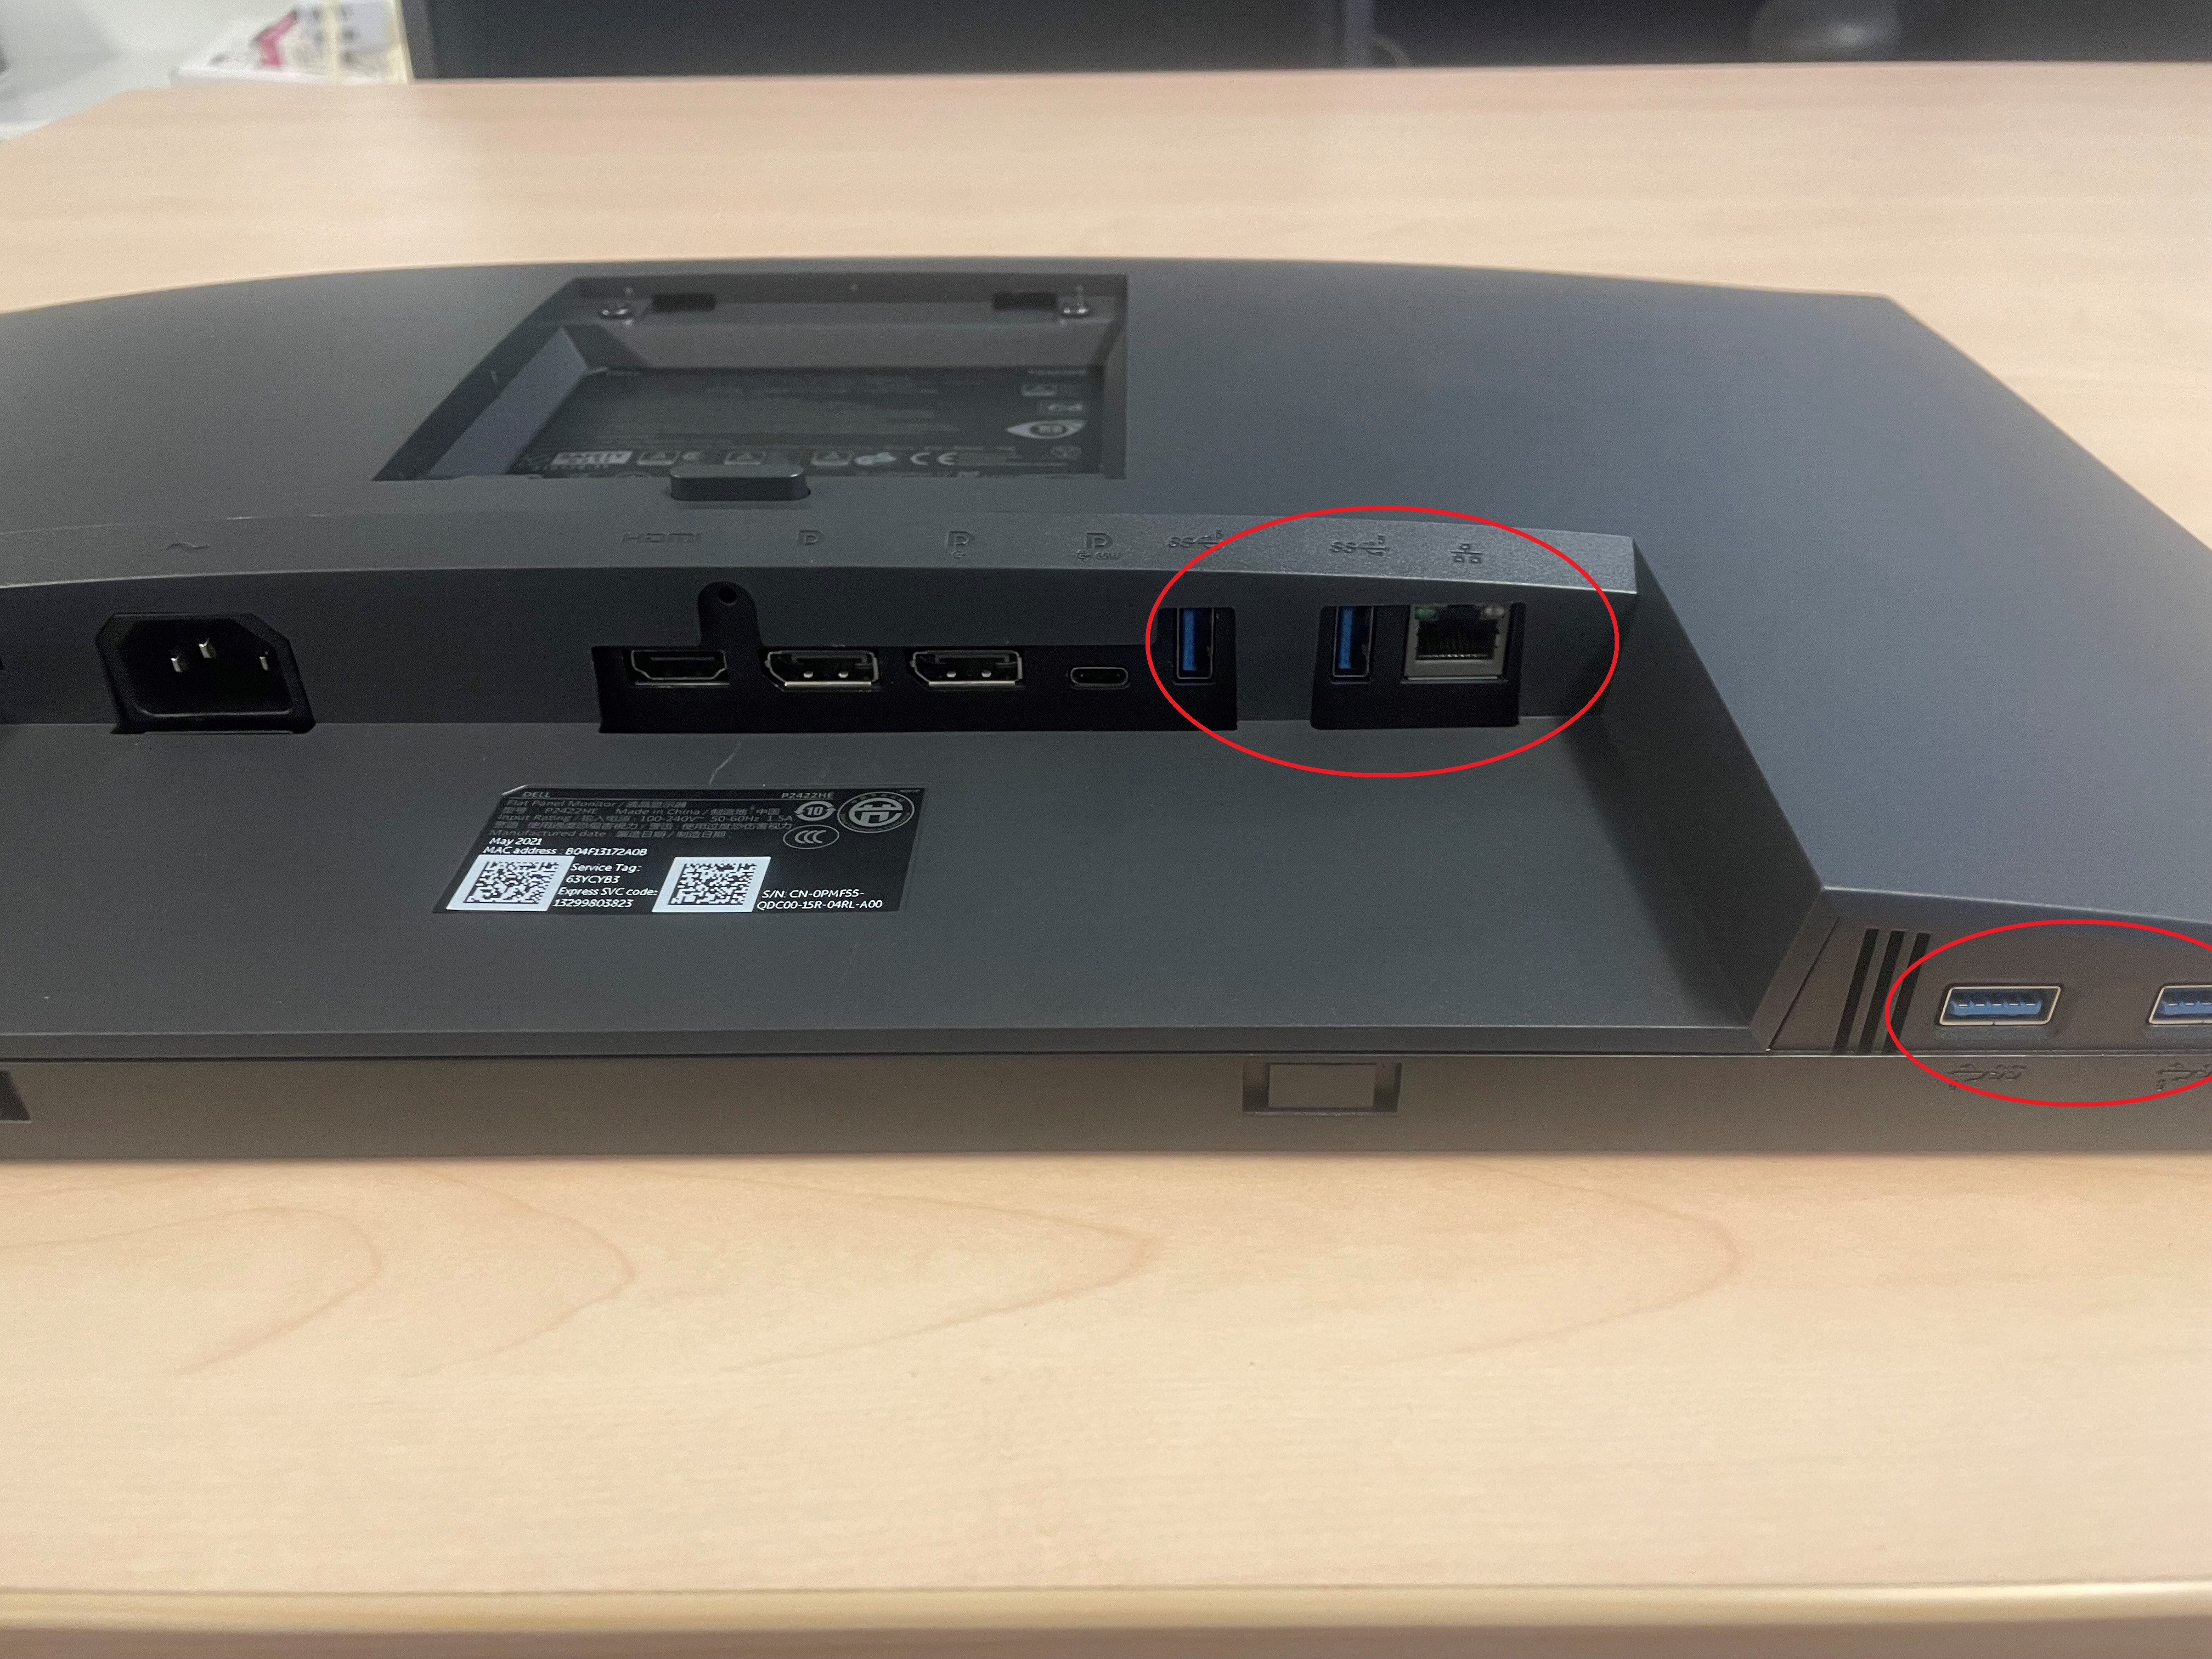
La charge de votre ordinateur portable est assurée par l'écran. Il n'est donc pas nécessaire de brancher votre chargeur. De plus, votre écran comporte des ports USB qui seront également desservis par le câble USB-C unique. Vous pouvez donc brancher vos périphériques USB (clavier, souris, webcam, disque externe...) directement à l'arrière, ou sur le côté gauche de votre écran.
Ajuster l'emplacement de vos écrans
Lors d'une configuration à deux écrans, il est possible que la continuité entre les deux moniteurs ne soit pas respectée. En effet, votre écran externe peut se trouver sur la droite de votre ordinateur portable, mais vous ne pouvez y accéder qu'en passant votre souris à gauche de votre ordinateur portable.
Vous trouverez ci-dessous la marche à suivre vous permettant de configurer vous-même l'emplacement, dans l'espace, de vos écrans.
Sur MacOS
Afin d'ajuster l'affichage de l'écran, par exemple quel écran apparait à gauche, quel est l'écran principal, etc.. il faudra vous rendre sur les préférences système.
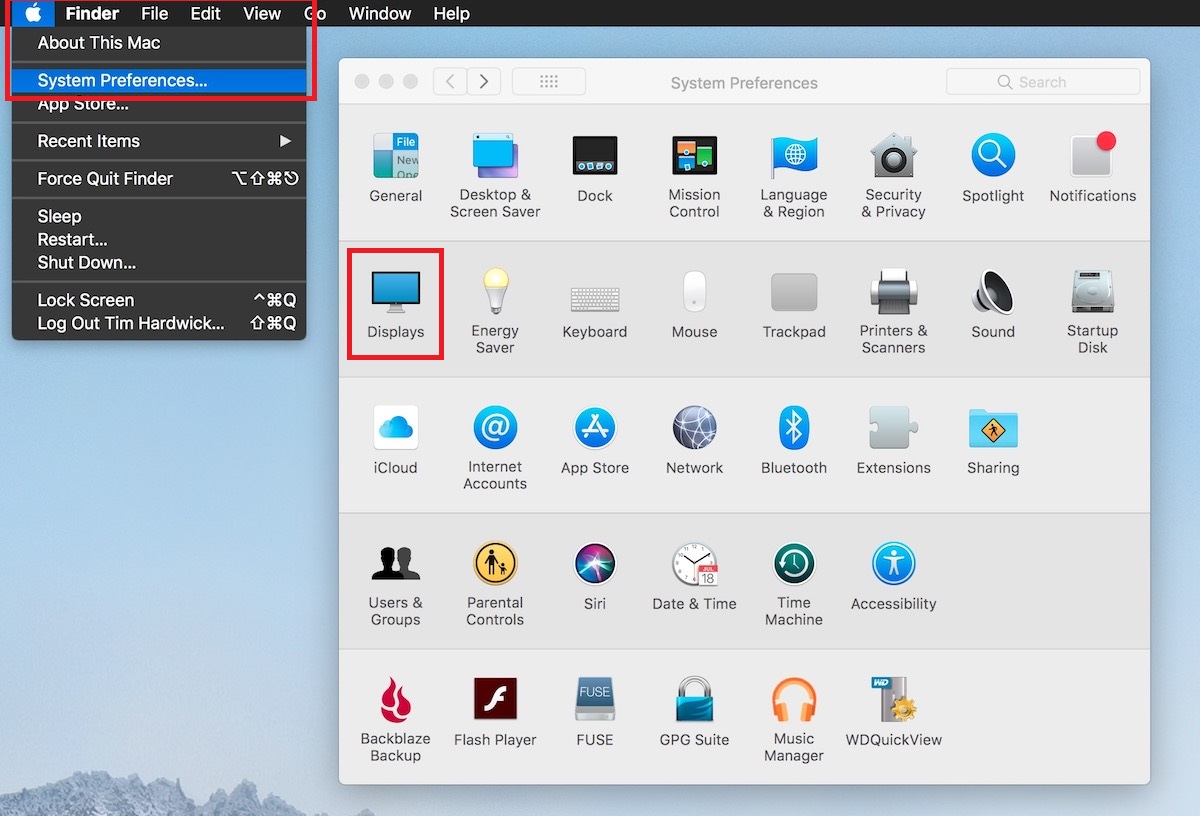
Pour ce faire : Cliquez sur la pomme (en haut à gauche de votre écran) -> Préférences Système -> Moniteurs
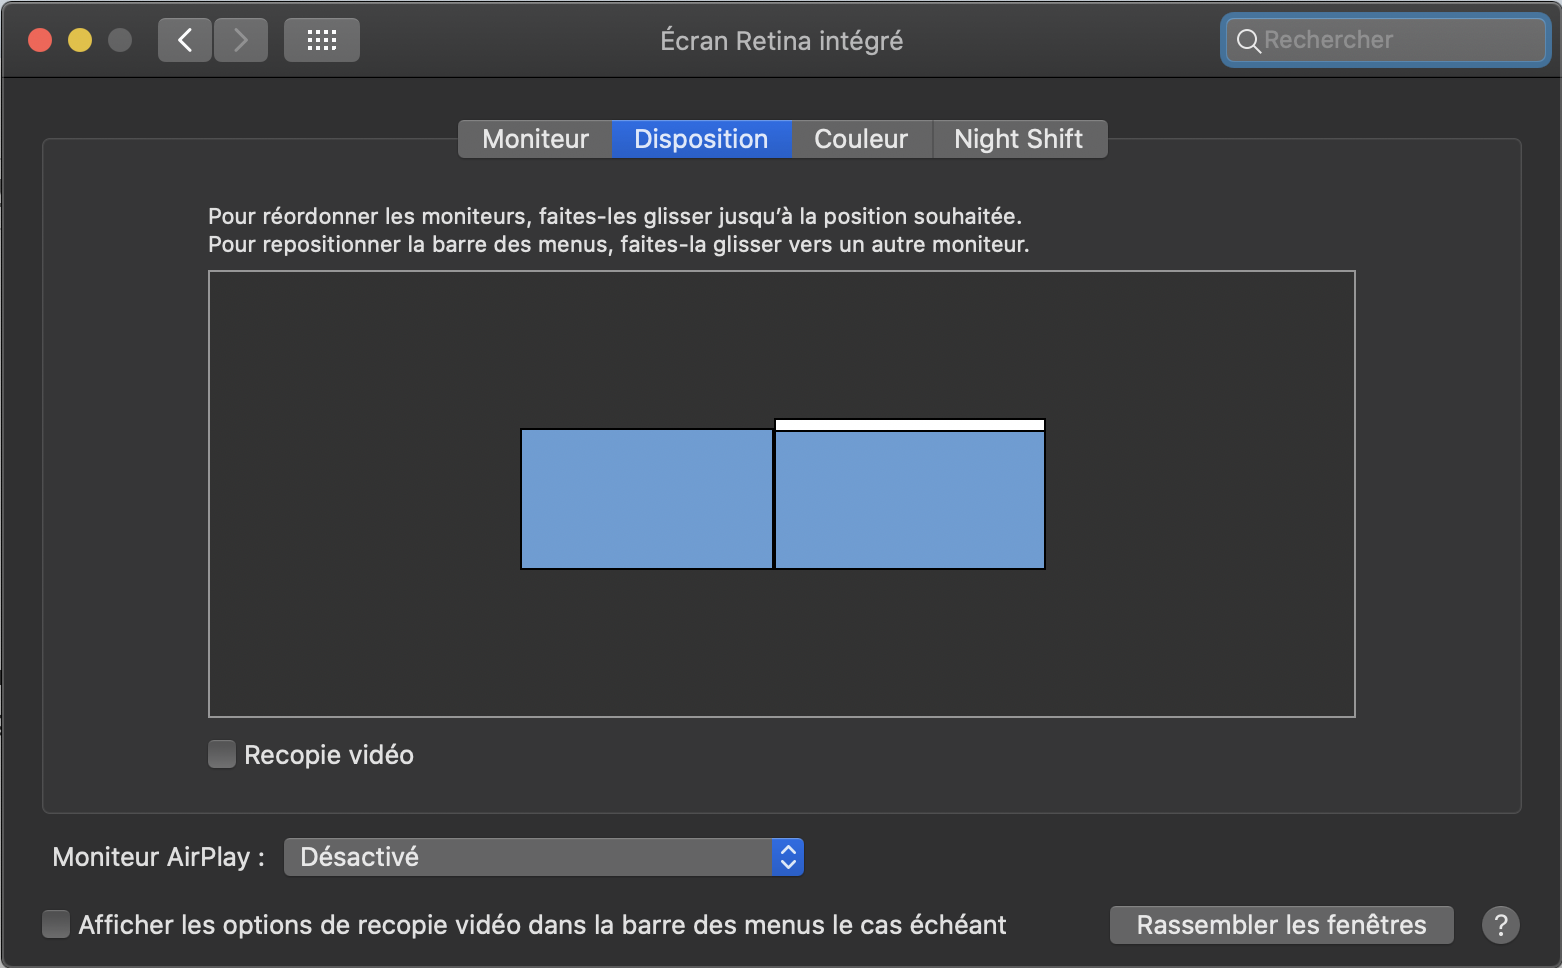
Vous pourrez alors cliquer sur "Disposition" (2ème onglet).
Les rectangles bleus représentent vos écrans. La barre blanche au-dessus (ici, sur l'écran de droite) désigne l'écran principal. Si vous déplacez cette barre d'un rectangle à l'autre, vous désignez votre autre écran comme l'écran principal. Si vous utilisez votre écran externe comme écran principal, il convient de déplacer cette barre sur le bon écran.
En cliquant sur un des carrés bleus, vous pouvez le déplacer vers le haut, bas, droite, ou gauche afin que le passage d'un moniteur à l'autre soit continu et dans le bon sens.
Il est fortement déconseillé de fermer votre MacBook lorsque ce dernier est en utilisation avec l'écran externe. En effet, votre machine peut surchauffer et avec la machine fermée, cela peut endommager votre écran.
Sur Windows
Étendre vs. Dupliquer
Windows offre plusieurs options de partage d'écran. Notamment la duplication d'écran (utile quand vous vous connectez sur un projecteur en amphithéâtre par exemple), ou l'extension de l'écran, utile quand vous travaillez avec deux écrans l'un à côté de l'autre.
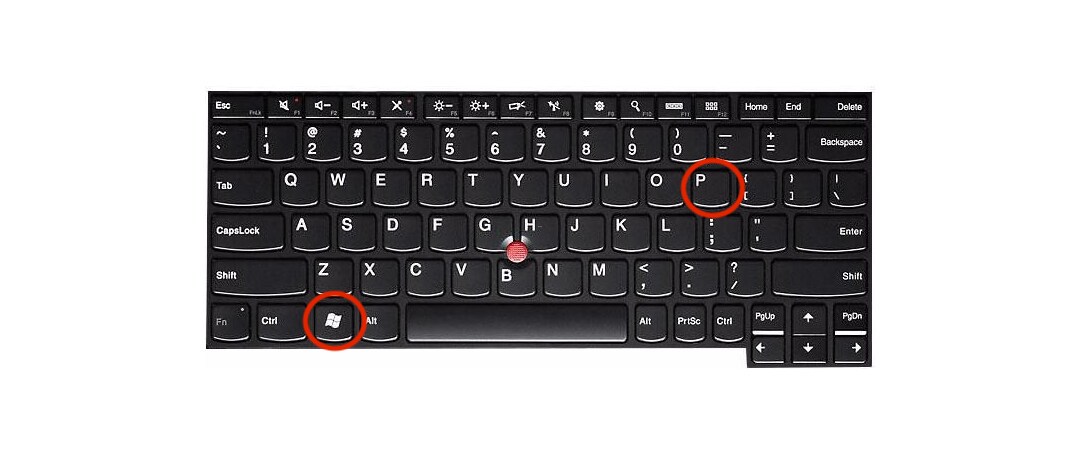
Afin de modifier cette option d'affichage, vous pouvez utiliser le raccourci clavier "touche Windows + P"
Emplacement de vos écrans
Pour ajuster l'emplacement de vos écrans dans l'espace (par ex. quel écran est à gauche, quel est l'écran principal, etc...), vous devrez aller dans les paramètres.
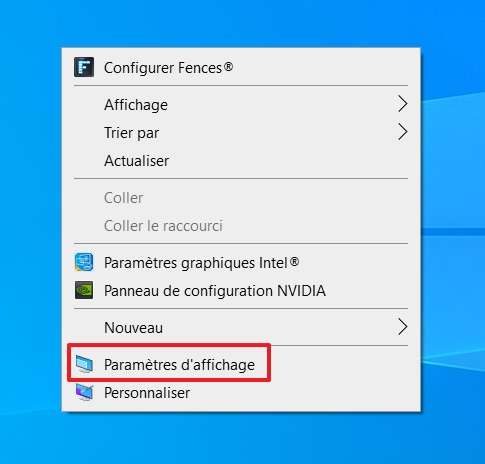
Pour ce faire: clic droit sur le bureau -> Paramètres d'affichage
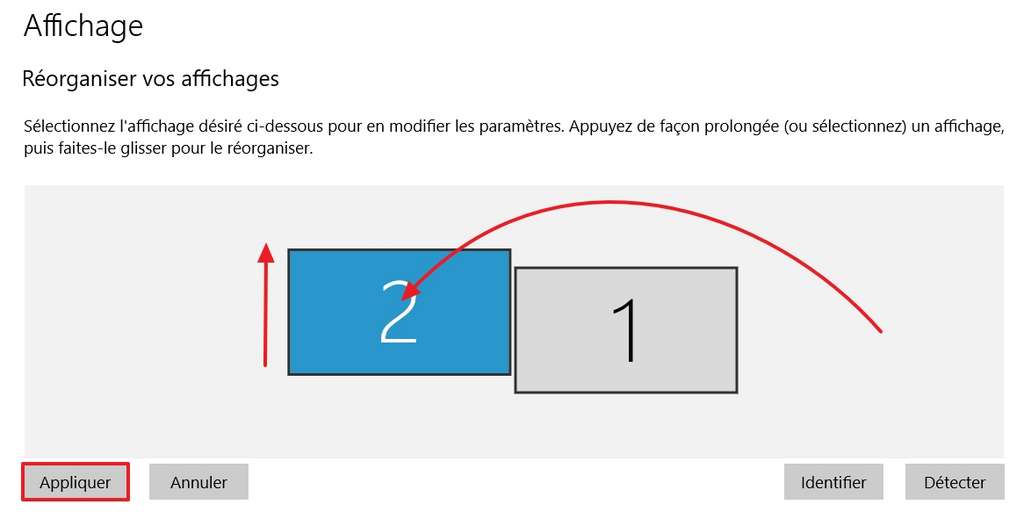
Les rectangles représentent vos écrans. En cliquant sur un des écrans, vous pouvez le déplacer de haut en bas, droite, gauche afin que vos moniteurs soient bien coordonnés.
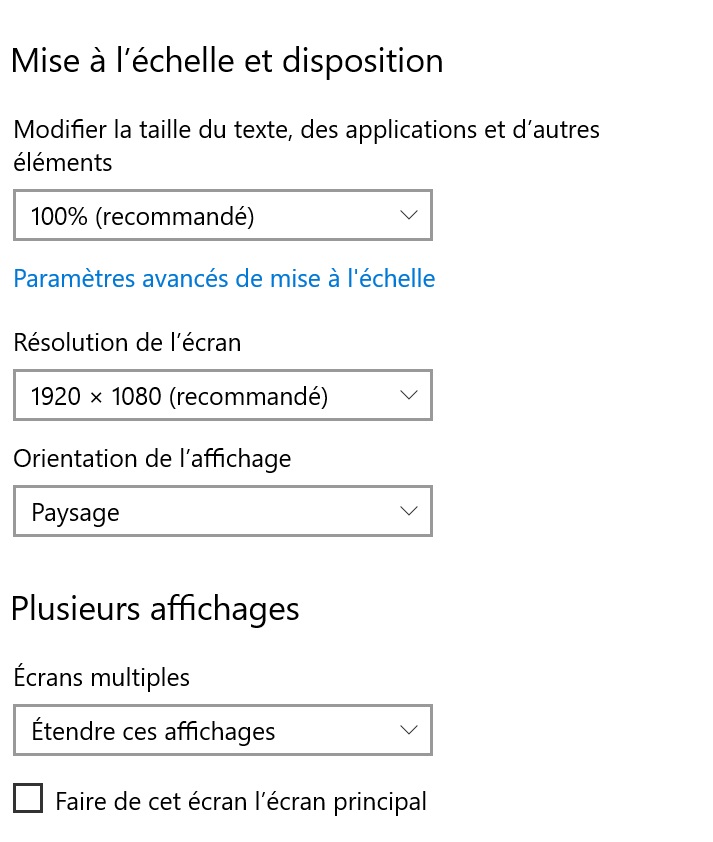
Toujours dans les paramètres d'affichage, vous pouvez sélectionner une résolution d'écran adaptée et adapter la taille des éléments à votre guise. C'est également ici que vous pouvez définir l'orientation de votre écran, si vous désirez l'utiliser en portrait plutôt qu'en paysage.
Pour un confort d'utilisation accru, privilégiez une résolution élevée (idéalement 3840x2160). À défaut, sélectionnez au minimum une résolution Full HD (1920x1080).
FAQ et problèmes connus
Sur MAC M1
Certaines fois, les périphériques connectés sur un écran externe, qui est branché avec un câble USB-C sur un mac, cessent de fonctionner. Cela est dû à une puce se trouvant dans les nouveaux macs.
Si vous êtes affectés, par ce problème, et que vous redémarrez votre machine avec le câble de l'écran connecté, les périphériques ne vont pas fonctionner.
Il faut donc débrancher l'écran, redémarrer la machine et rebrancher l'écran une fois que vous serrez dans votre session.
How to configure a USB-C monitor / screen
UNIL is changing its screens
With the arrival of newer computers, UNIL is adapting and getting new screens compatible with the USB-C connector standard.
Those new screens present a multitude of advantages compared to the old ones:
- A unique cable that needs to be plugged in your computer, assuming the role of outputting the image, receiving input from a keyboard and mouse connected to the screen, and all this whilst receiving an AC input, thus charging your device. That means that there is no need to carry your charger around !
- A better resolution for a superior image clarity and more and more comfort for your eyes.
- A more reliable connection
- A modern experience
Getting started
If one of the new screen has been attributed to you, it will be delivered by one of our Helpdesk technicians. He will connect the screen to all of your peripherals, and it will be ready to use.
You will then find a single cable coming out of your screen, looking as follows:
You will be able to plug this cable onto your laptop and the external monitor will connect automatically.
Your laptop is charged by the screen. So there's no need to plug in your charger. In addition, your display has USB ports that will also be served by the single USB-C cable. So you can connect your USB peripherals (keyboard, mouse, webcam, external drive...) directly to the back, or to the left side of your screen.
Adjusting your display
In a two-screen configuration, it is possible that the continuity between the two monitors is not respected. Your external monitor may be on the right side of your laptop, but you can only access it by moving your mouse to the left of your laptop.
Below you will find the procedure for configuring the location of your screens in space.
On MacOS
In order to adjust your monitor, for example which screen appears on top, bottom, left, right etc... you will have to open the system preferences on your MAC.
To do this: Click on the apple (top left of your screen) -> System Preferences -> Displays
There you should select "Arrangement".
The blue rectangles represent your screens. The screen with the white bar above it is your main display (here, the display on the right). If you move this white bar from one screen to the other, this screen will become your primary display.
By clicking on one of the blue rectangles, you can freely move it in order to reflect the true position of your monitors and make their usage more intuitive.
Please note that we highly advise against closing your MacBook screen and using exclusively the external monitor. We have had a multitude of cases in which the device heated with the screen closed, and some screen burns appeared.
On Windows
Extend or Duplicate
Windows offers various ways to share your screen with an external screen. The two main ones are screen duplication, which is useful if you use your screen with a projector in an amphitheater; and screen extension, which is useful if you work with two monitors.
You can easily change the way your screen is shared by using the shortcut "Windows Key + P"
Screen position
In order to adjust your monitor, for example which screen appears on top, bottom, left, right etc... you will have to open the Settings on your computer, and then select "System" and "Display". Or right-click on the desktop -> display settings.
The blue rectangles represent your screens. By clicking on a rectangle, you can move it from one screen to the other, this screen will become your primary display.

Still in the display settings, you can select a suitable screen resolution and adapt the size of the elements to your liking. This is also where you can set the orientation of your screen, if you want to use it in portrait rather than landscape.
For a better user experience, choose a high resolution (ideally 3840x2160). Otherwise, select at least a Full HD resolution (1920x1080).
FAQ and known issues
On M1 MACs
Sometimes the peripherals that are connected to the screen do not work with the MAC. That is due to an internal chip that the early M1 macs have.
When you are affected by this issue, if you boot your device with the screen connected, then the peripherals would be rendered unusable.
The workaround is simple but effective. Disconnect the external display from your laptop, reboot and re-plug the screen once your computer is turned on. Everything would then work.
Installation d'un écran externe pour le télétravail
Installation d'un écran avec une connectique USB-C
Les écrans dotés d'un port USB-C sont particulièrement simples à installer. En effet, ils n'ont besoin d'être connectés exclusivement sur le secteur électrique et sur votre machine.
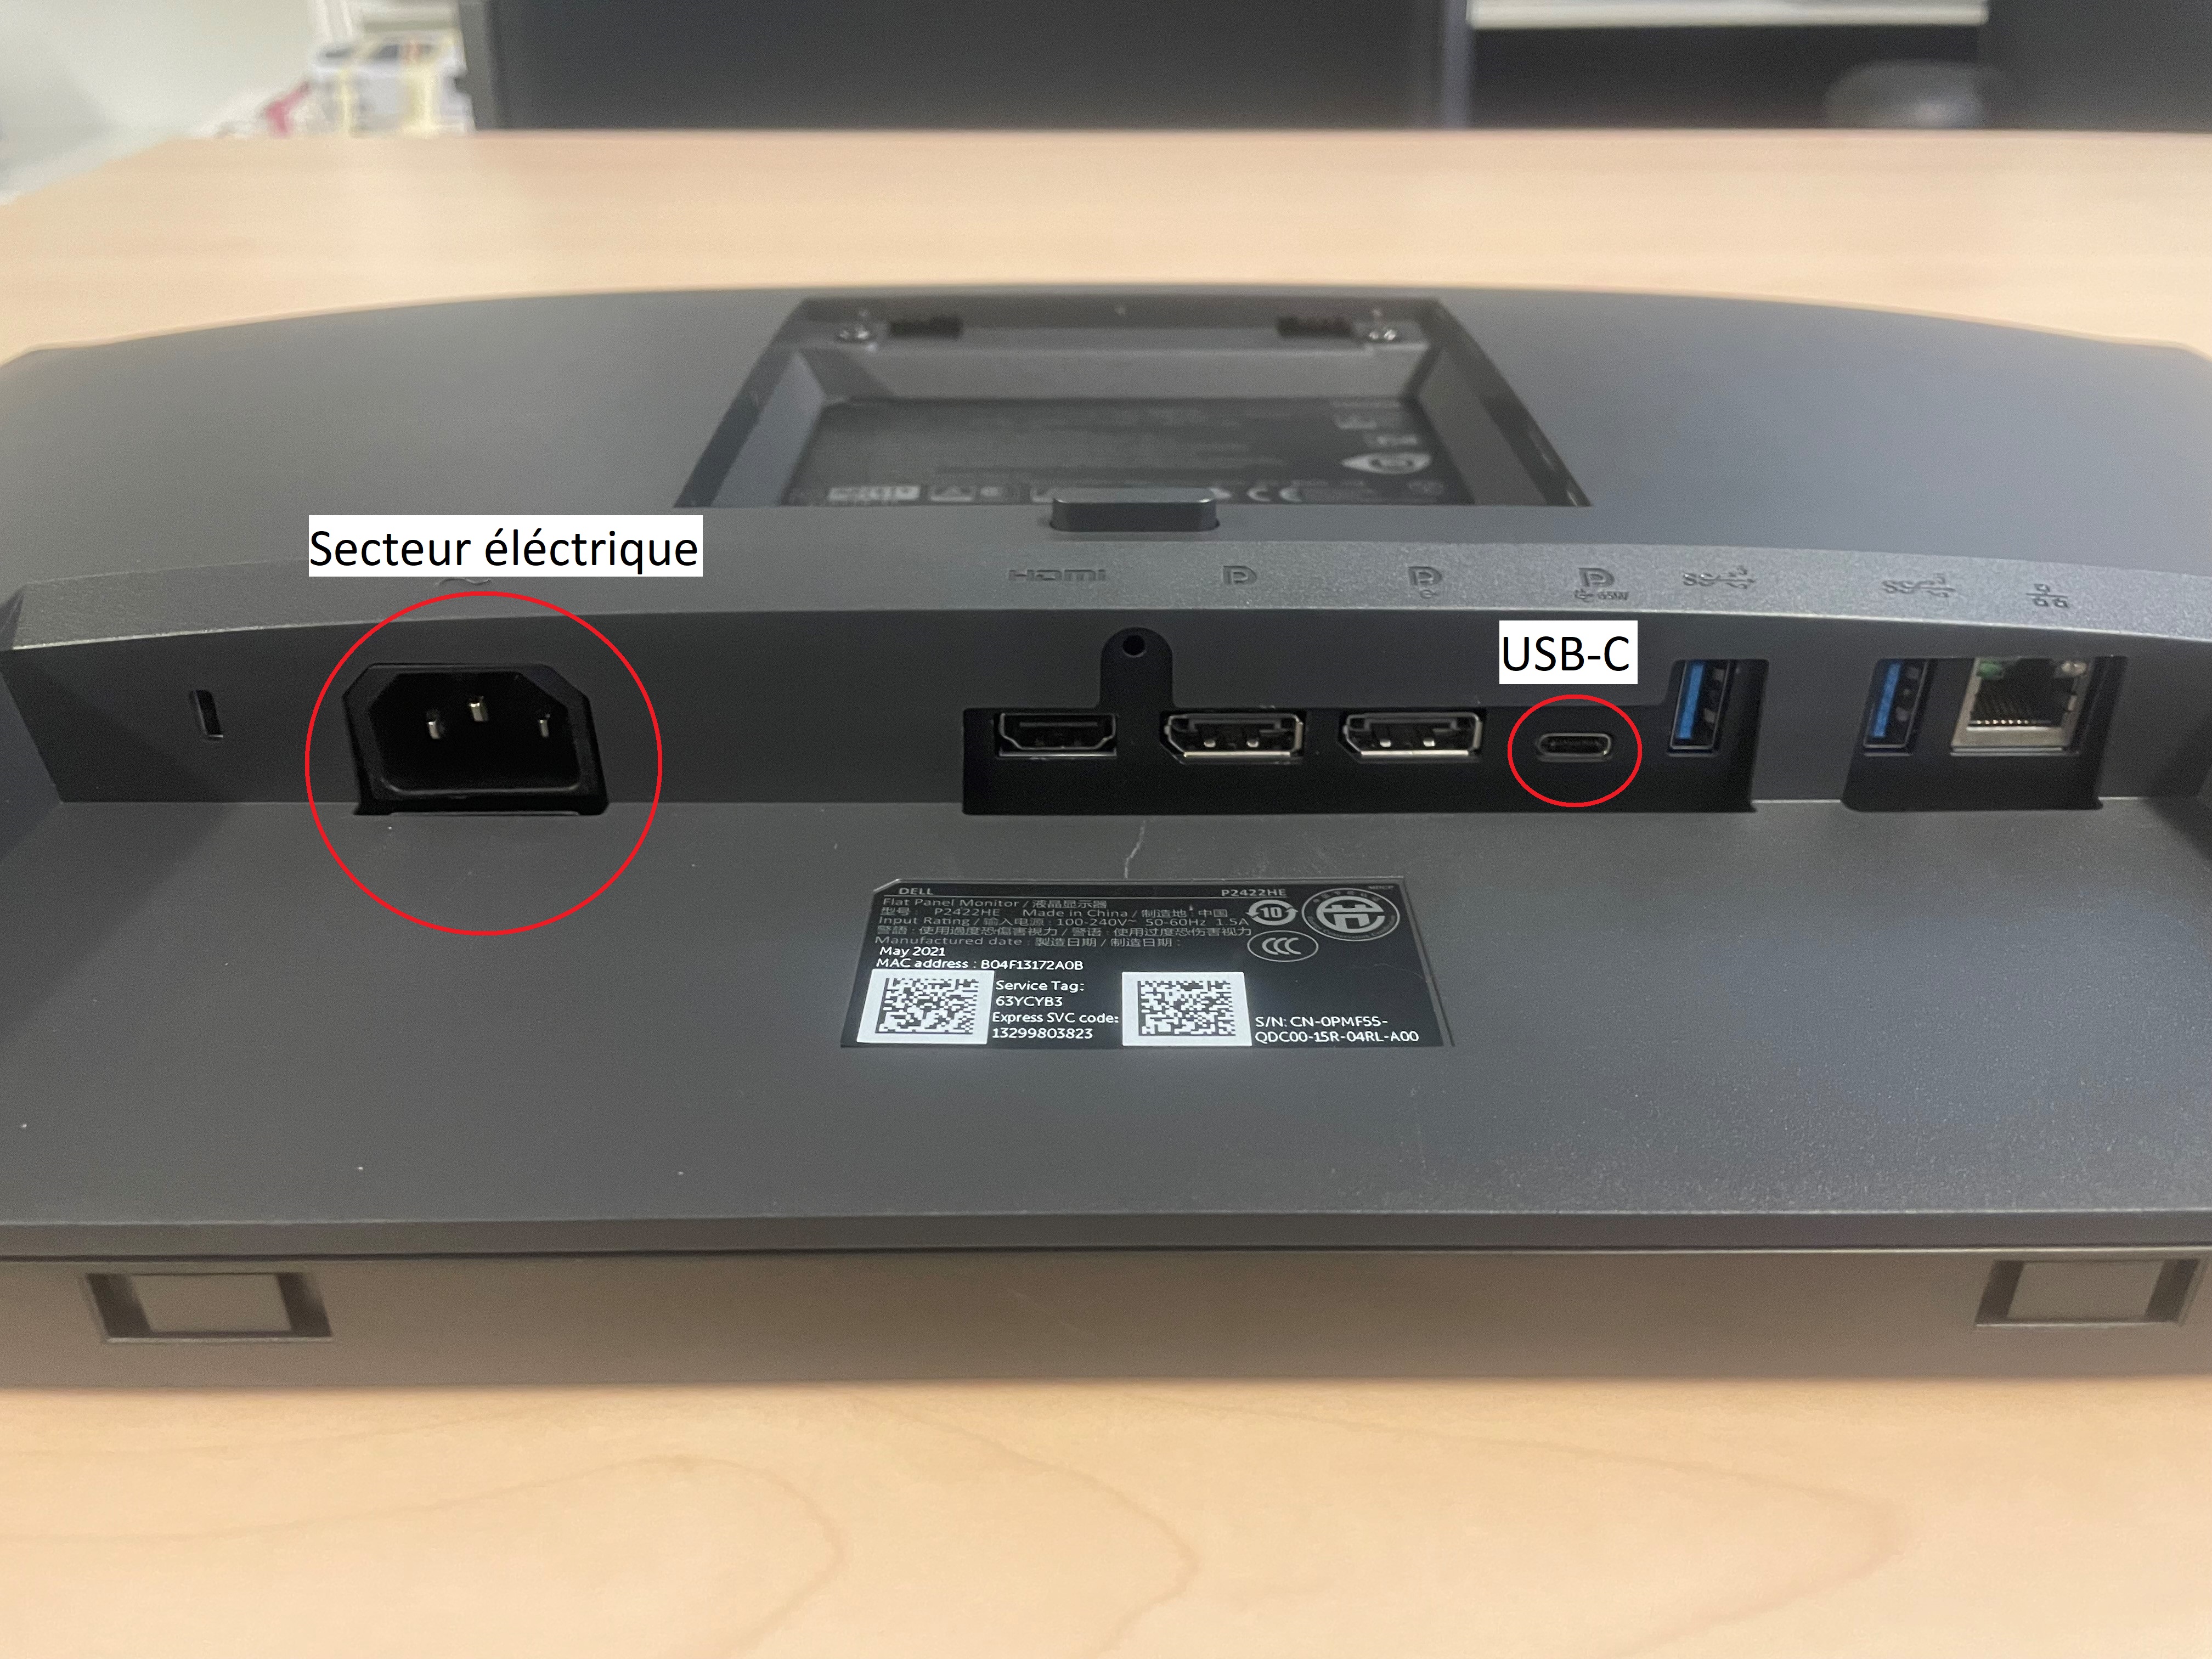
Tous les câbles nécessaires à ce branchement vous seront fourni avec votre écran.
De plus, grâce au connecteur USB-C, tous les périphériques connectés sur votre écran fonctionneront sans problème. Cela peut inclure un clavier et/ou une souris USB, un disque dur externe, un câble Ethernet et bien plus encore.
Les périphériques supplémentaires habituels sont donc des ports USB et même parfois un port Ethernet.
Une fois que vous aurez connecté tout cela, il vous suffira de tout mettre en place sur votre laptop. Pour cela vous pouvez consulter cette page.