Editing a record (advanced entry)
- Publishing of a draft record
- Adding and/or correcting metadata
- Adding of a full text and/or secondary documents
- Adding and/or correcting links (to persons, units and/or groups)
- Changing the type of a record
Publishing of a draft record
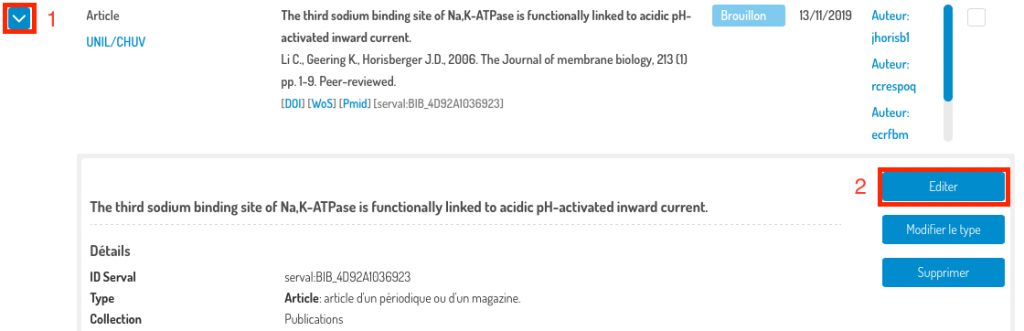
Access the editing (advanced entry) interface of the record in question by pressing the blue chevron (1) in the “Details/Edit” column, then press “Edit” (2).
Once in the advanced entry screen, press “Publish”.

Your record is now in public:

Adding and/or correcting metadata
Go to the editing (advanced entry) interface of the record in question by pressing the blue chevron (1) in the “Details/Edit” column, then press “Edit” (2).
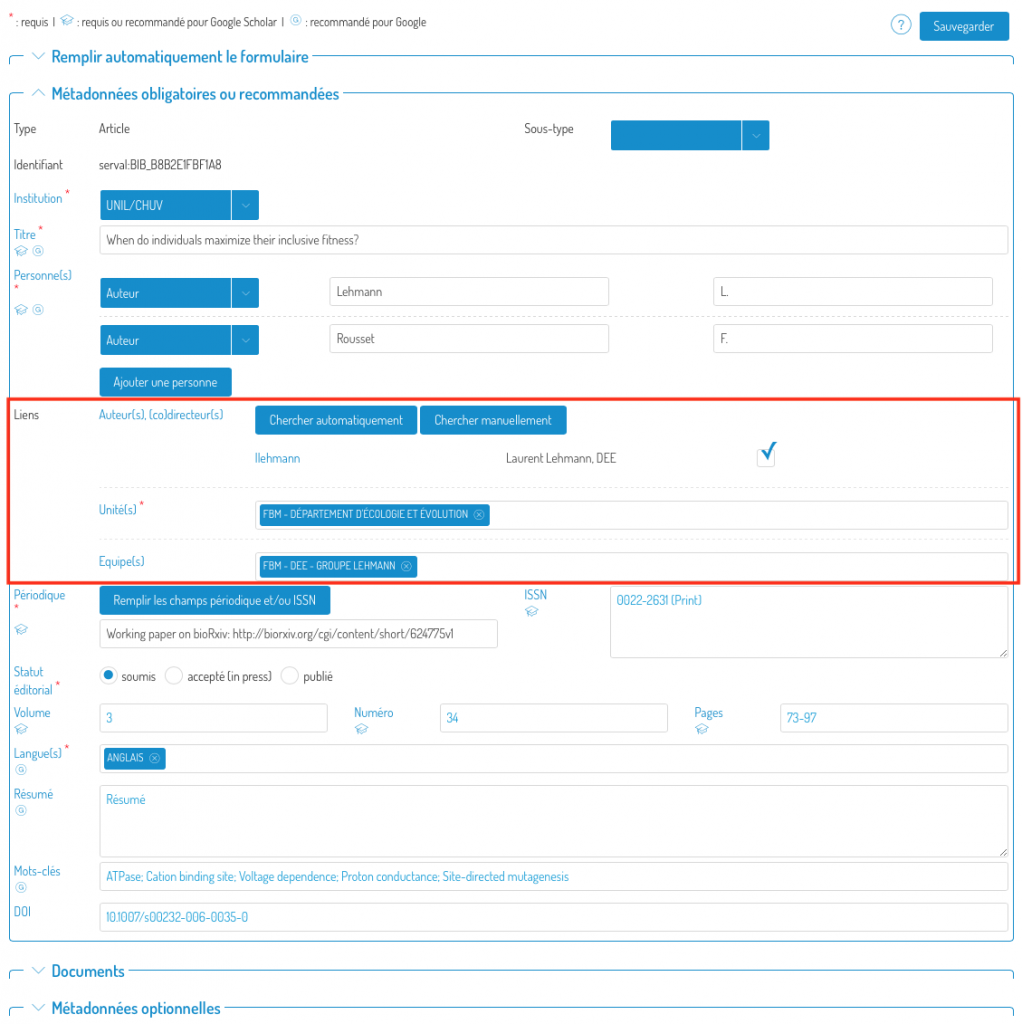
You are directed to the advanced entry (editing) interface with all its sections deployed:
- Filling in the form with an identifier;
- Mandatory or recommended metadata;
- Documents (full text and secondary documents);
- Optional metadata.
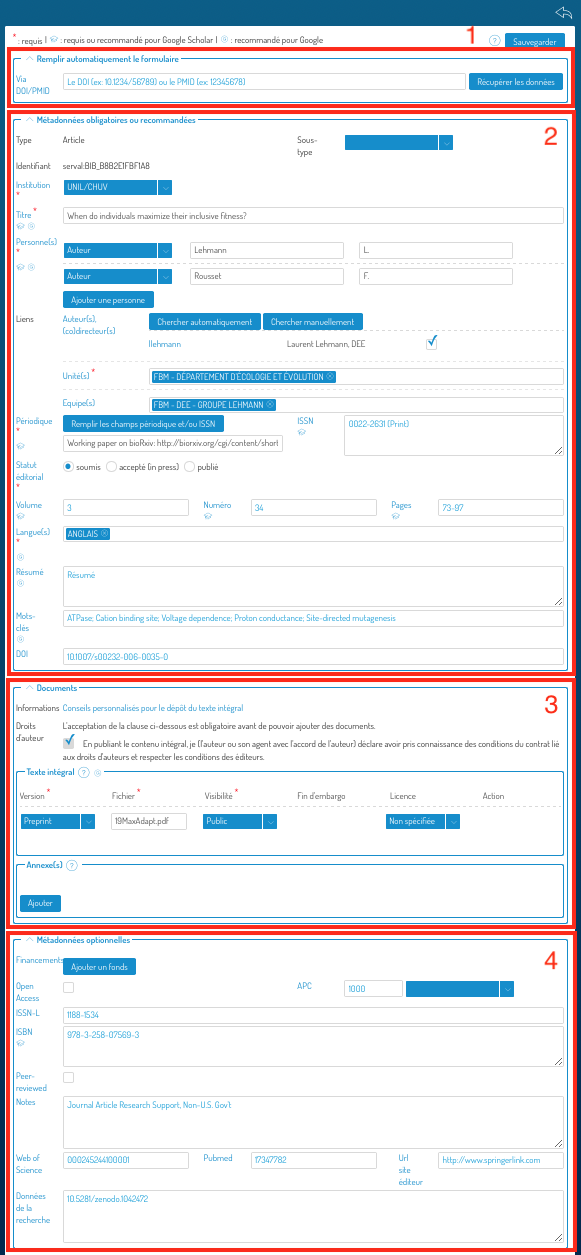
Each section can be deployed or condensed using the chevron to the left of the section name:

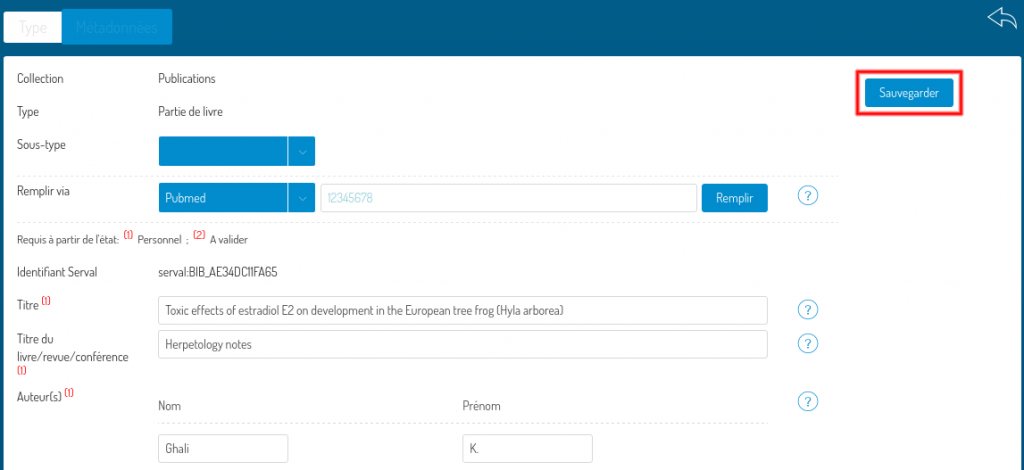
You can complete or correct the data in sections (2) and (4). If an identifier had not been used to create the record (but exists), then you can complete the metadata using section (1). Warning: existing metadata will be overwritten.
Don’t forget to save your changes by pressing the “Save” button at the top right or bottom of the screen.
![]()
You can cancel the changes at any time by pressing the “Go back” icon.

Adding of a full text and/or secondary documents
Go to the editing (advanced entry) interface of the record in question by pressing the blue chevron (1) in the “Details/Edit” column, then press “Edit” (2).
You are directed to the advanced entry (editing) interface with all its sections deployed:
- Filling in the form with an identifier;
- Mandatory or recommended metadata;
- Documents (full text and secondary documents);
- Optional metadata.
Each section can be deployed or condensed using the chevron to the left of the section name:
Go to section (3), Documents.
In this section, you can either add a full text (or secondary documents) if there were none yet, or correct the metadata associated with the documents.
Adding a full text (PDF) or secondary documents
To find out your rights and obligations regarding the self-archiving of a copy of your publication, follow the links provided in the “Information” field (1).
Then check the “Copyright” box (2) and press “Add PDF” (3).
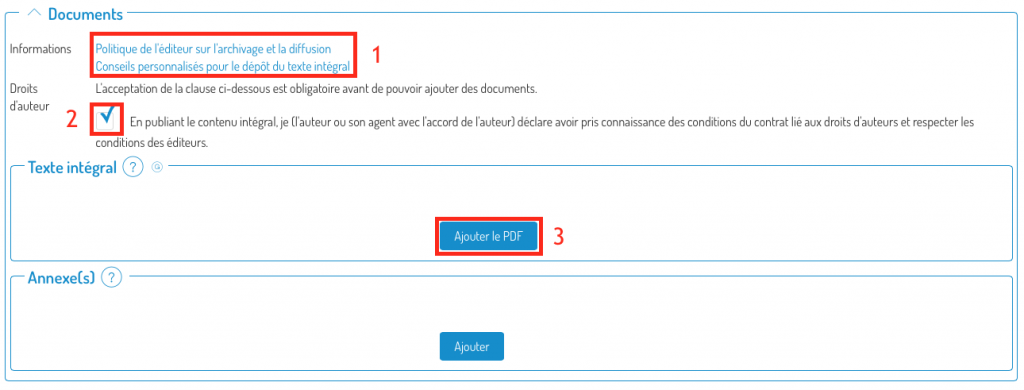
You can then browse your computer to choose the PDF to add.

Then choose the version of the manuscript you are submitting (in case of doubt, consult this link) and the visibility of the document (restricted UNIL – by default -, public or under embargo). If you choose “under embargo”, a calendar is displayed in the “end of embargo” column to be able to specify the end date of the embargo. You also have the possibility to define the document’s license, if you know it.
Correction of metadata associated with a document
You can also modify the metadata associated with a document:
Correct the metadata: the version of the manuscript you are submitting (in case of doubt, consult this link) or the visibility of the document (restricted UNIL – by default -, public or under embargo). If you choose “under embargo”, a calendar is displayed in the “end of embargo” column to be able to specify the end date of the embargo. You also have the possibility to define the document’s license, if you know it.
Don’t forget to save your changes by pressing the “Save” button at the top right or bottom of the screen.
![]()
You can cancel the changes at any time by pressing the “Go back” icon.
Adding and/or correcting links (to persons, units and/or groups)
Go to the editing (advanced entry) interface of the record in question by pressing the blue chevron (1) in the “Details/Edit” column, then press “Edit” (2).
You are directed to the advanced entry (editing) interface with all its sections deployed:
- Filling in the form with an identifier;
- Mandatory or recommended metadata;
- Documents (full text and secondary documents);
- Optional metadata.
Each section can be deployed or condensed using the chevron to the left of the section name:
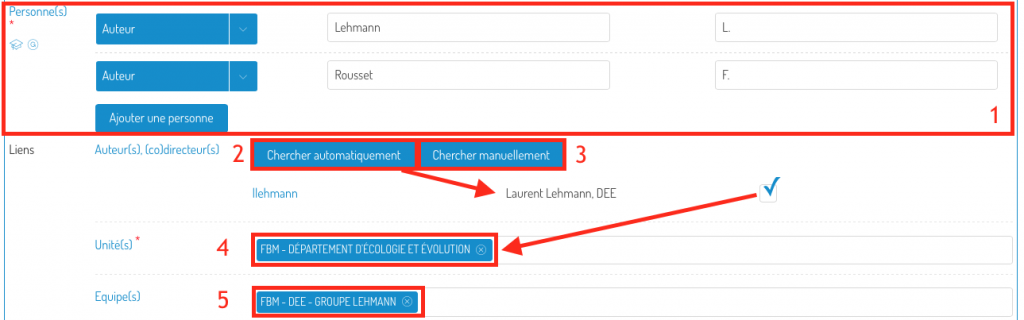
Go to section (2) where the links are located:
What are links for?
- They allow you to link your publications to your profile (which will be displayed in Unisciences).
- They also allow you to assign your publications to the unit where you conducted the research on which your publications are based. The Unisciences page of your unit will therefore also be complete.
- You can also link your co-authors, who can then also take control of the leaflet and possibly complete it.
Link people to the notice with automatic proposals
Proposals for links to people (if found from the names in the “Person(s)” field (1)) will be displayed by pressing the “Search automatically” button (2). When you tick the authors’ boxes, their units will automatically be added to the “Unit(s)” (4) field.
Adding a unit is done by typing its name directly into the “Unit(s)” field (4). It is also possible to link the record to a search group by typing its name directly into the “Team(s)” field (5).
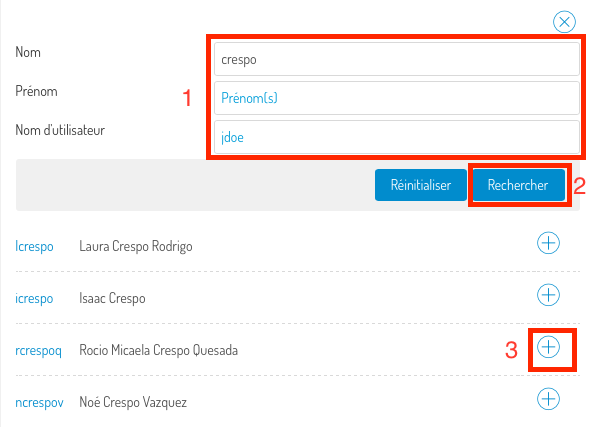
Manually link people to the record
In the pop-up window, type the name and/or first name and/or ID of the person you are looking for (1) and click on “Search”.
Once you have found the person, click on the “+” symbol next to his name, and the link will be added to the record.
Don’t forget to save your changes by pressing the “Save” button at the top right or bottom of the screen.
![]()
You can cancel the changes at any time by pressing the “Go back” icon.
Changing the type of a record
Go to the editing (advanced entry) of the record in question by pressing the blue chevron (1) in the “Details/Edit” column, then press “Change Type” (2).

Choose the type of publication (1) in which you want to convert this publication. The “Before” (2) and “After” (3) fields allow you to see the changes that will be made during the conversion. Once you are sure of your choice, click on “Continue” (4).
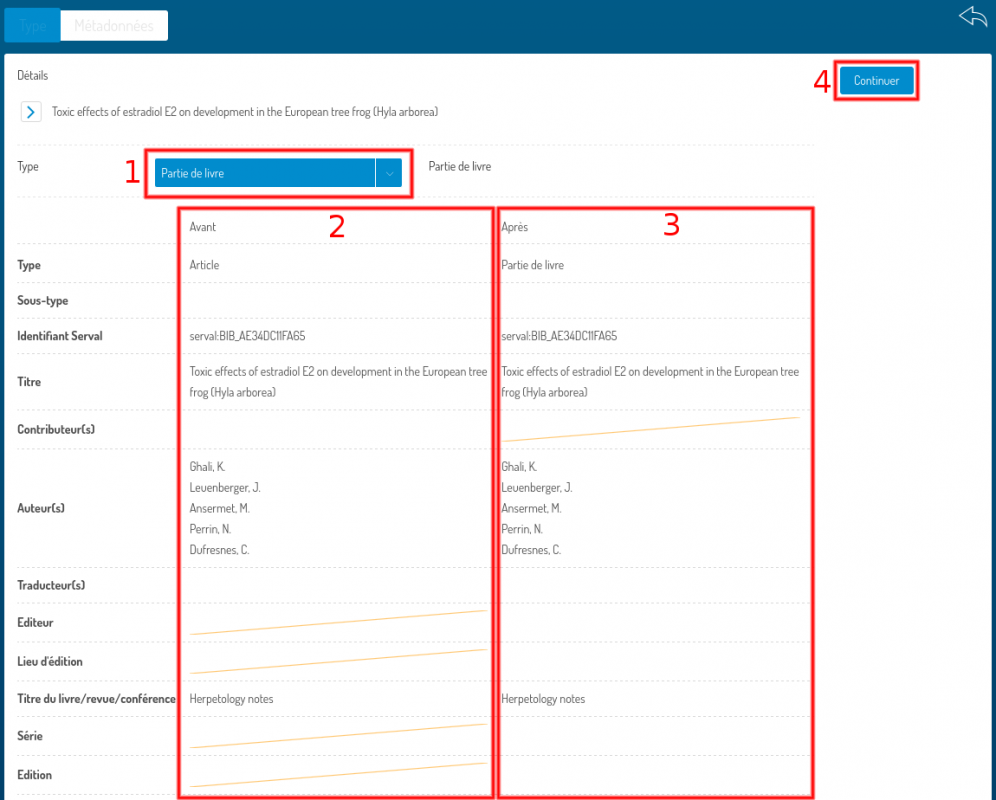
Adapt the metadata to match the new type selected. Then click on “Save” to save the type change and metadata changes.