User guide
Welcome to the IRIS user help wiki. This guide centralises all the resources, procedures and information you need to use the IRIS platform effectively. Whether you are a new user or an experienced member, here you will find clear explanations of features, best practices, useful contacts and answers to frequently asked questions.
This wiki is structured to guide you through the entire process, from the initial login to advanced use of the tools offered by IRIS. It is regularly updated to reflect developments on the platform.
- Faculty contacts
- Introduction, search and navigation
- Overview
- Special rights
- Access your researcher profile
- Searching IRIS
- Advanced search
- Search and filter faculty publications
- My workspace
- Data entry and editing
- Entering a publication manually
- Entering a publication by DOI/PMID
- Adding full text and/or secondary documents
- Adding and/or correcting links in a record
- Publish a record I have created that is in the « submission in progress » status
- Delete a record I have created that is in the « submission in progress » status
- Edit a record in "archived" status
- Entering your thesis in IRIS
- Validating a record
- Publications: type descriptions
- Importing et exporting
- Exporting items from IRIS
- Linking your ORCID account with IRIS
- Importing individual items into IRIS (DOI/PMID/ORCID)
- Exporting Publications from IRIS to ORCID
- Manual import of ORCID publications into IRIS
- Importing ORCID publications into IRIS from an external source
- Advanced functionalities
Faculty contacts
This page lists the faculty contacts for IRIS.
For individuals who are not affiliated with a faculty, please contact iris@unil.ch
| Faculté | Contacts |
| FTSR |
Christelle Cocco Pour les questions de base à propos d'IRIS
|
| FDCA |
Soon available
|
| LETTRES |
Andrea Giananti Répondant IRIS
|
| SSP |
Zoé Codeluppi
Ellina Mourtazina
|
| HEC |
Bureau Recherche |
| FGSE |
Manon Rosset (IGD)
Catherine Schlegel Rey (ISTE)
Amélie Dreiss (IDYST, FGSE) |
| FBM |
Sandrine Pernier Jenny Panziera Pôle Open Science BiUM
Magdalena Czartoryjska-Meier (BIHM) Bibliothécaire responsable
magdalena.czartoryjska-meier@chuv.ch
Unisanté - Unité de documentation et de données
|
Introduction, search and navigation
This section guides you through your first steps on IRIS, introducing you to the general interface, the main menus and the navigation tools. You will learn how to carry out an effective search, filter the results and quickly access relevant content.
Overview
The voice in this video was generated by artificial intelligence.
Introduction
Before you start working with IRIS, it is important to become familiar with four key concepts.
Workspace: it mainly allows you to view the records you have created and to create new ones. To explore its features in detail, visit this page.
Researcher profile: it provides an overview of your academic and personal data. To explore its features in detail, visit this page.
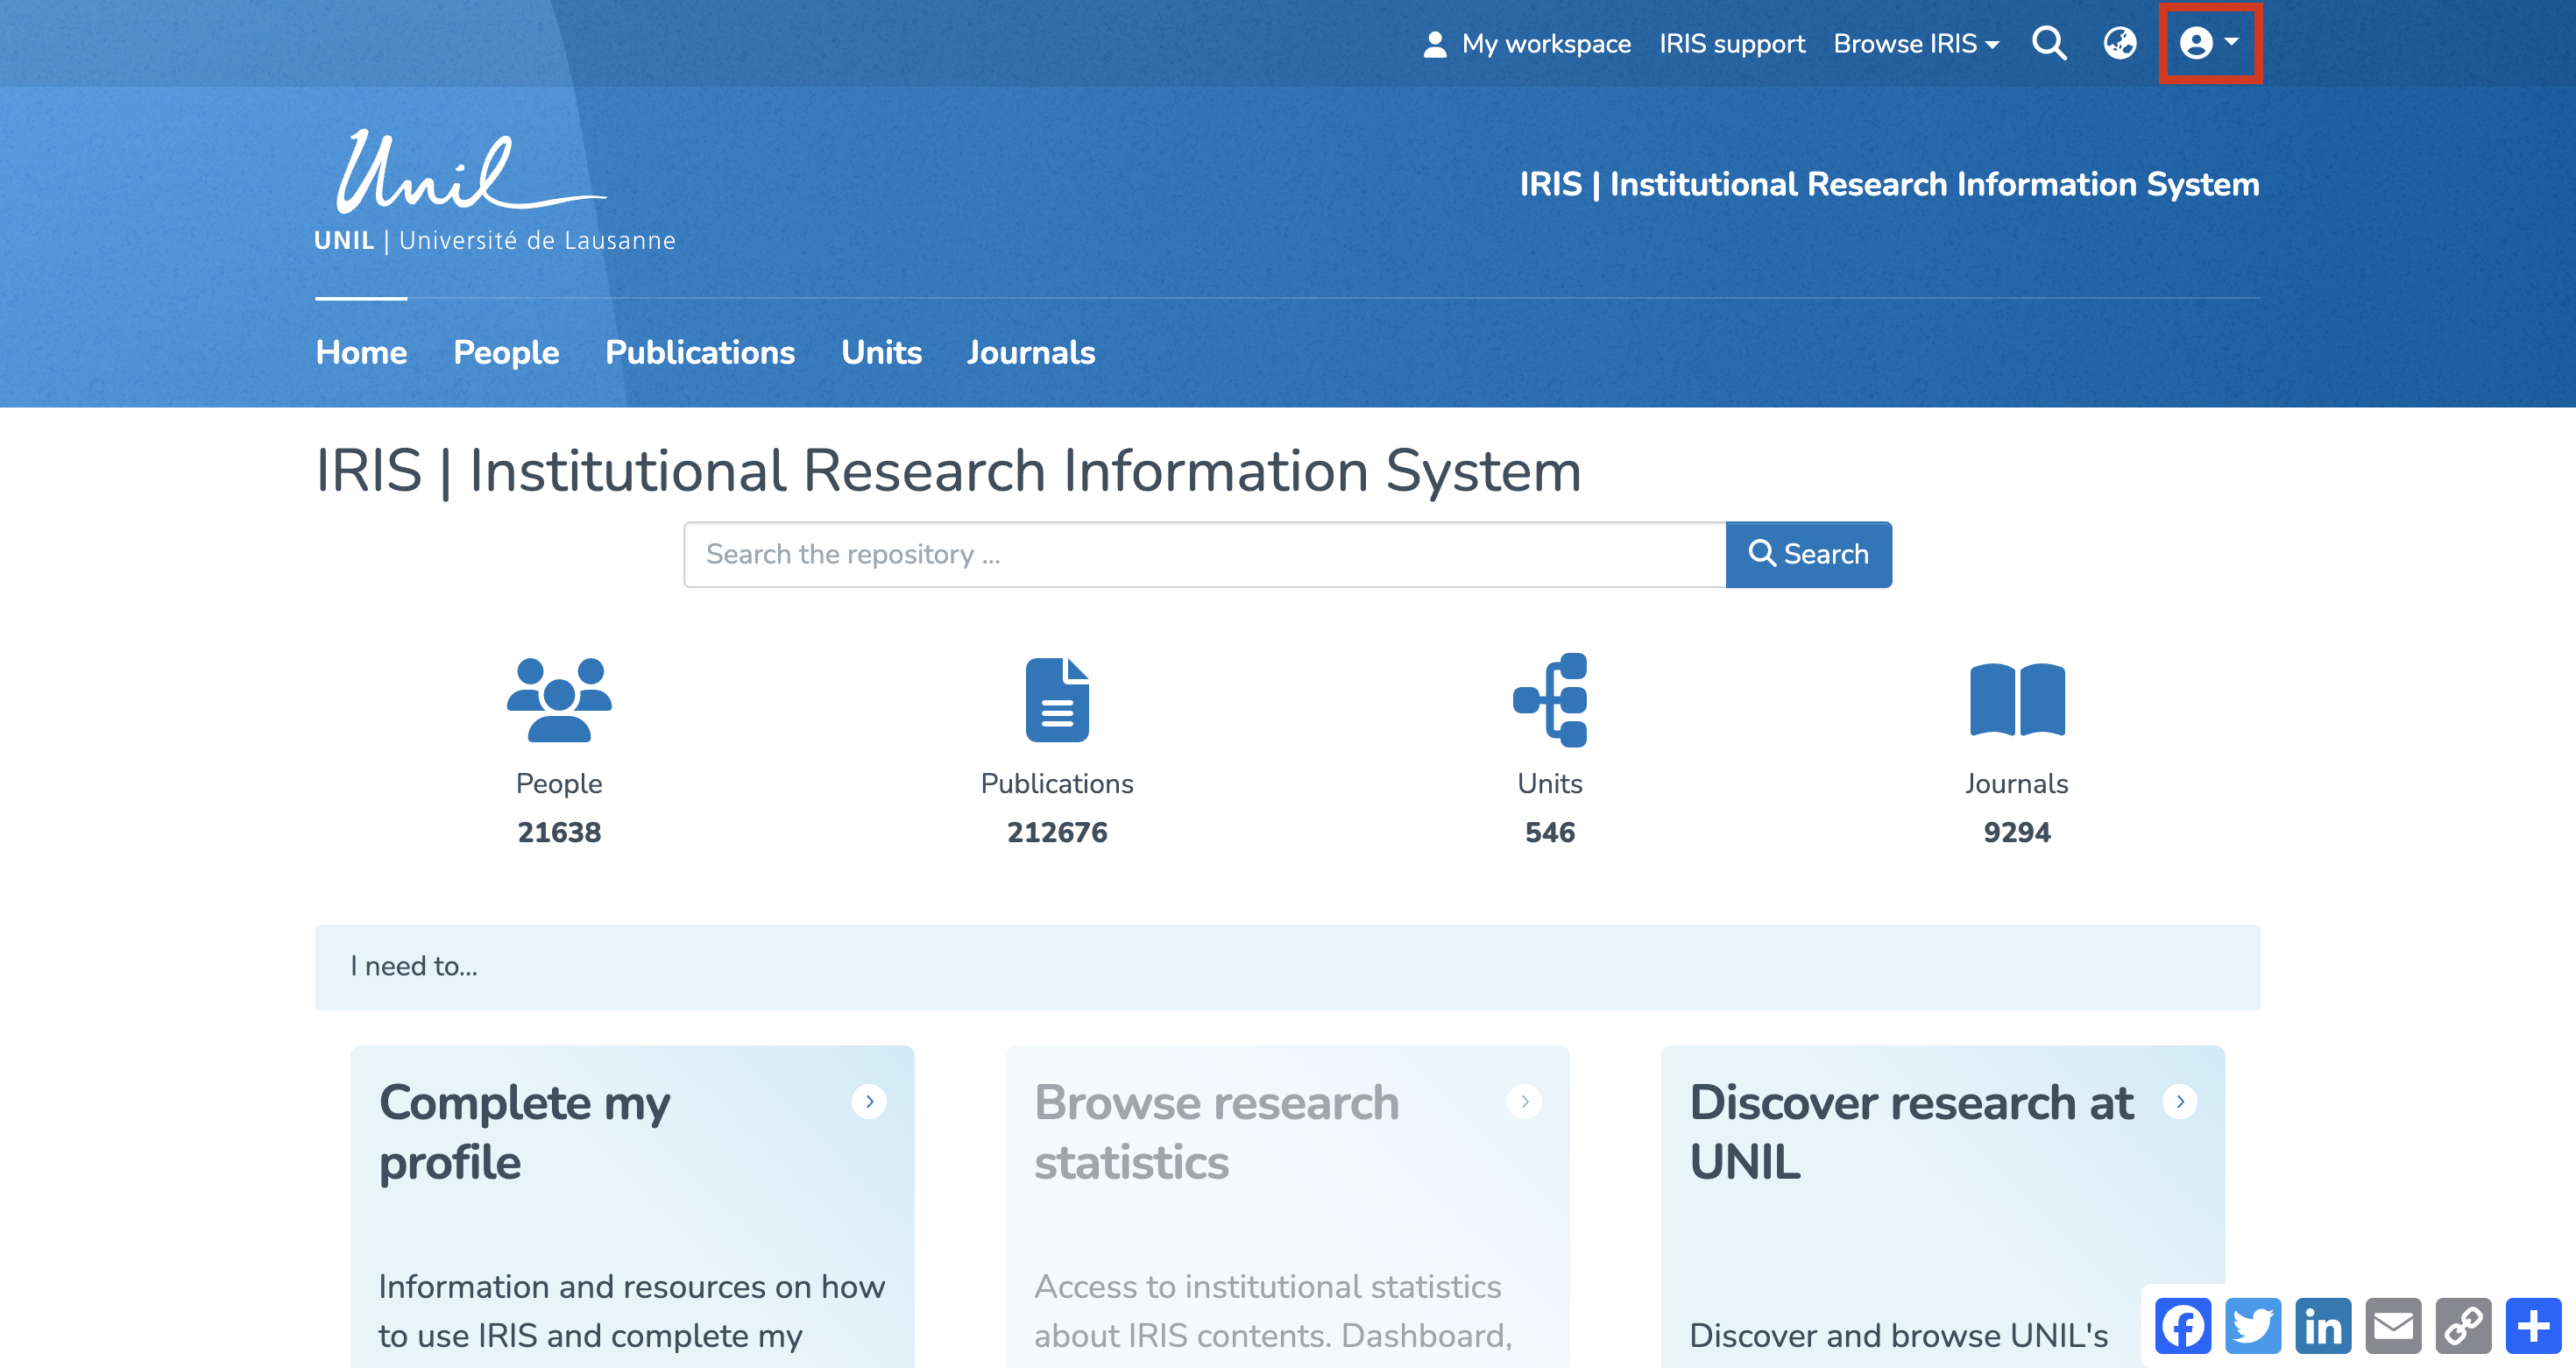
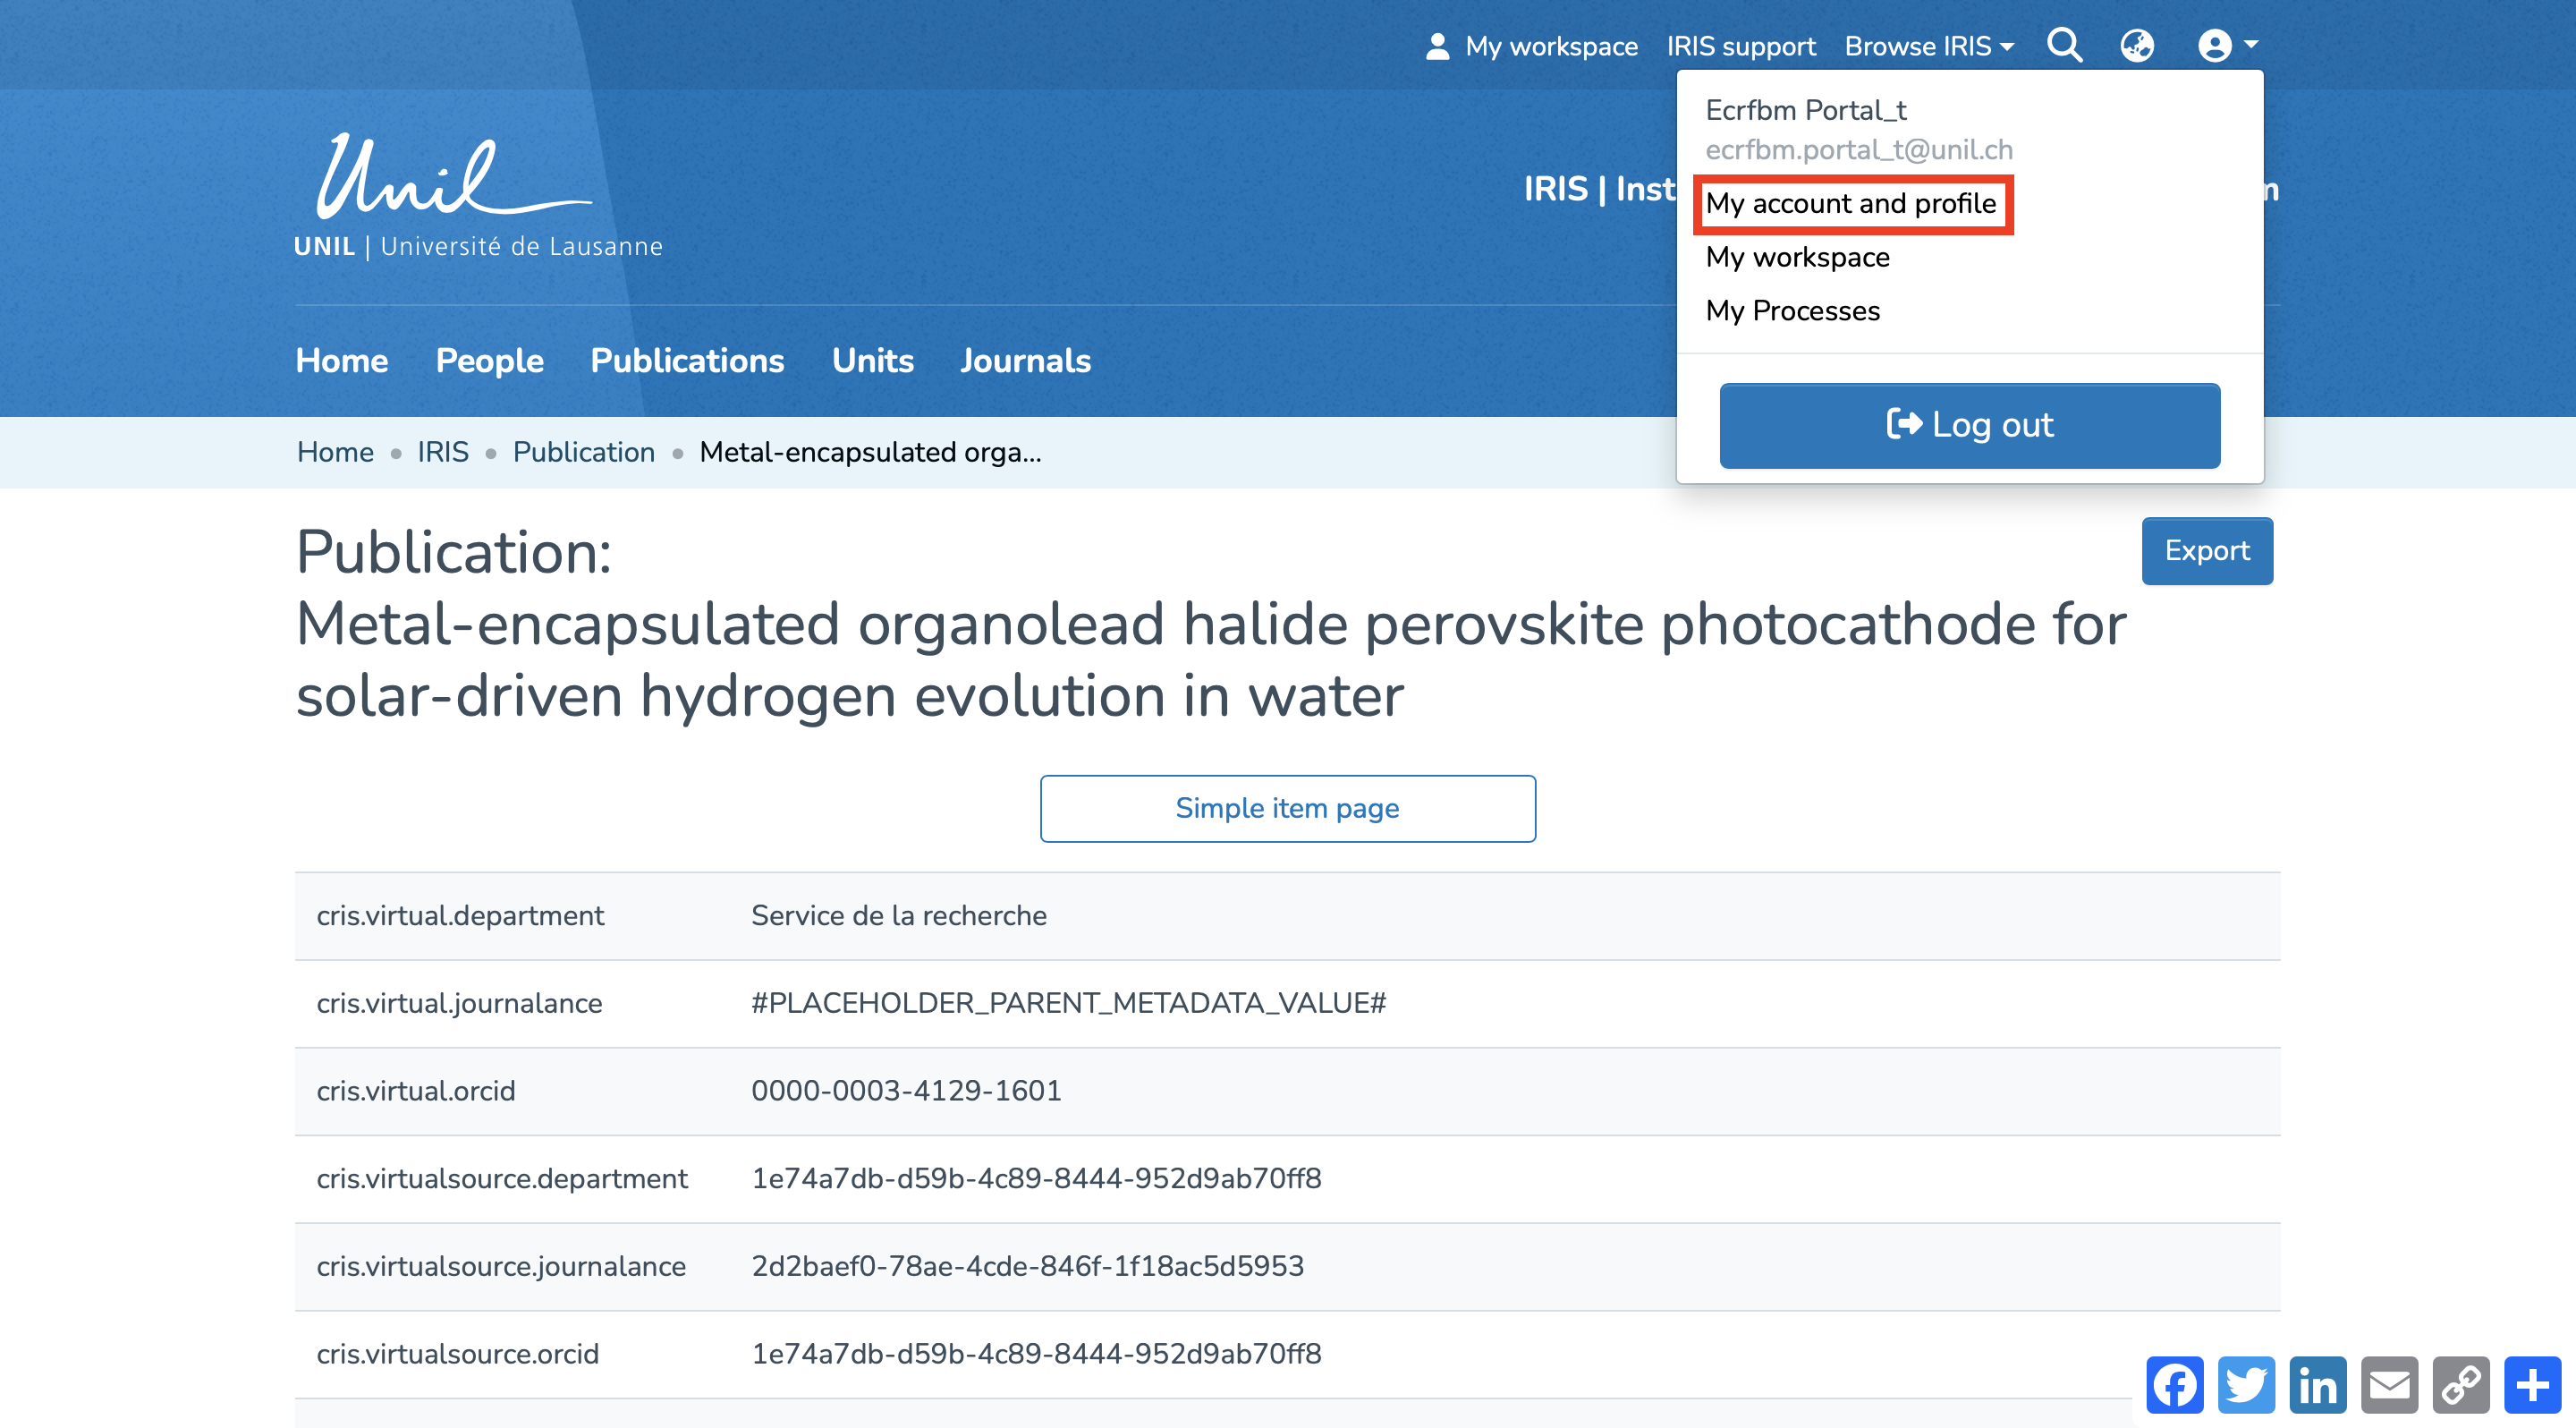
User account: here, you can check your account settings as well as your personal information, and update your profile. To access it, click on the login menu at the top right.
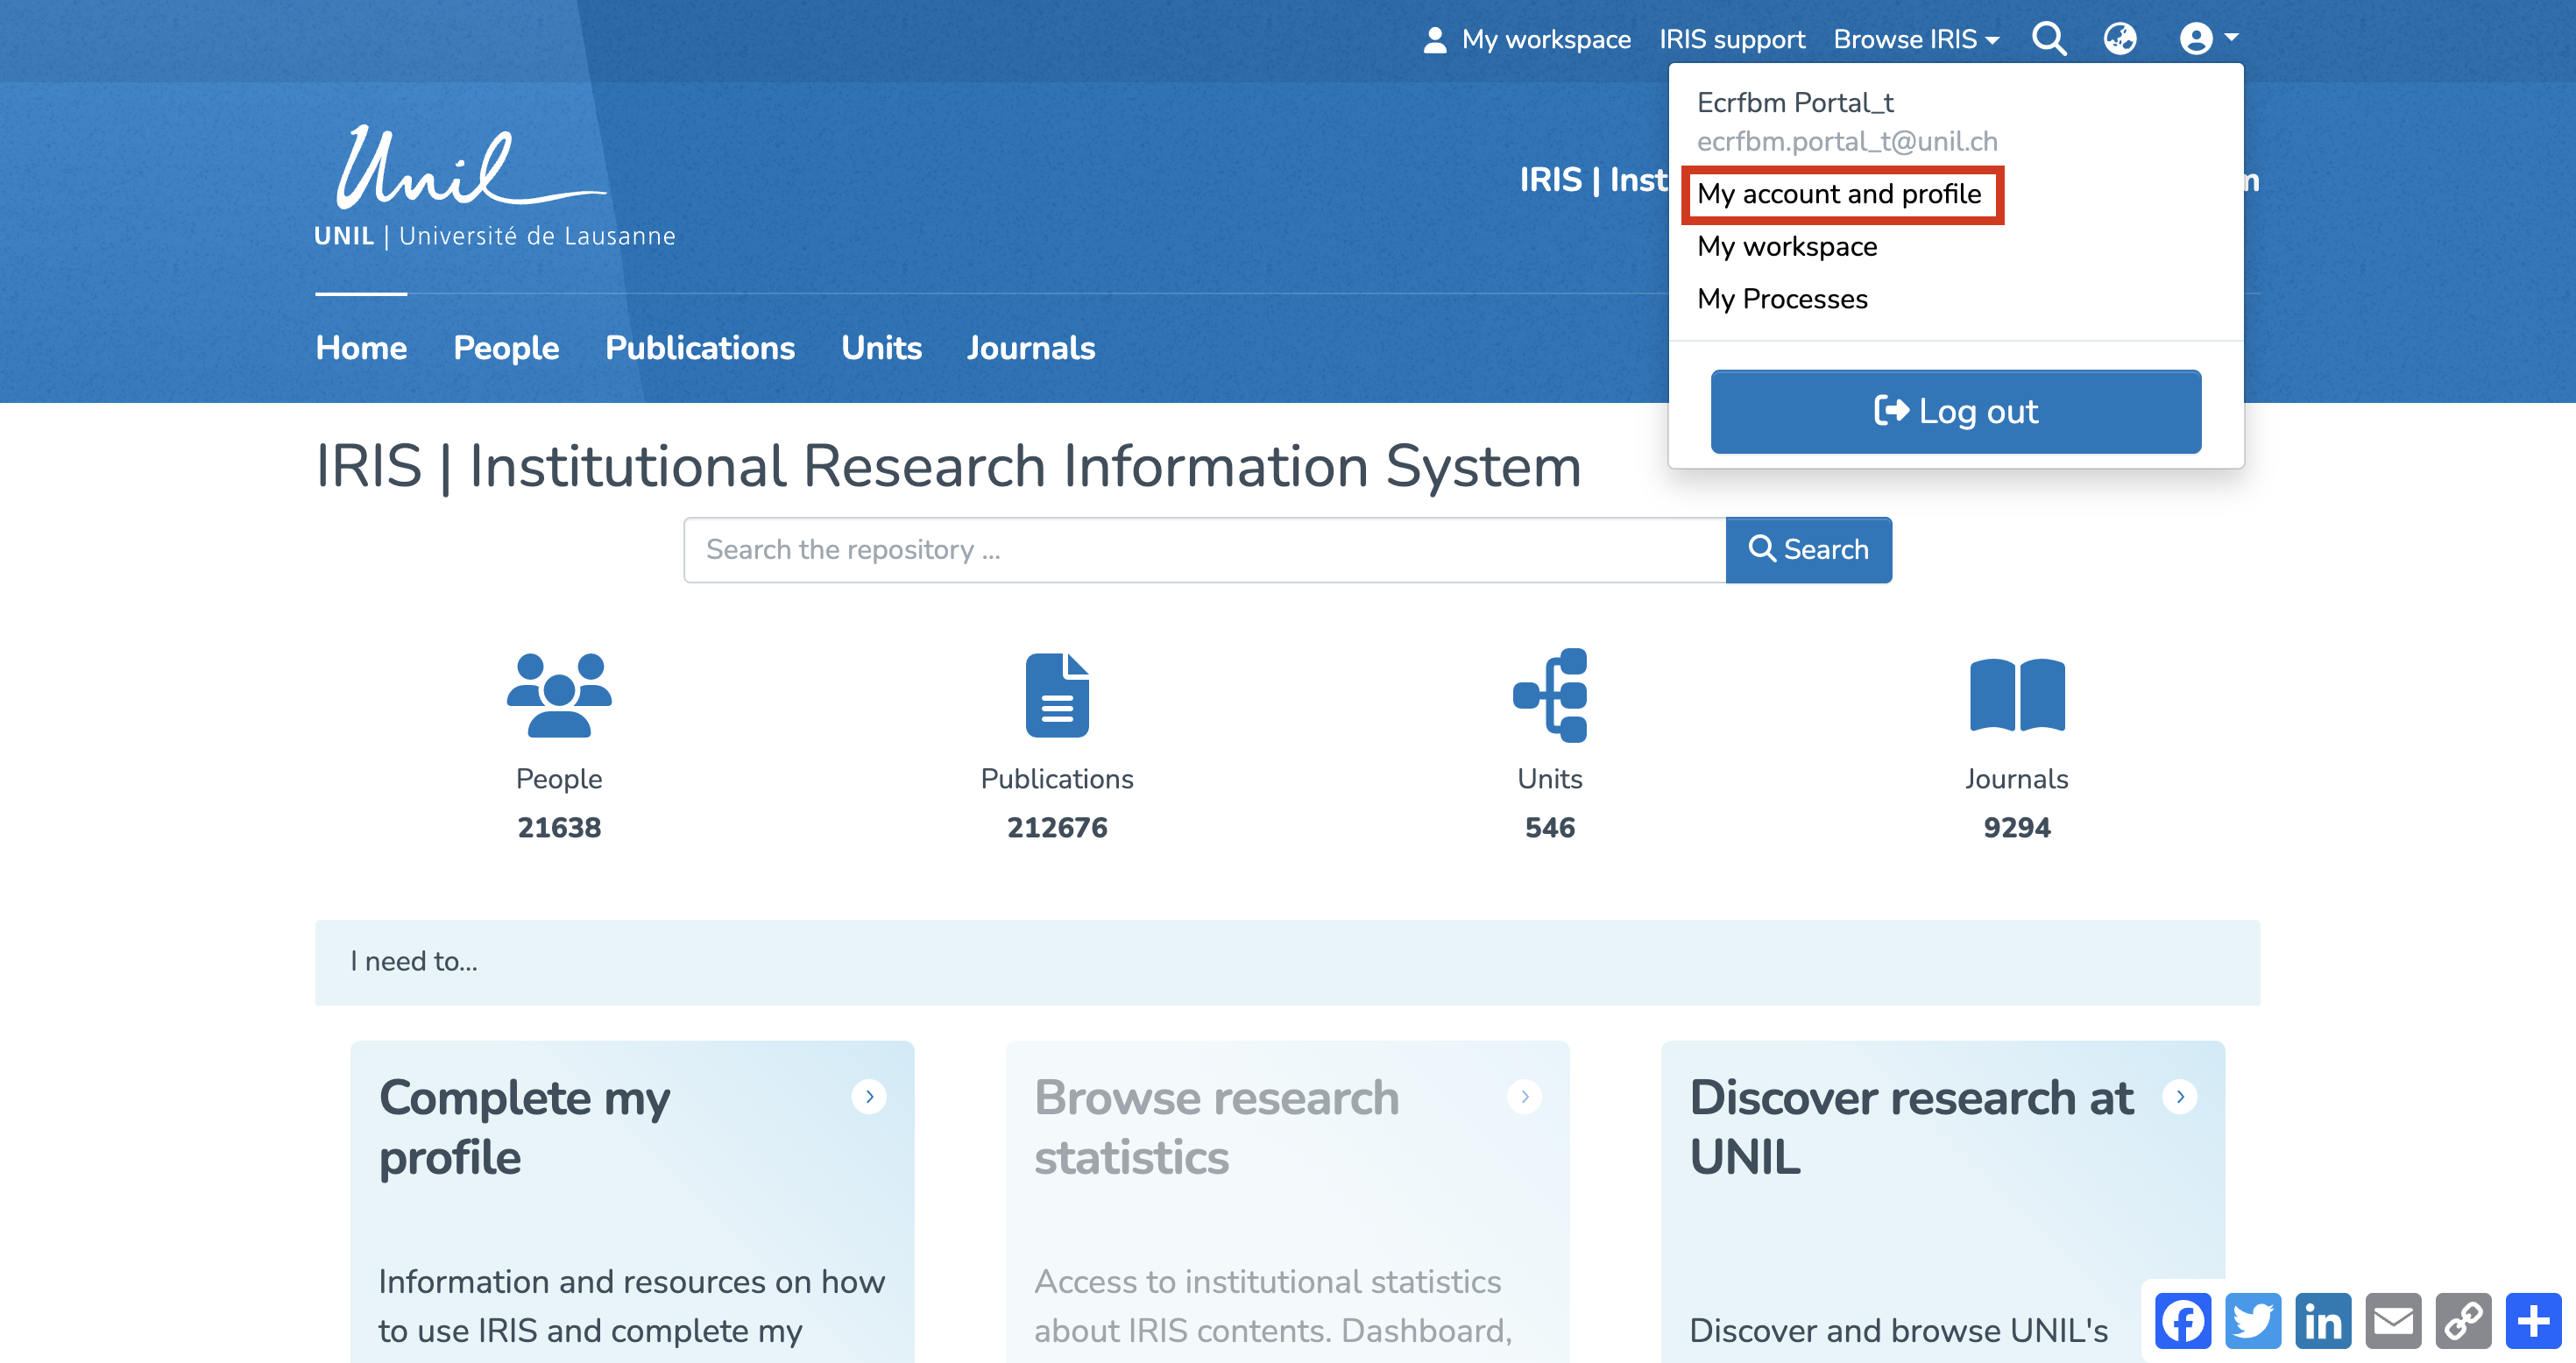
In the drop-down menu, select the option "My account and profile".
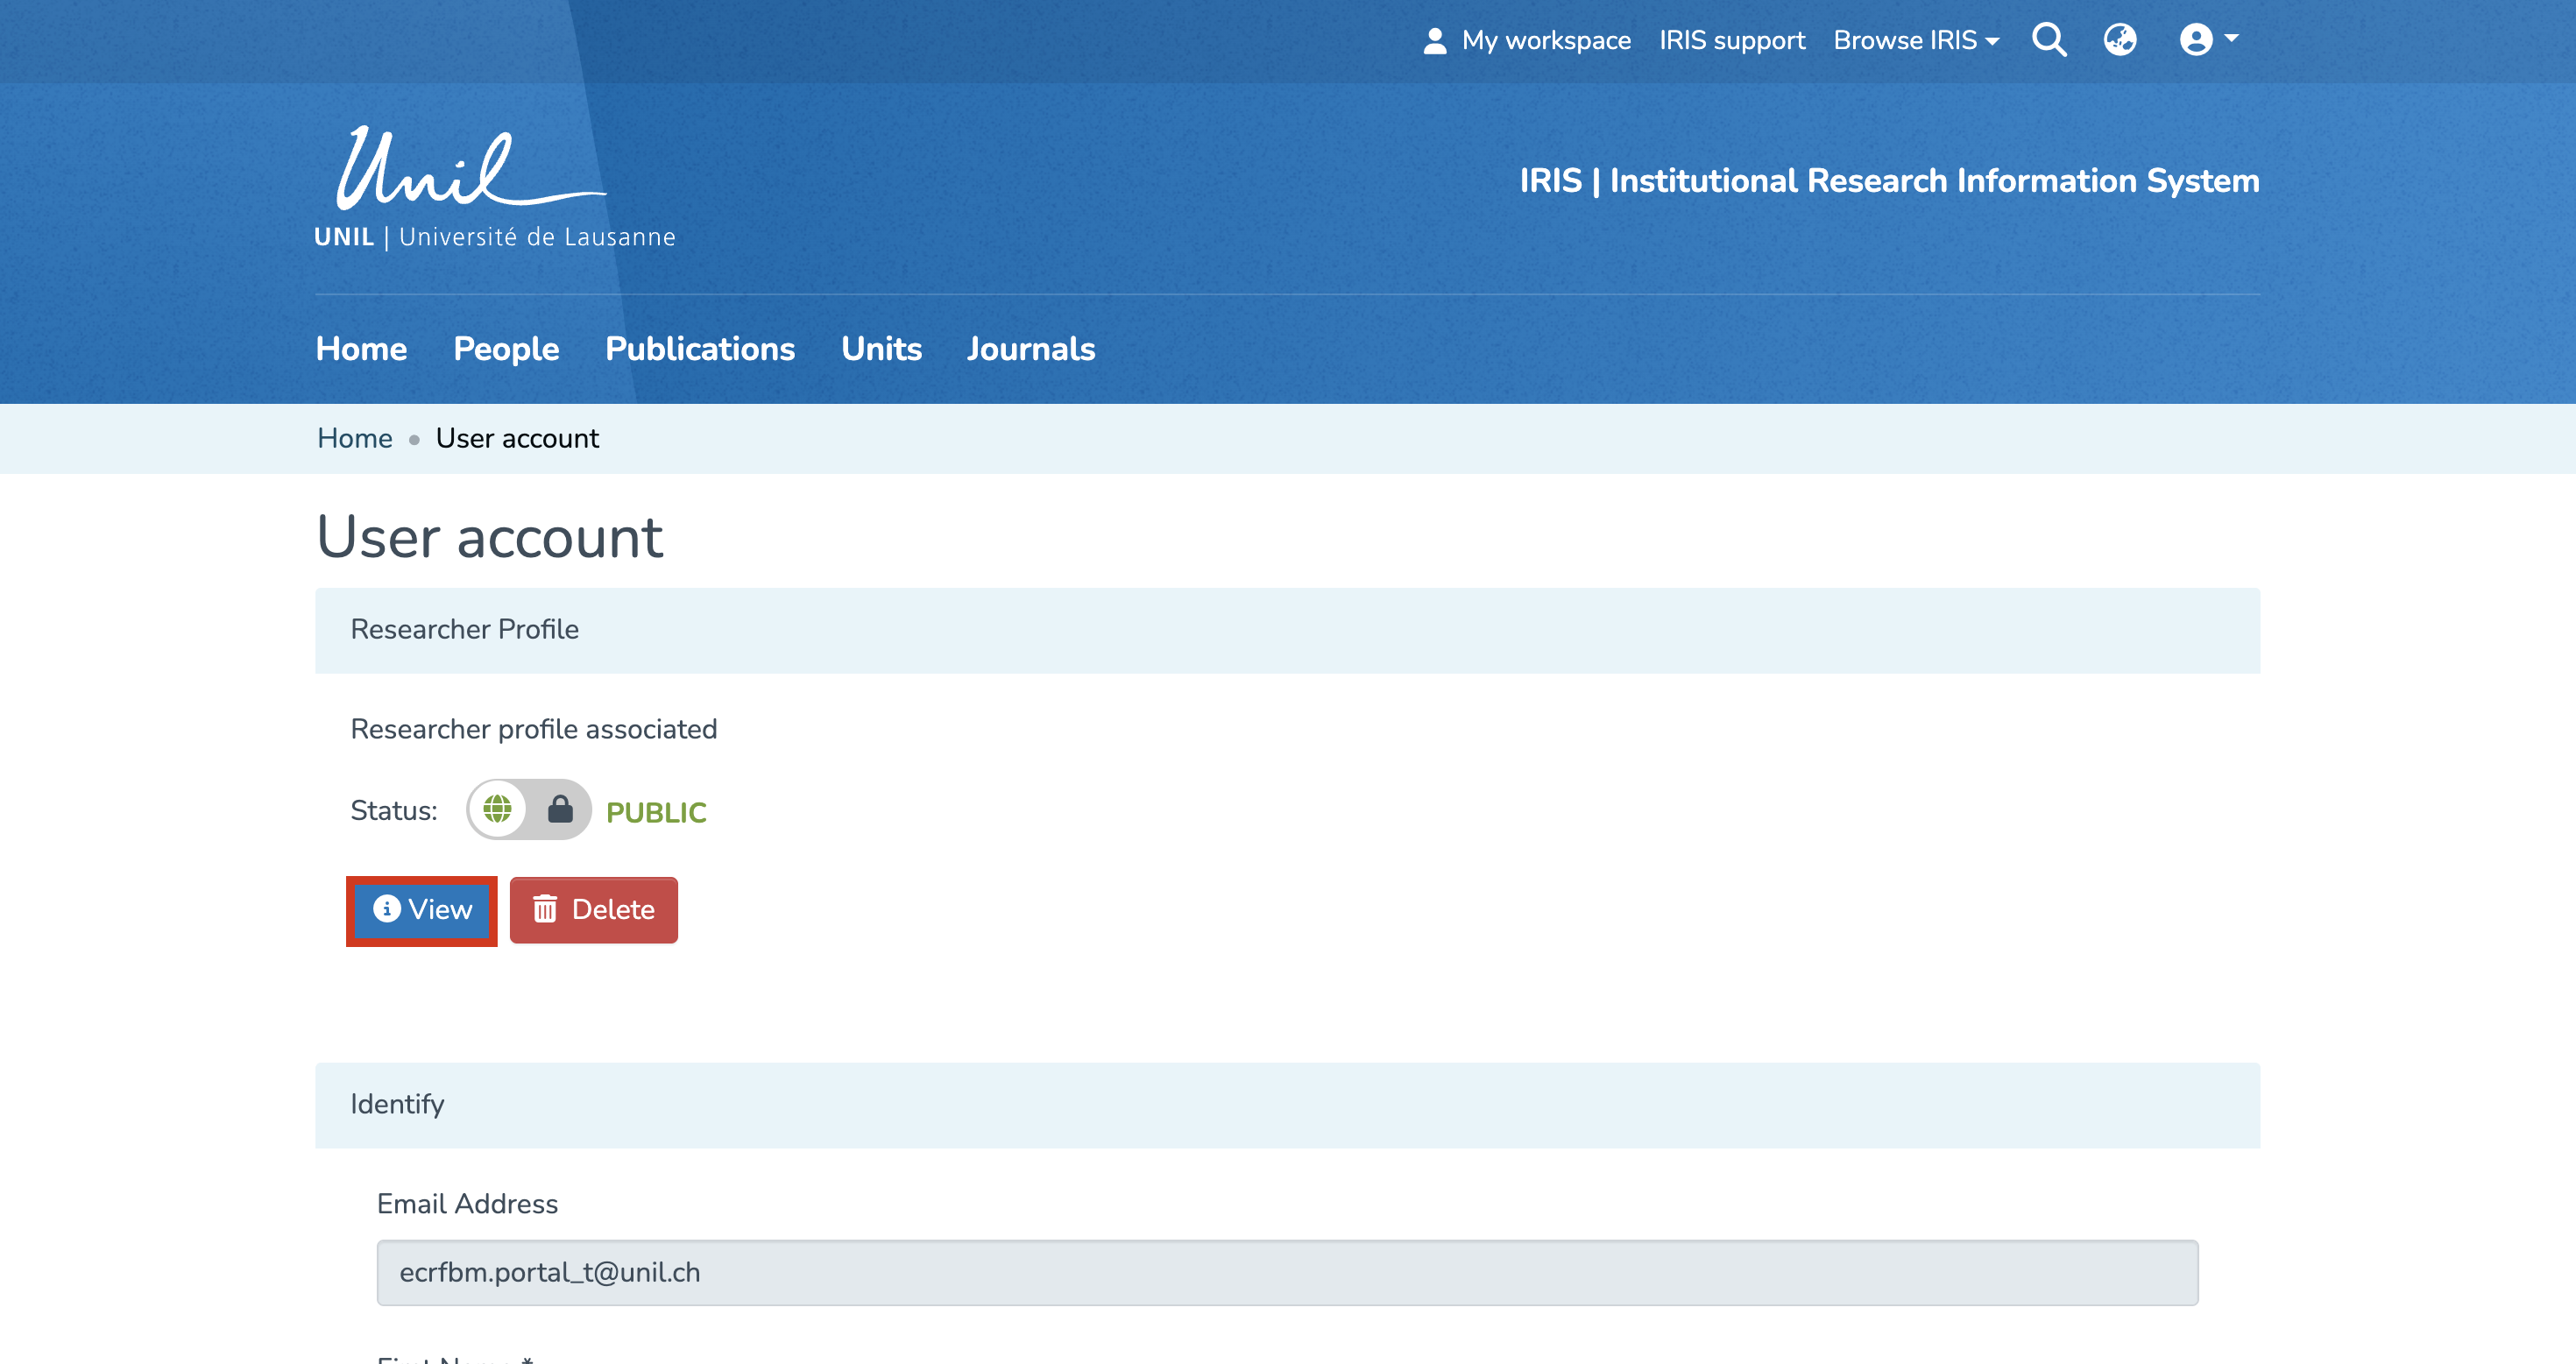
You will then be redirected to your user account. From this page, you can also access your researcher profile by clicking on "View".
Collections: each collection represents a specific category of research-related data, such as collaborators, publications, units, and journals. There are four collections in IRIS:
-
People: this collection includes the collaborators in IRIS. You can search for repository members and view their researcher profiles.
-
Publications: this section gathers all deposited works and provides access to their metadata.
-
Units: this collection lists the research units. It also allows you to access their profiles to view their information and related publications.
-
Journals: in this section, you will find all journals and periodicals linked to a publication in the repository.
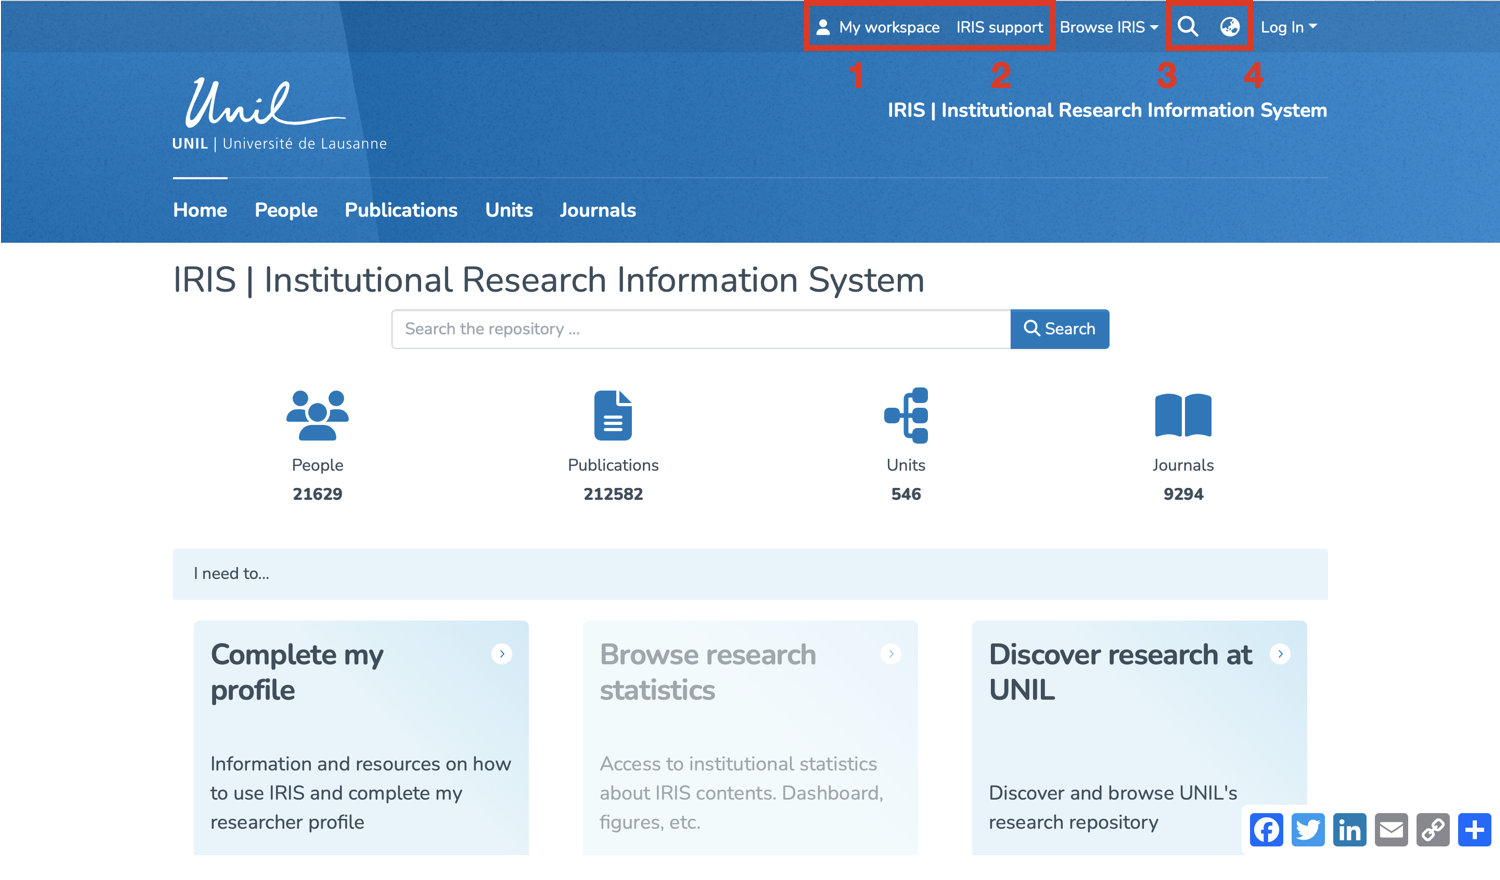
Initial Features
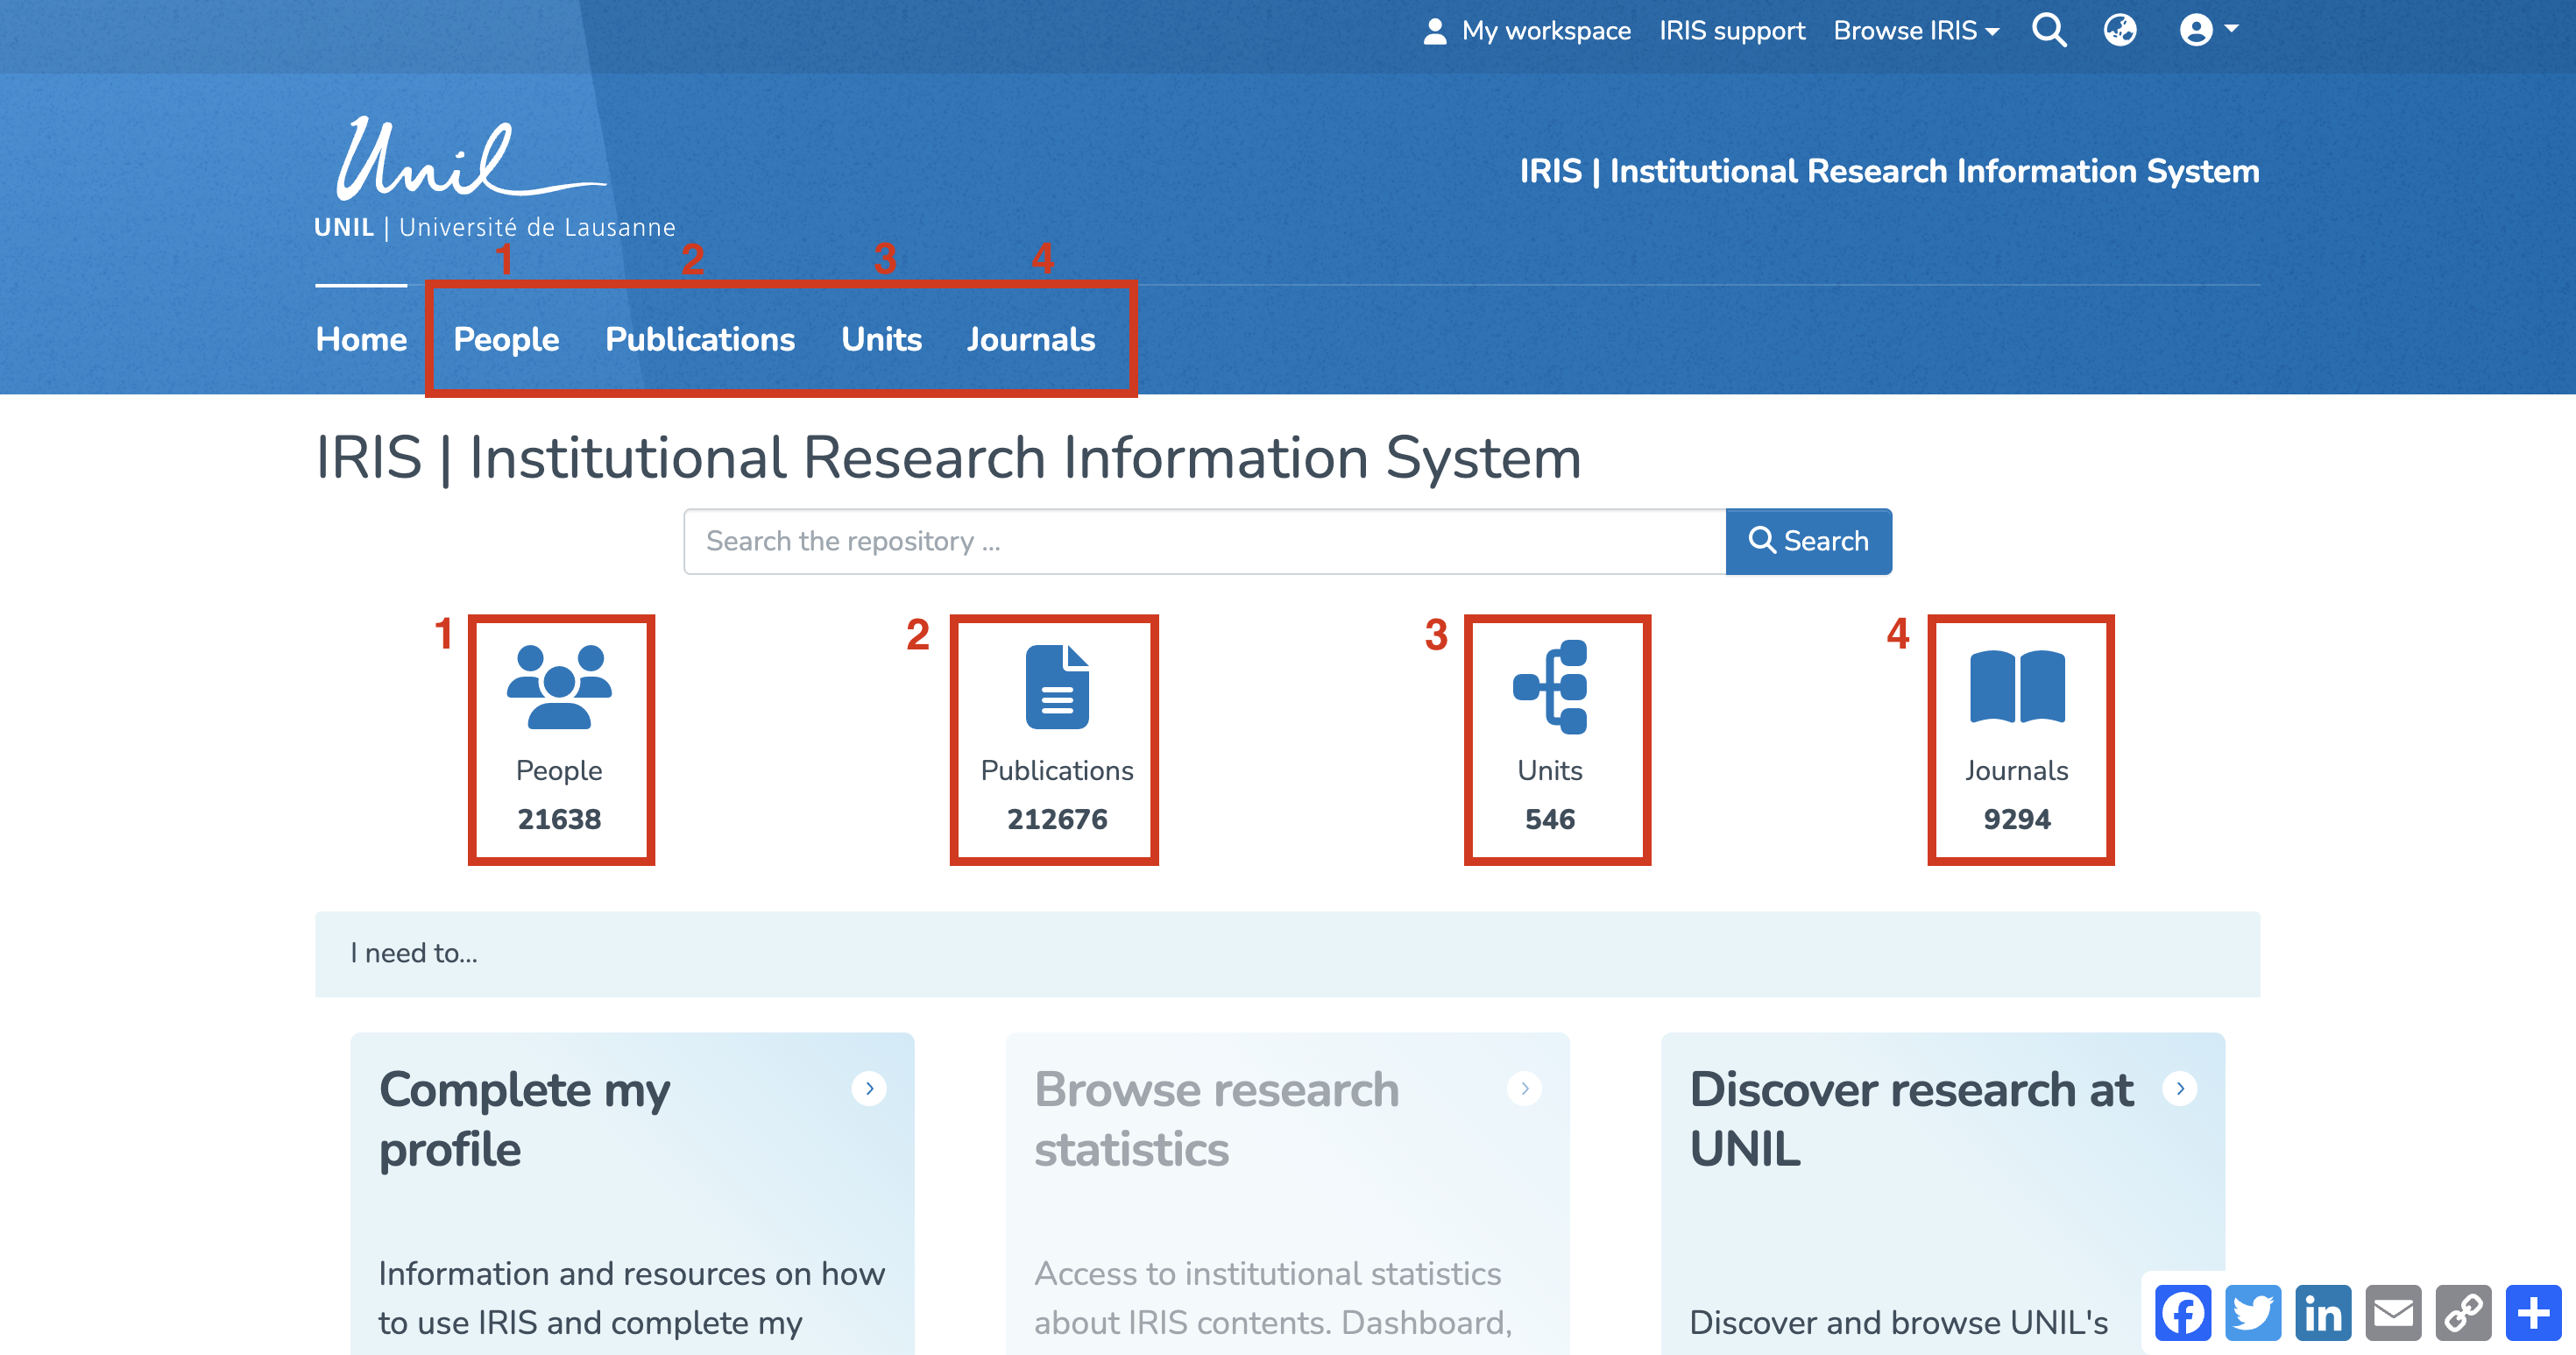
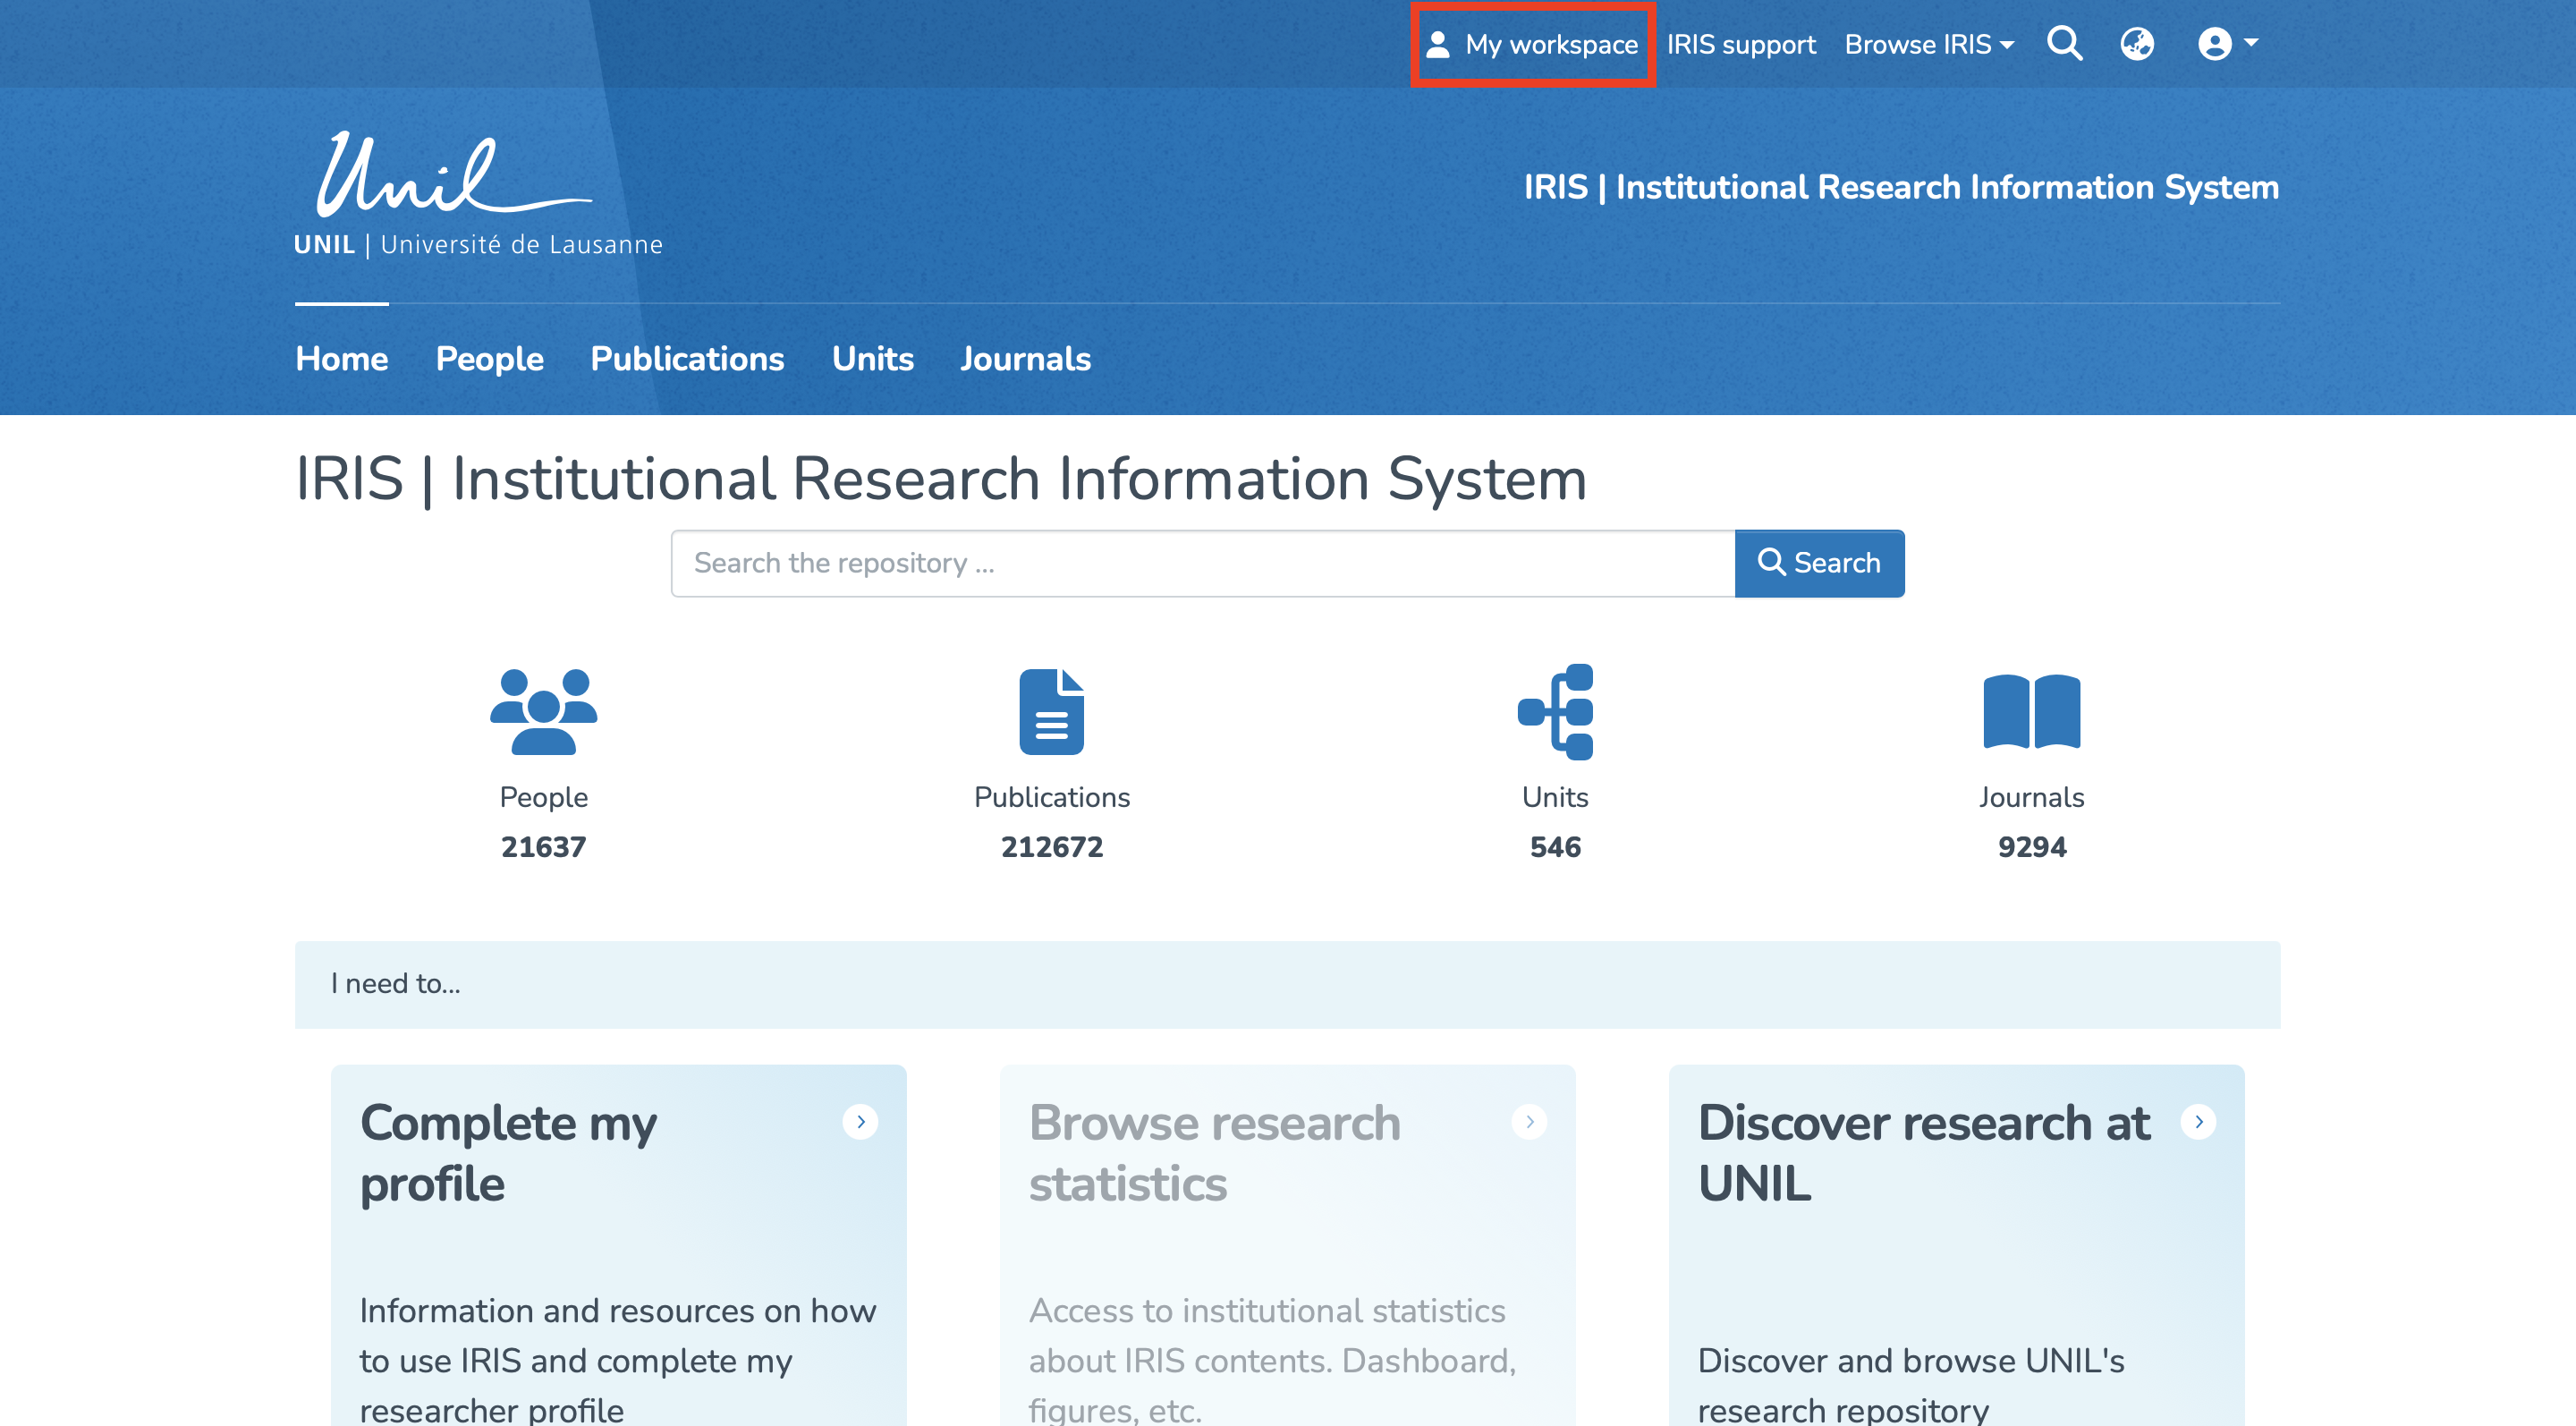
Once you are logged in, you will be redirected to the IRIS homepage. In the top-right corner of this page, you will find the following features:
1. My Workspace: This section allows you to view the records you have created and to create new ones.
2. IRIS Support: Access IRIS support and related documentation.
3. Search the entire repository.
4. Select the interface language (French/English).
Search
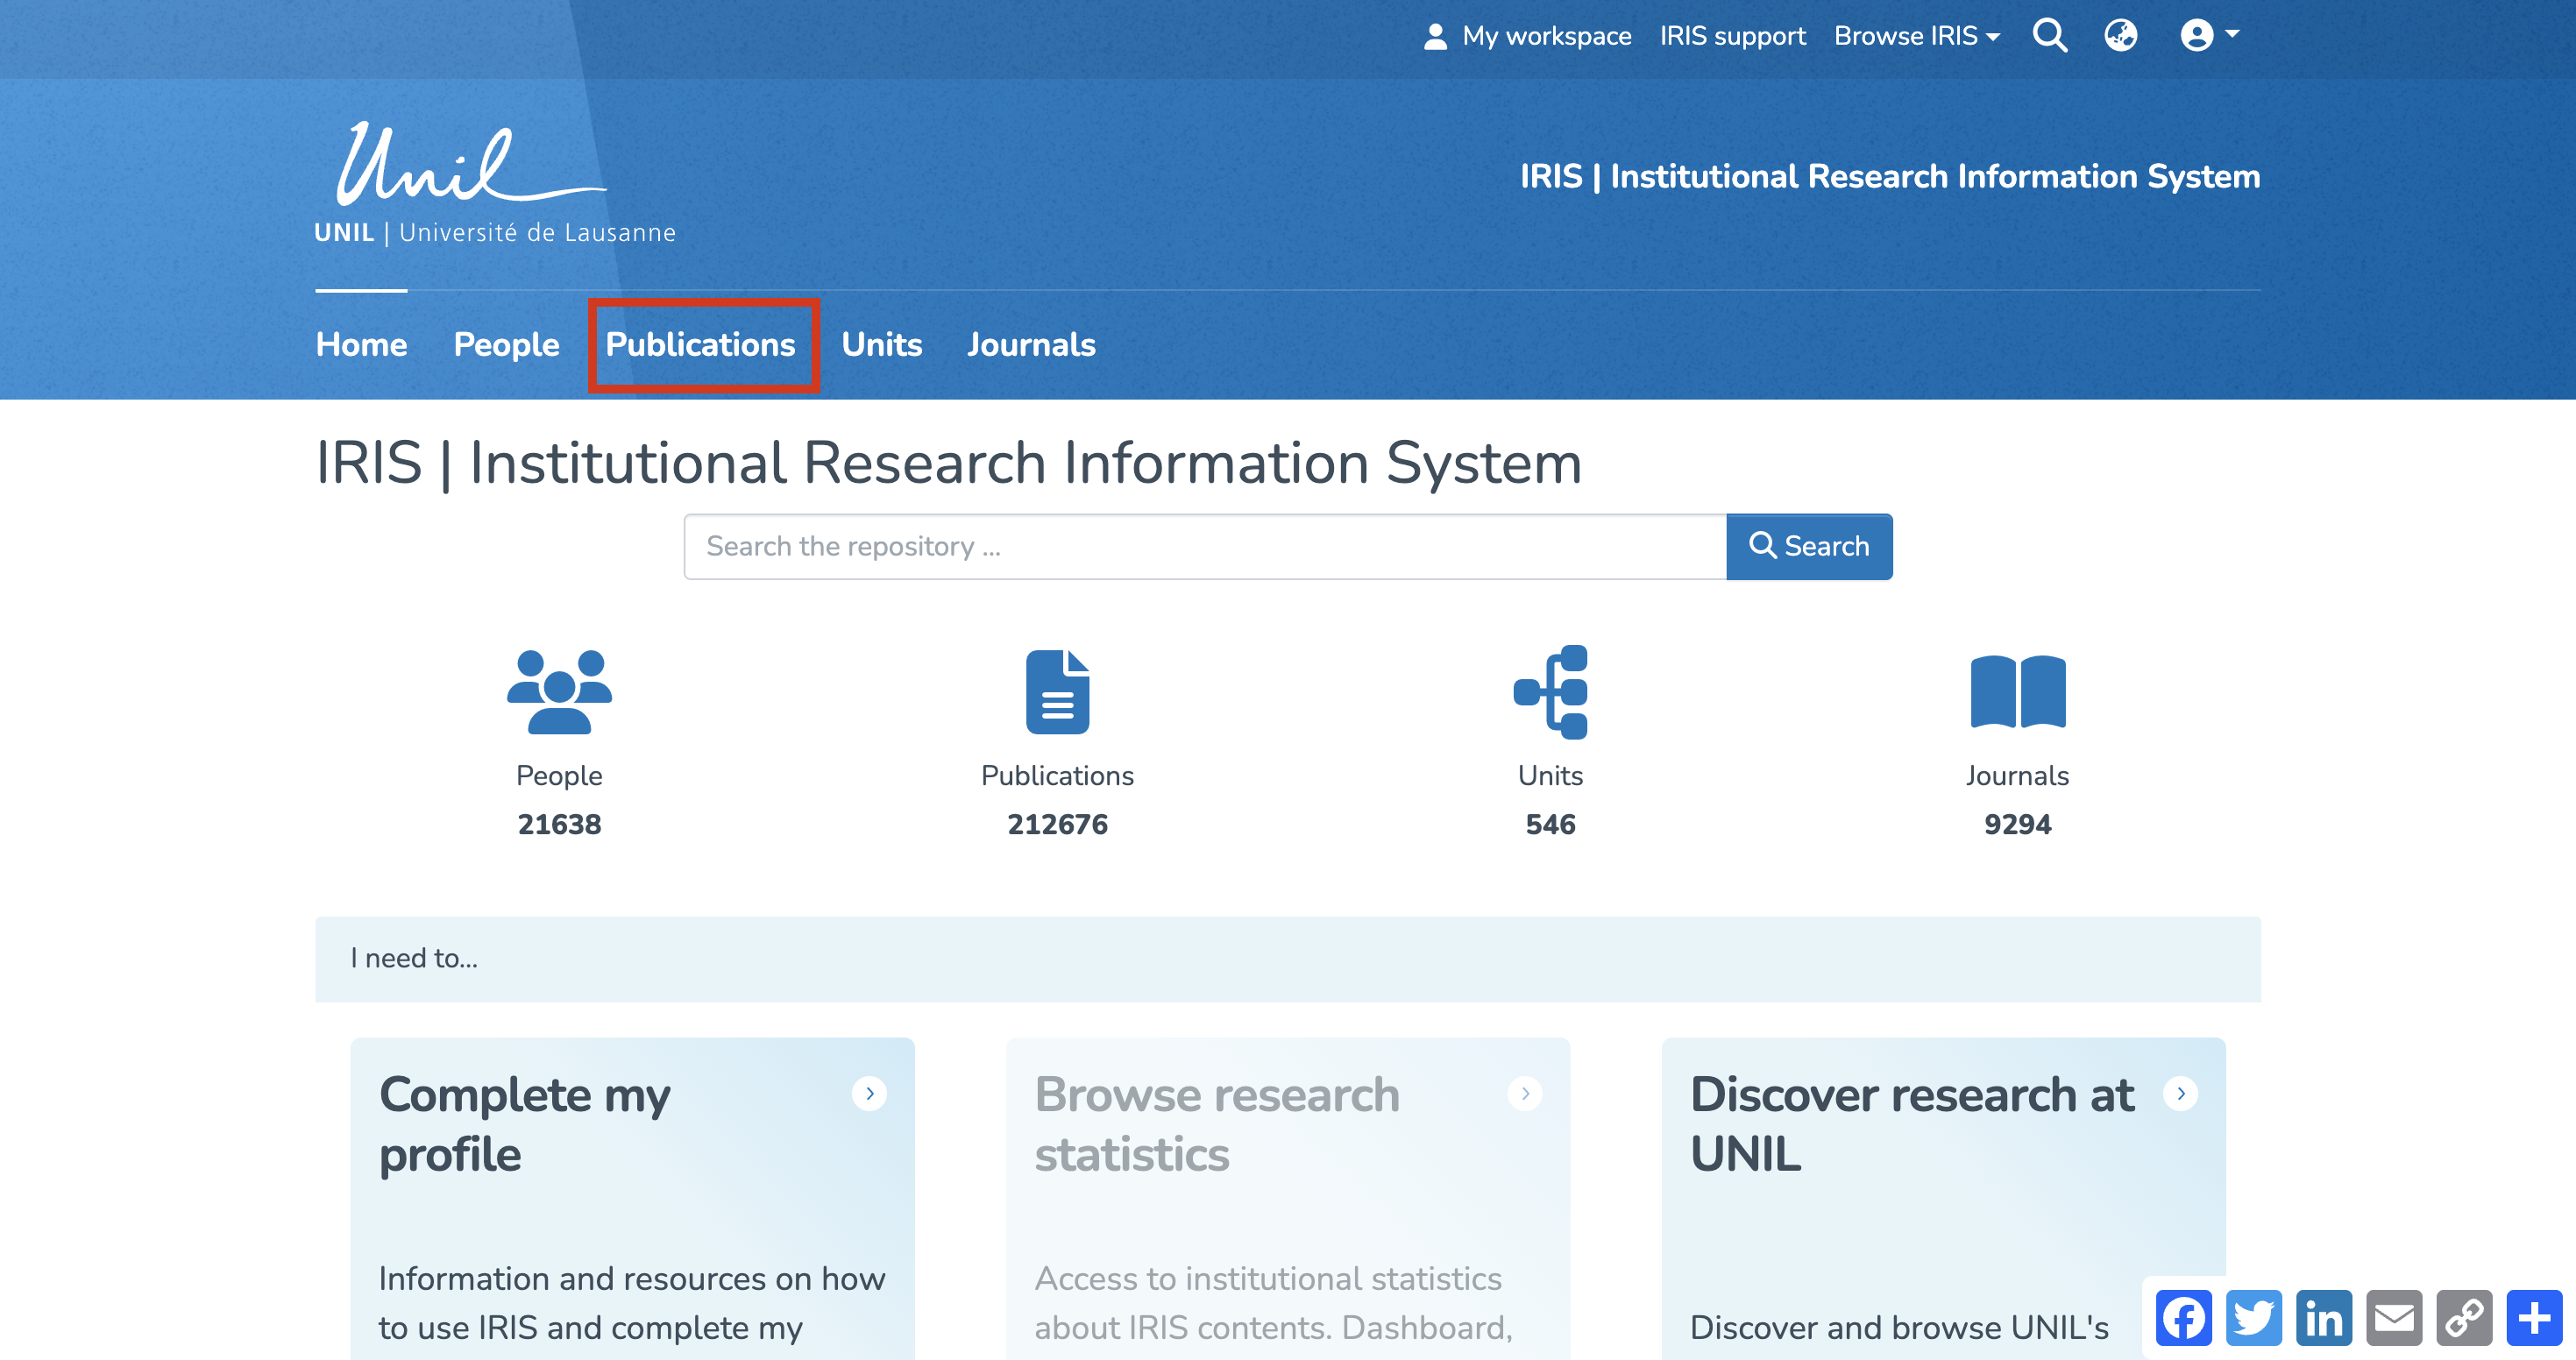
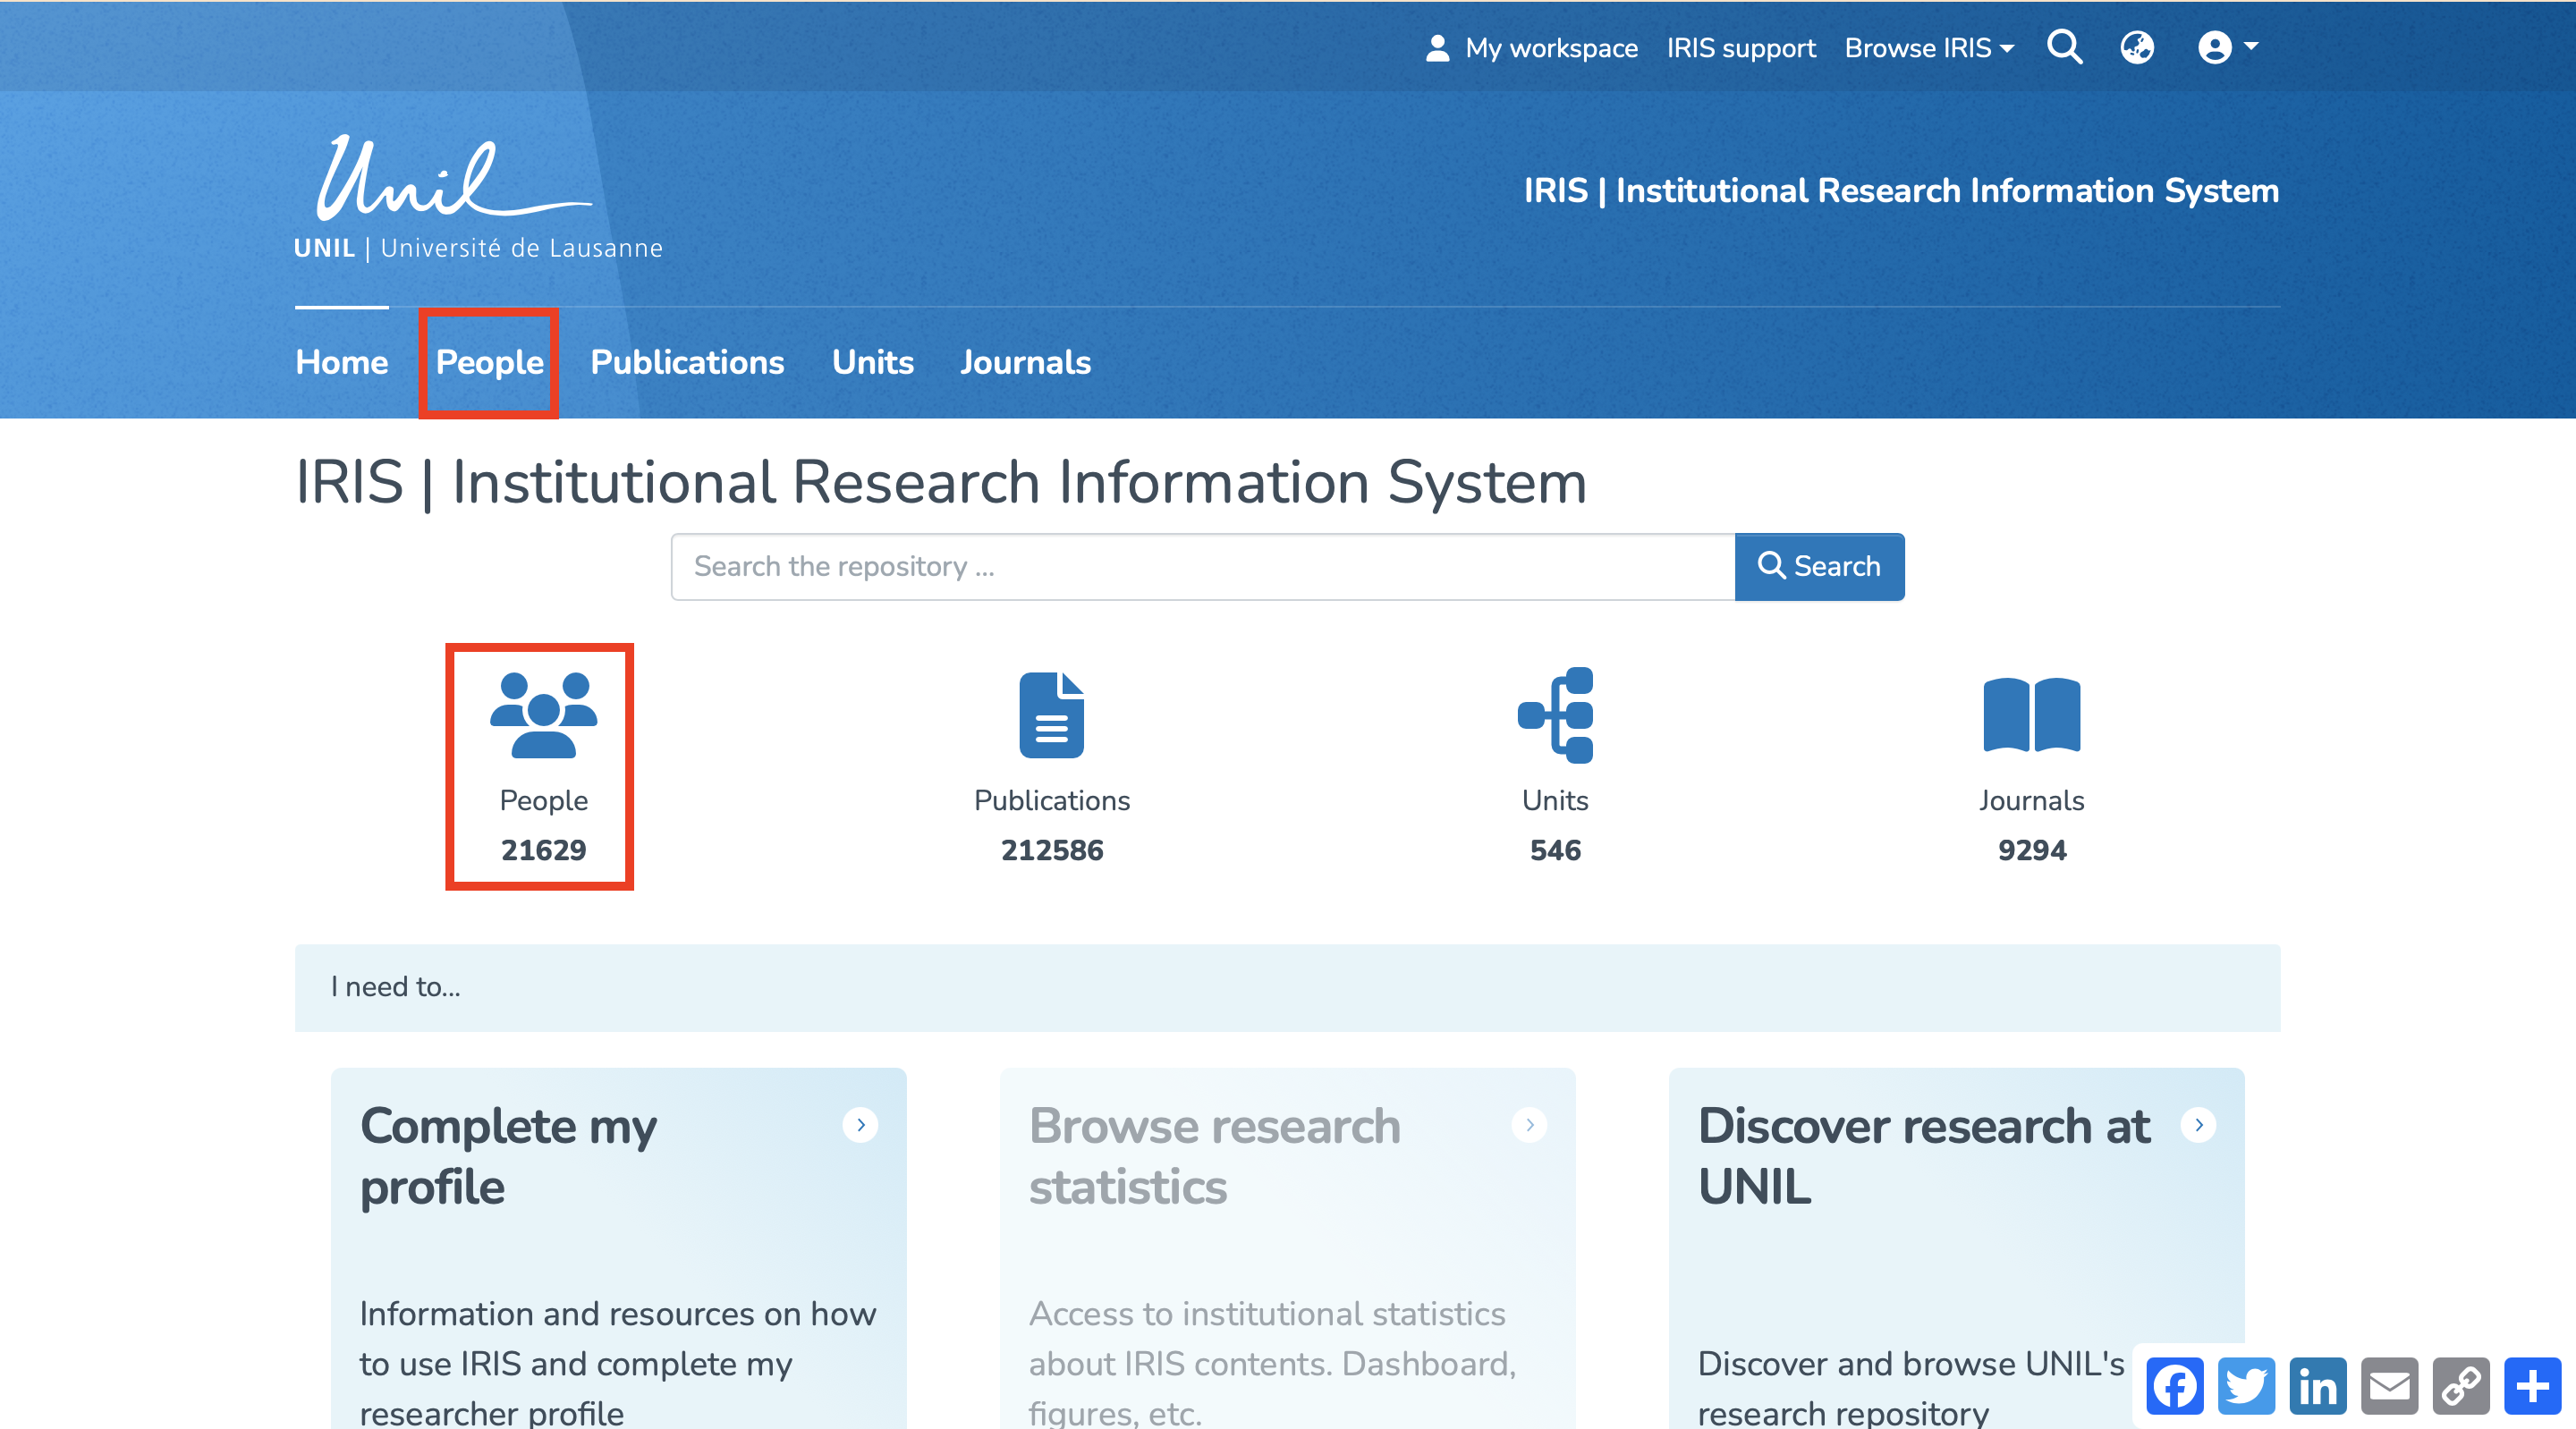
You can also browse the platform by People (1), Publications (2), Units (3), or Journals (4) by clicking on the button corresponding to the desired collection.
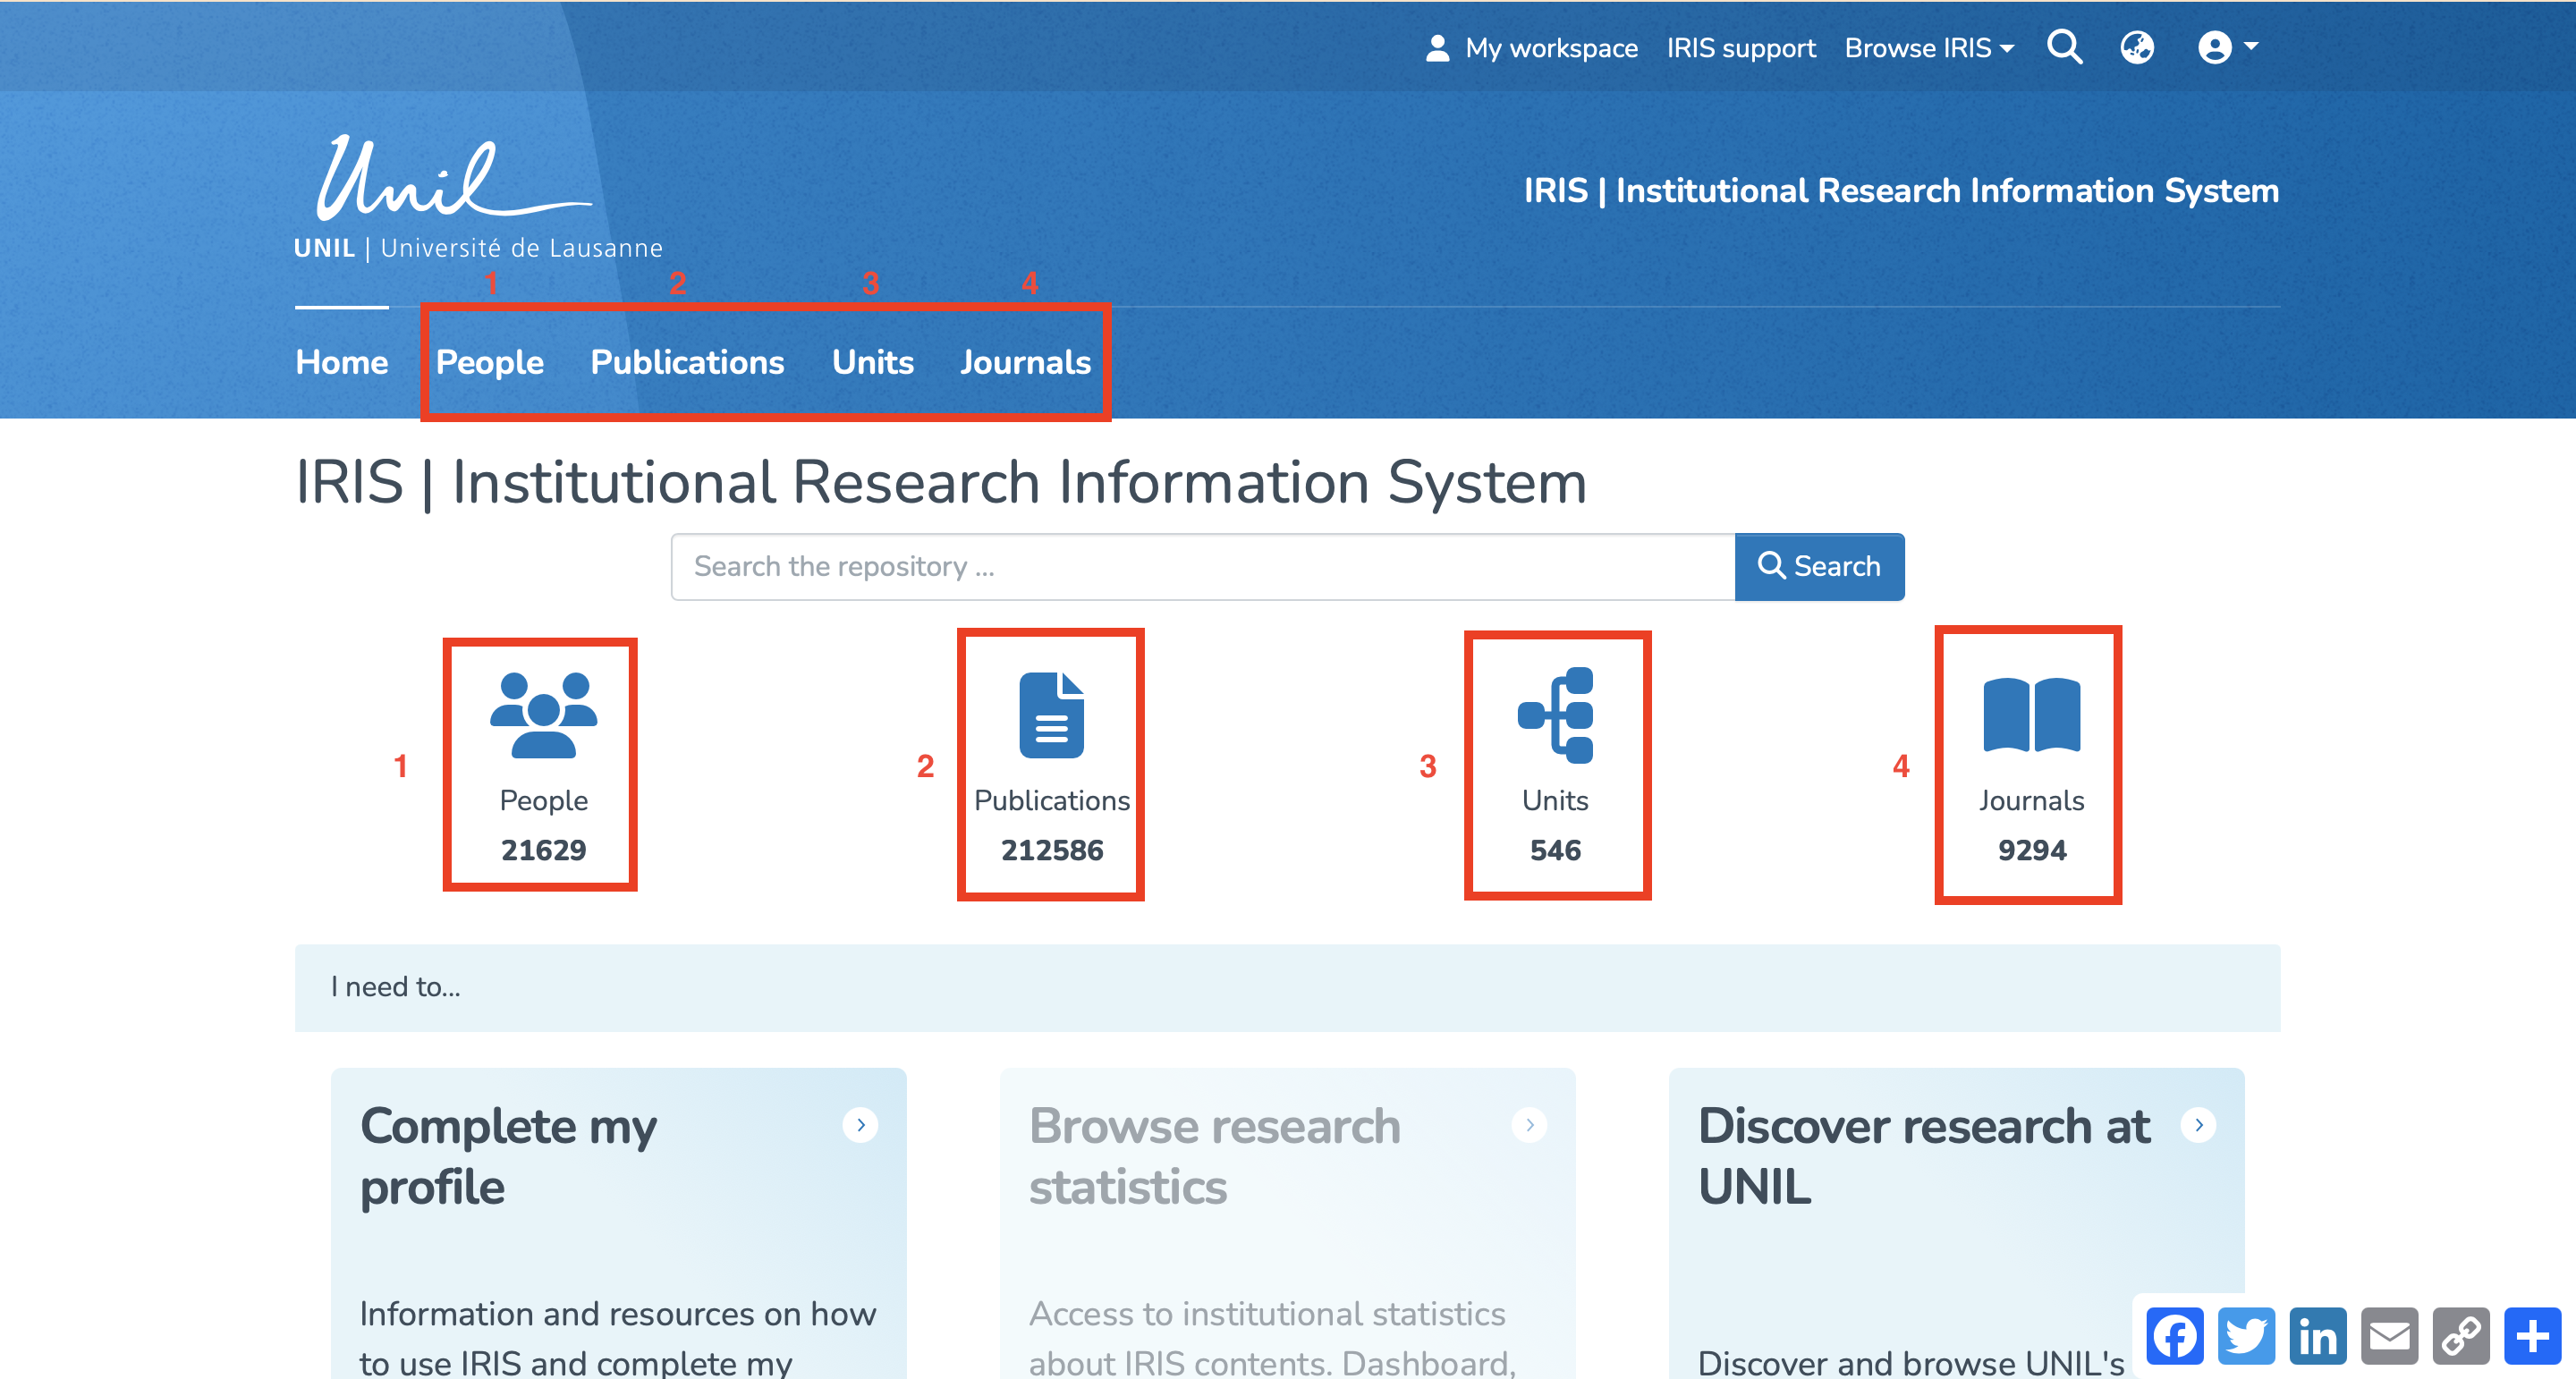
An advanced search can be performed using the search bar on the homepage.

For more details about searching, please refer to the page https://wiki.unil.ch/recherche/books/user-guide/page/searching-iris.
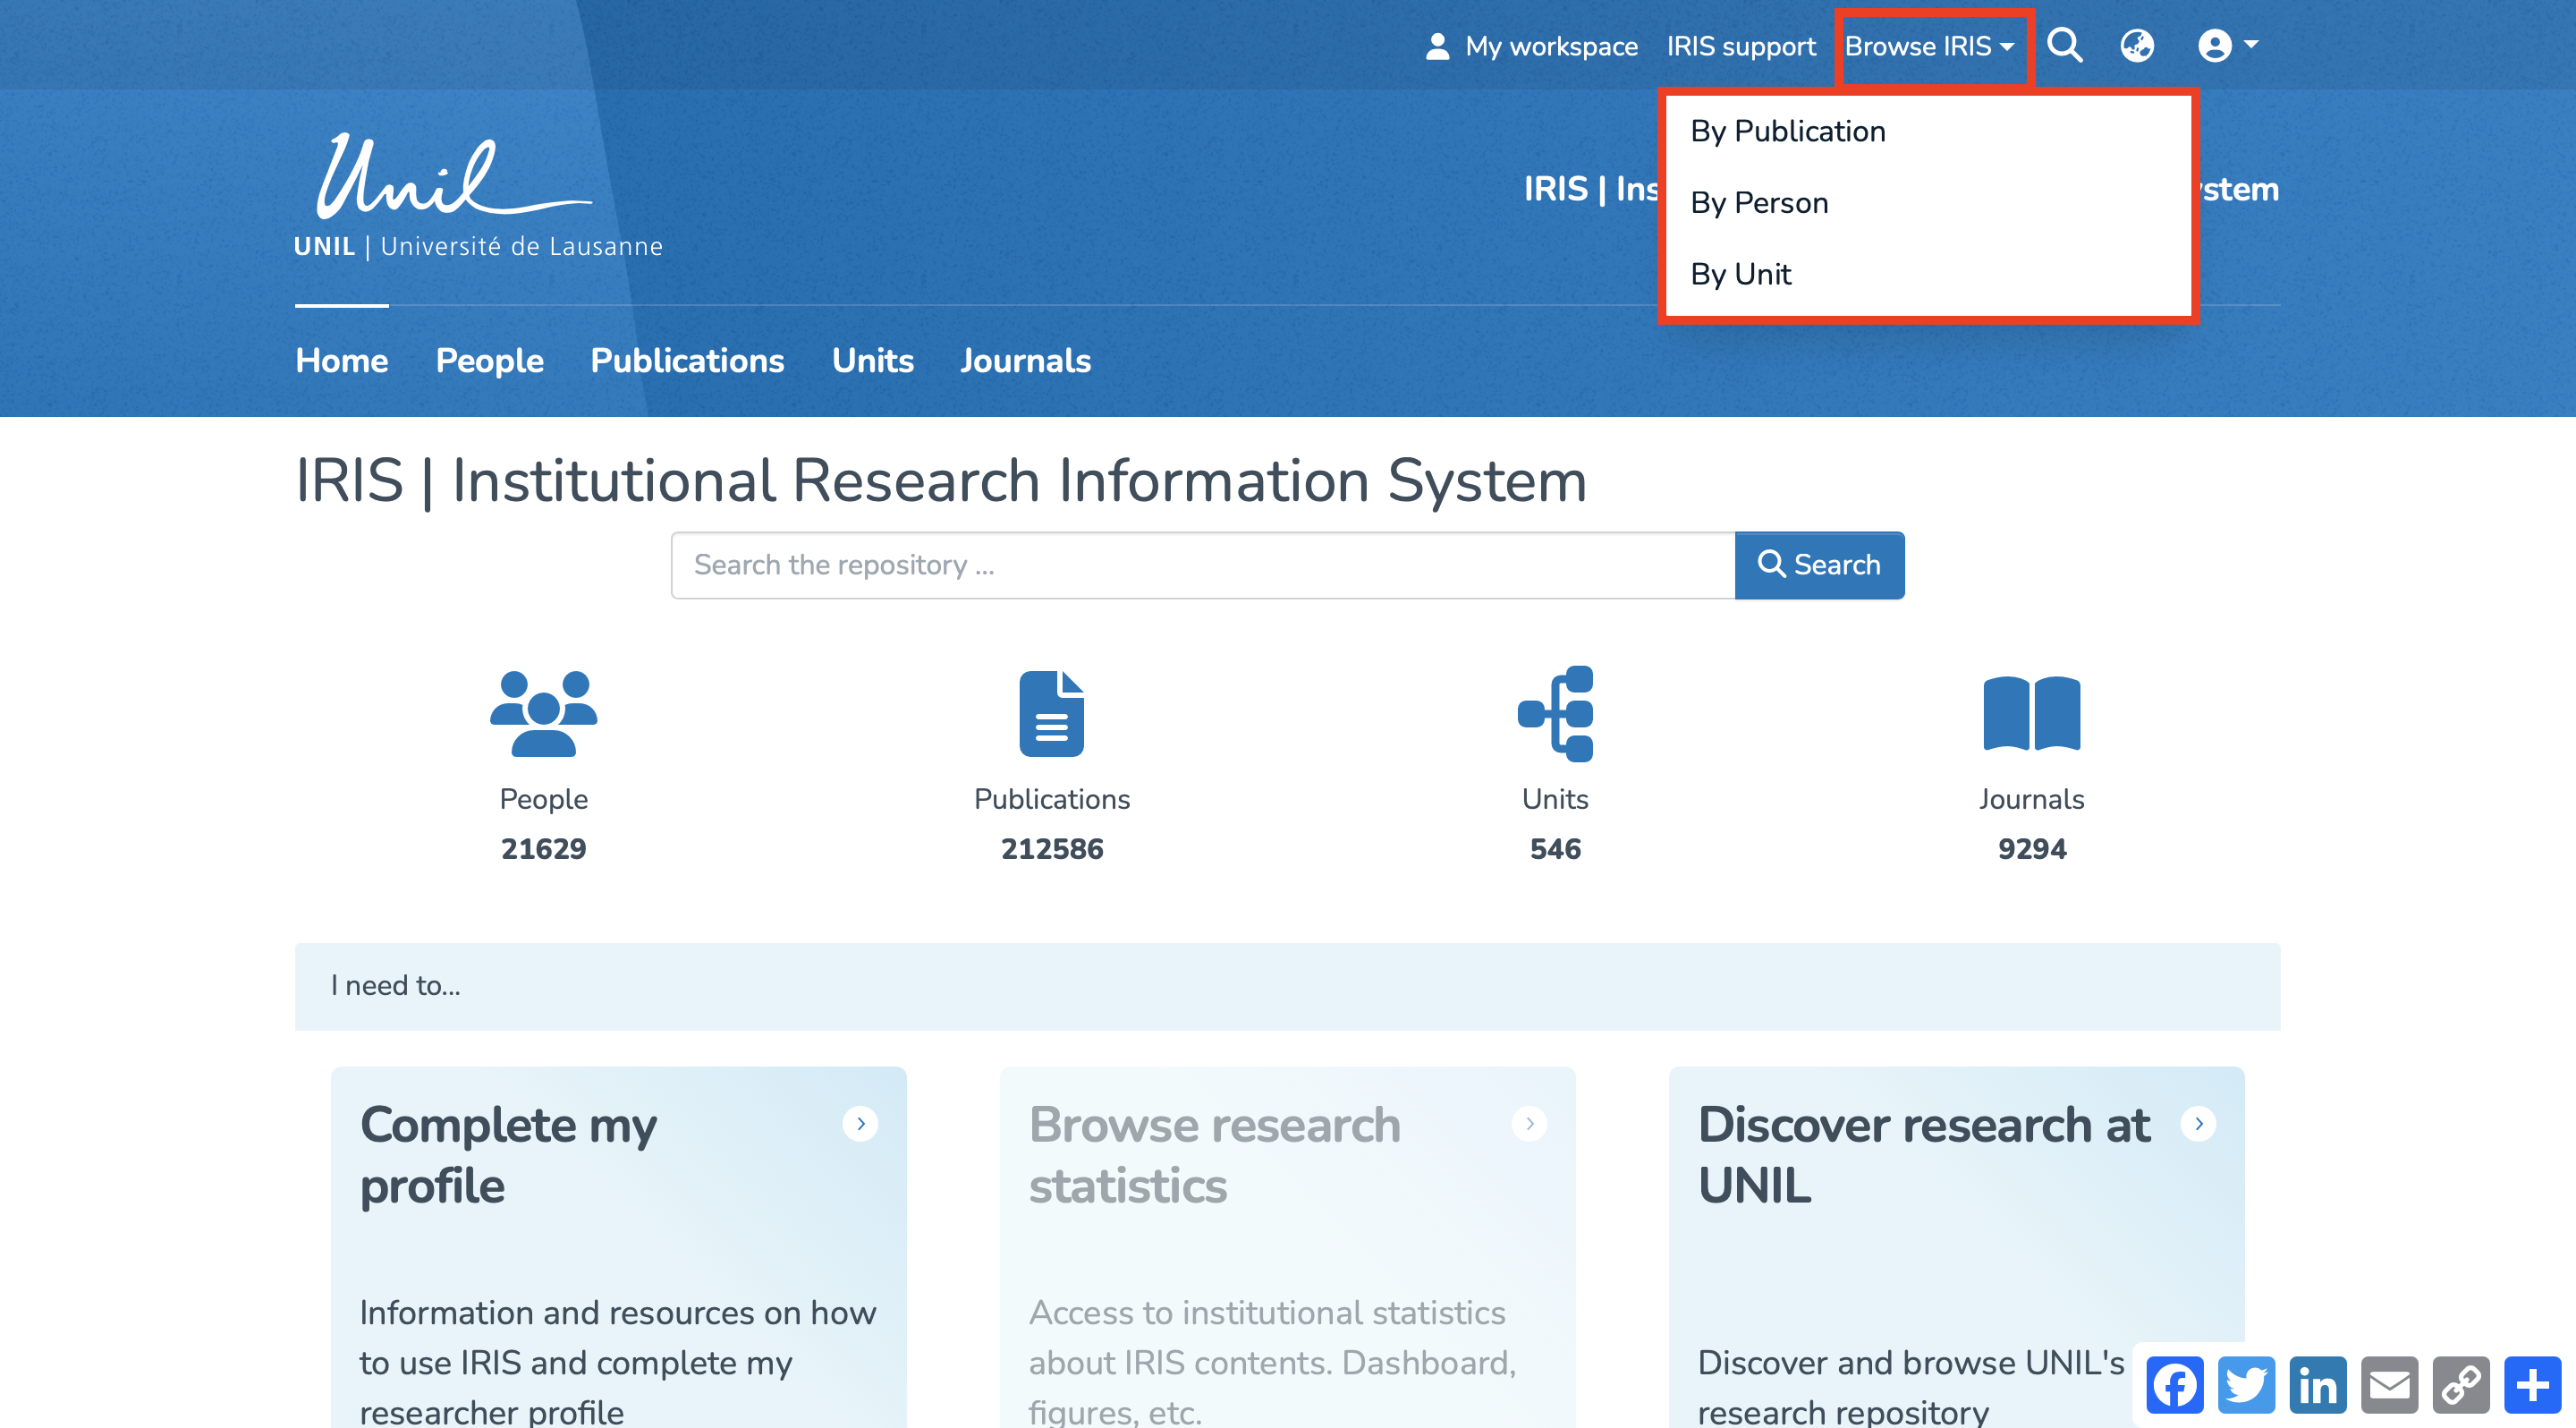
Browse
To browse the platform, click on “Browse IRIS.” You will then be able to browse by Publication, Person, or Unit.
Another way to browse the platform is by clicking on “Discover Research at UNIL” in the “I need to…” window.
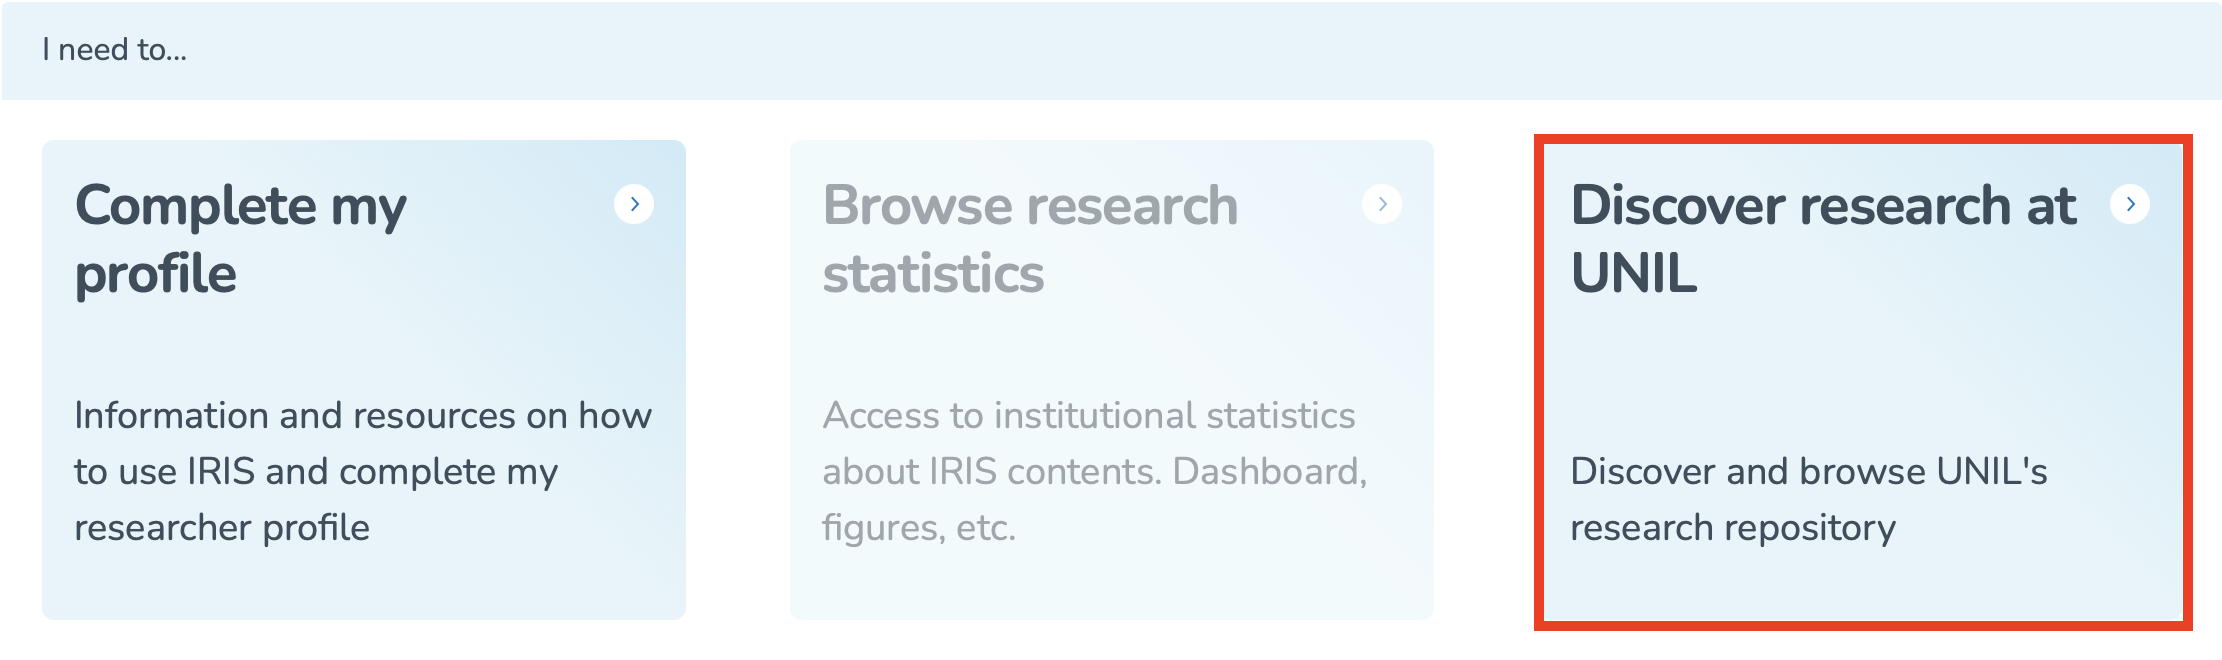
You will then be redirected to a page displaying all publications in the repository. On this page, you can browse publications by:
- Recent Submissions
- Author
- Issue date
- Keyword
- Title
- Type
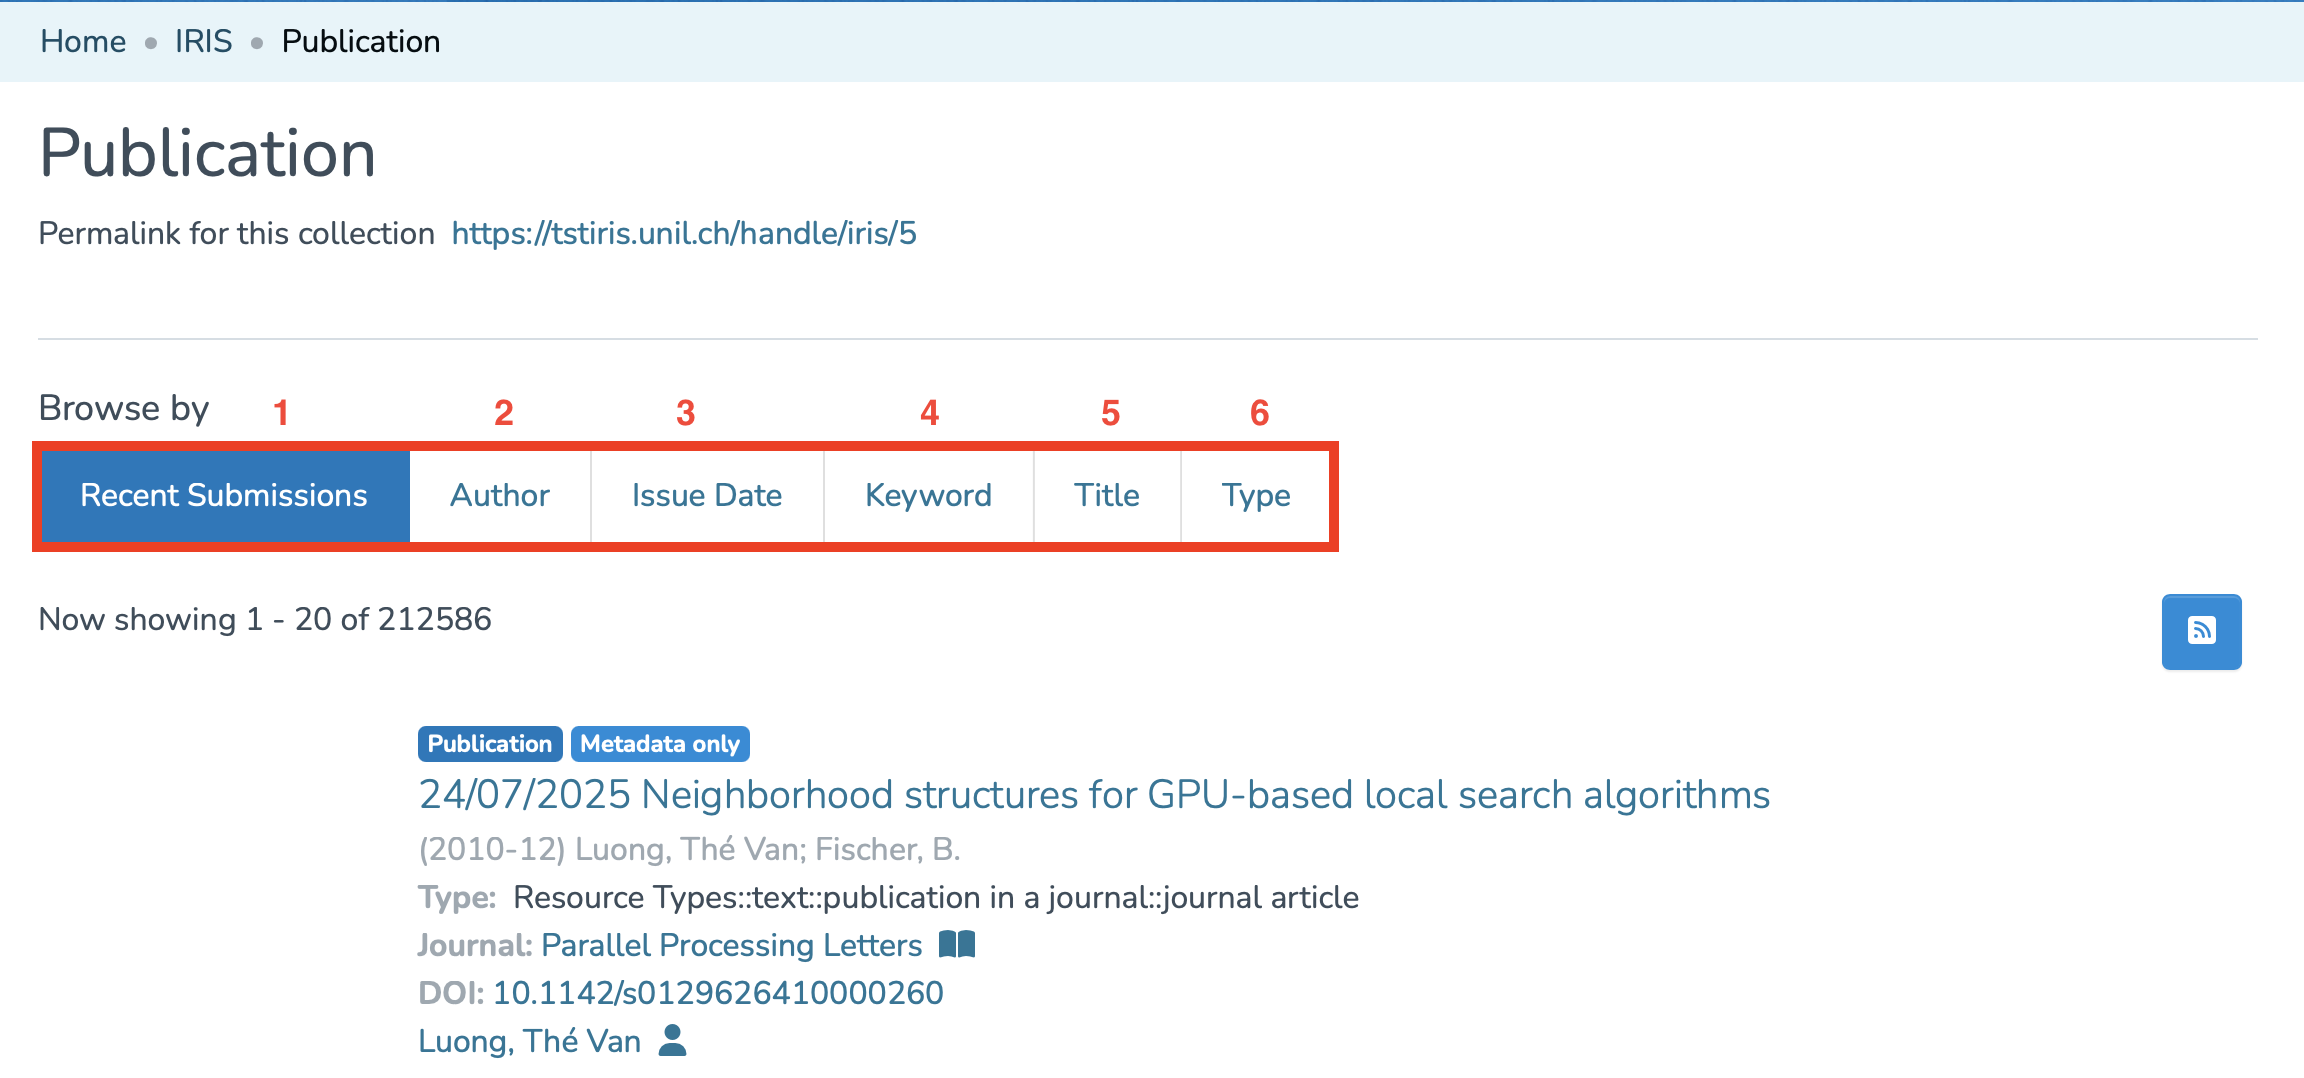
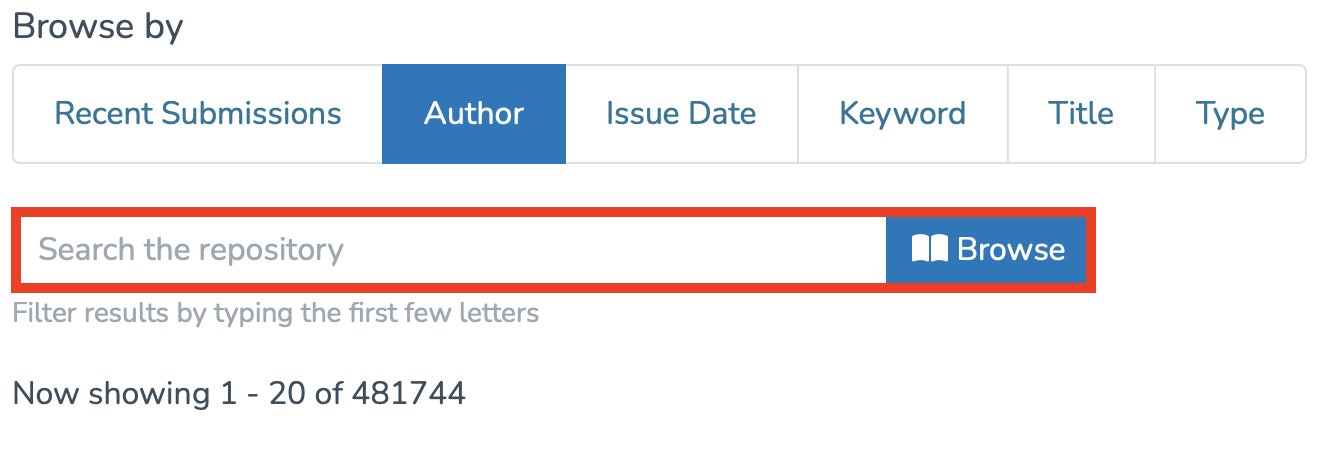
For all these categories (except recent deposits), you can filter the results using the search bar.
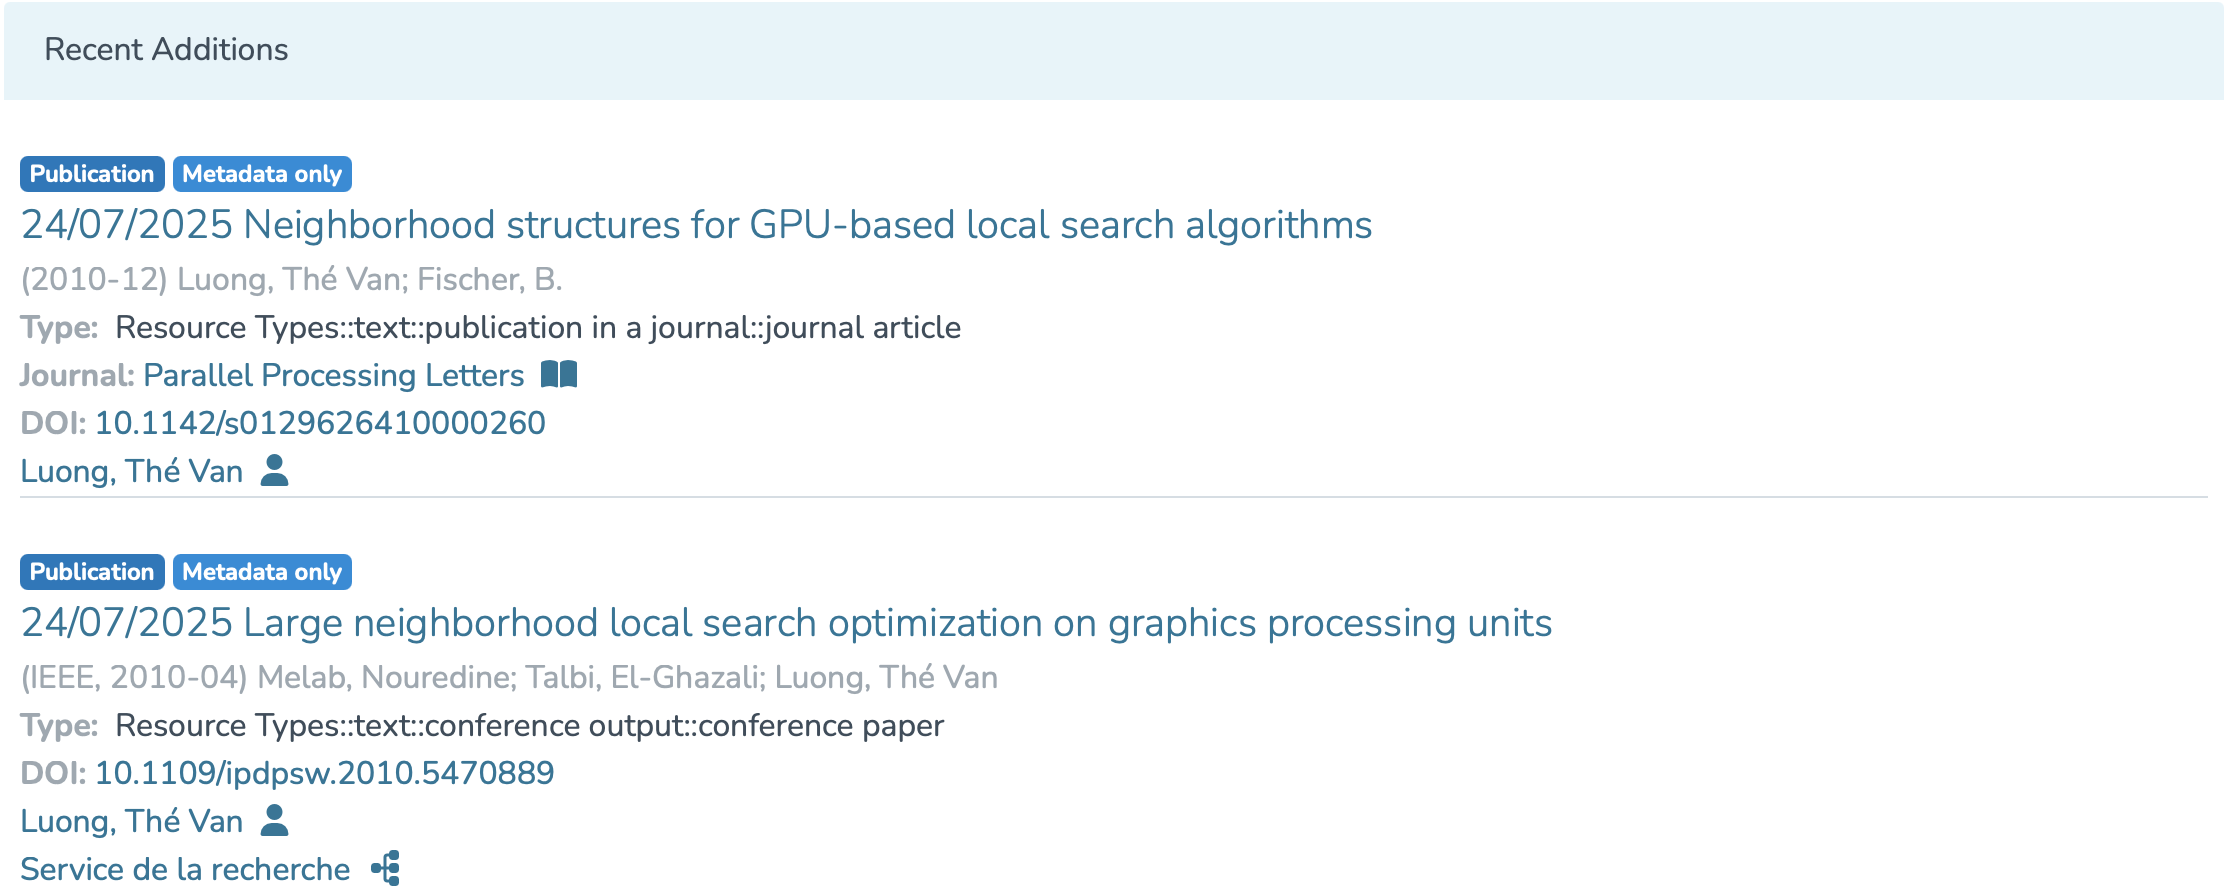
You can also view the Recent Additions at the bottom of the page.
At any time, you can return to the homepage by clicking on “Home.”

Special rights
If you require specific rights in IRIS:
- Collection administrator
- Data entry agent
- Thesis validator
please complete the form available via this link.
Access your researcher profile
The voice in this video was generated by artificial intelligence.
Accessing your researcher profile
Your researcher profile gives you an overview of your personal and academic information. From this space, you can:
- View and edit publications you’ve created, as well as those you’re linked to.
- Access your ORCID settings page.
There are two ways to access your researcher profile in IRIS:
Accessing Your Profile via the Login Menu
- From the IRIS homepage, click on the login menu.

- In the dropdown menu, select “My account and profile.”

- You’ll be redirected to a page titled “User account”. Click on “View” to open the full version of your profile.

- You will then be directed to your researcher profile.


Accessing Your Profile via Search
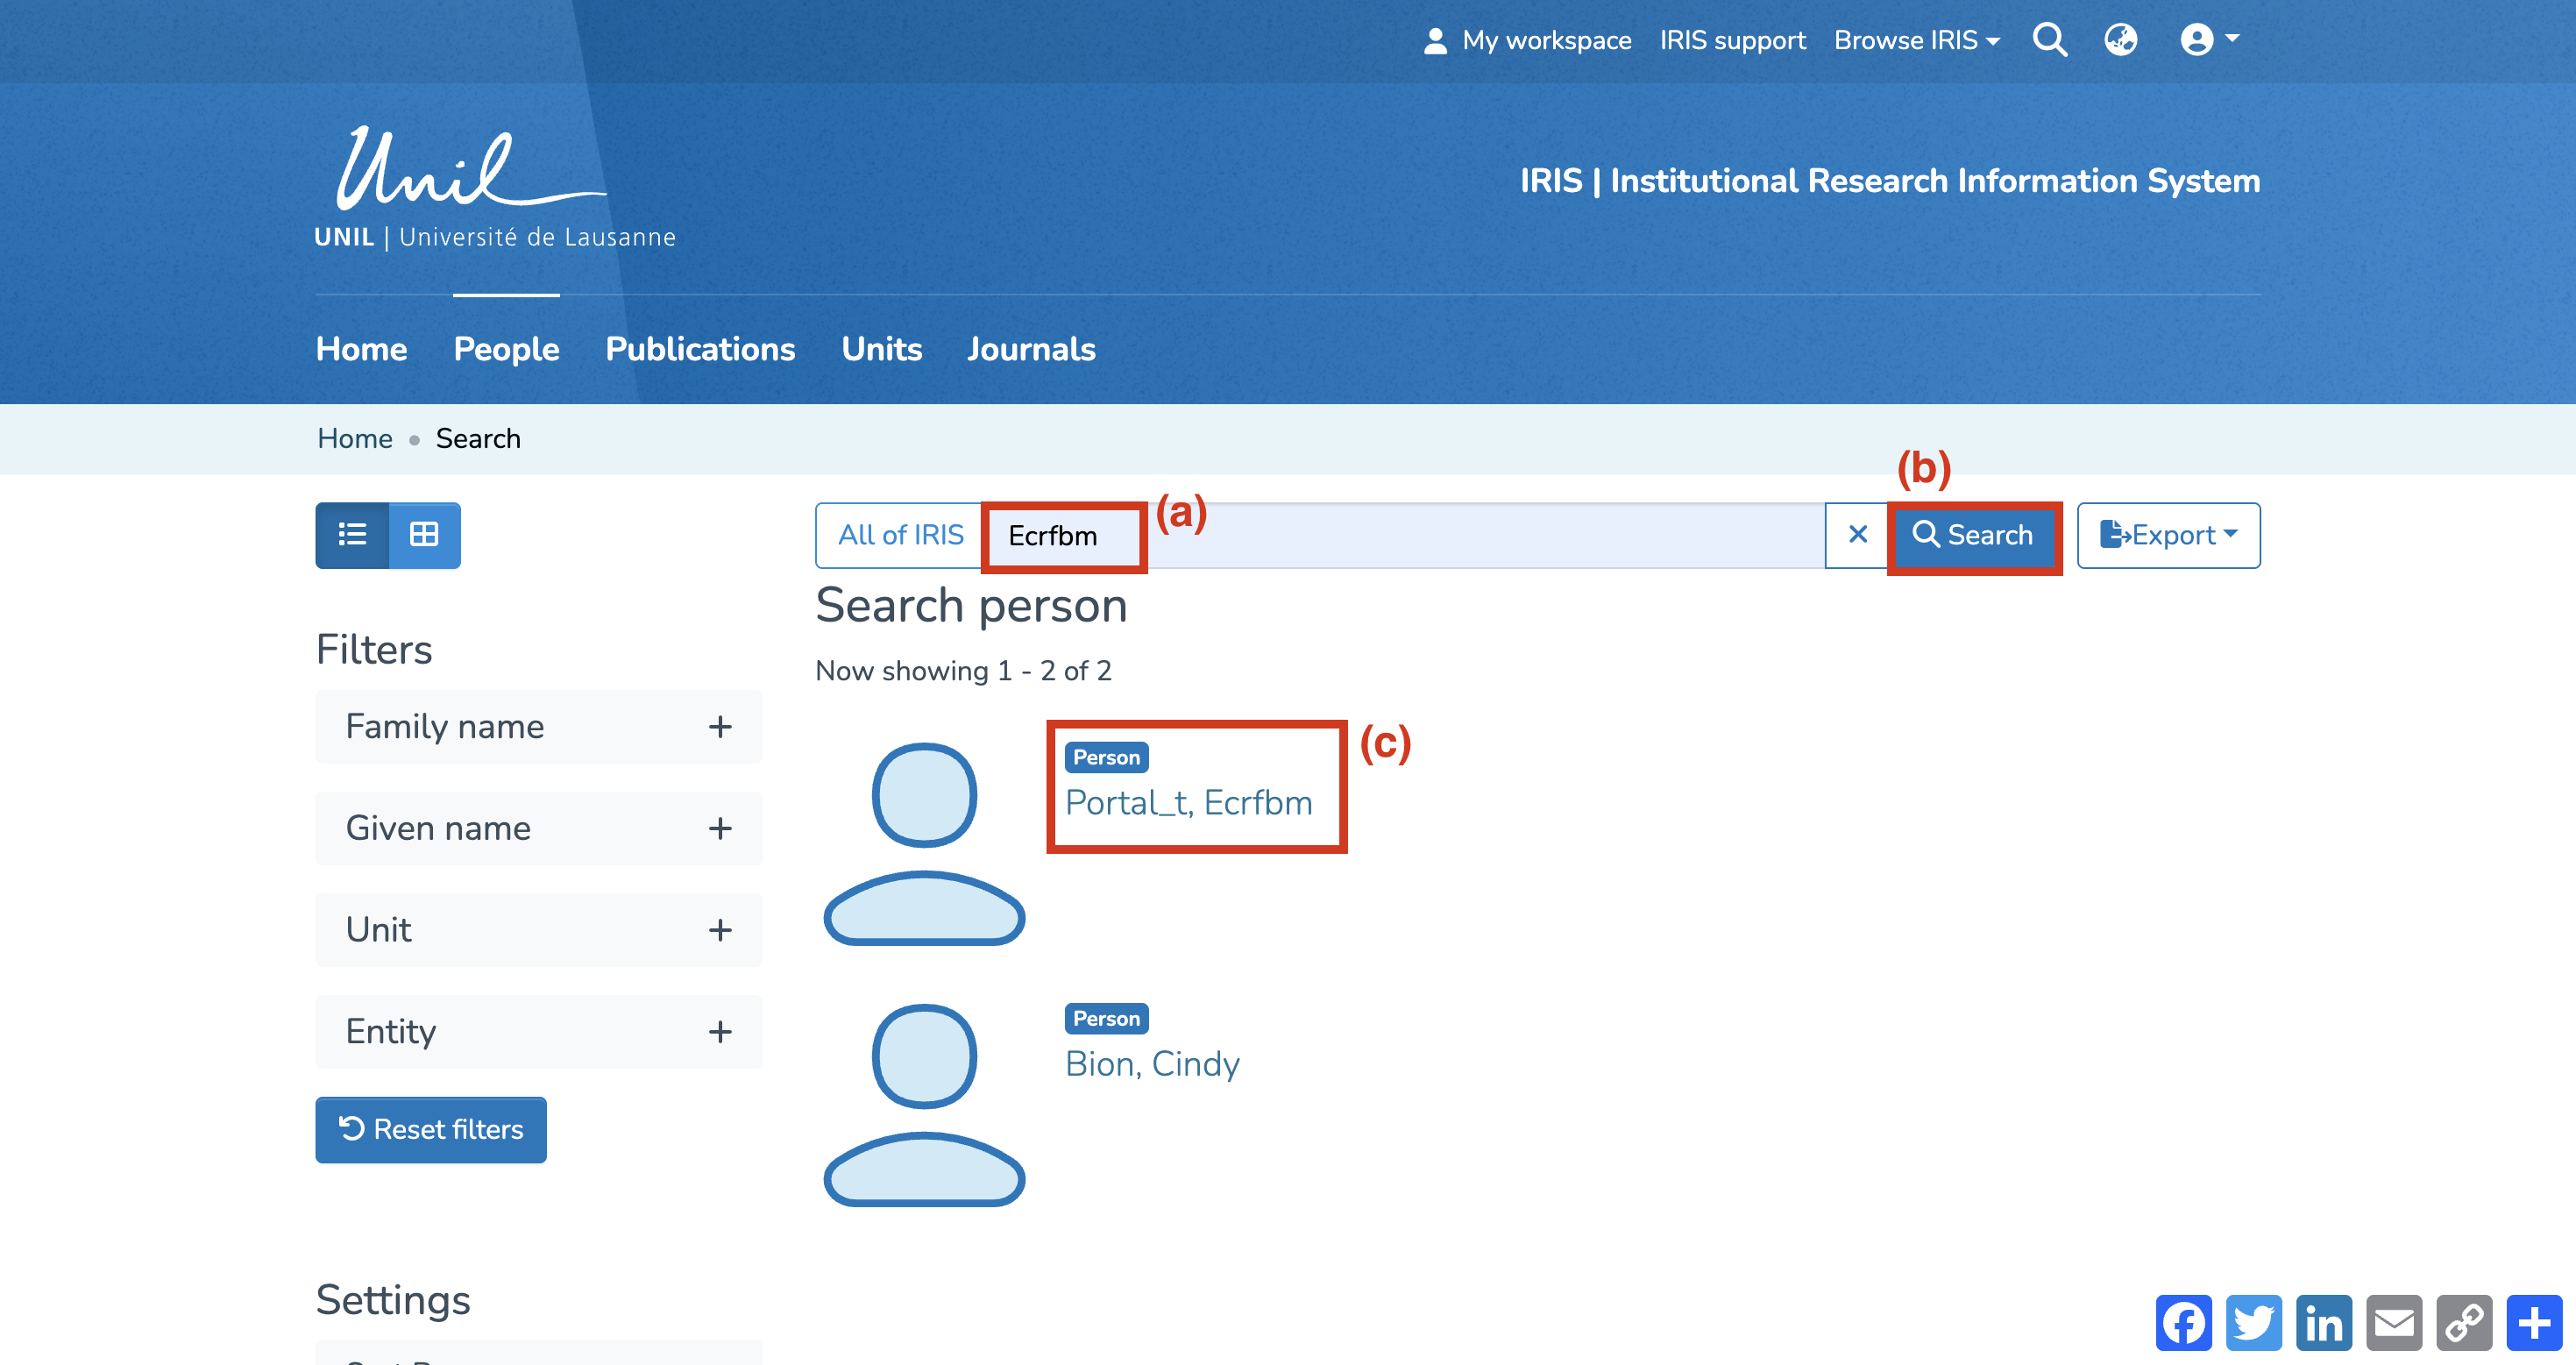
- From the IRIS homepage, click on “People.”

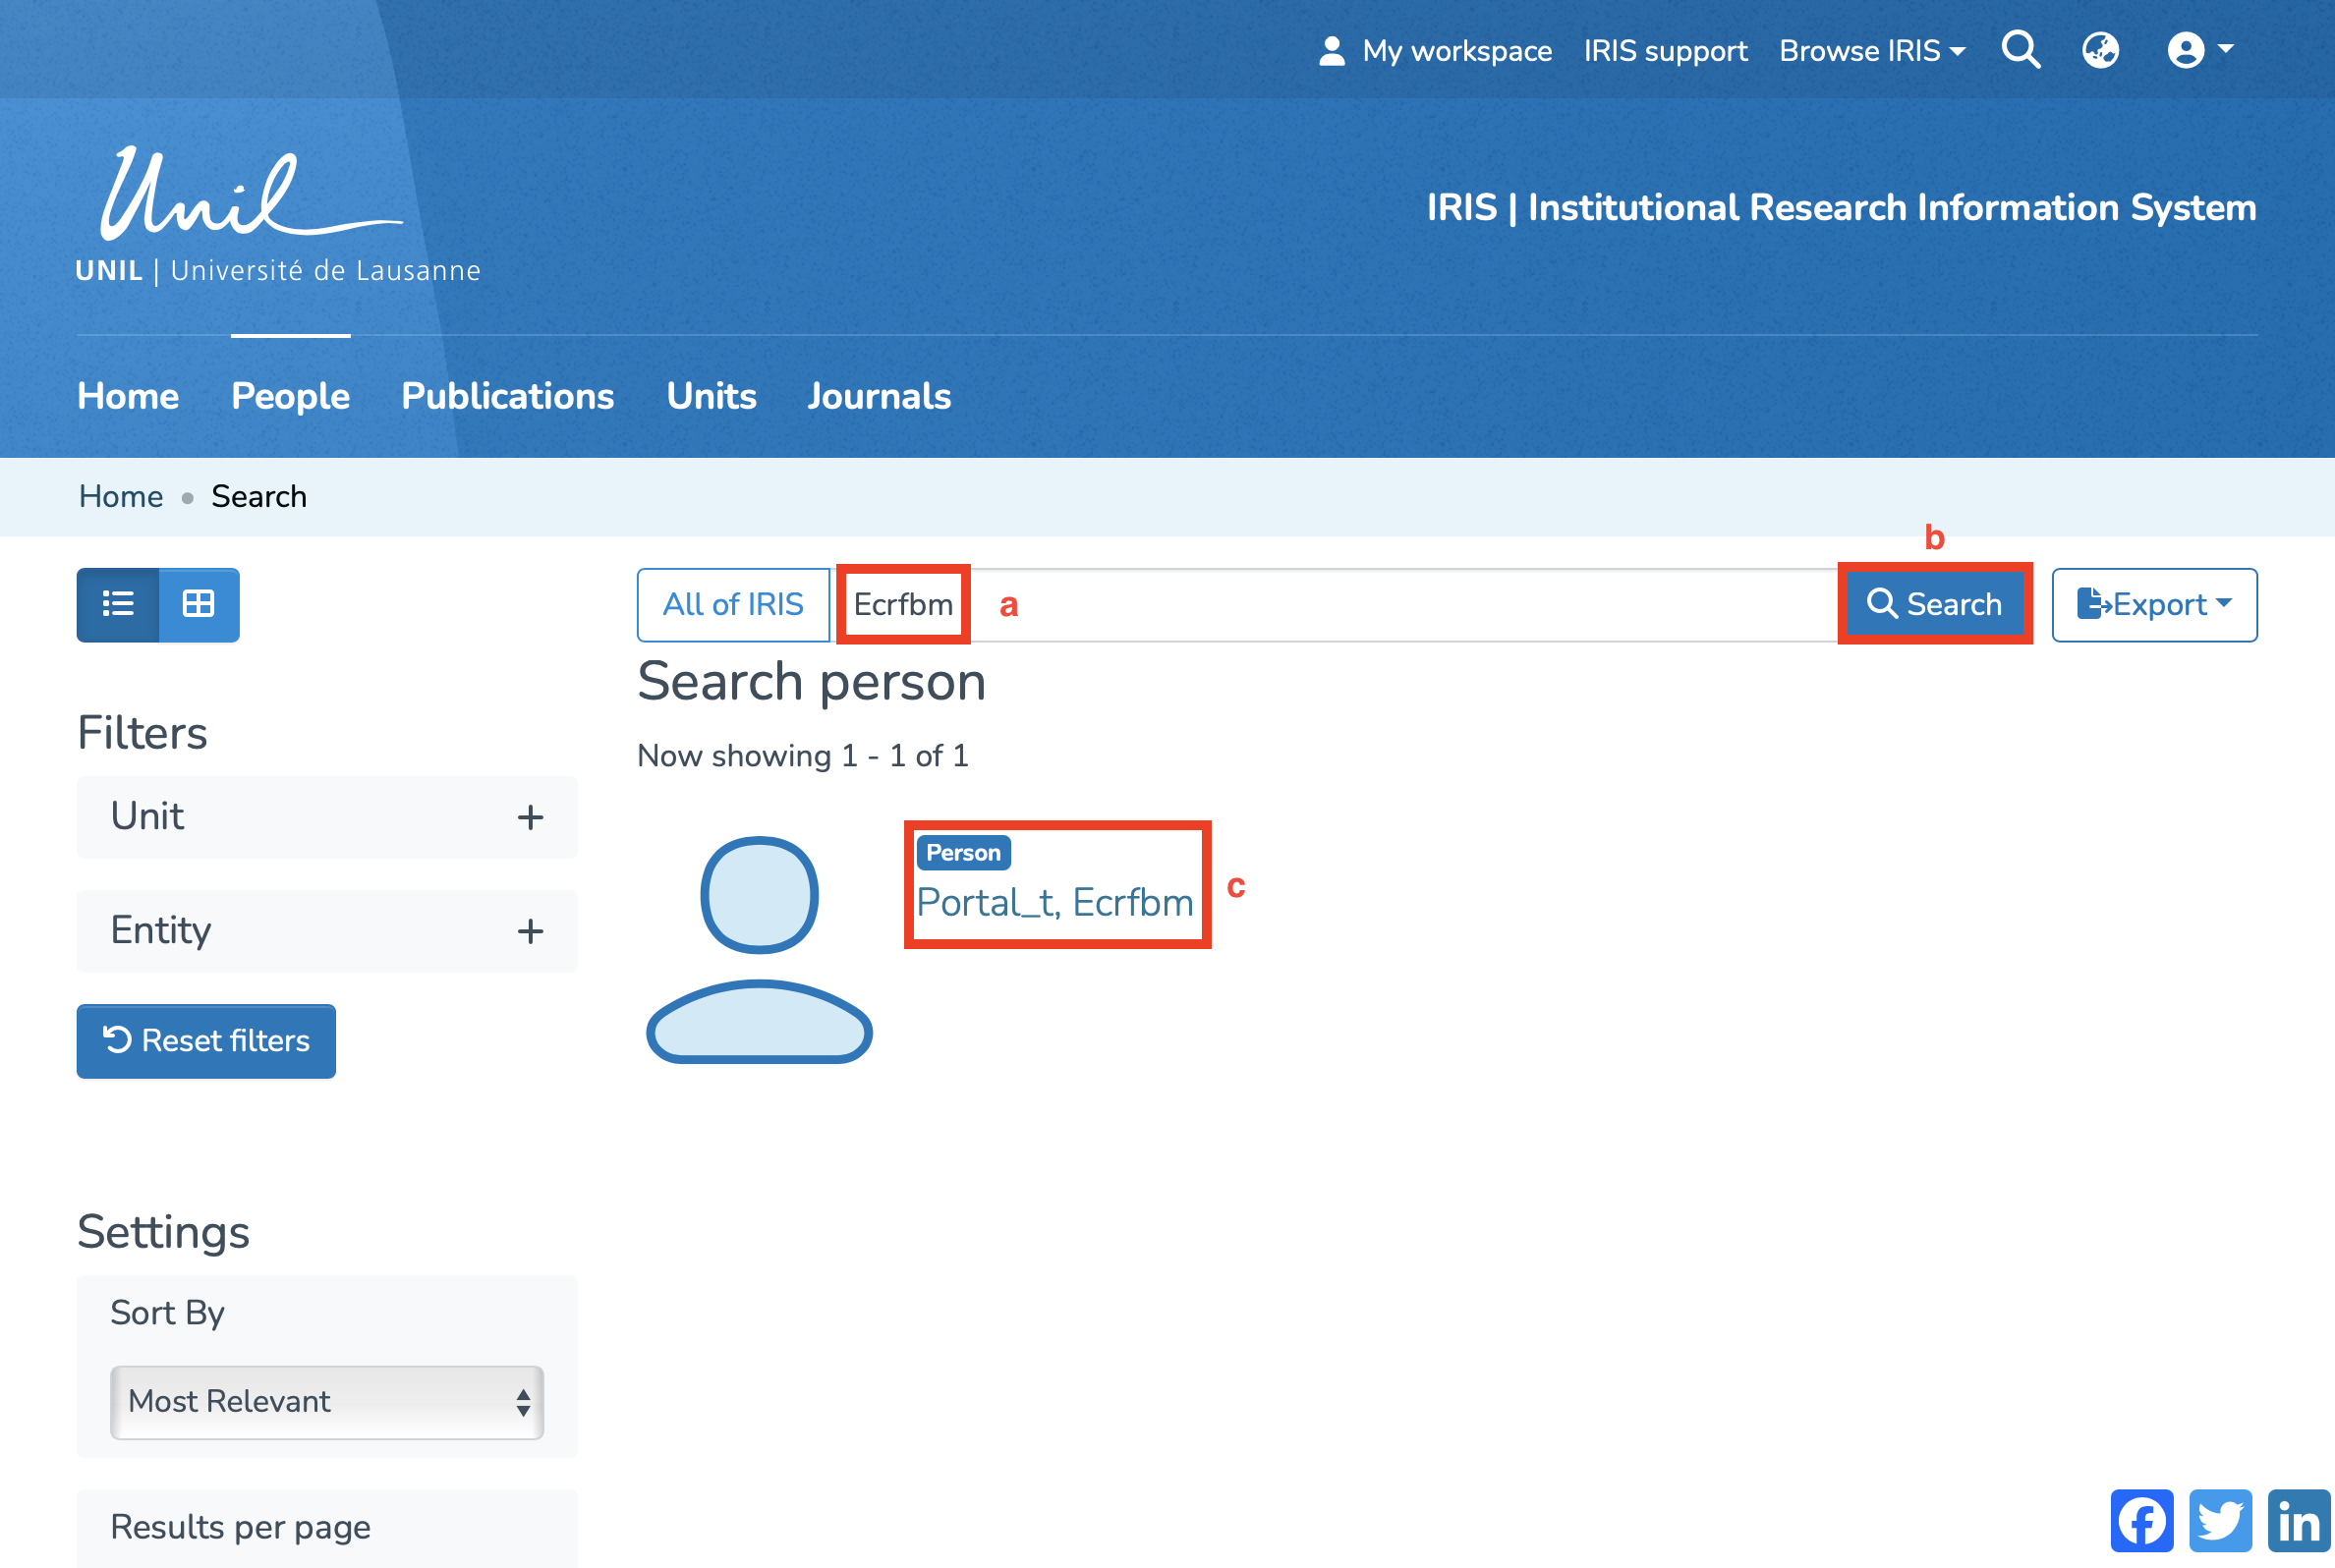
- In the search bar that appears, enter your name (a), then click “Search” (b).
- Once the search is complete, your profile will appear in the results. Click on your name (c).


- You will then be directed to your researcher profile.

Searching IRIS
The voice in this video was generated by artificial intelligence.
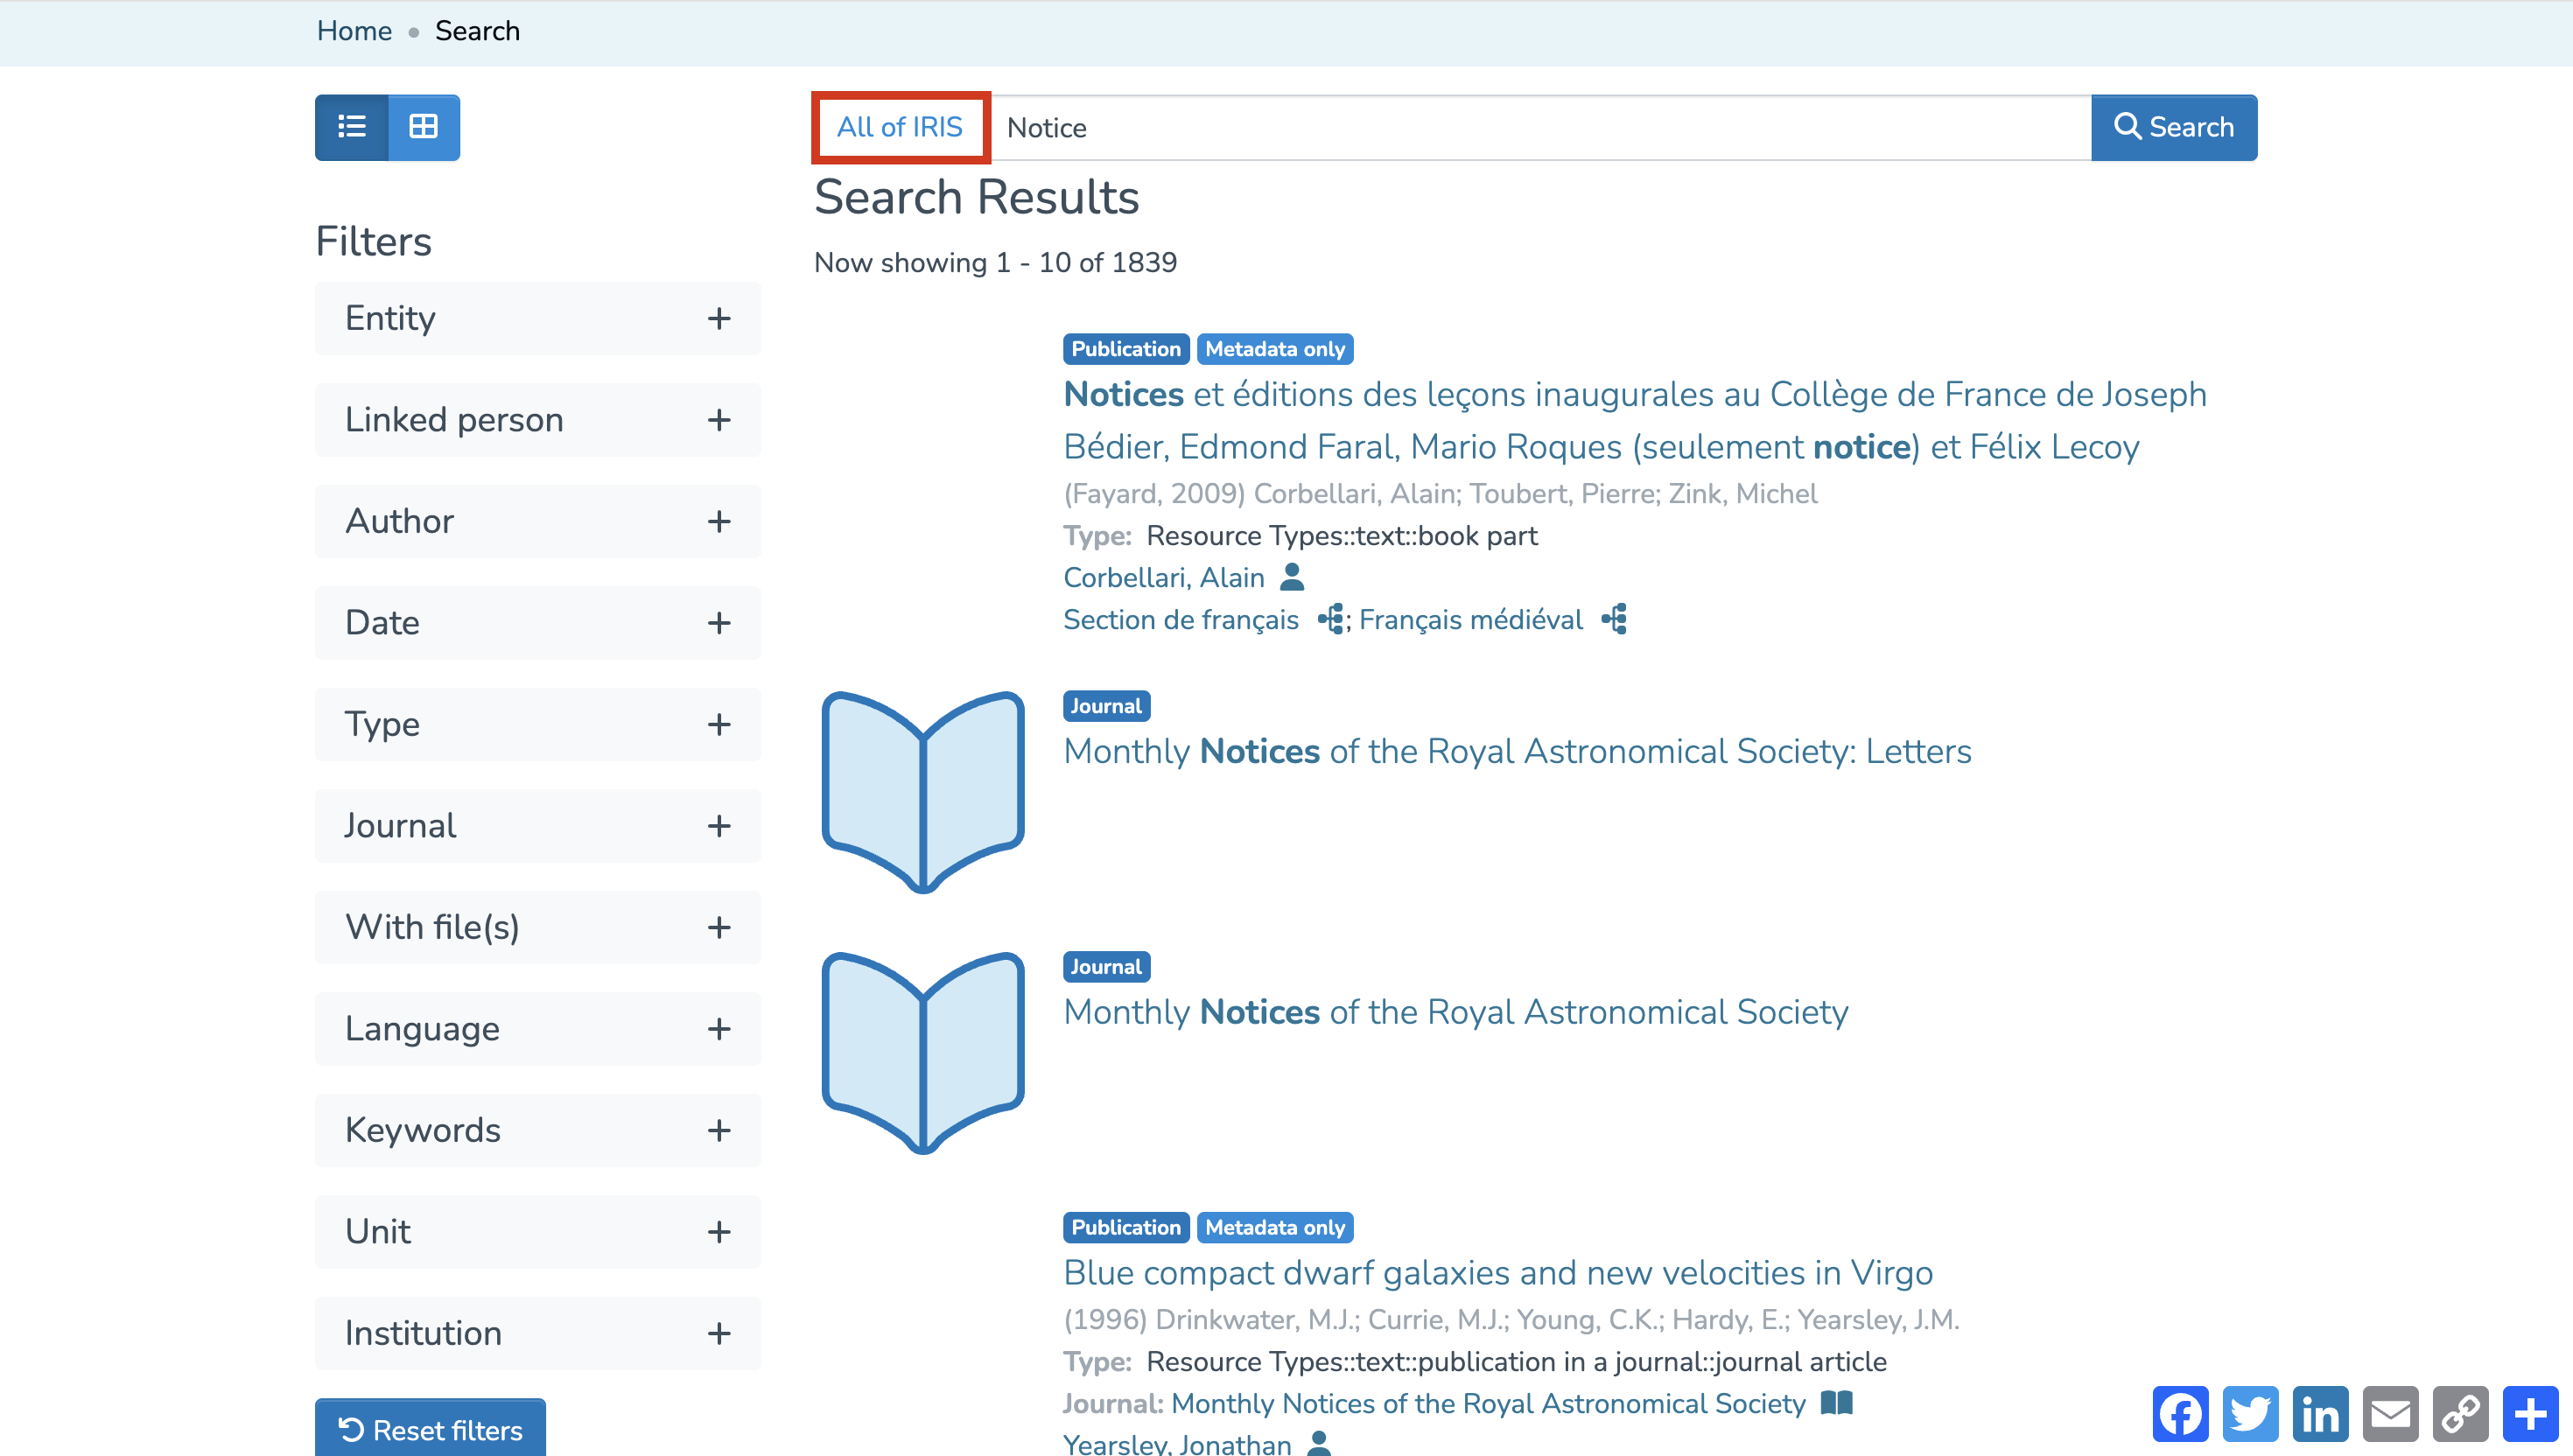
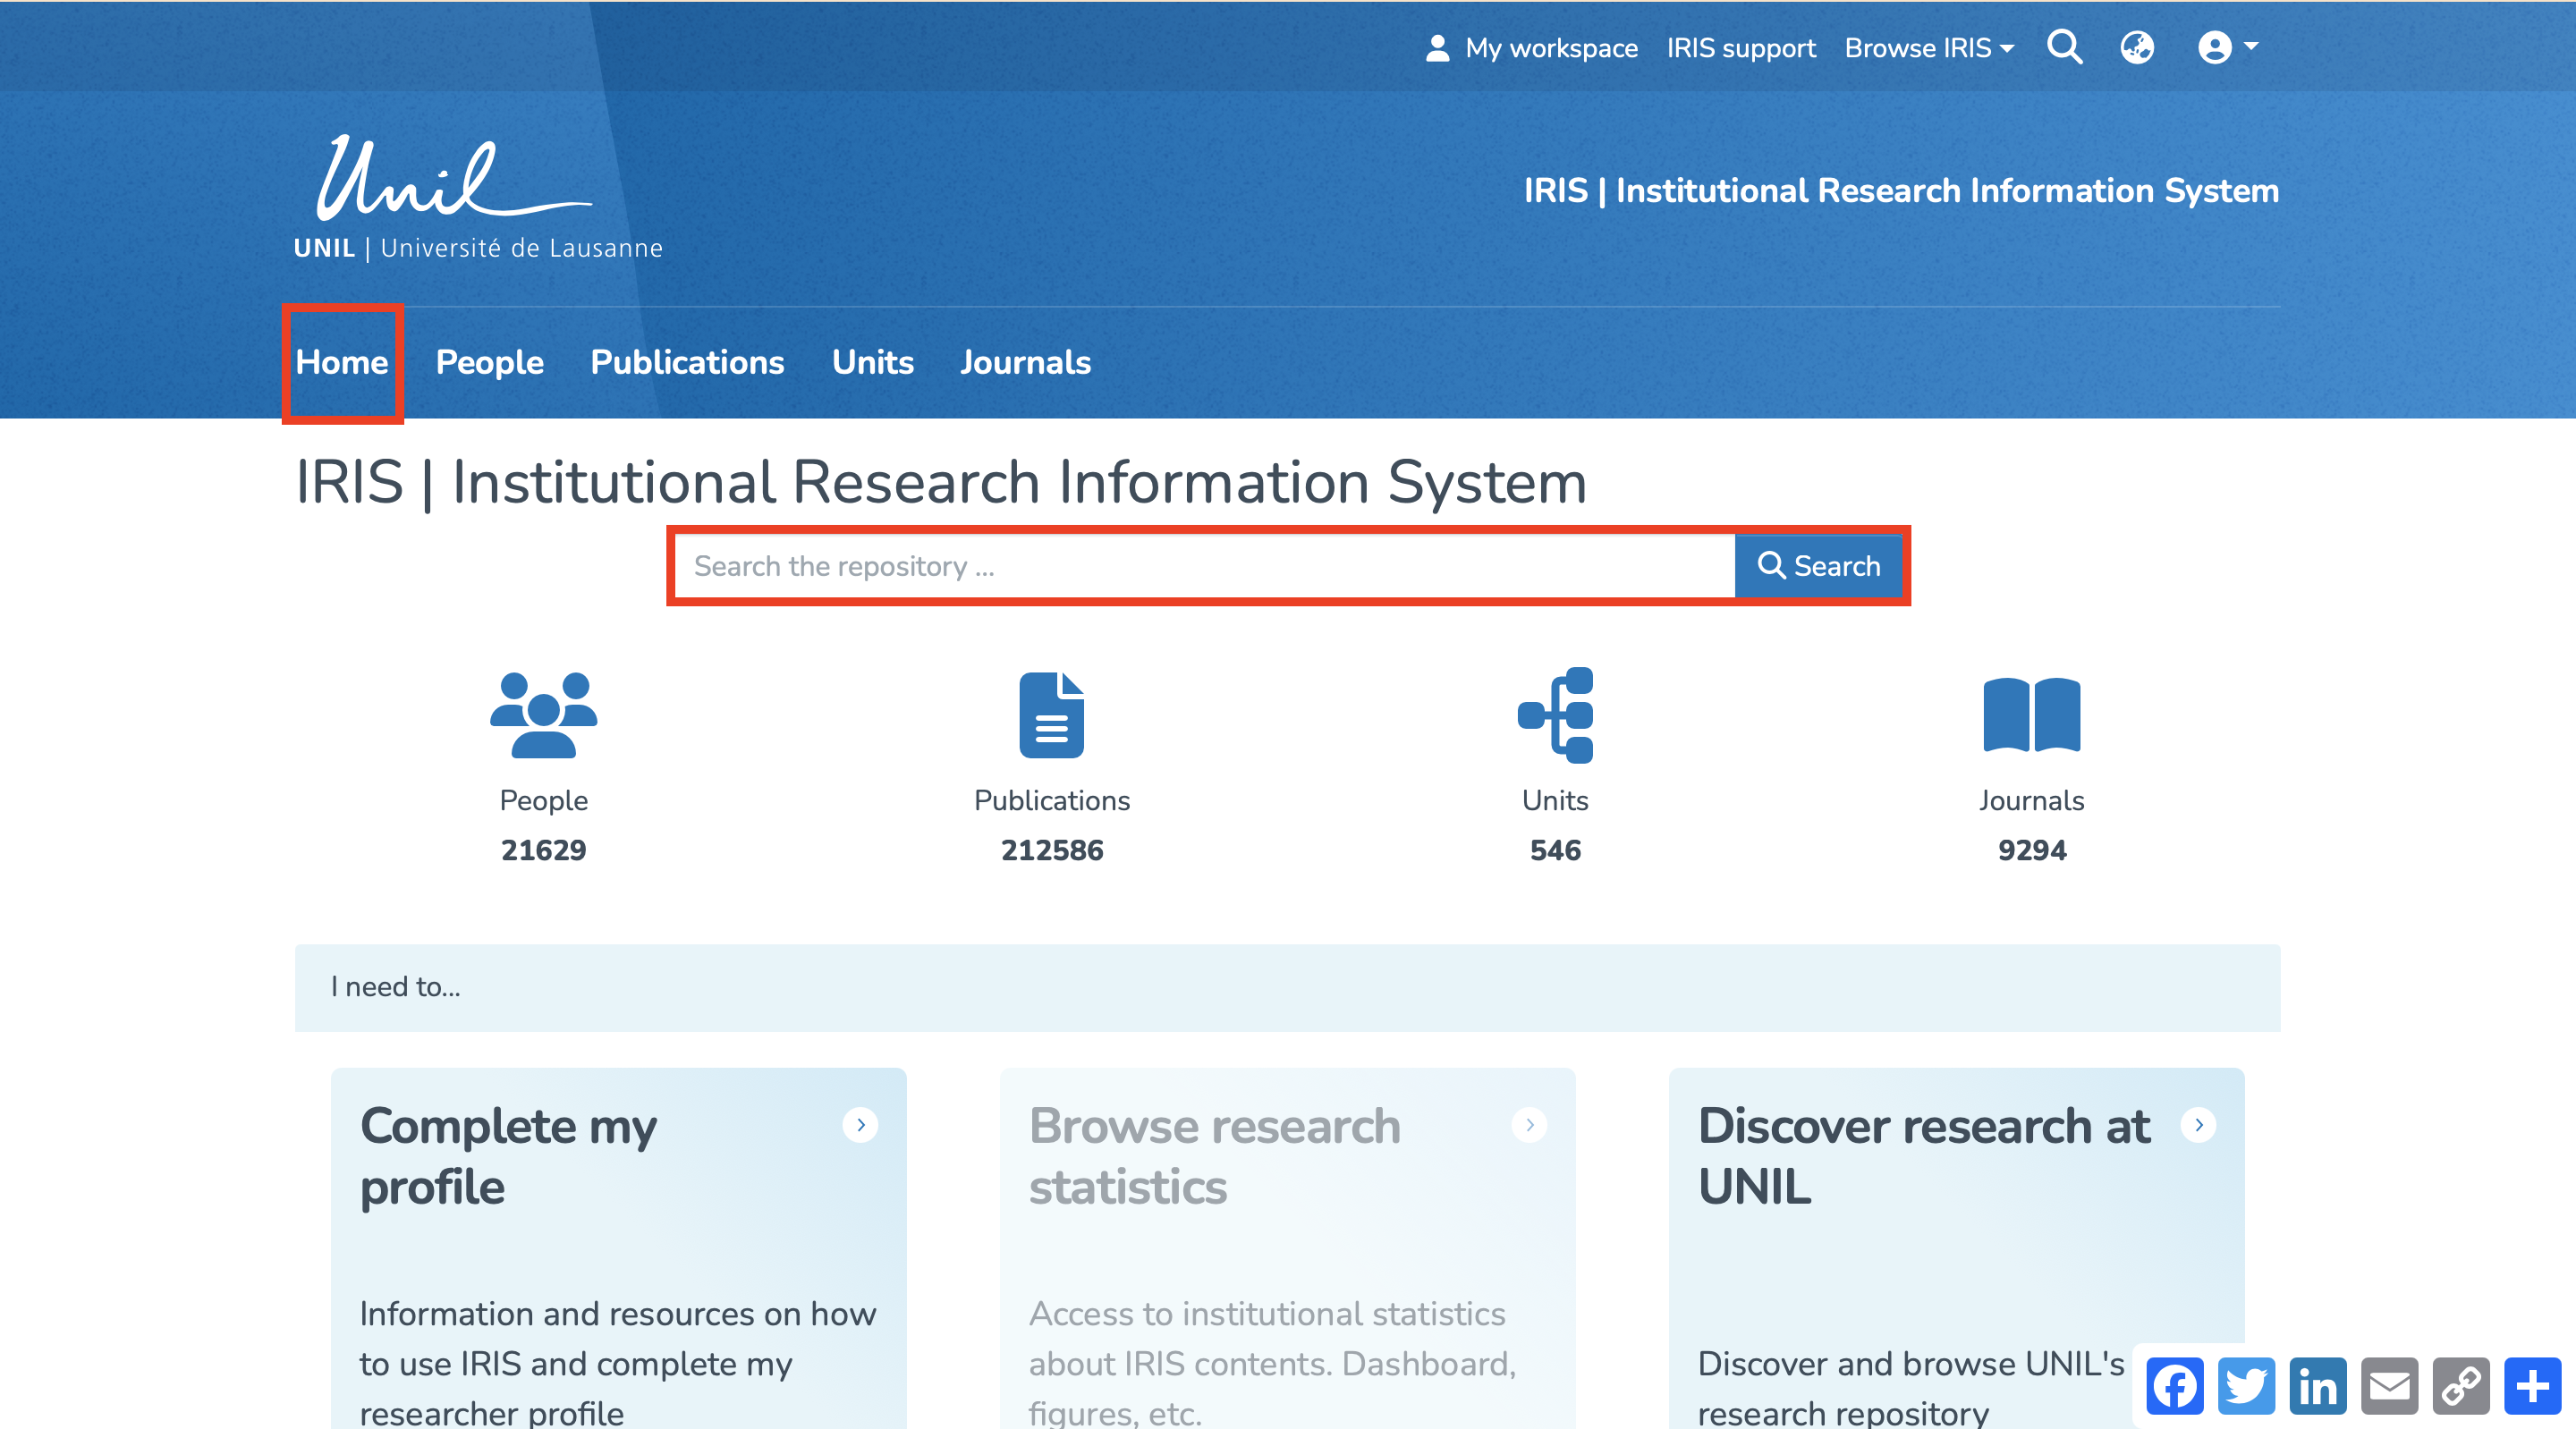
Start your search
From the IRIS homepage, you can begin a search in two ways:
- By clicking the search icon: type your keyword and press the Enter key on your keyboard. Note: This option is available from any page within IRIS.

- By clicking directly into the search field: enter your keyword, then click “Search.”

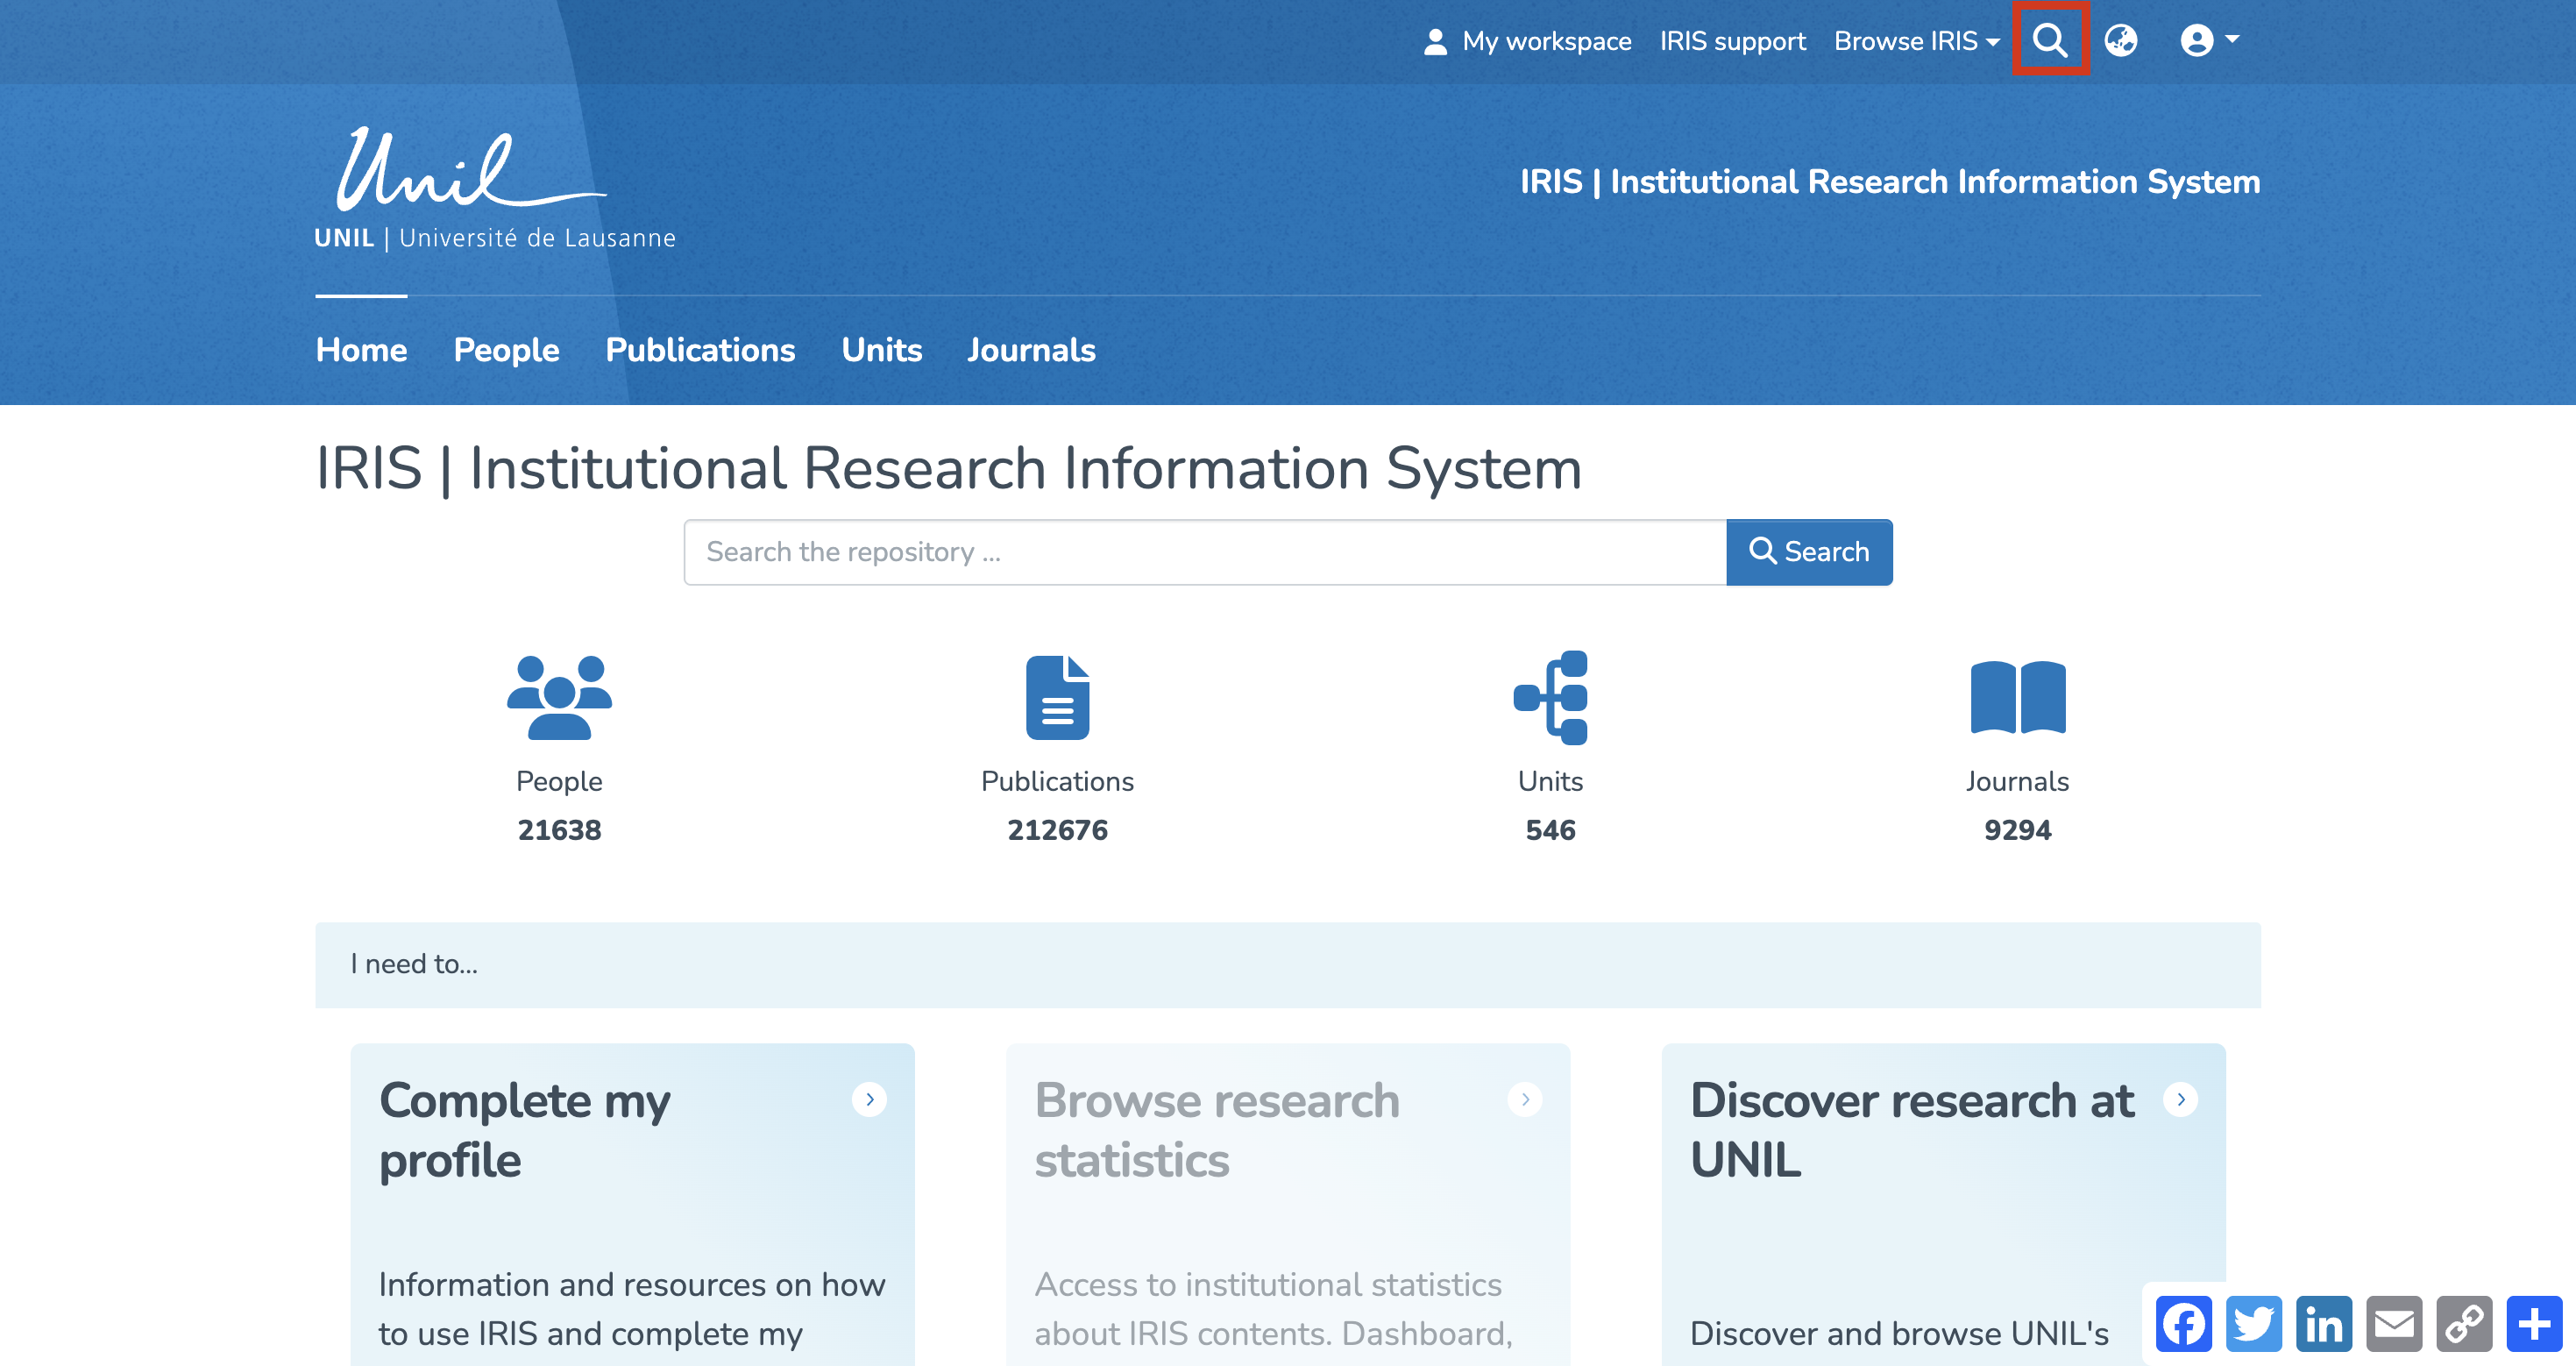
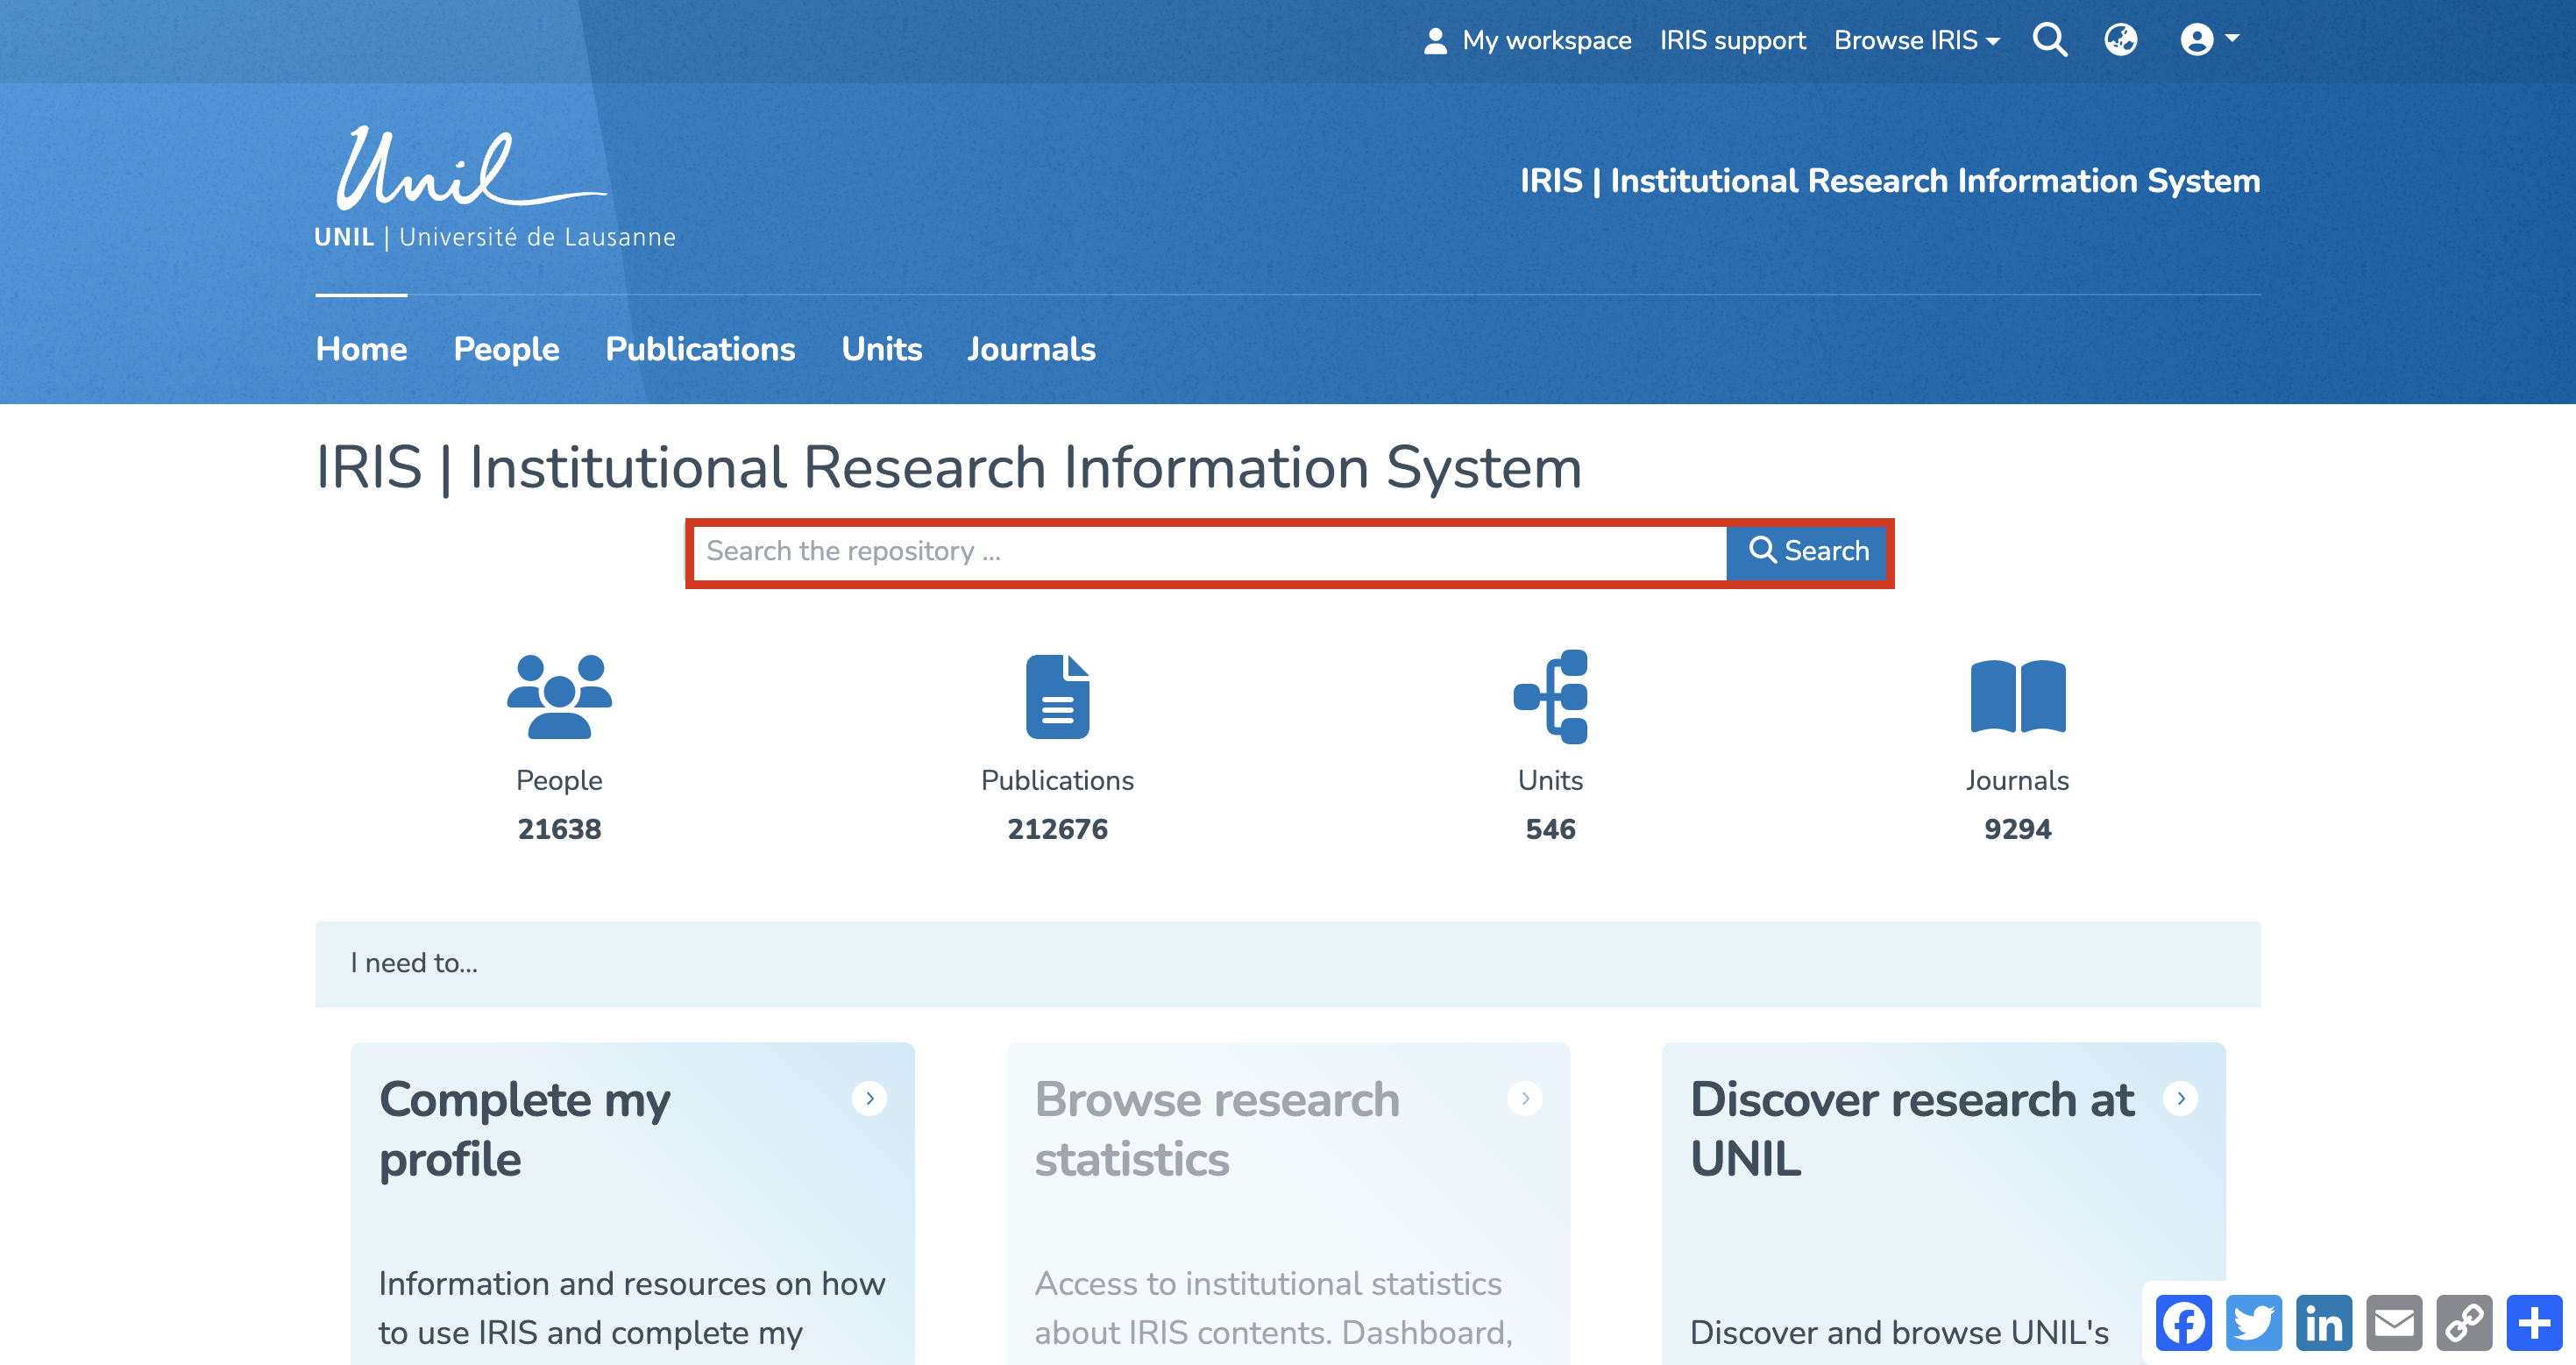
Both methods allow you to search across the entire repository, covering all entities (people, publications, units, and journals).
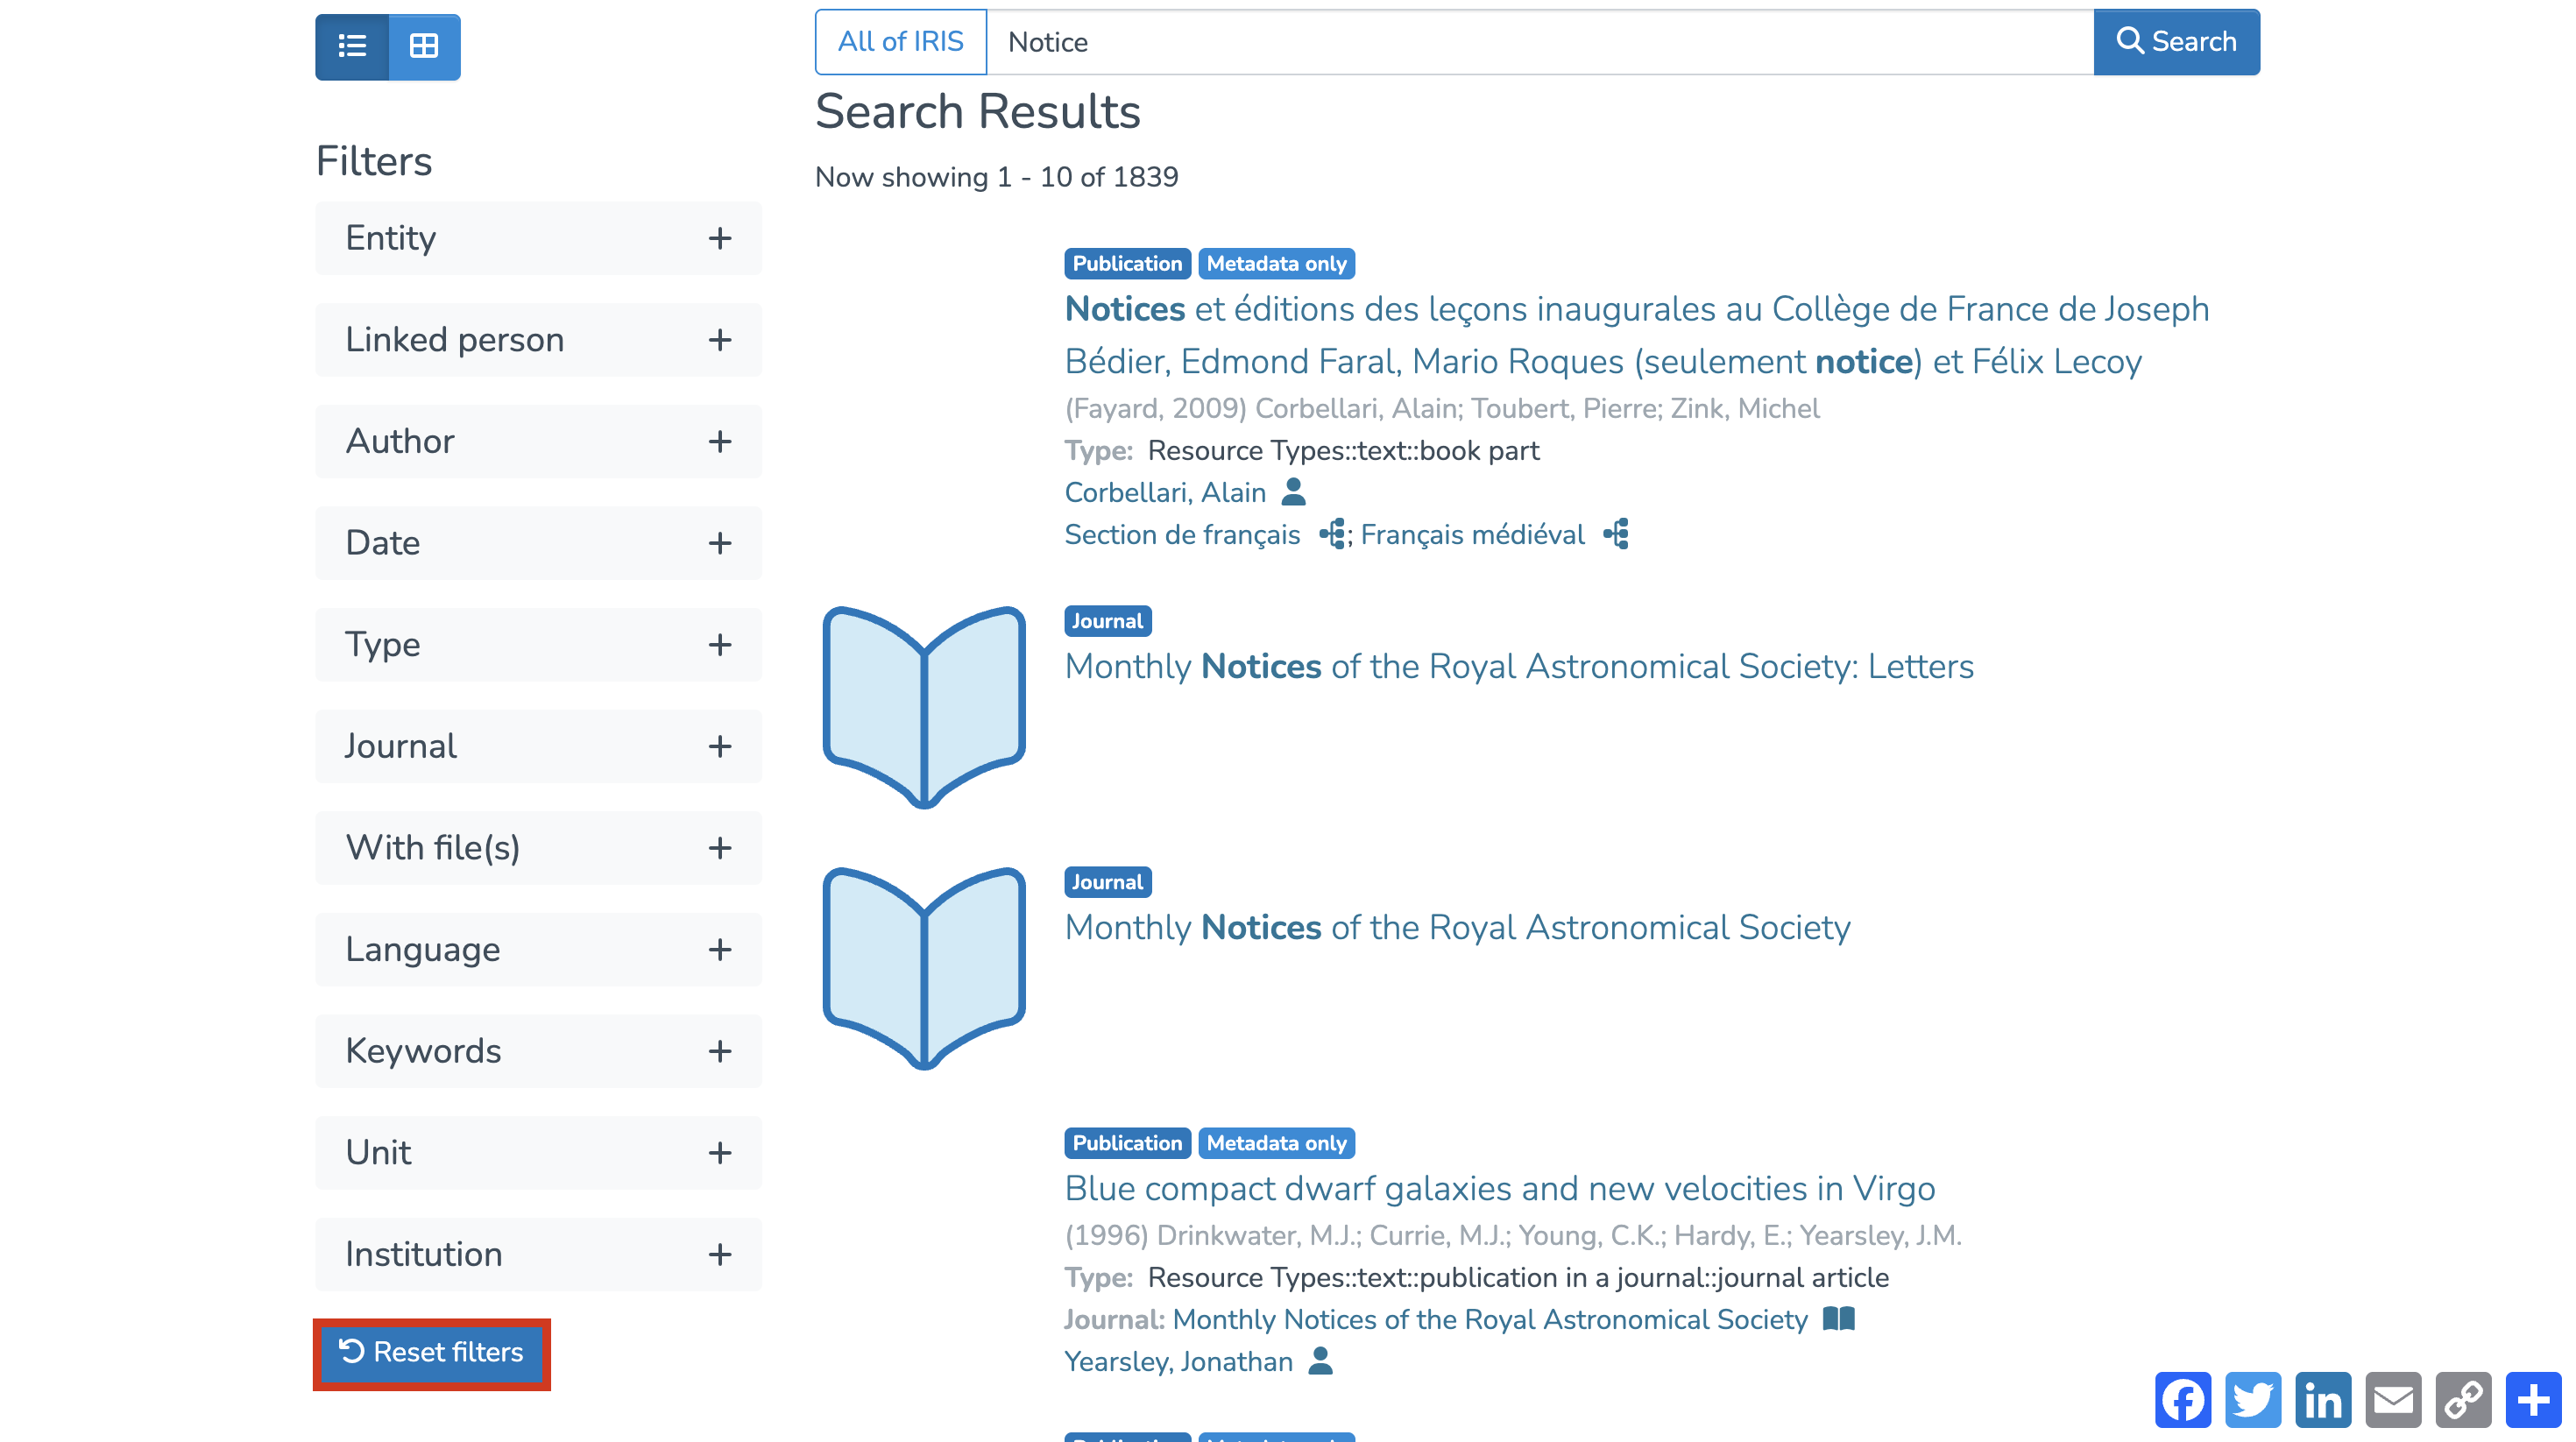
Filters and settings
Once your search is launched, you'll automatically be redirected to the search results page. A series of filters allows you to narrow down the results, including:
- Entity: people, publications, units, or journals
- Linked person: a person associated with the publication (not necessarily the author)
- Author
- Publication date
- Type of publication
- Journal or magazine name
- File presence: with or without
- Language of the publication
- Keywords
- Linked unit
- Institution: UNIL/CHUV/Unisanté + partner institutions or external


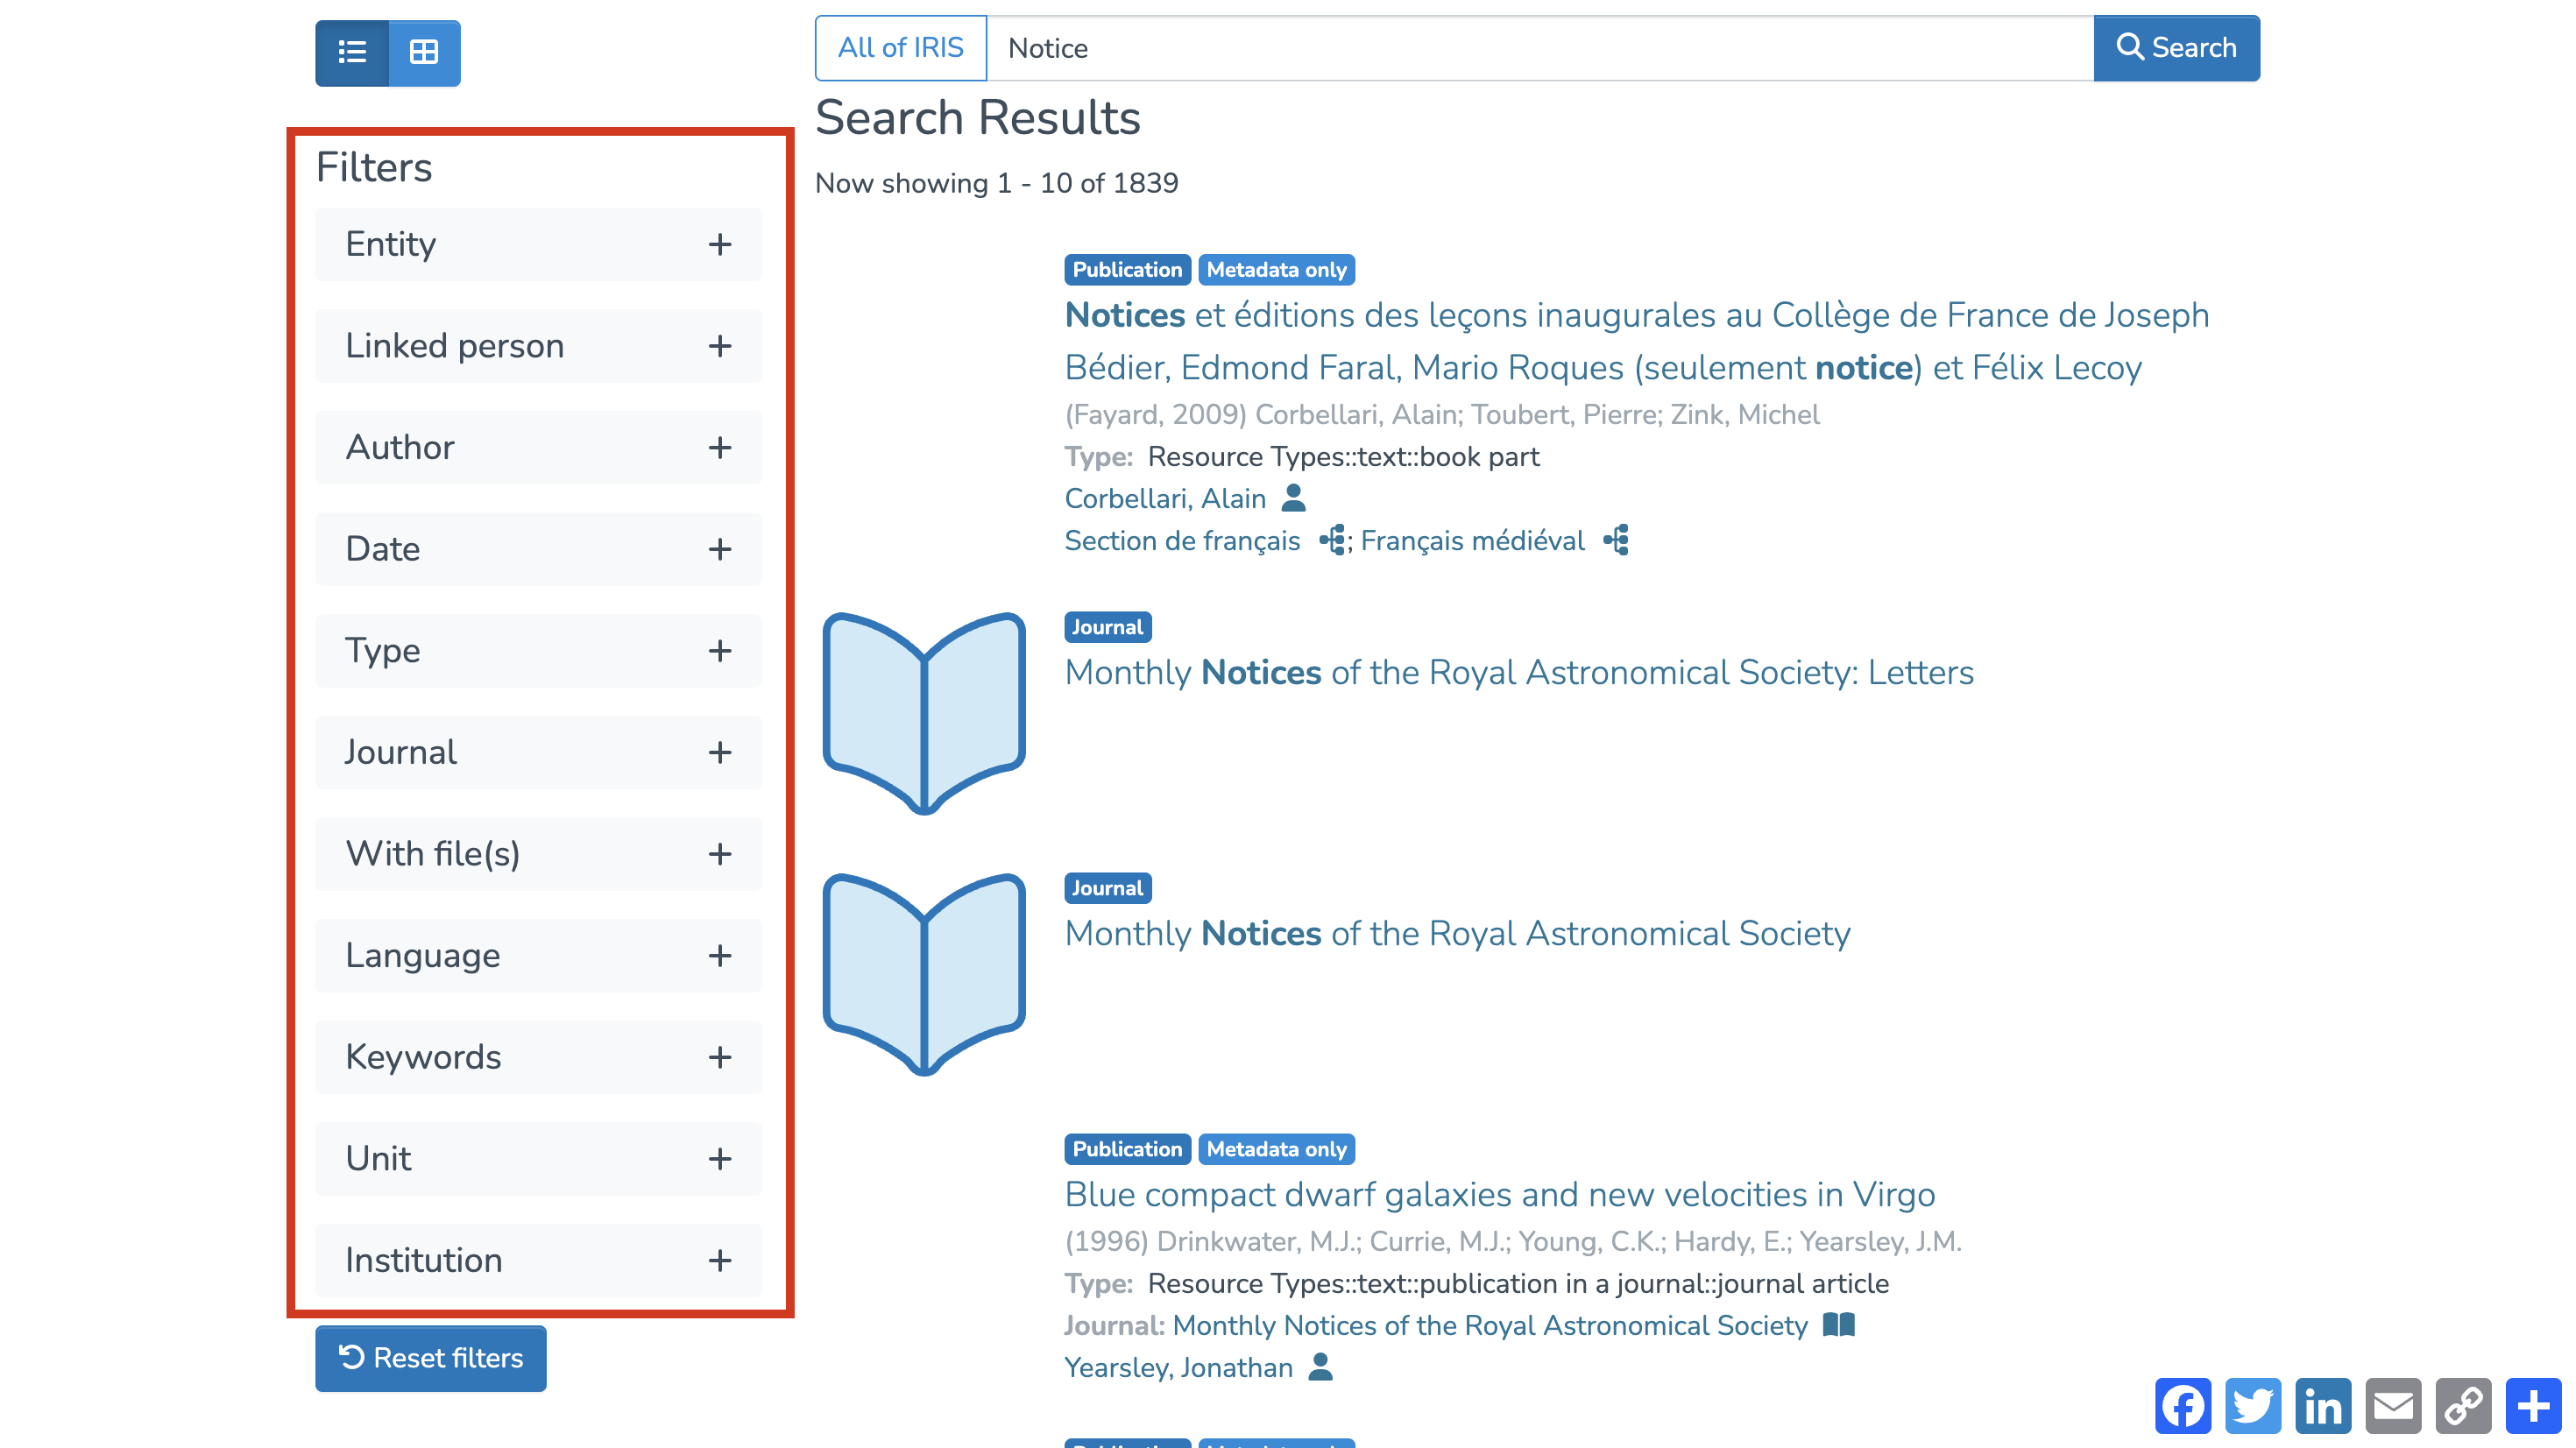

To reset the filters, simply click “Reset filters.”
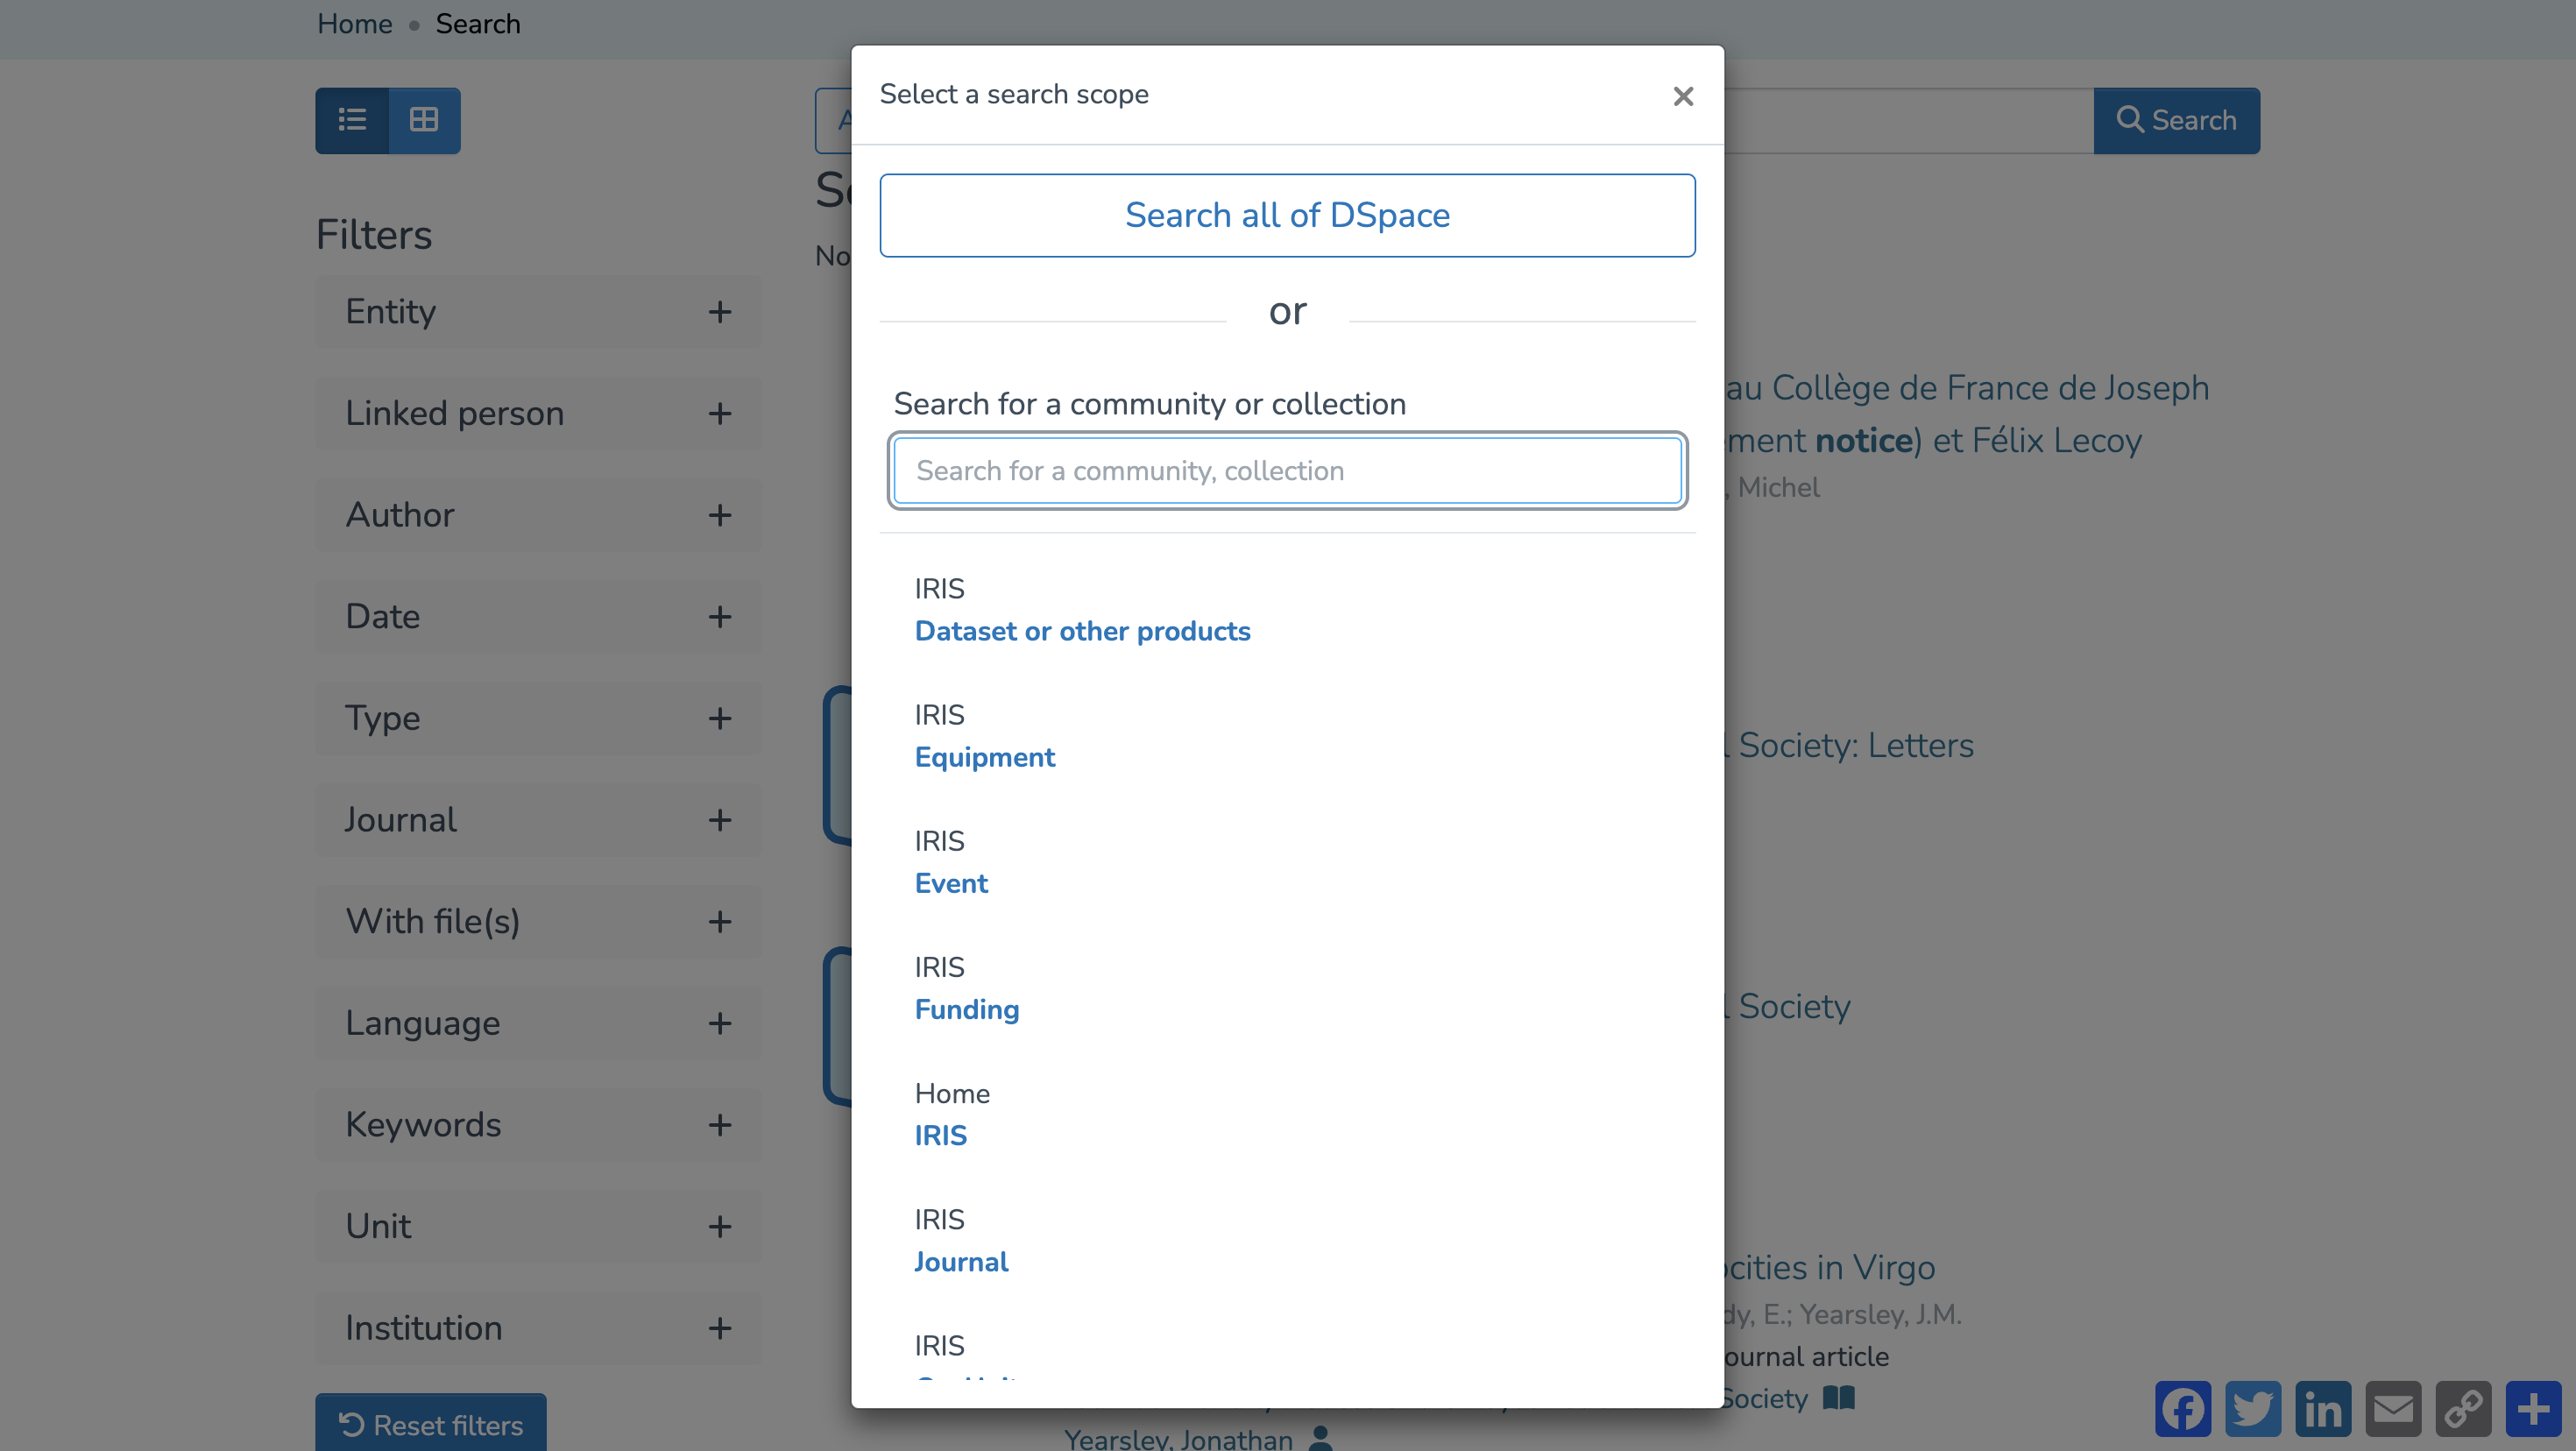
You can also choose to limit your search to a specific collection. To do so, click into the search bar and select the desired collection.
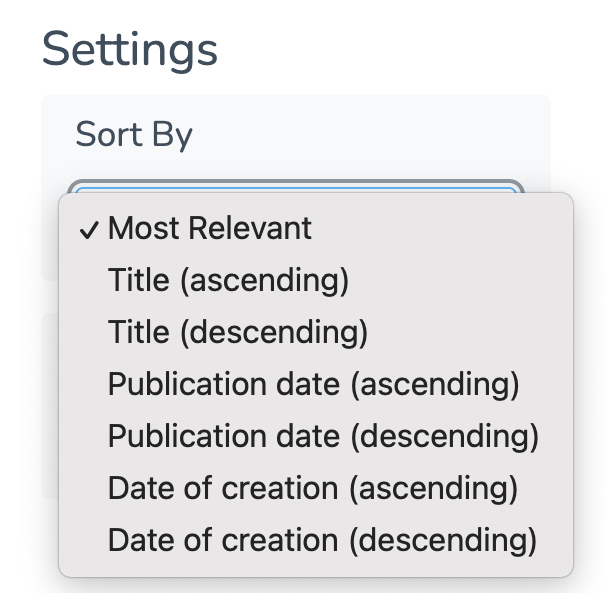
Sorting settings are available to help organize your results as you prefer.
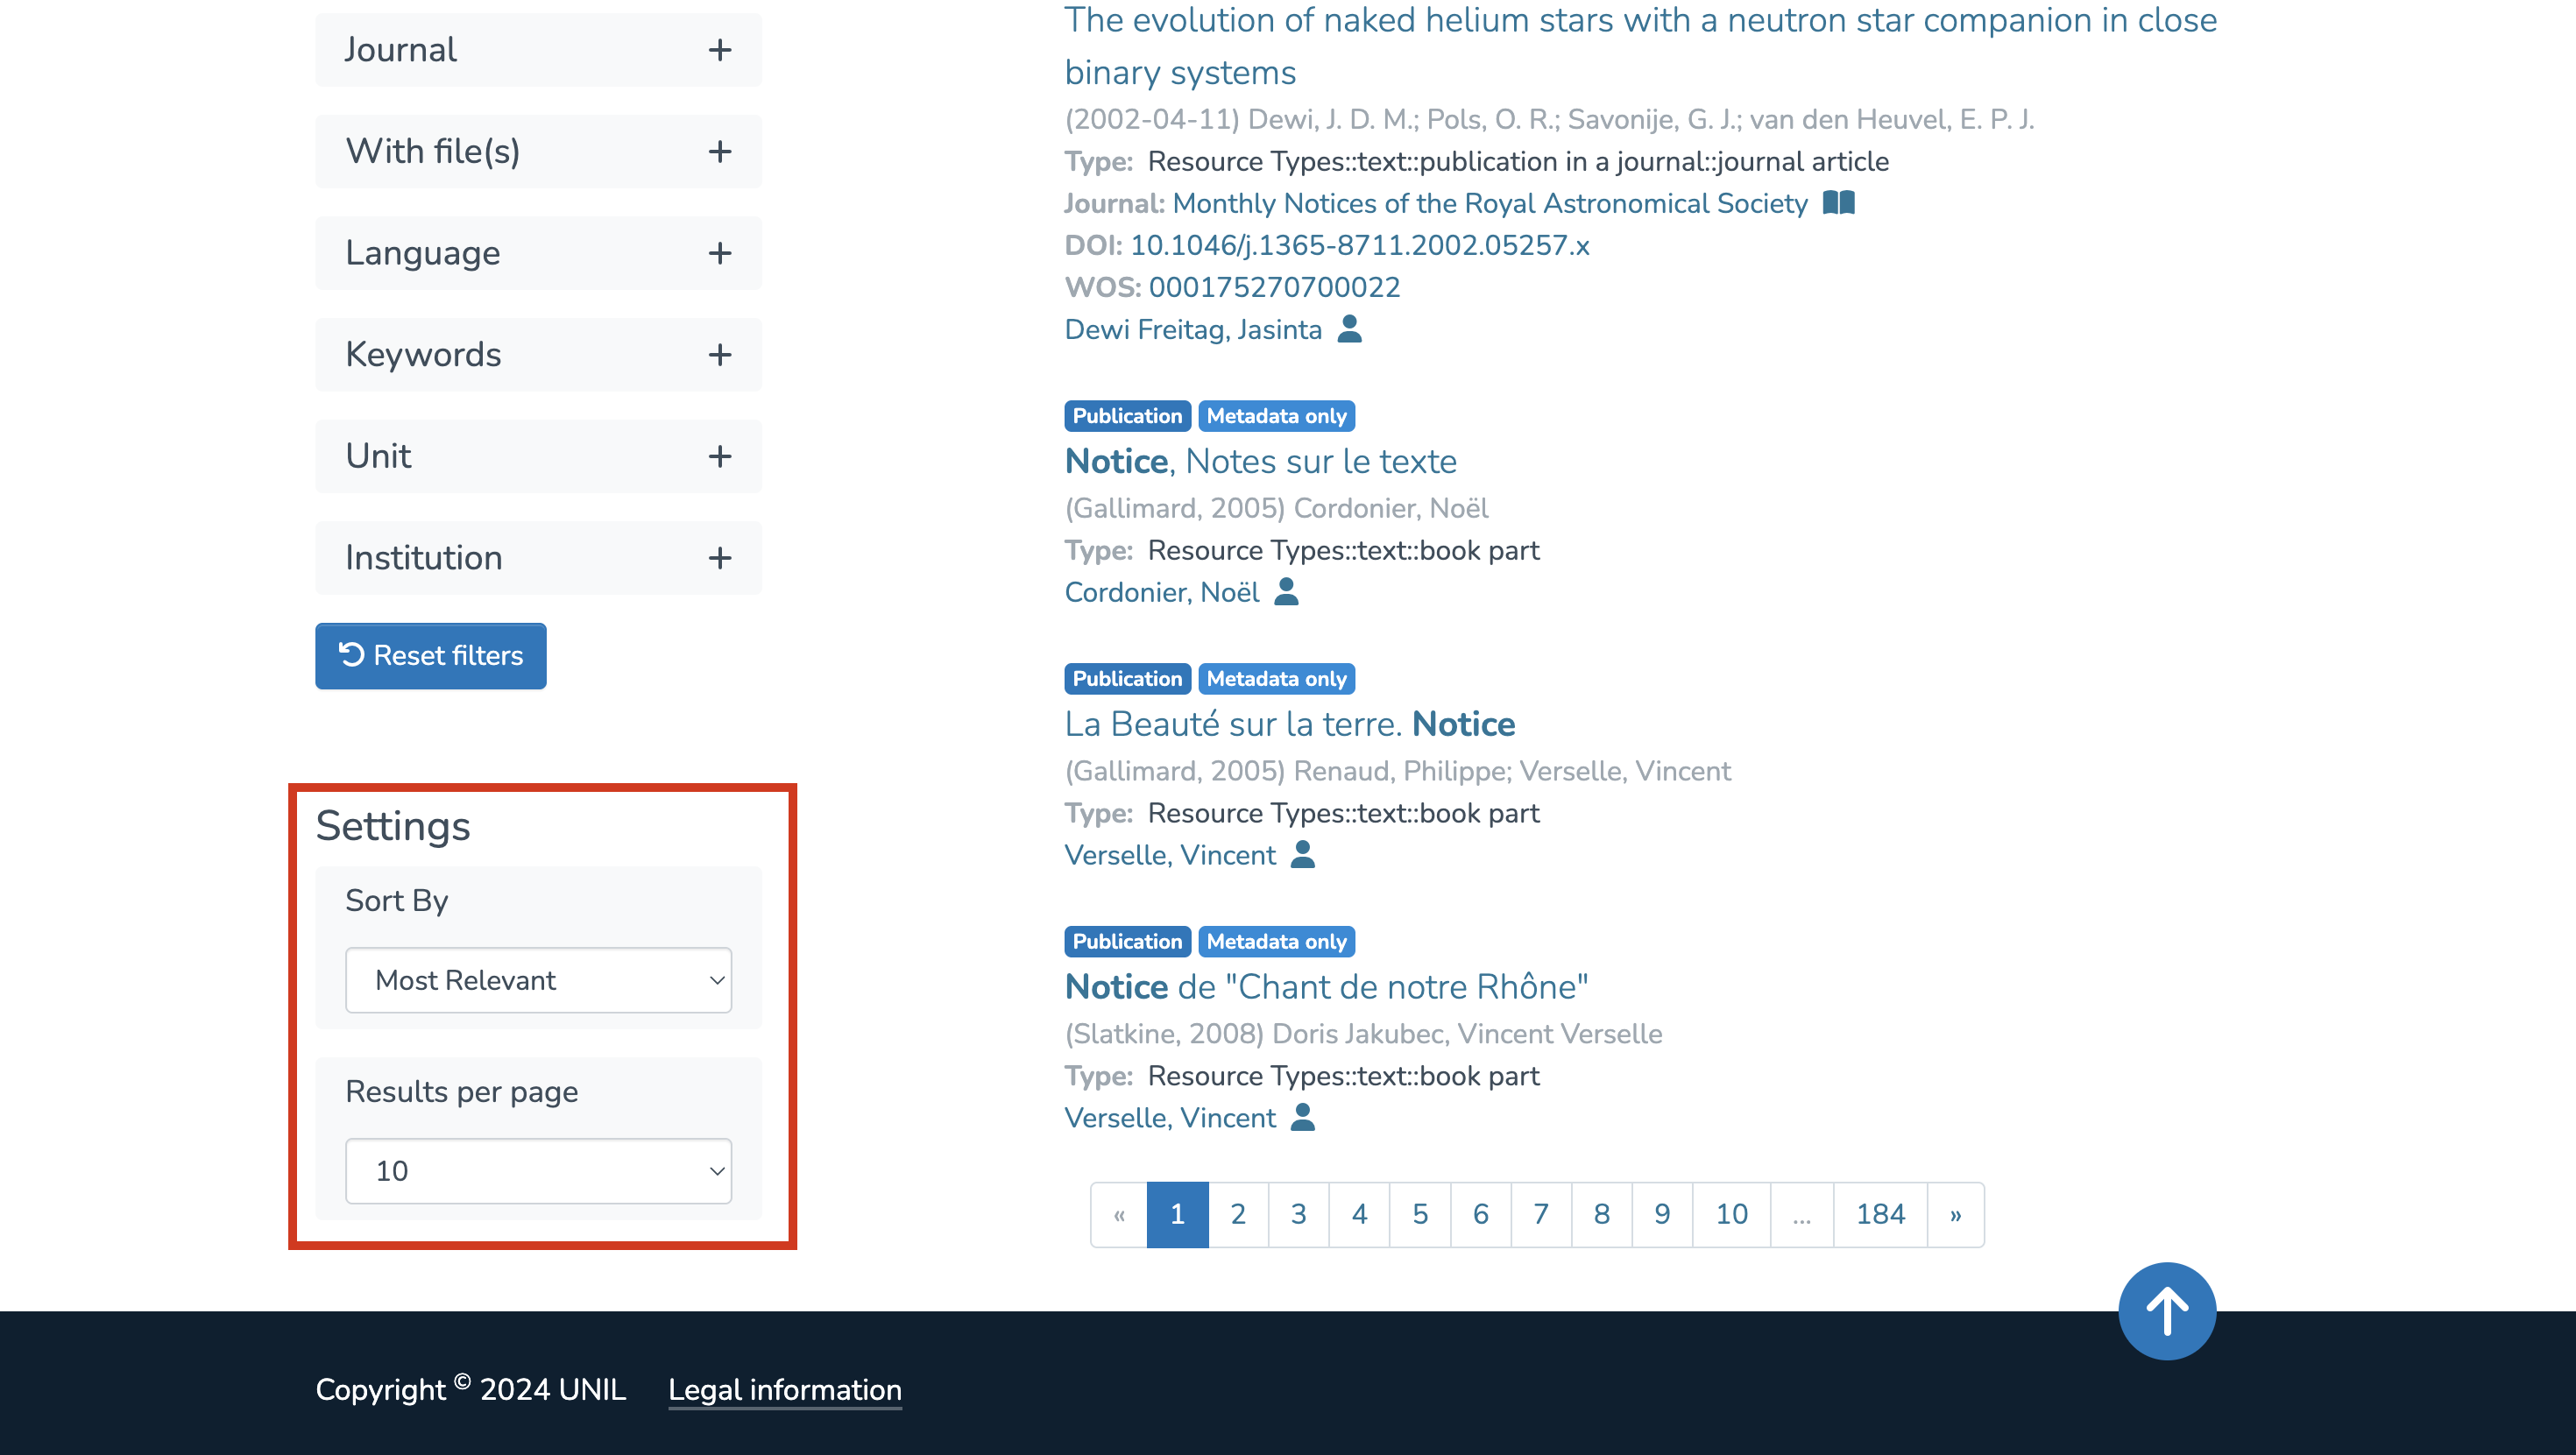
You can sort by:
- Relevance
- Title
- Publication date
- Date of creation
Each of these can be sorted in ascending or descending order.
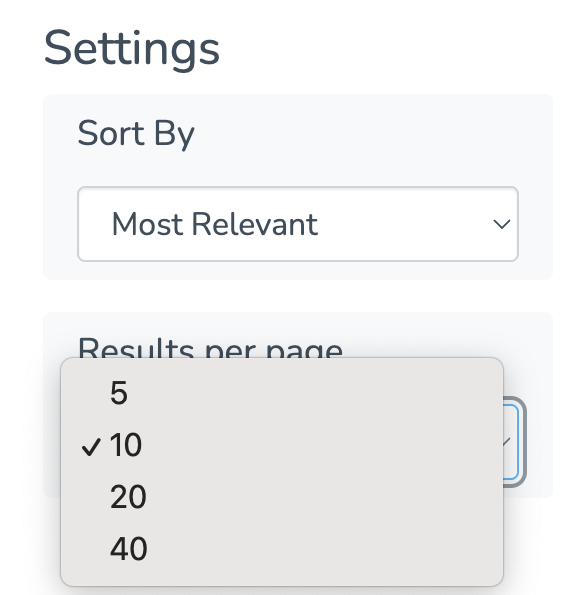
You can also adjust the number of results displayed per page.
Search by collection
Another way to refine your search is to start directly from a specific collection. From the homepage, click on the collection you’re interested in.

You’ll then be redirected to the collection-specific search page, where you can enter your keyword in the search field.
The search results page will look similar, but the filters displayed will vary depending on the selected collection.
Advanced search
The voice in this video was generated by artificial intelligence.
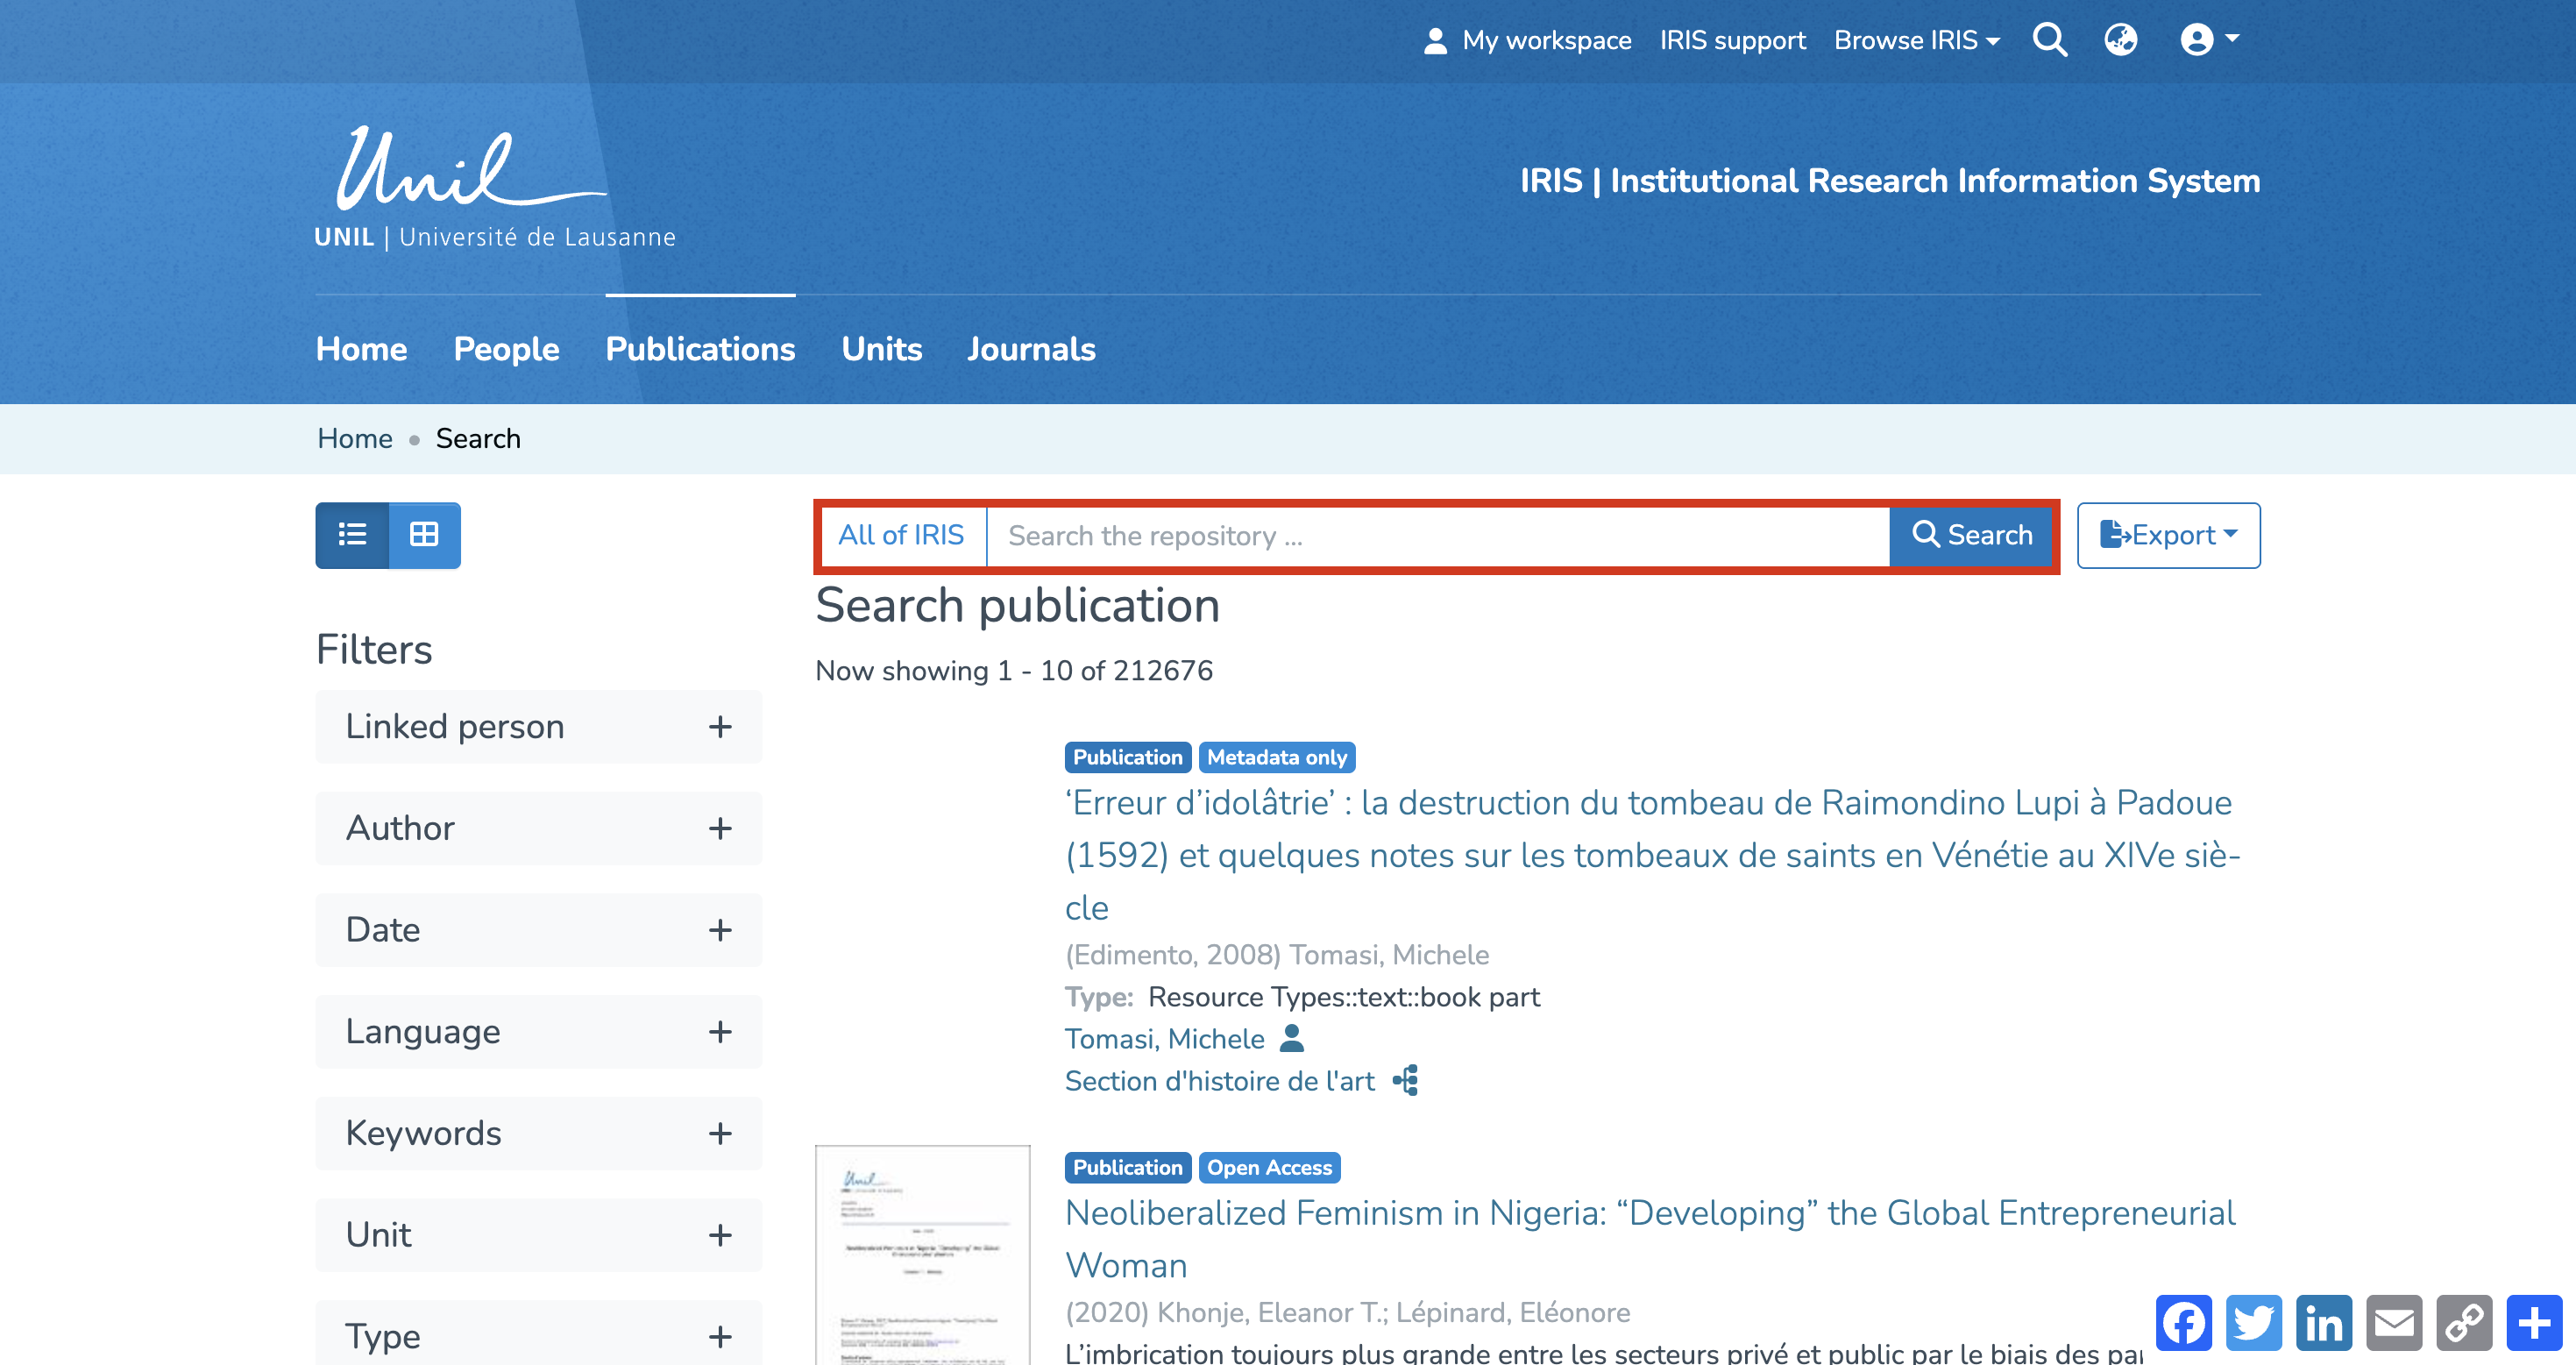
Search
To launch an advanced search, click on “Search the repository” from the homepage:
Advanced Search using metadata
Before getting started, it is important to know where to find the metadata linked to the entities, as these will be necessary for your advanced searches.
First, click on the title of the publication:
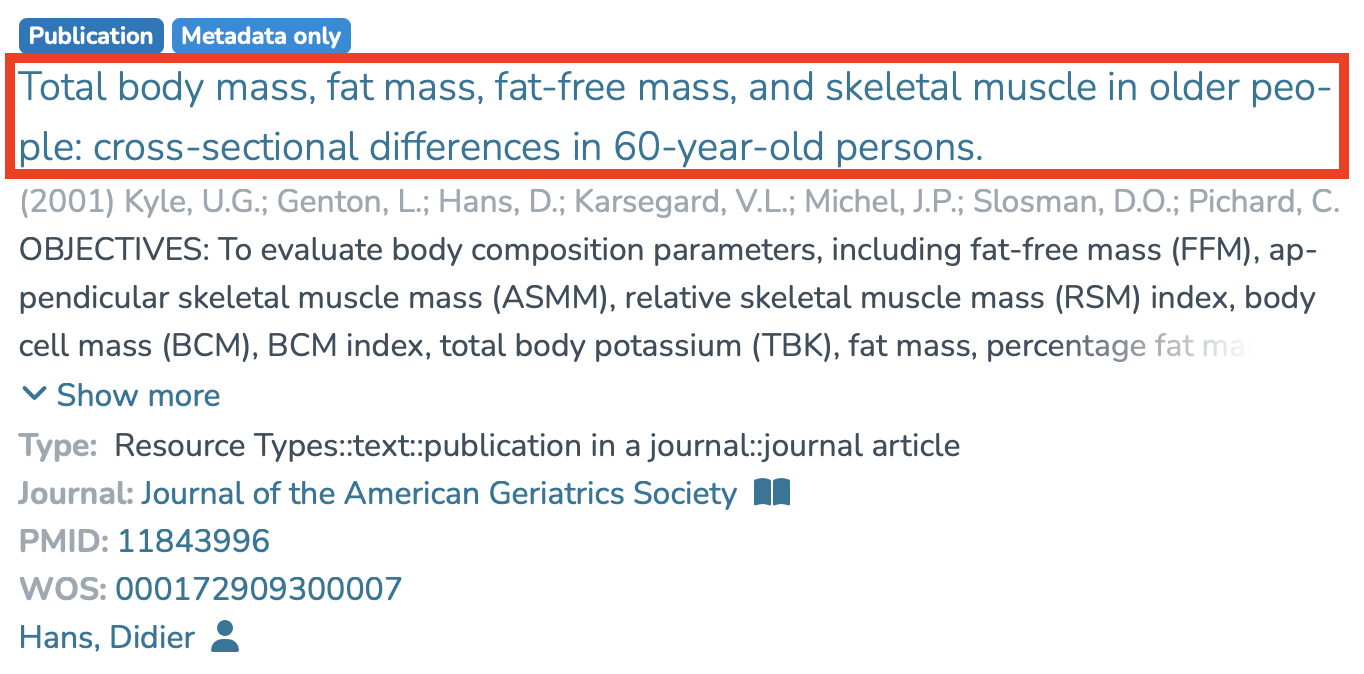
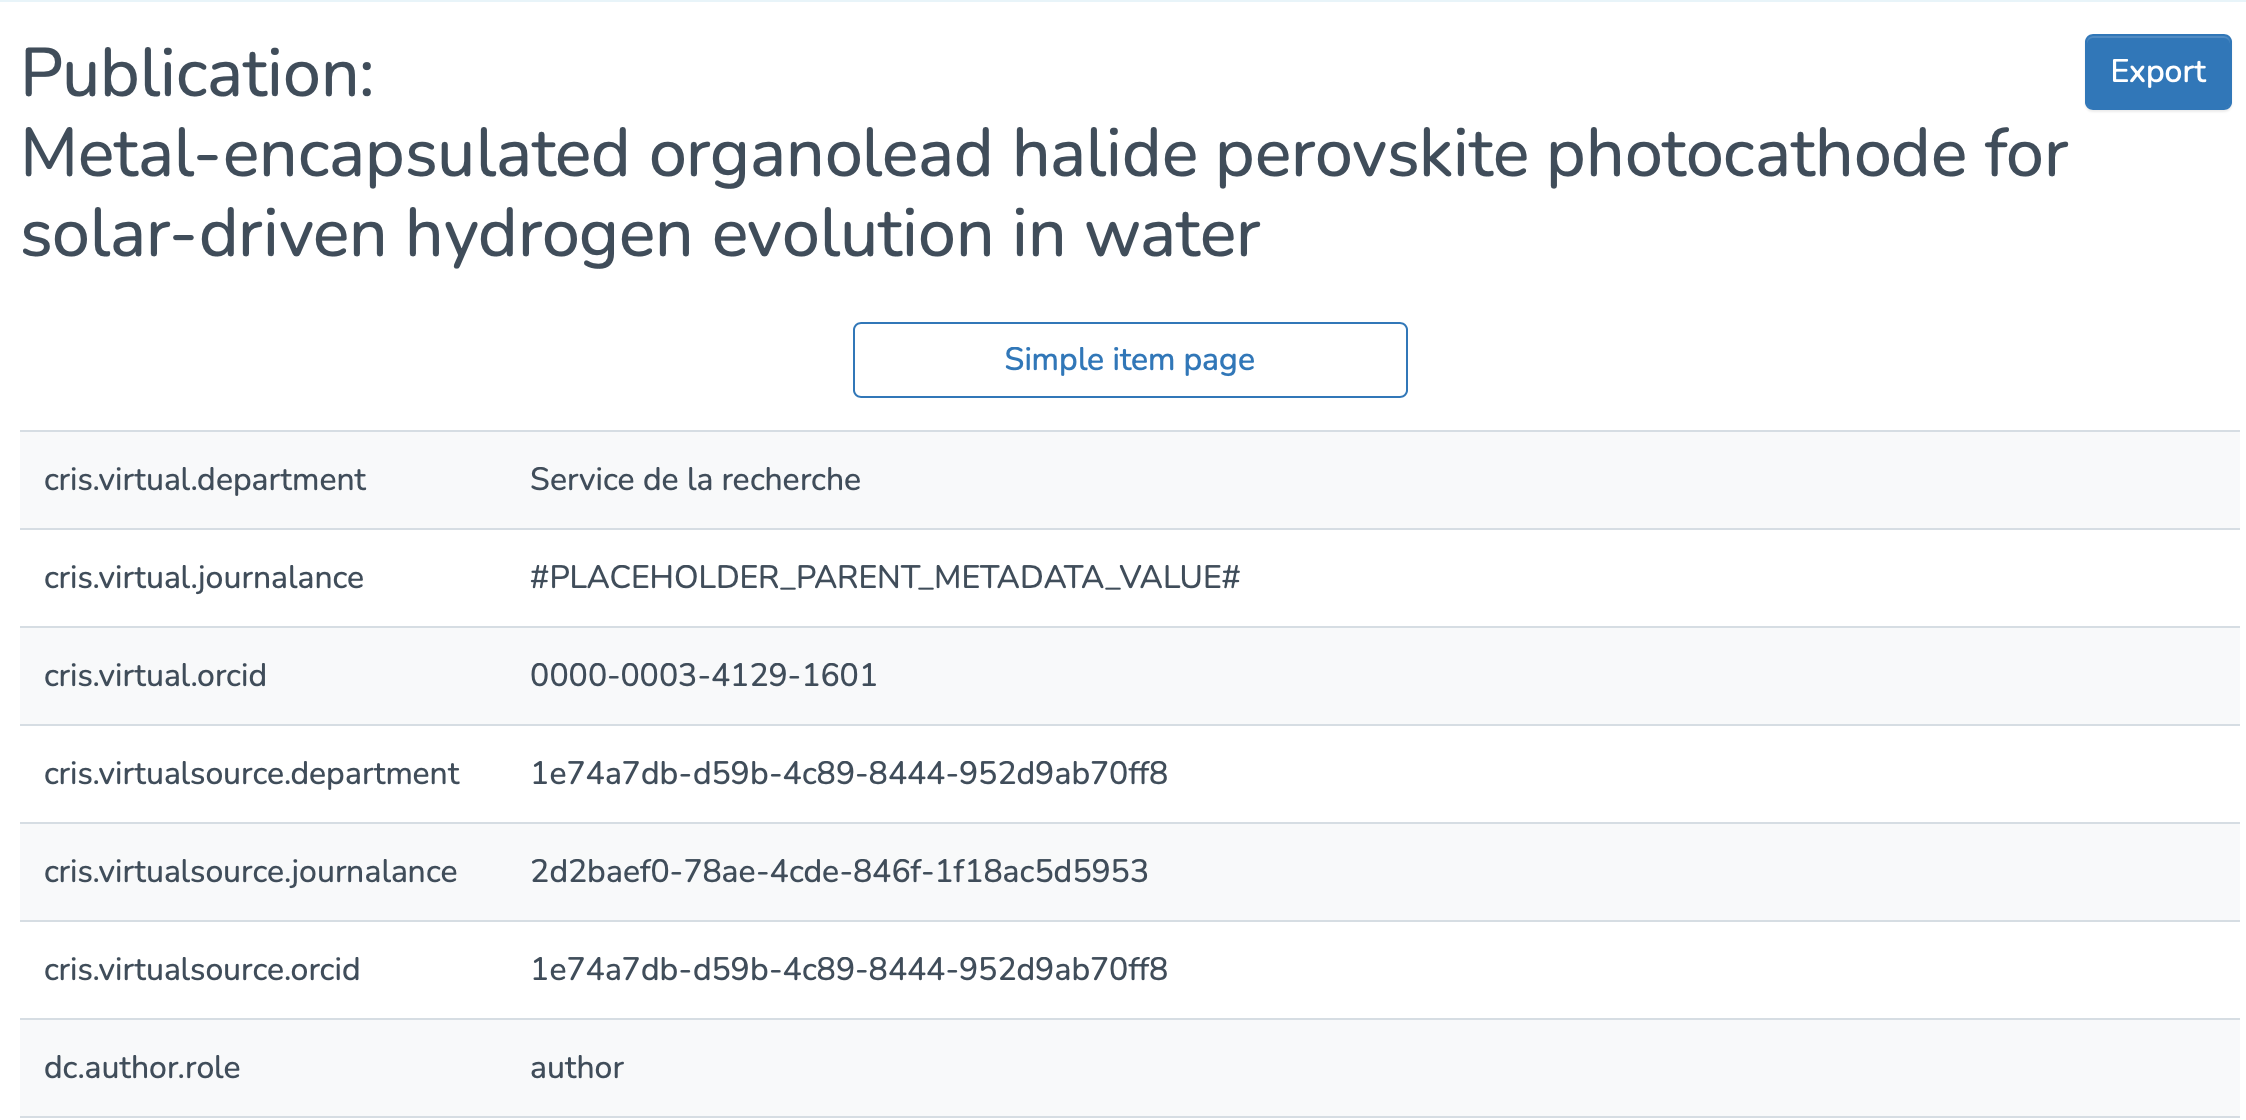
You will then arrive on the publication detail page:
-
Click on the three-dot icon.
-
Click on “Show all metadata.”
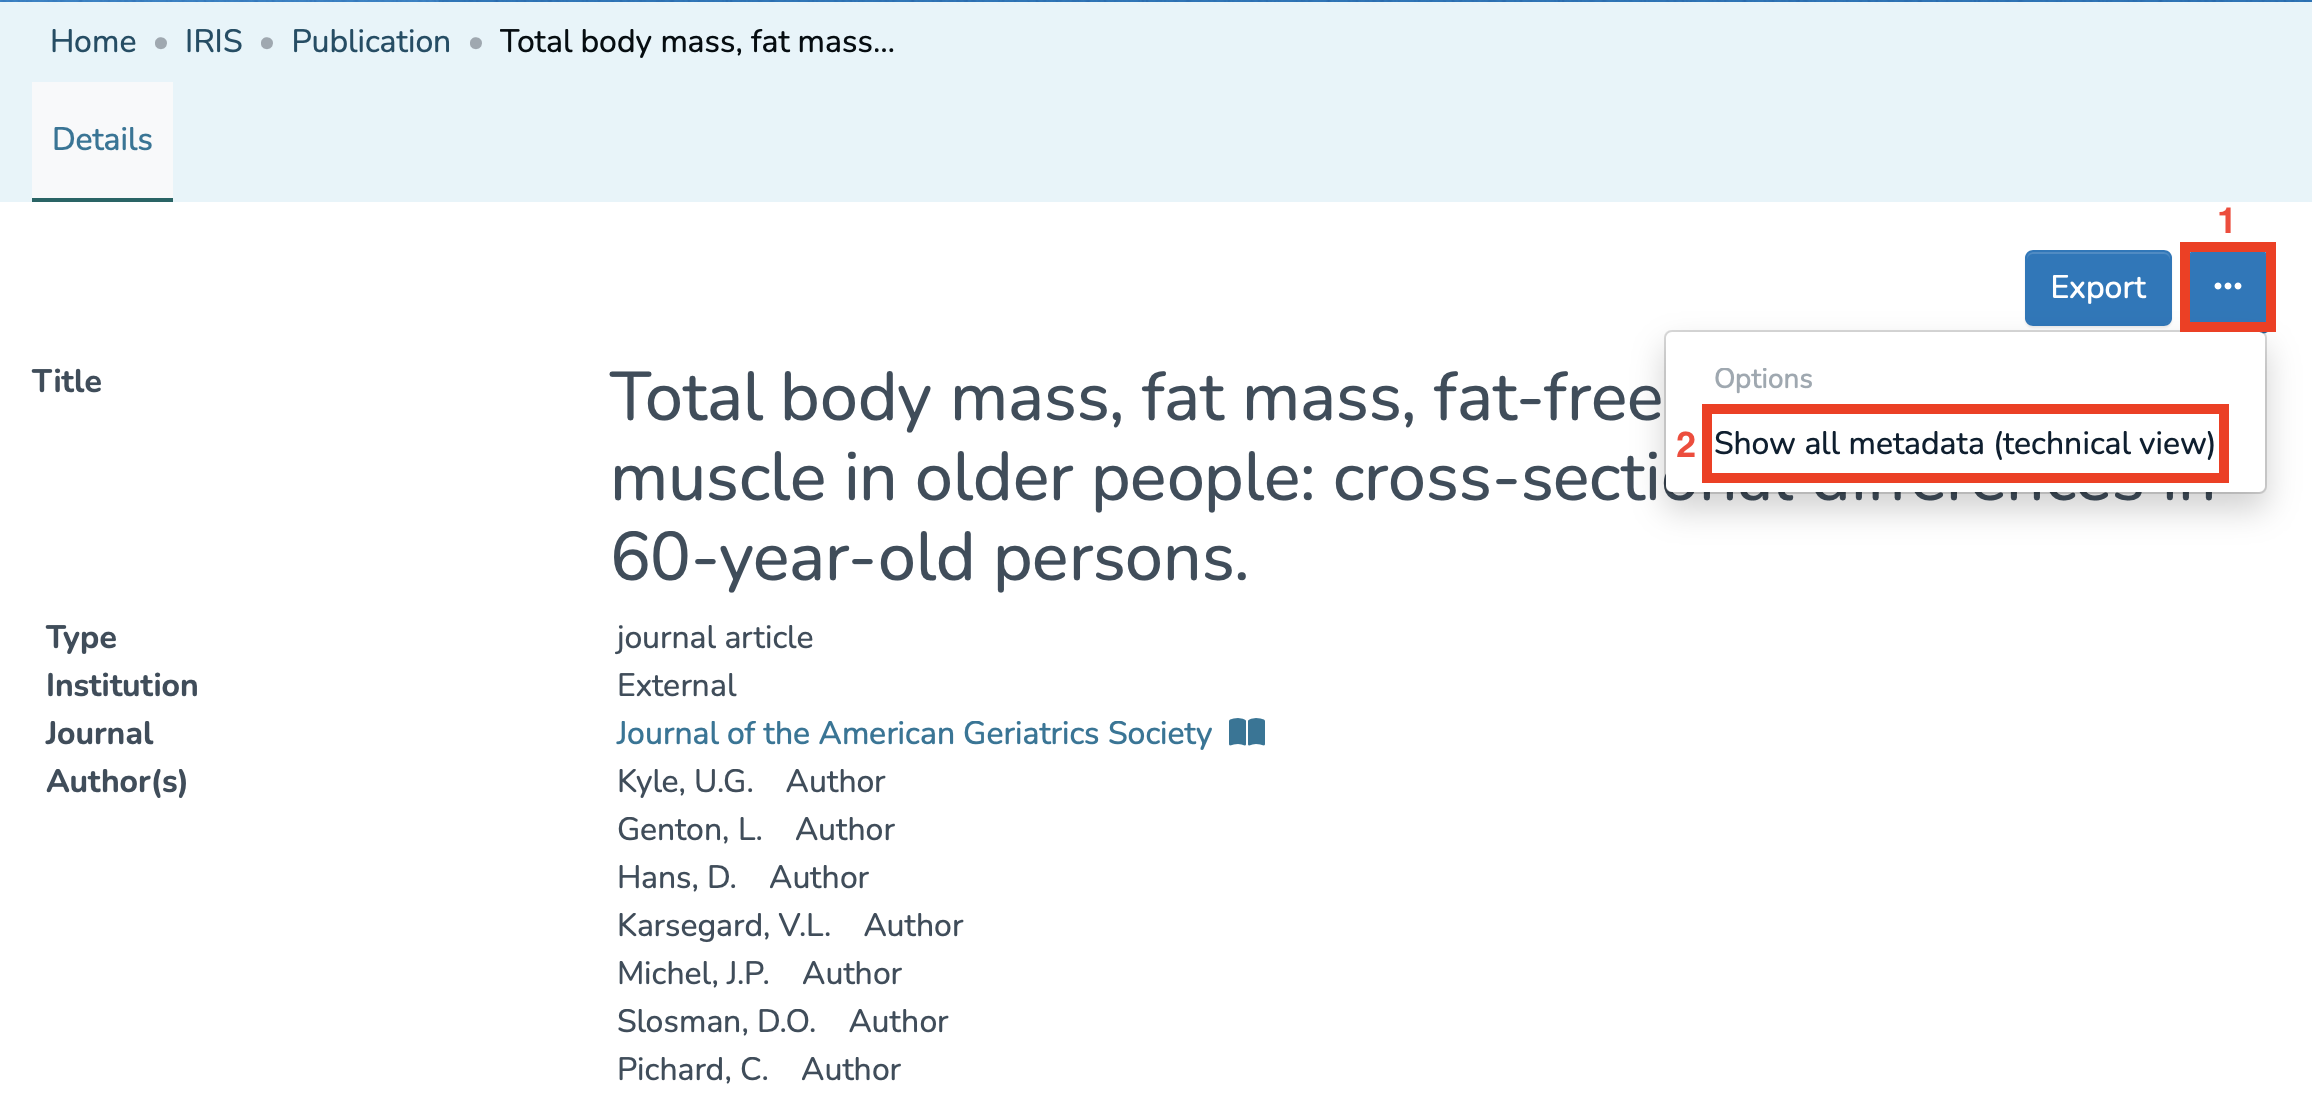
You will then have access to all the metadata of the entity and will be able to use them to choose the fields you are interested in.
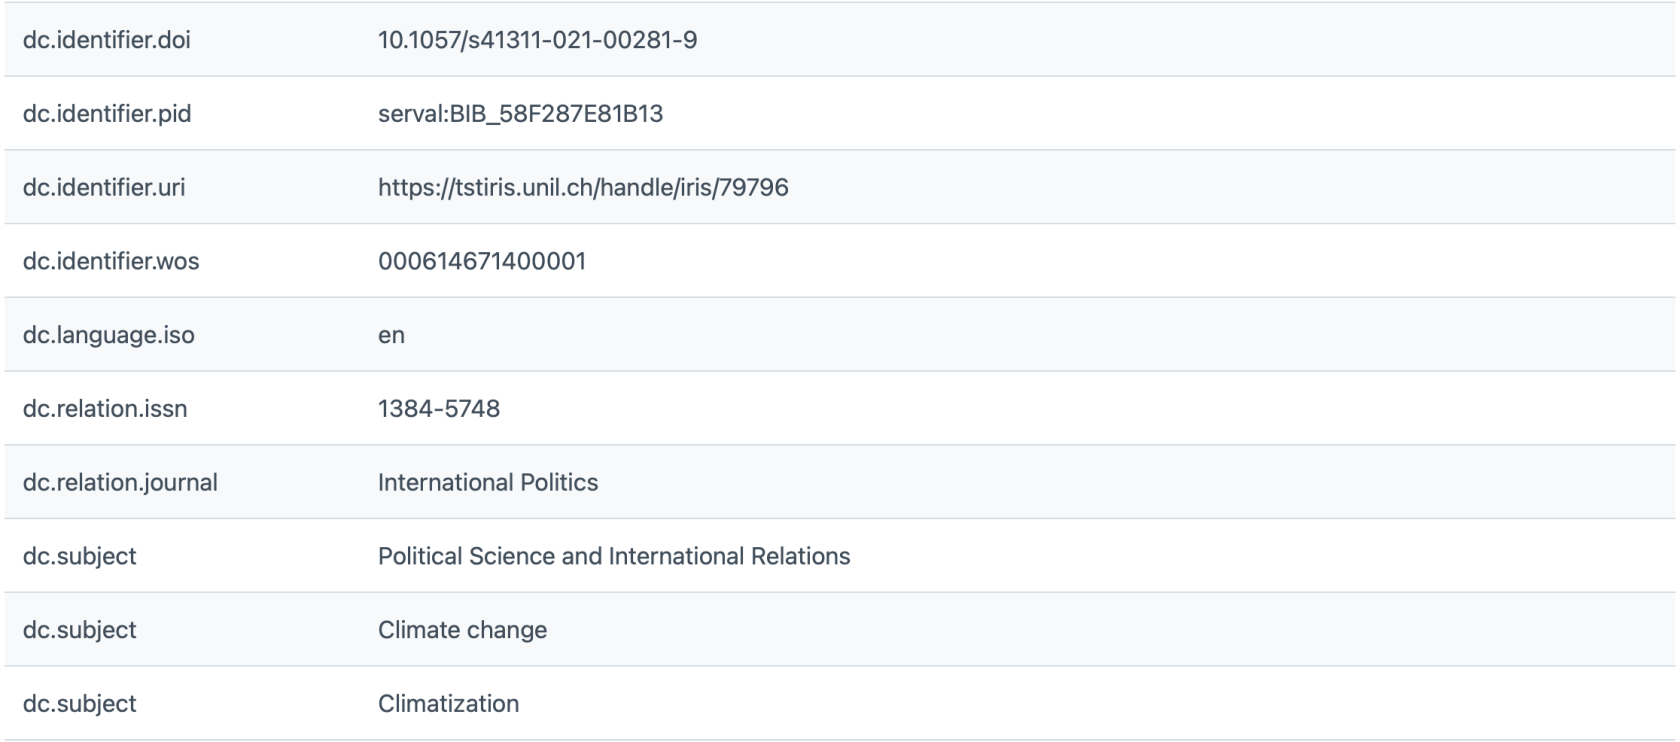
Advanced search can be performed in several ways depending on the metadata you use and with several operators. It can be useful when you want to search with criteria that are not included in the filters available in the basic search.
The syntax field :* allows you to search for all items where the specified field contains any value, meaning it is not empty.
Note : Searching for a title that contains quotation marks
When the title or reference you want to search for contains quotation marks, the search may fail.
This is because quotation marks are normally used by the system to indicate the beginning and end of an exact phrase. They must therefore be distinguished from the quotation marks that are part of the title itself. The solution is simply to add a backslash (\) before every quotation mark inside the title. This tells the search engine that these quotation marks belong to the title and should be included in the search.
Example : dc.relation.ispartofseries:"Rapport de recherche \"Développement, sociétés, environnements\""
1. To search, for example, for a publication on the topic “Climate Change,” you can write:

2. To search, for example, for a publication containing a PMID, you can write:

3. To search, for example, for a publication containing a DOI, you can write:

4. To apply several criteria at once, you can use the three Boolean operators below:
-
AND: For example, to find all items having both a DOI and a PMID, you can proceed as follows:

-
OR: For example, to find all items having a DOI or a PMID, you can proceed as follows:

-
NOT: For example, to find all items having a DOI and NOT a PMID, you can proceed as follows:

5. To set a publication date range, you can proceed as follows:

6. To search for all records that have been accepted, including those accepted in press, you can proceed as follows:
unil.editorialstate:"accepted"

However, if you wish to search only for records that have been accepted but not accepted in press, you should proceed as follows: unil.editorialstate:"accepted" AND NOT unil.editorialstate:"accepted_in_press"

You can also combine multiple search criteria as follows:
dc.contributor.author : Lucile AND (dc.title : council OR dc.title : climat) AND dc.date.issued : [2020 TO 2024]
This search will return a publication where the author’s name contains “Lucile,” the title contains (“council” OR “climat”), and the publication date is between 2020 and 2024.
Advanced search without using metadata
1. For fields containing dates in ISO-8601 technical format, you must use the technical version of the metadata field. For example, to filter all publications created in IRIS between two dates, several methods can be used:
- Inclusive format (i.e., the end date is included in the interval):
dc.date.accessioned_dt:[2025-08-18T00:00:00Z TO 2025-08-26T23:59:59Z]

- Exclusive format (i.e., the end date is not included in the interval):
dc.date.accessioned_dt:[2025-08-18T00:00:00Z TO 2025-08-27T00:00:00Z}

- To filter all publications created in IRIS between a specific date and now:
a) dc.date.accessioned_dt : [2025-08-18T00:00:00Z TO NOW]

b) dc.date.accessioned_dt : [2025-08-18T00:00:00Z TO *]

2. If you wish to filter records based on their recent modification date (rather than through standard metadata fields), here are some additional advanced queries. These filters apply to the discovery index, not to the record metadata.
a) lastModified:[NOW/DAY TO NOW] → all records modified today (since midnight)

b) lastModified:[NOW-2DAYS/DAY TO NOW] → all records modified in the last two days (since midnight two days ago)

c) lastModified:[NOW-2DAYS TO NOW] → records modified in the last 48 hours exactly (rolling window)

⚠️ Limitation: It is not possible to distinguish between system-generated modifications (e.g., embargo, author links, etc.) and user-made modifications.
Search and filter faculty publications
The voice in this video was generated by artificial intelligence.
There are two main ways to view a faculty’s publications in the repository.
From the "Units" tab
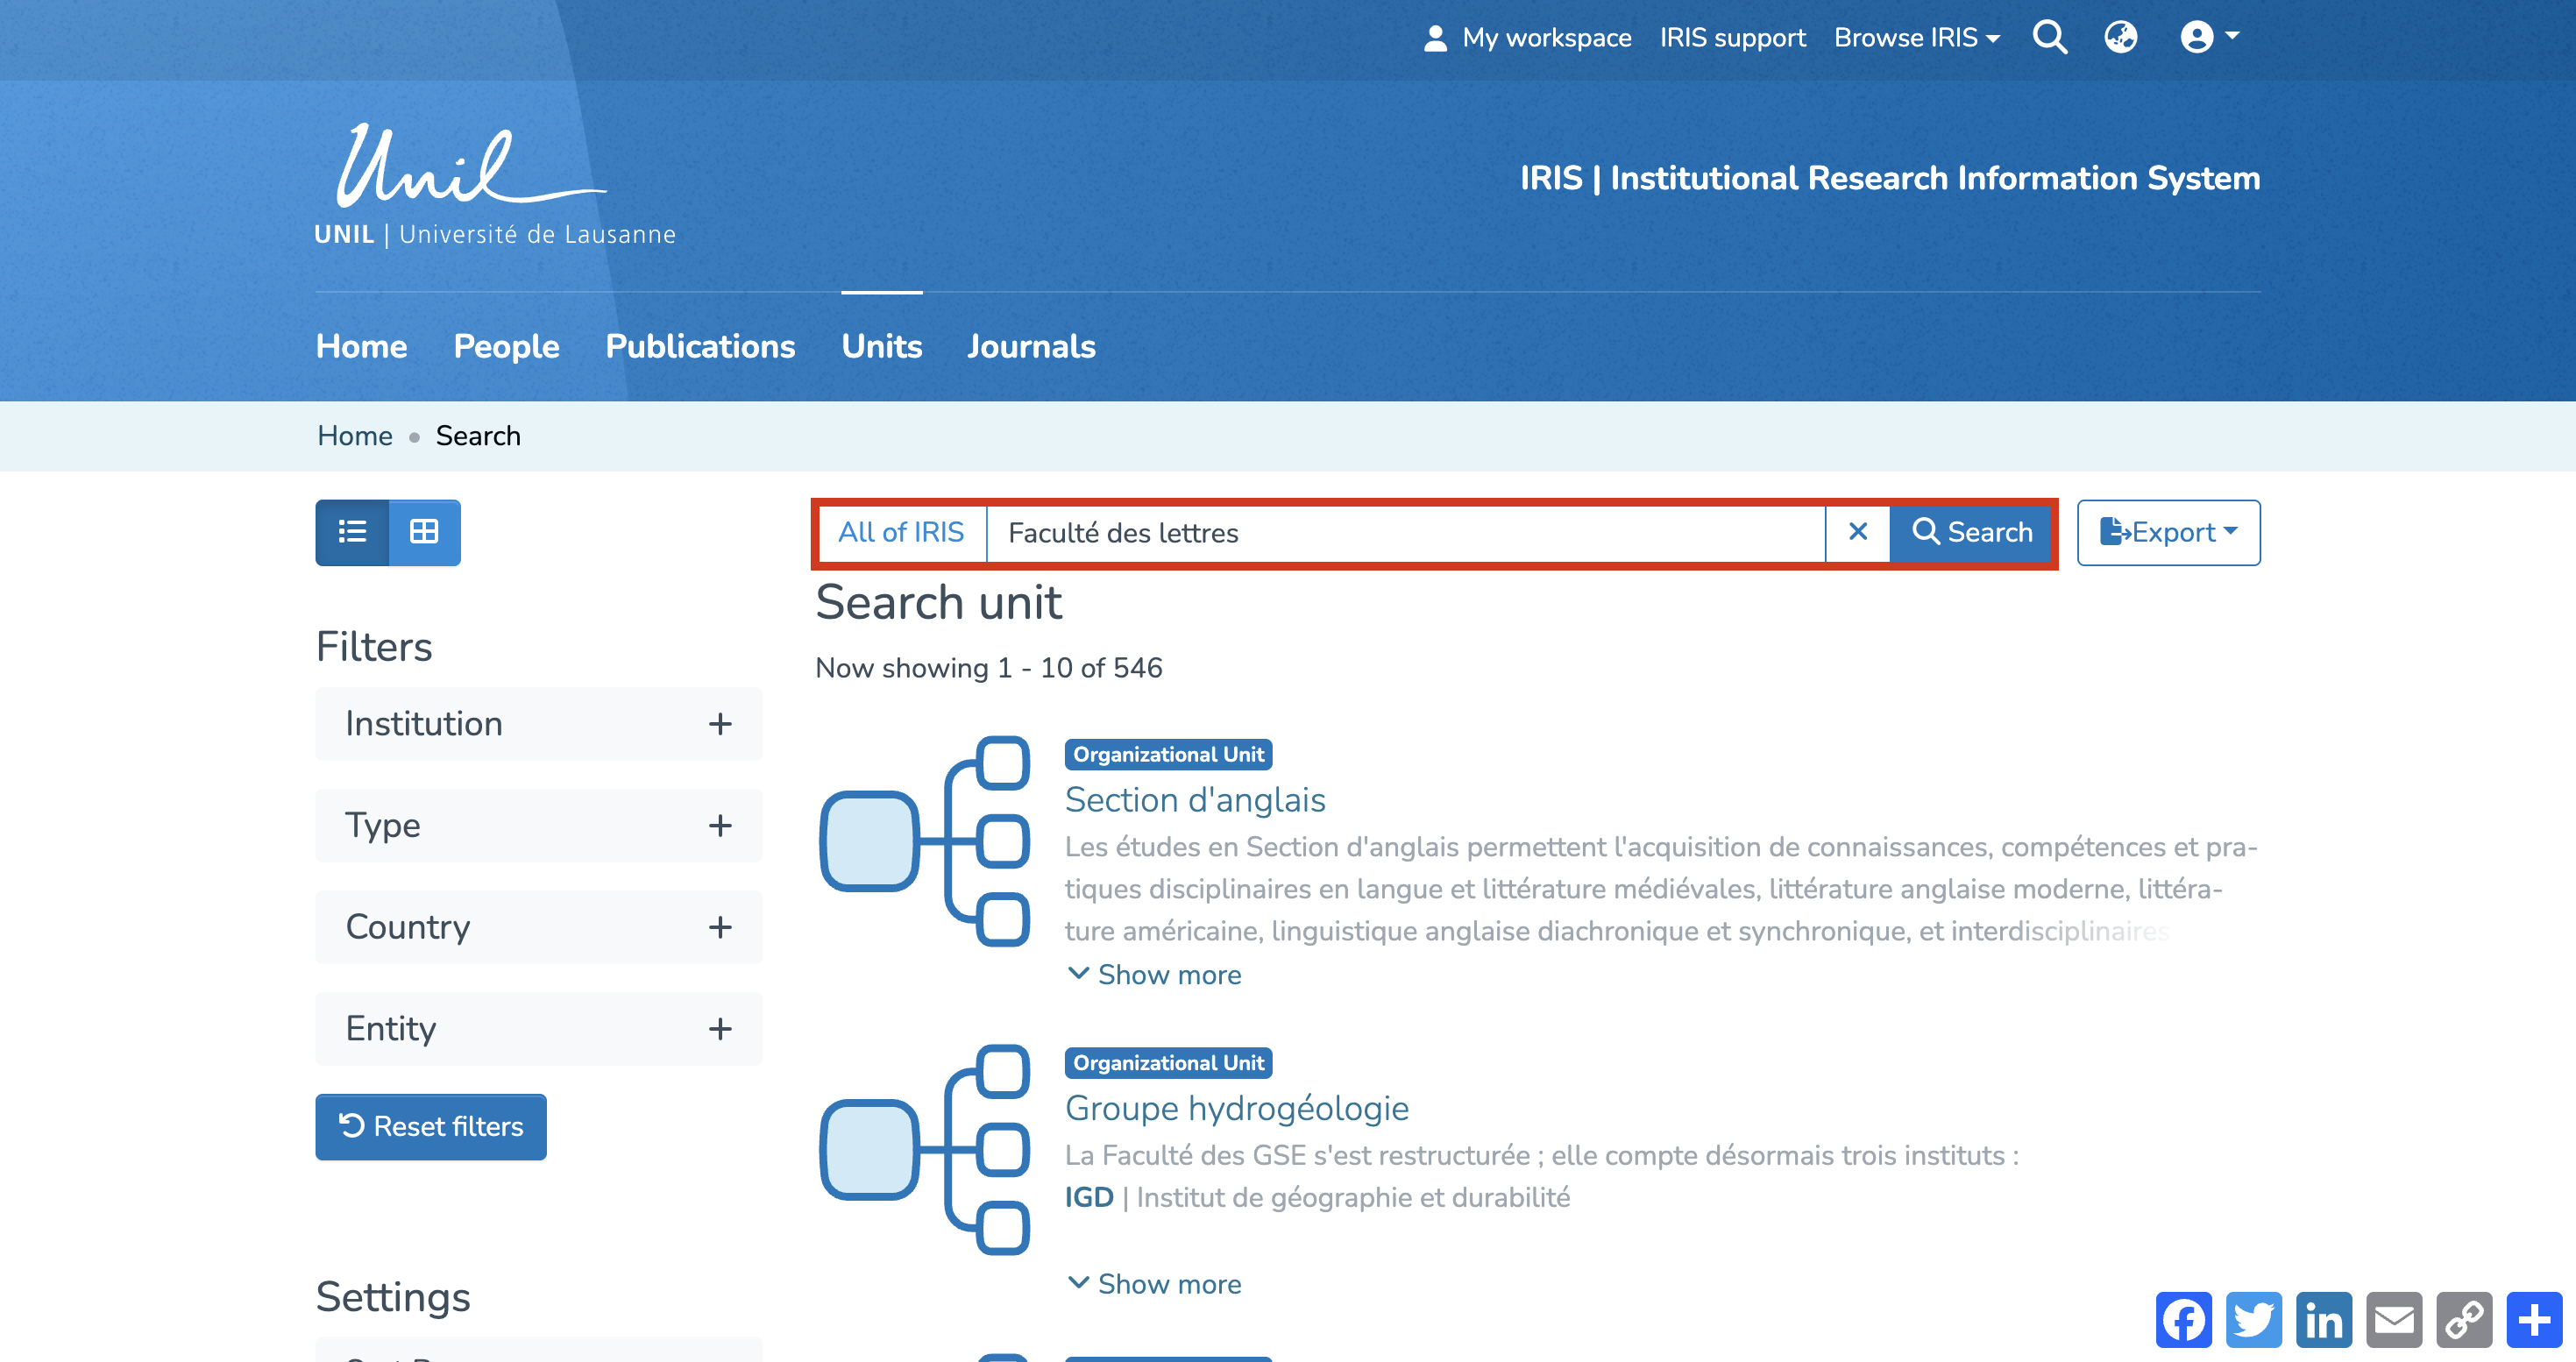
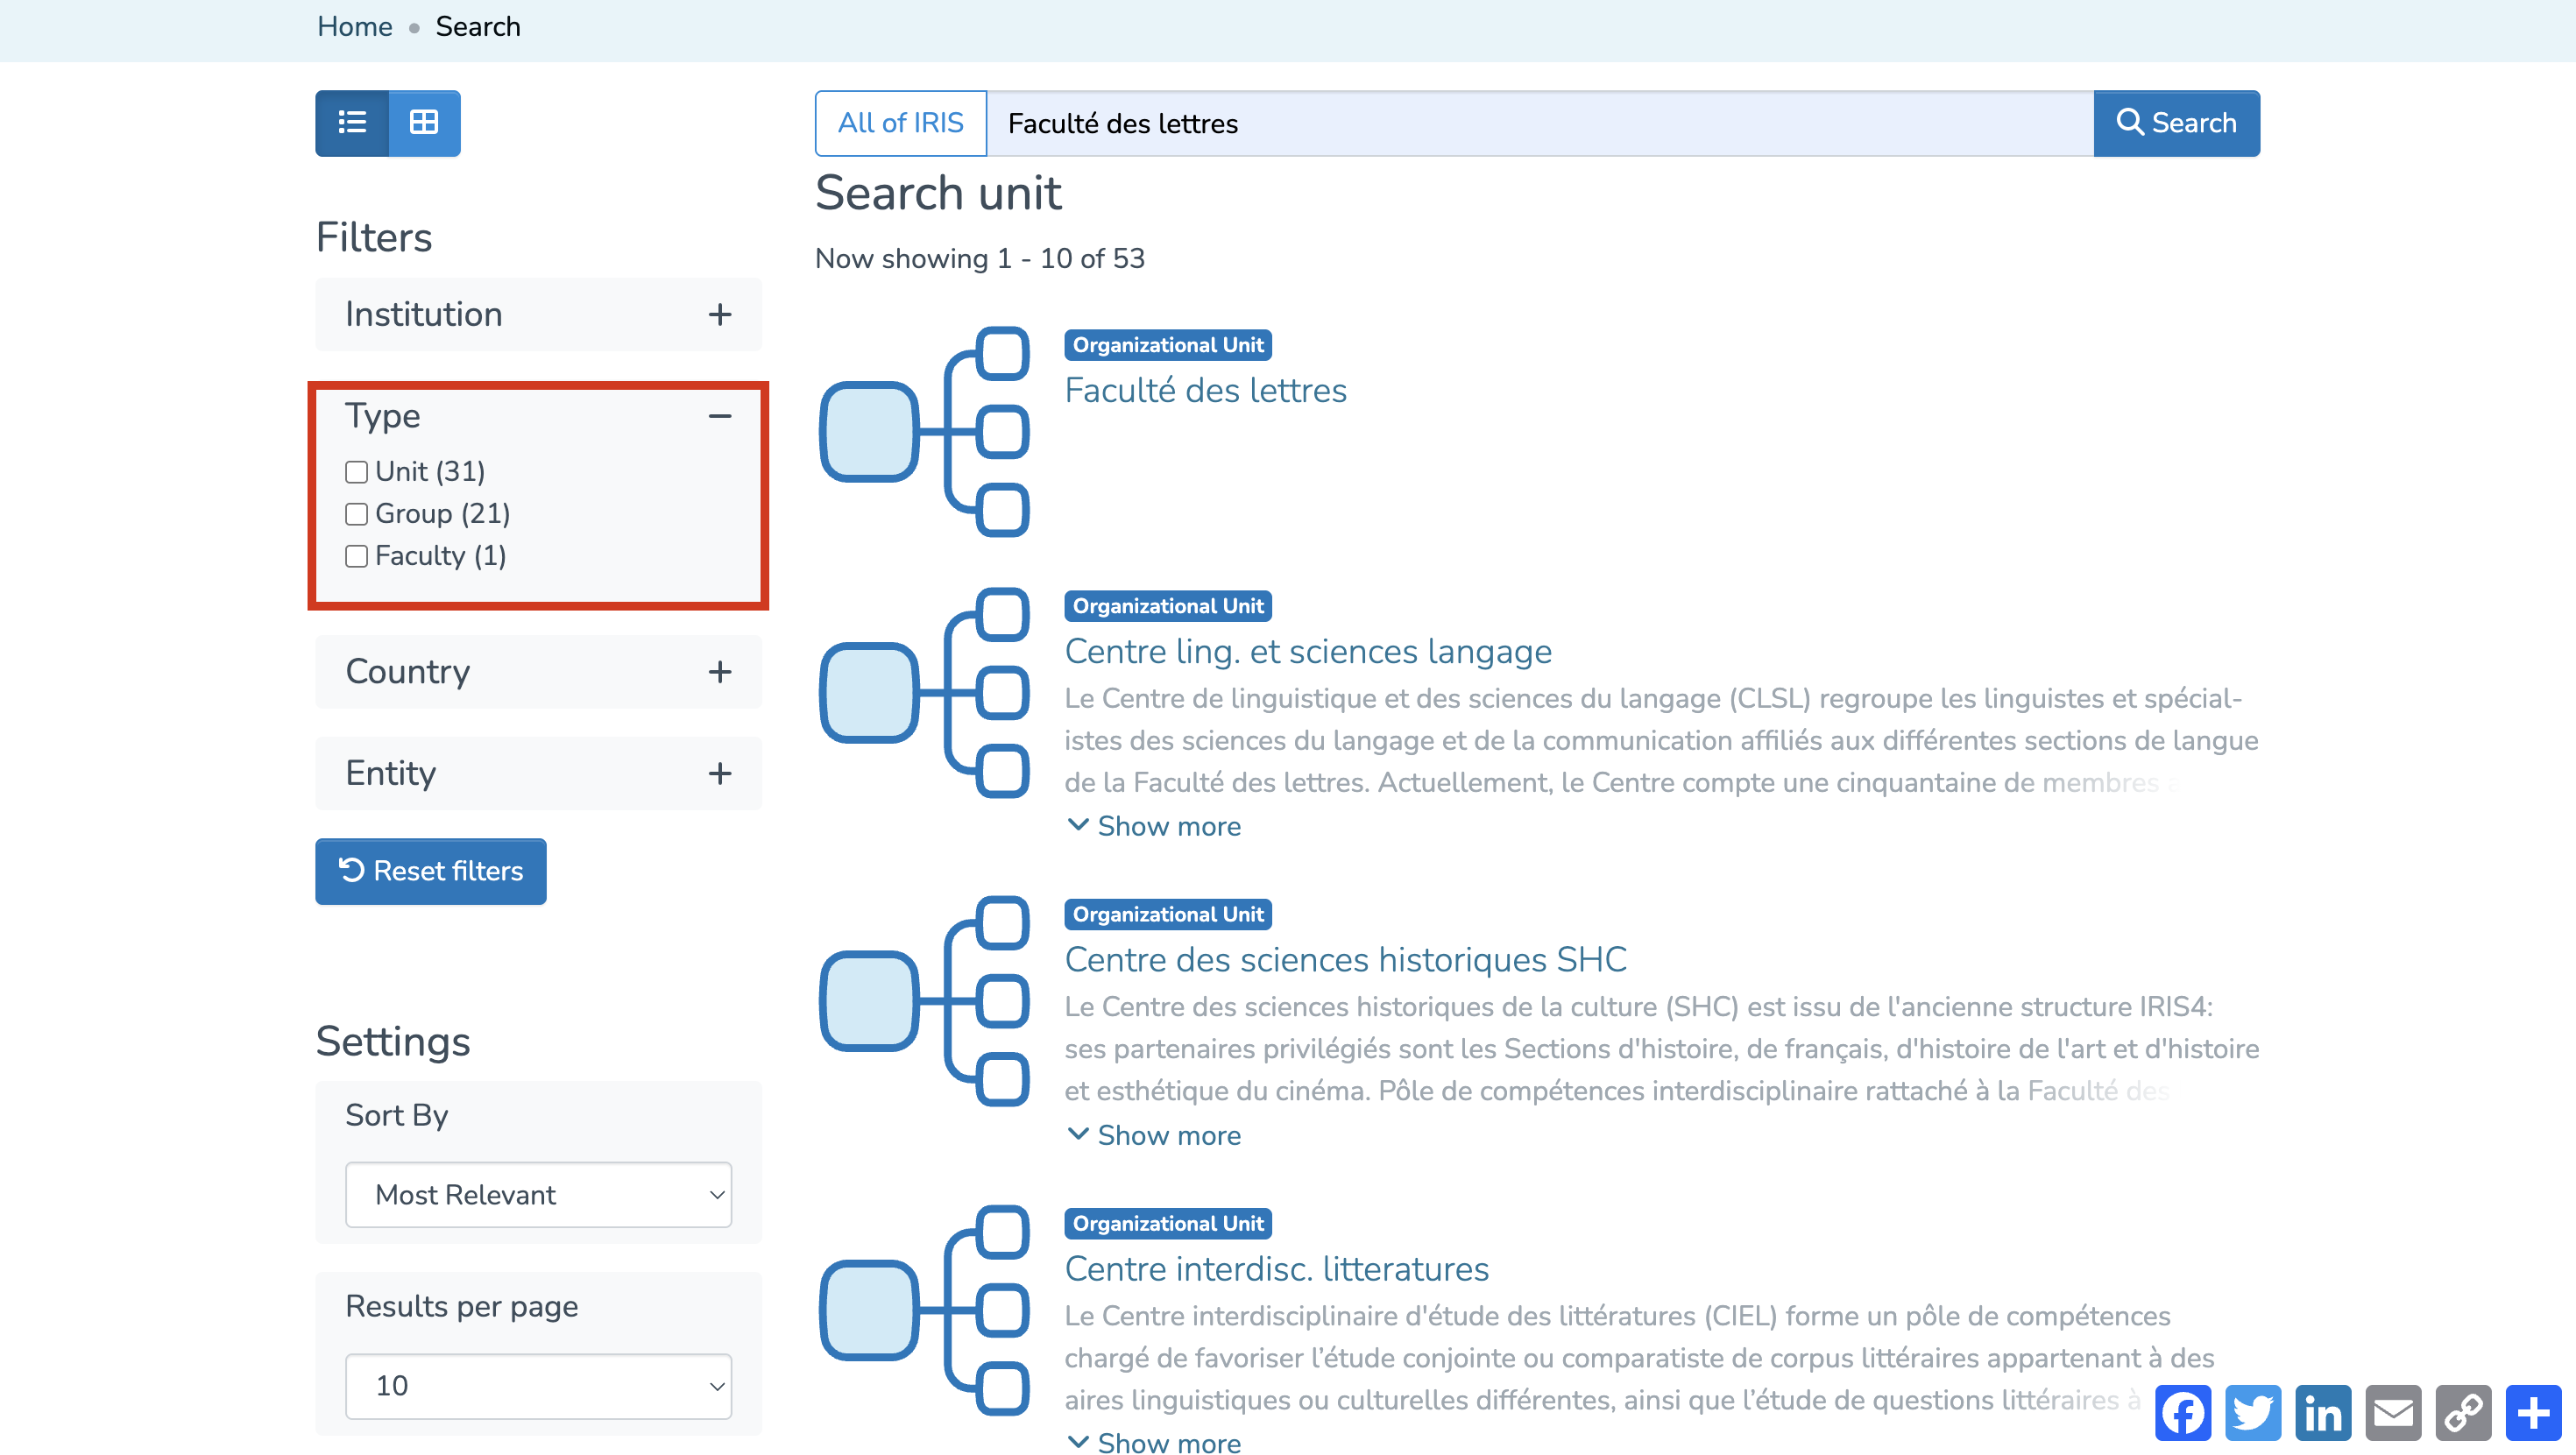
- From the homepage, click on “Units.”

- Type the name of the faculty into the search bar, then click “Search.” The results will display the faculty itself, along with its associated organizations.

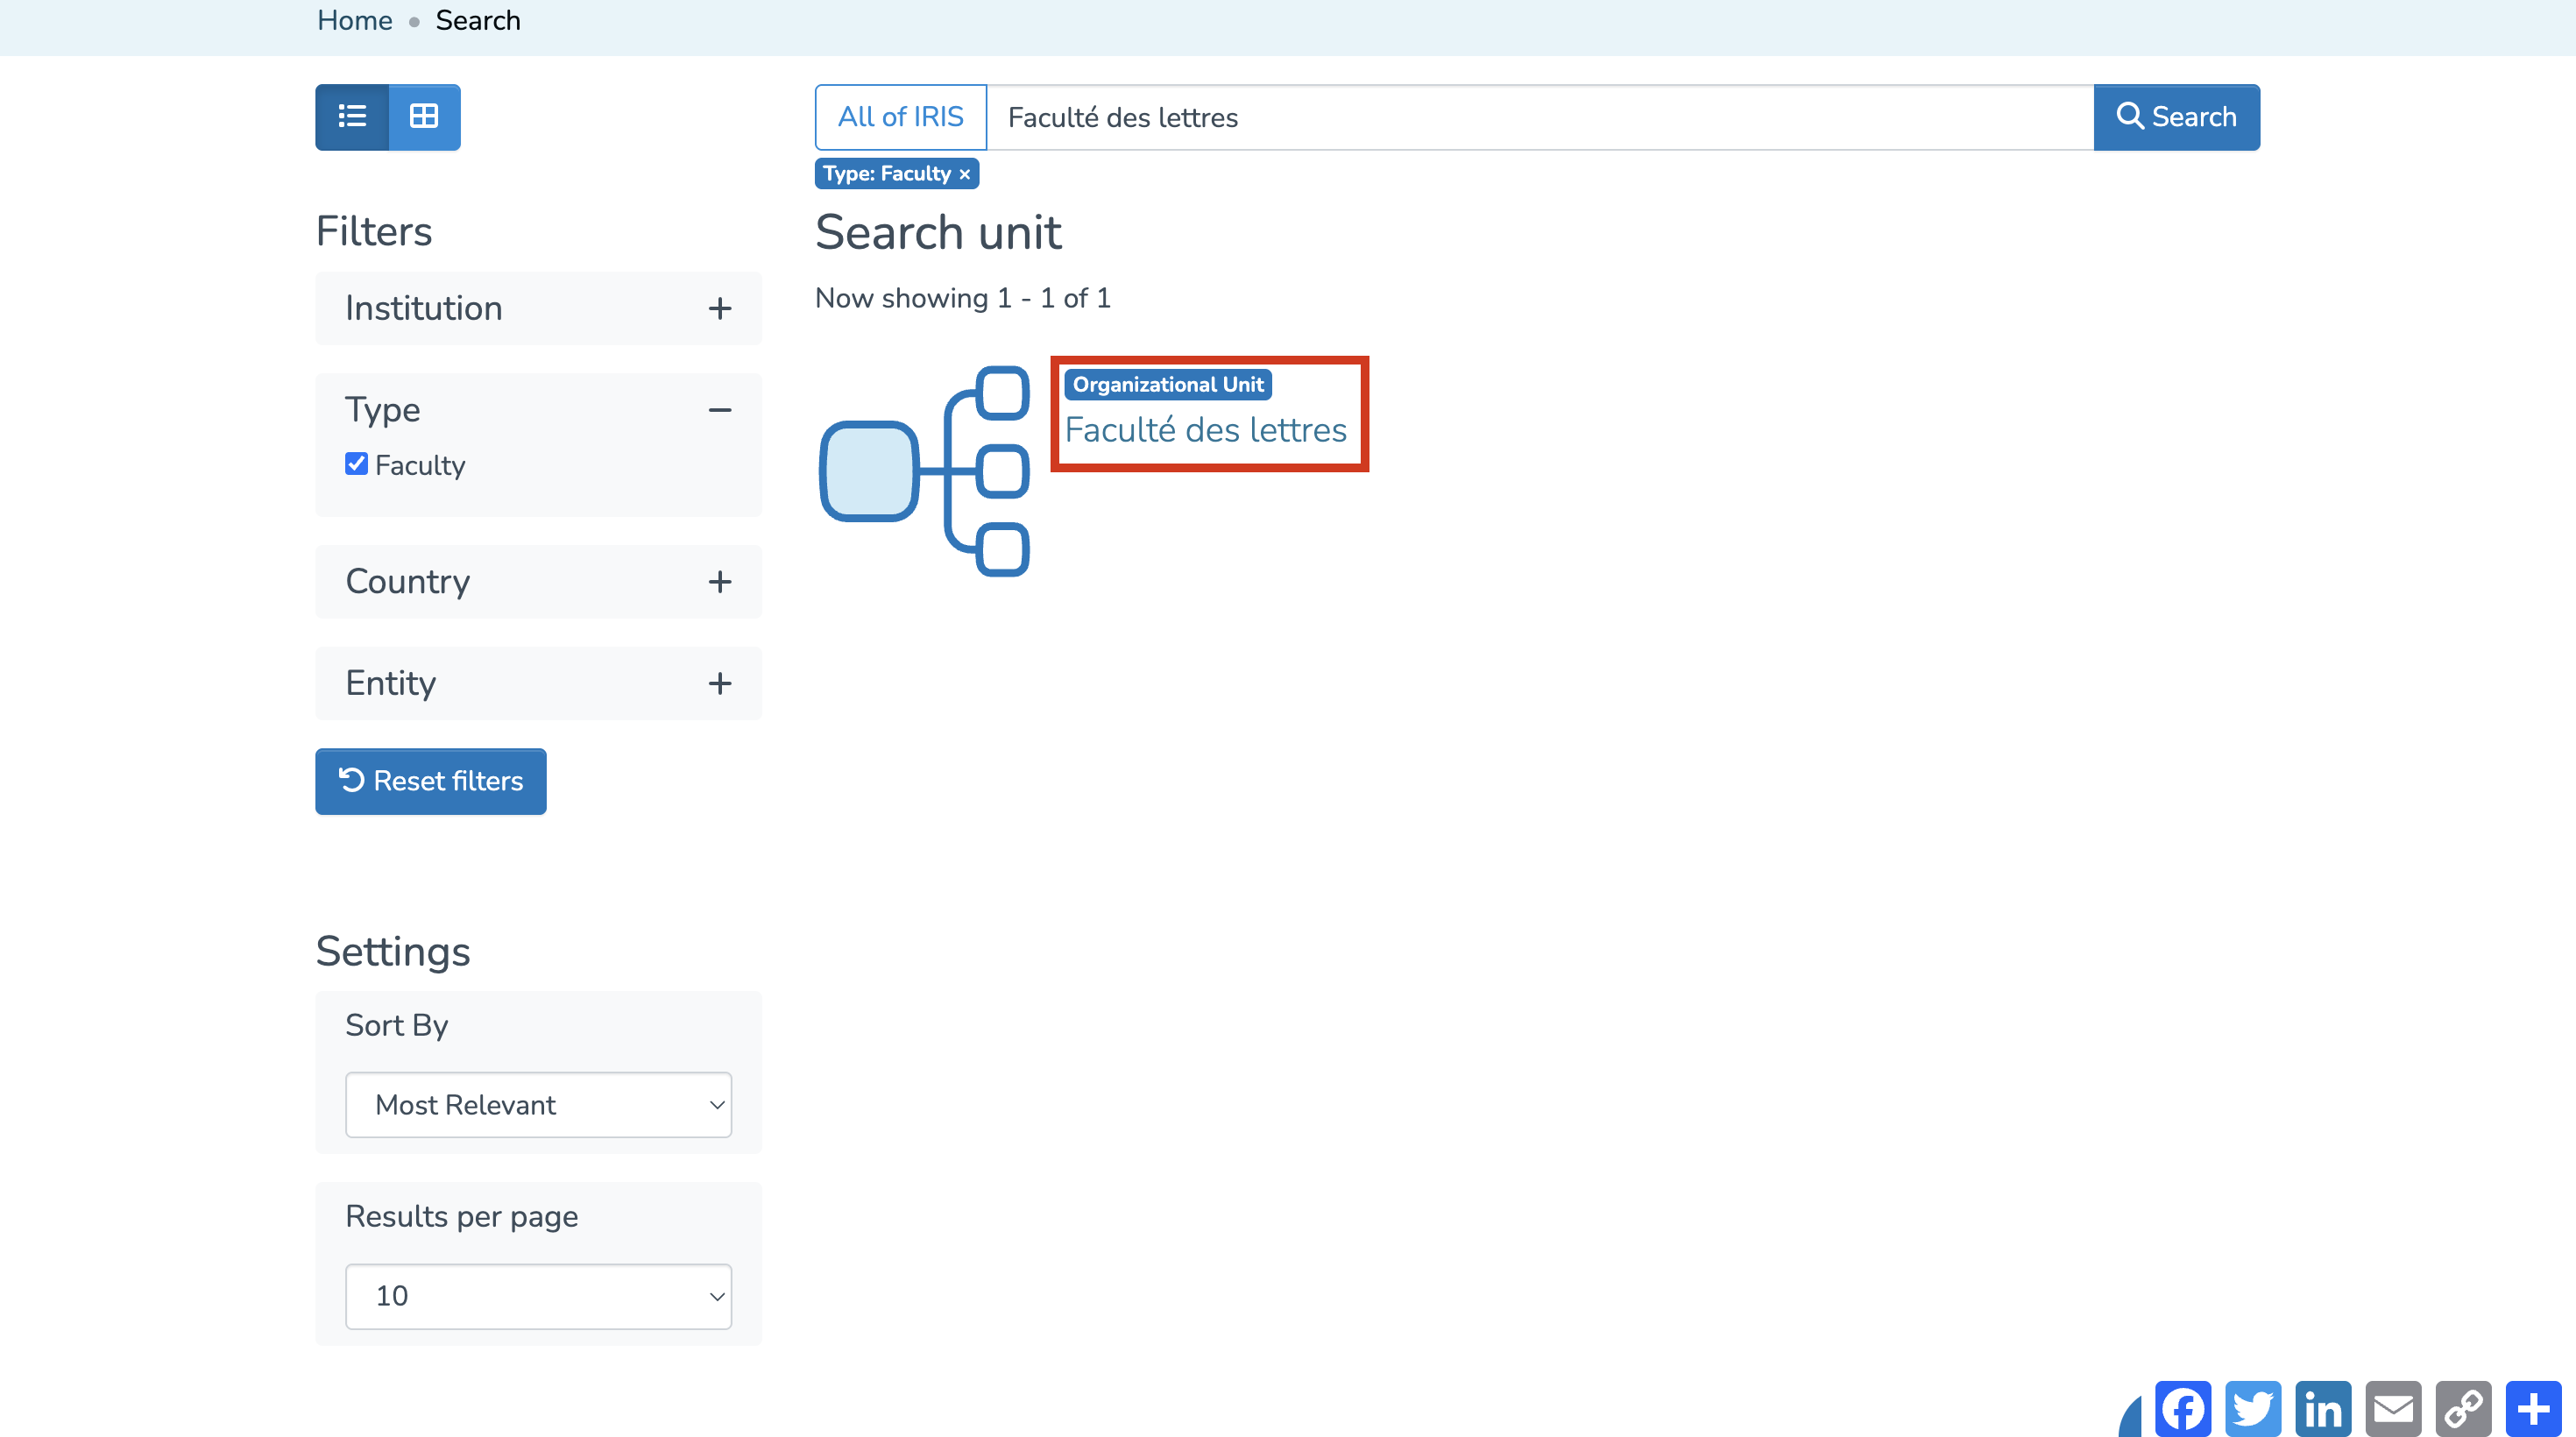
- To show only the relevant faculty, click on the “Type” filter and select “Faculty.”

- Click on the faculty’s name.

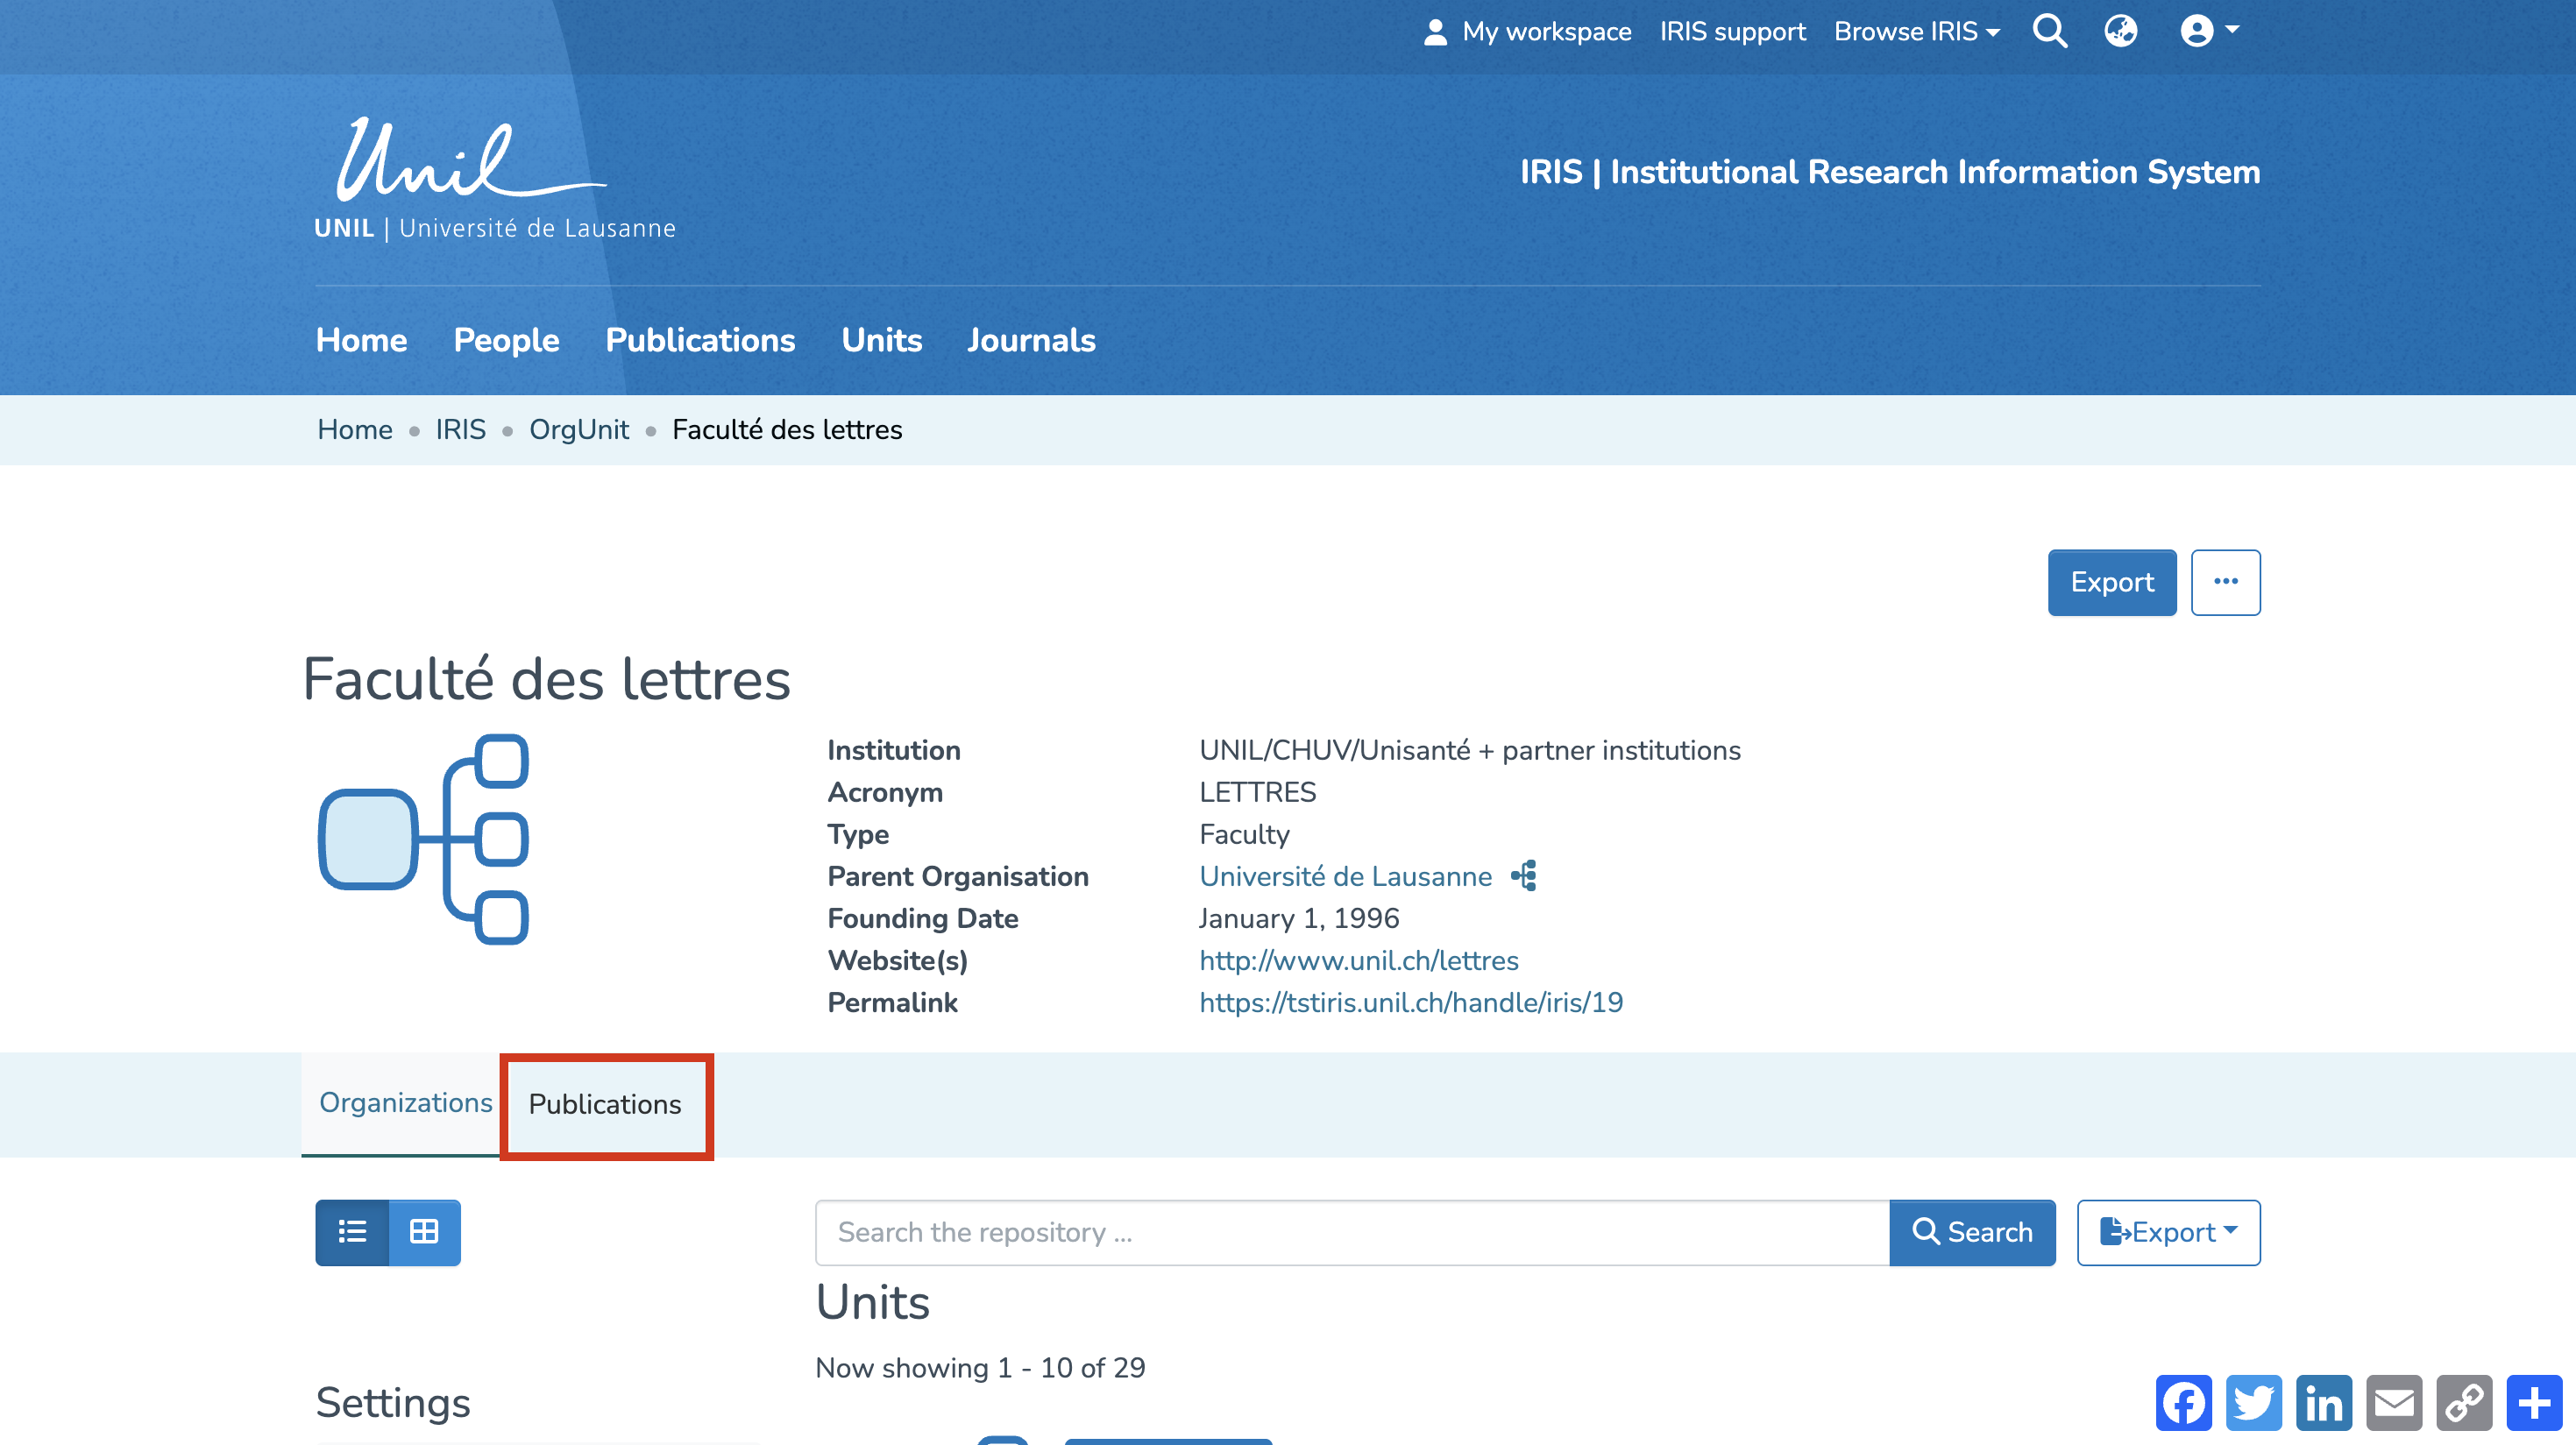
- Once on the faculty’s page, click on the “Publications” tab.

- You will now see all publications from the faculty and its organizations.
- You can use the available filters and settings to refine the results (by date, publication type, etc.).


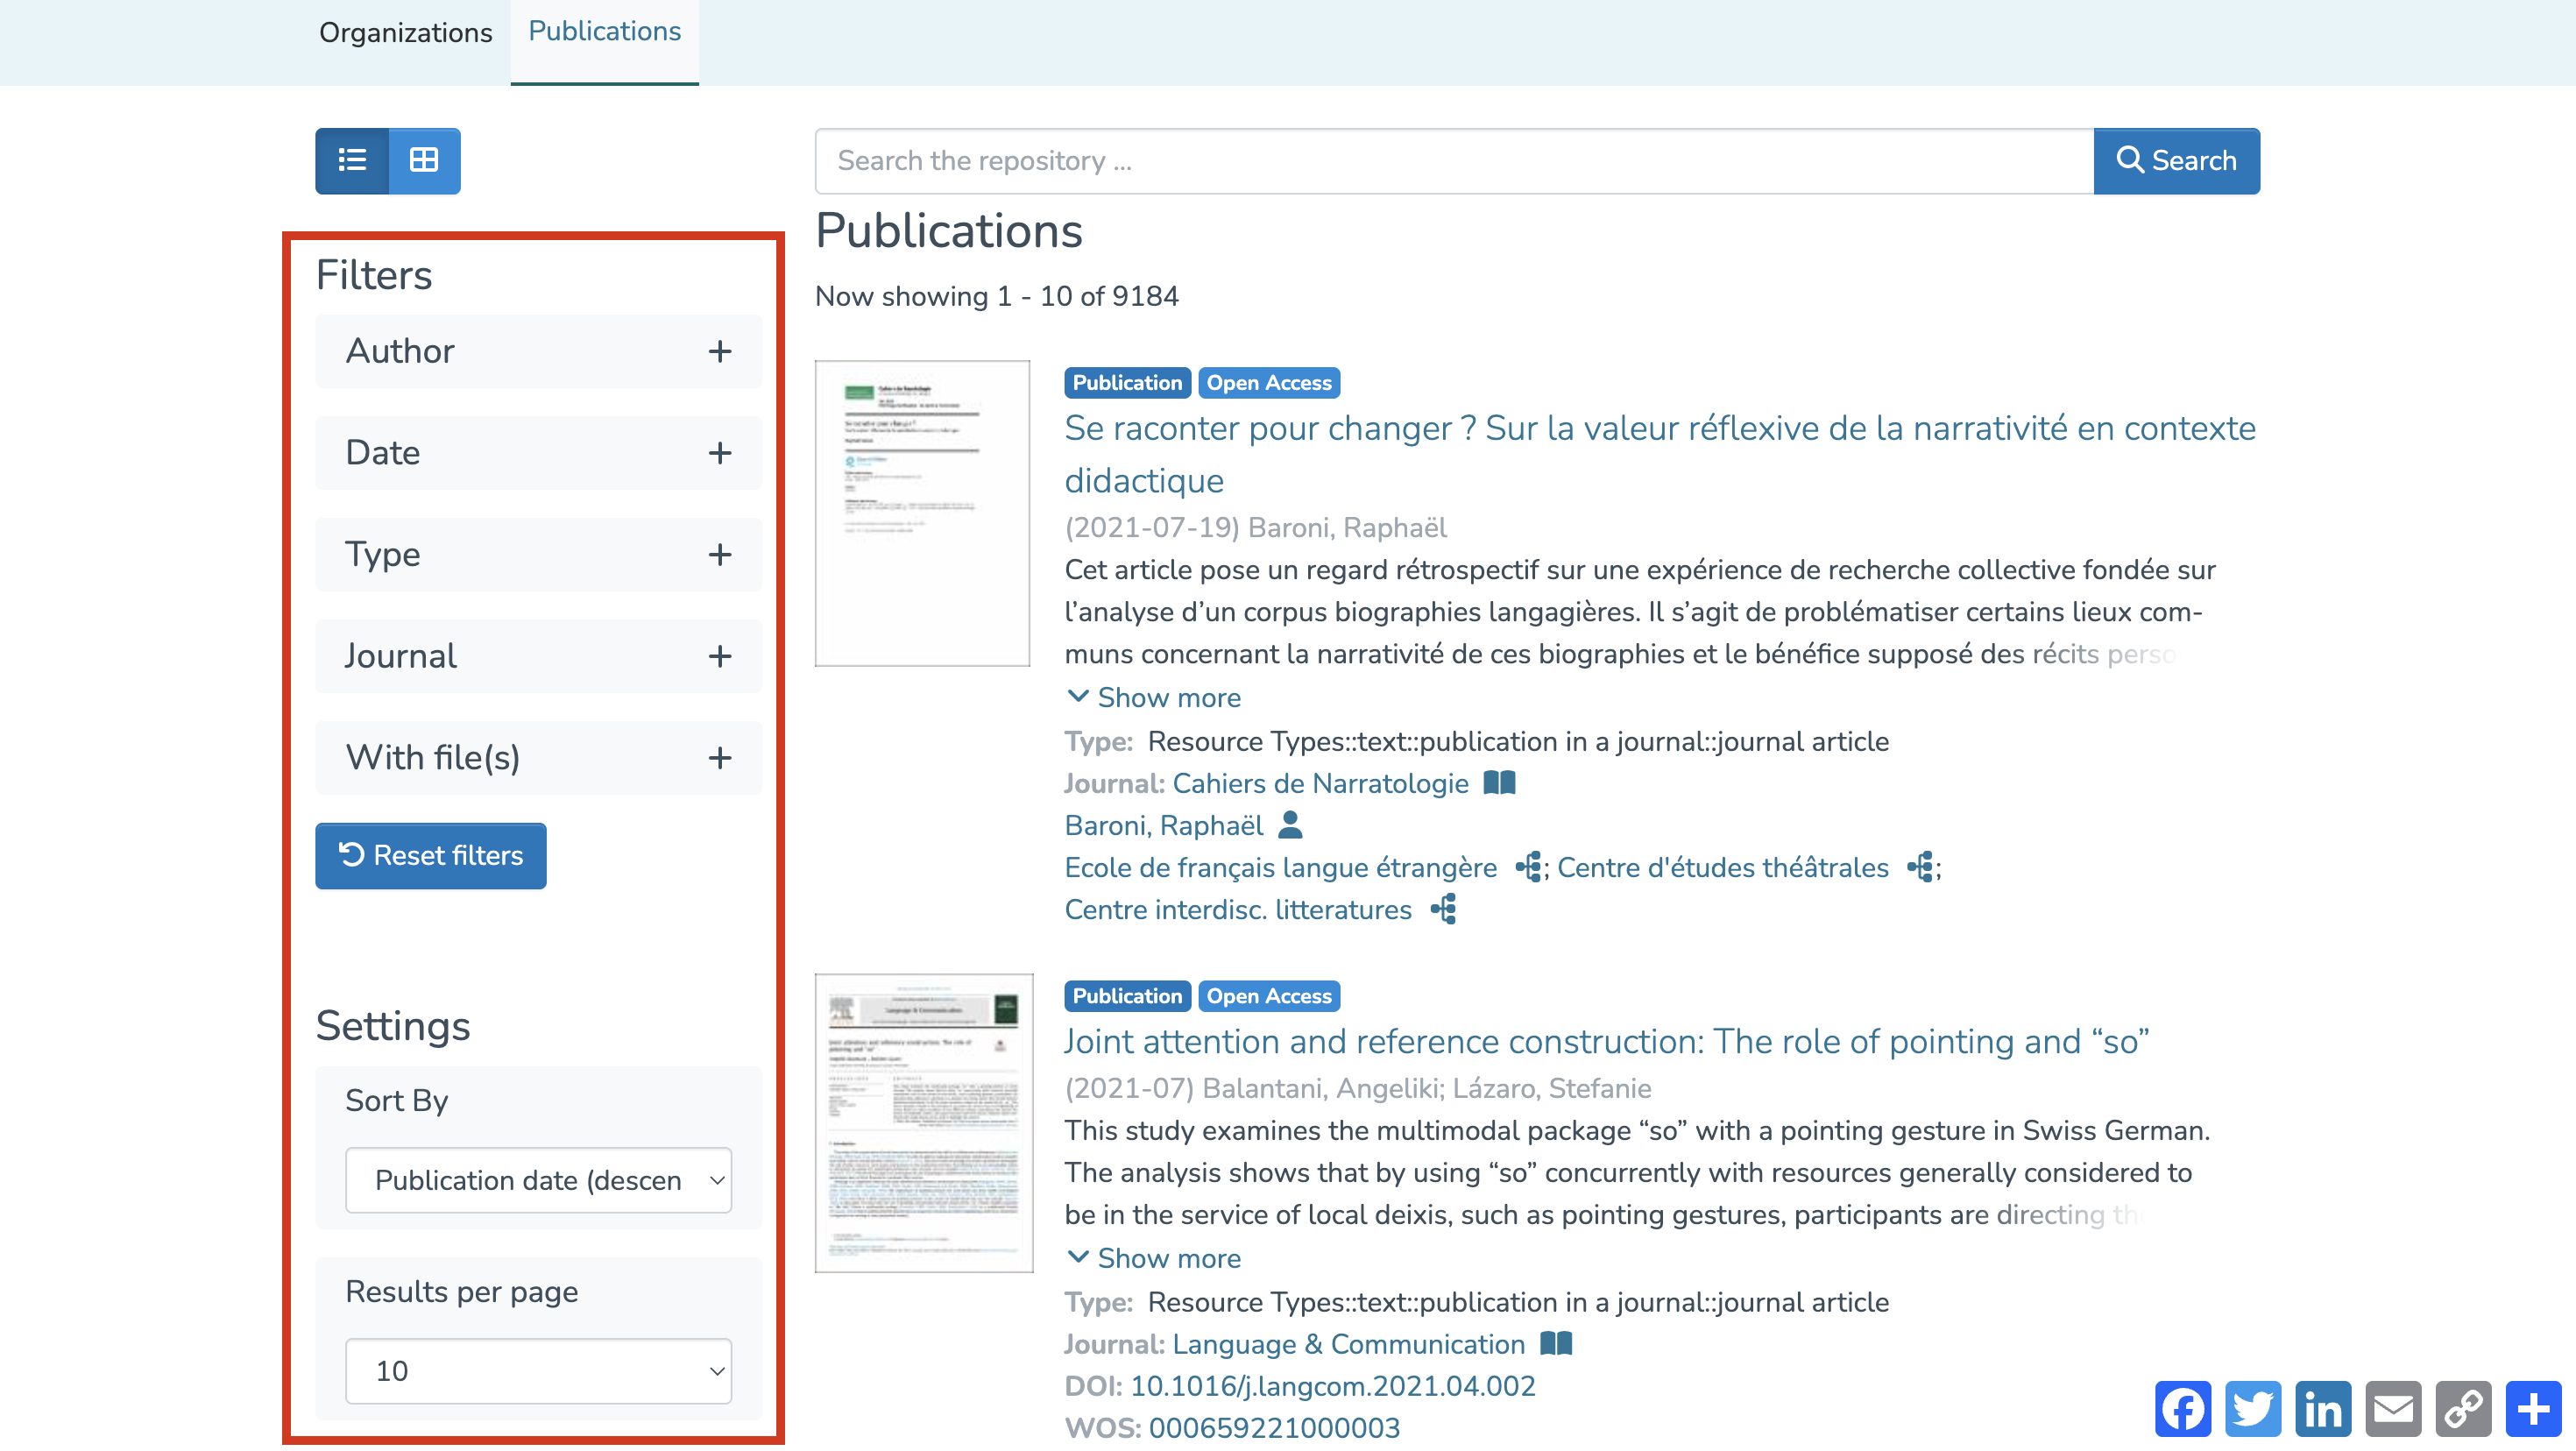
From the "Publications" tab
Unlike a search performed through the “Units” section, a search in the “Publications” section targets only the publications of the faculty itself, without including those of its associated organizations.
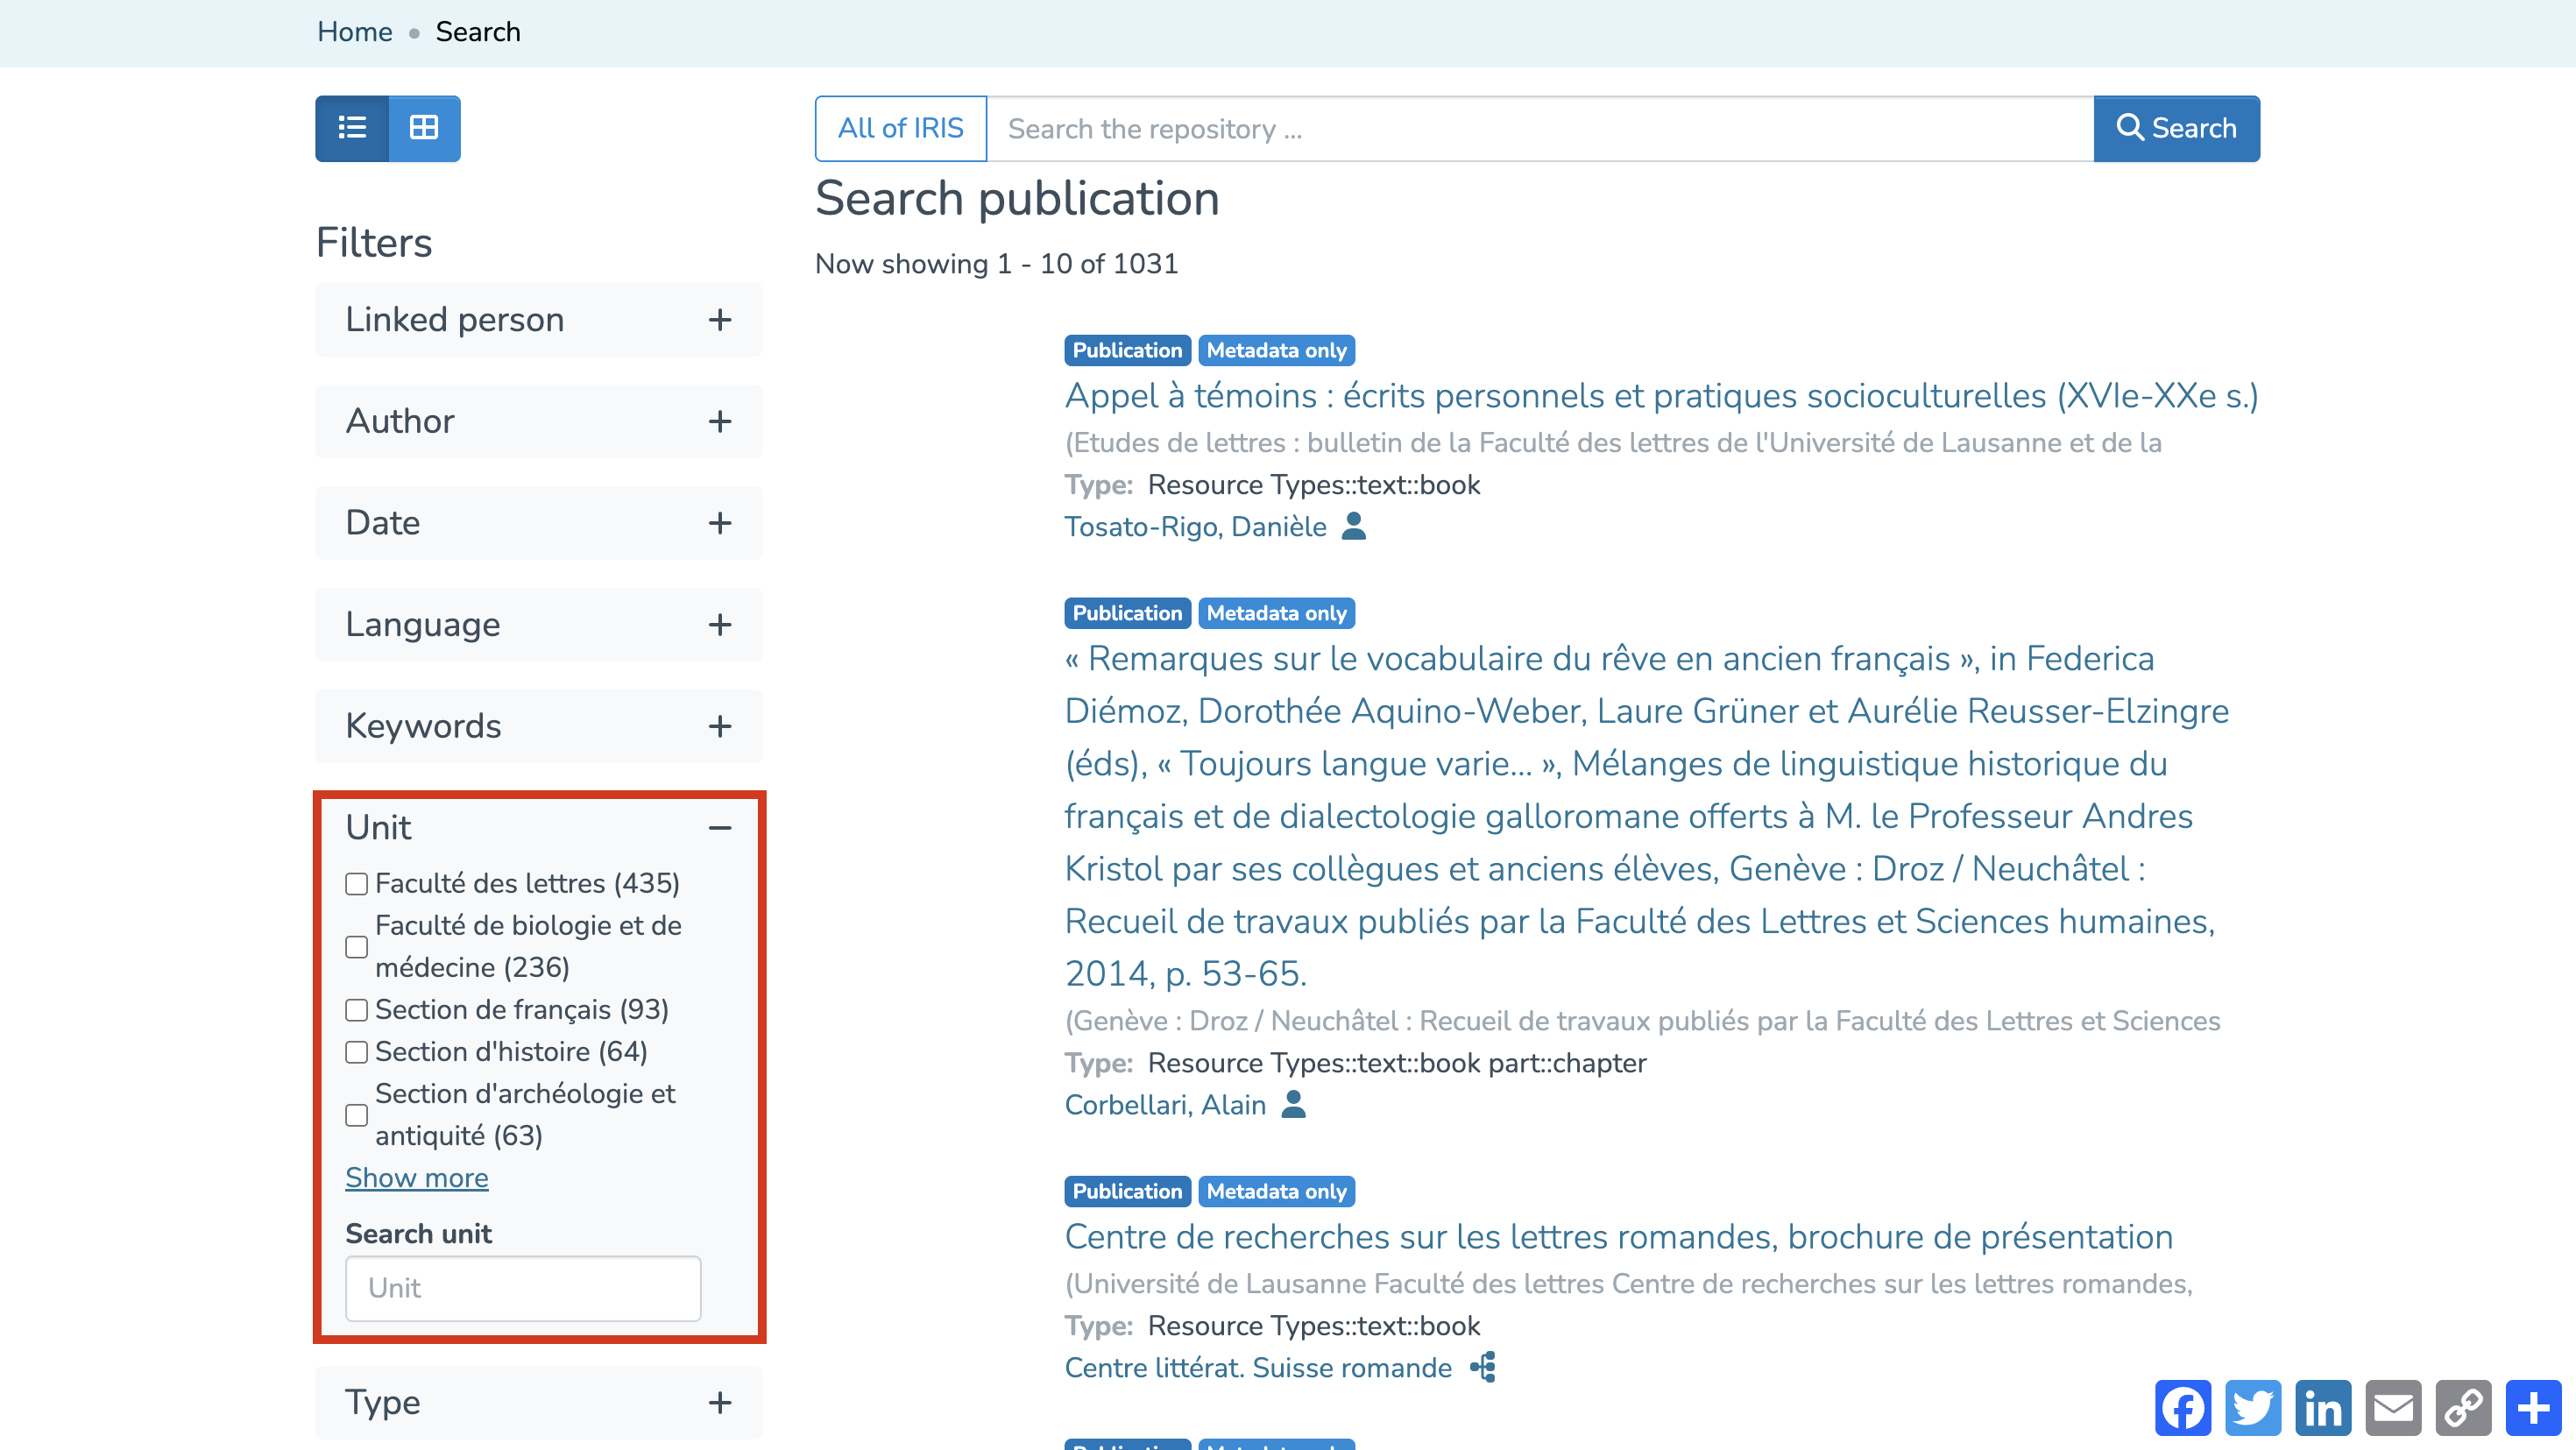
- From the homepage, click on “Publications.”

- To display publications specific to the relevant faculty, click on the “Unit” filter. You can either type the name of the faculty directly into the search bar, or scroll through the list by clicking “Show more” and selecting it manually.

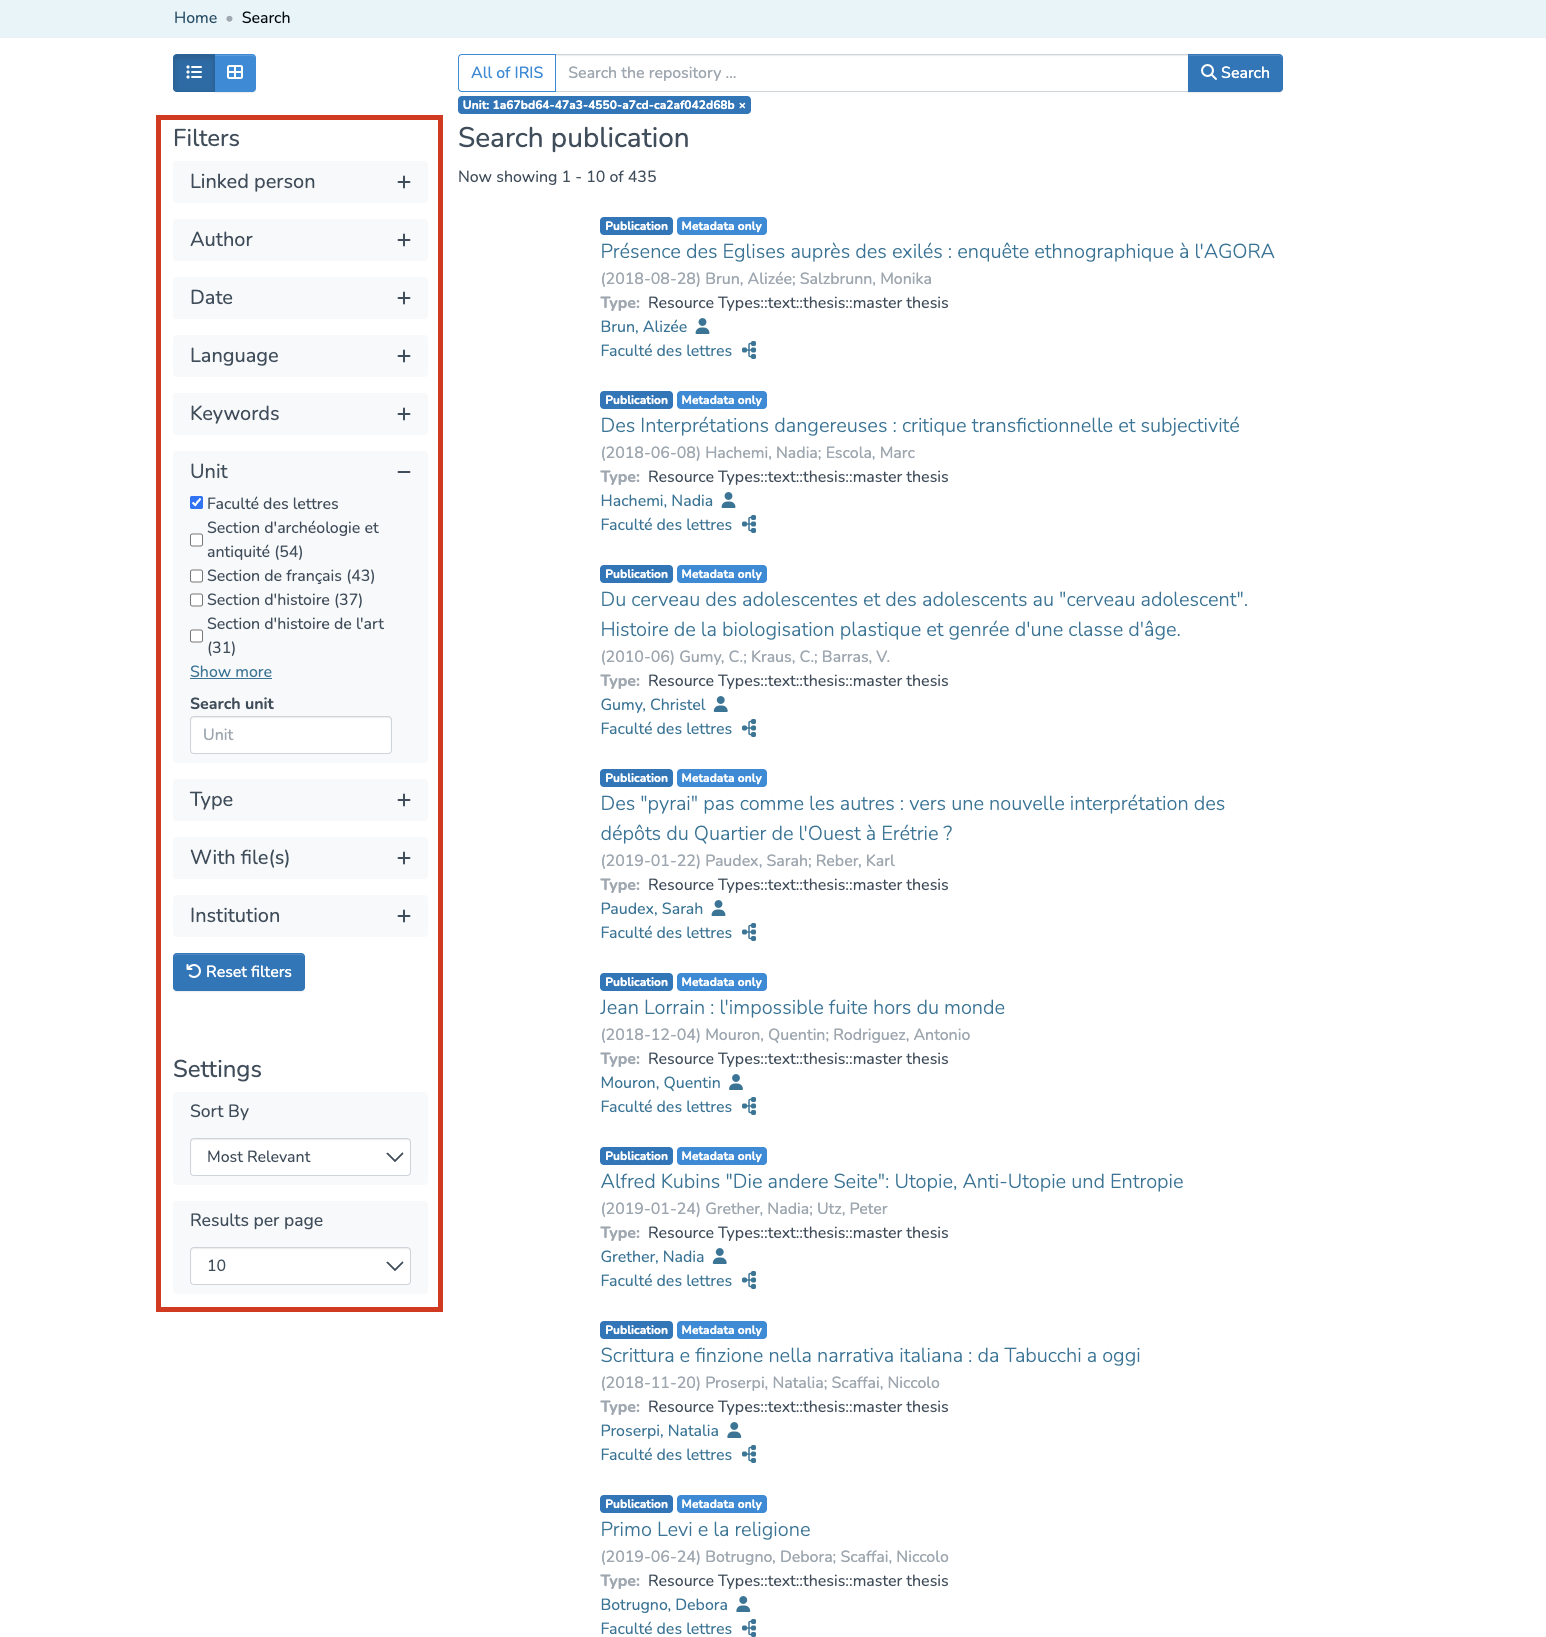
- The page will automatically refresh and display only the publications of the selected faculty, excluding those from its associated units, unlike the results shown when searching through the “Units” tab.
- You can further refine the results using the other available filters and settings.

My workspace
The voice in this video was generated by artificial intelligence.
Access
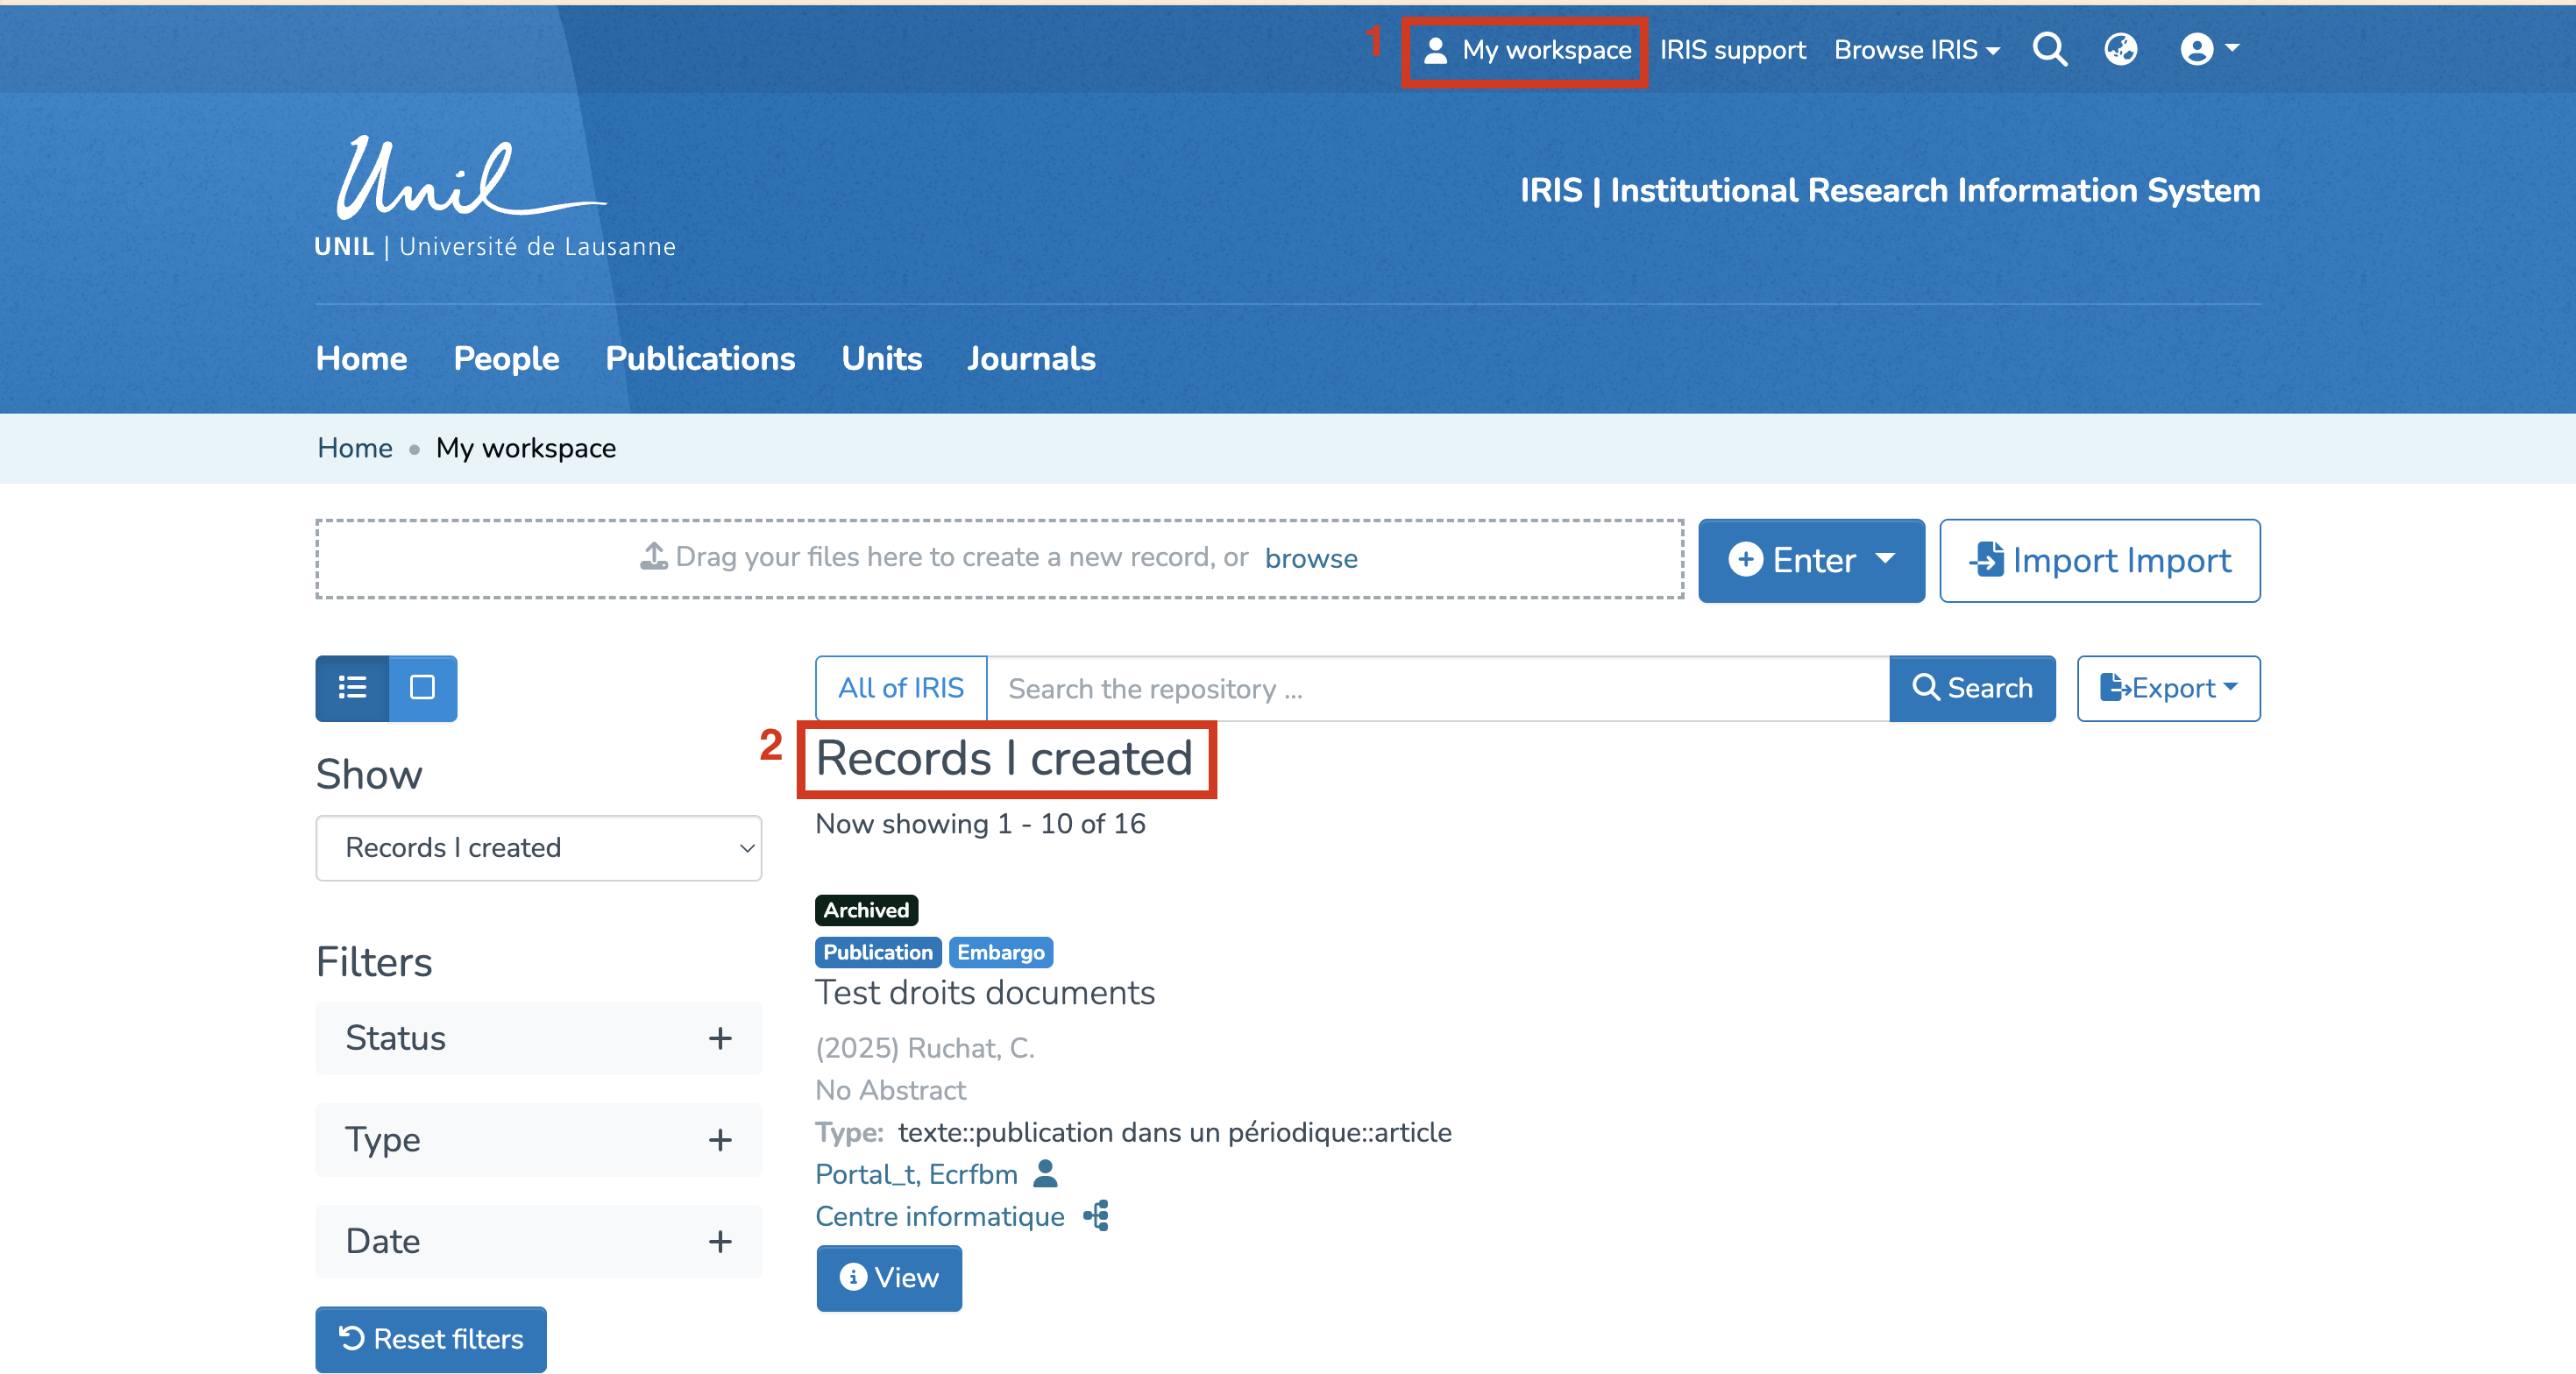
You can access your workspace directly from the main menu by clicking on “My Workspace.”

You can also access it by clicking (1) on your profile icon, then (2) on “My Workspace.”

Overview
The workspace is displayed as follows. From here, you can create, import, visualize, modify and export records.
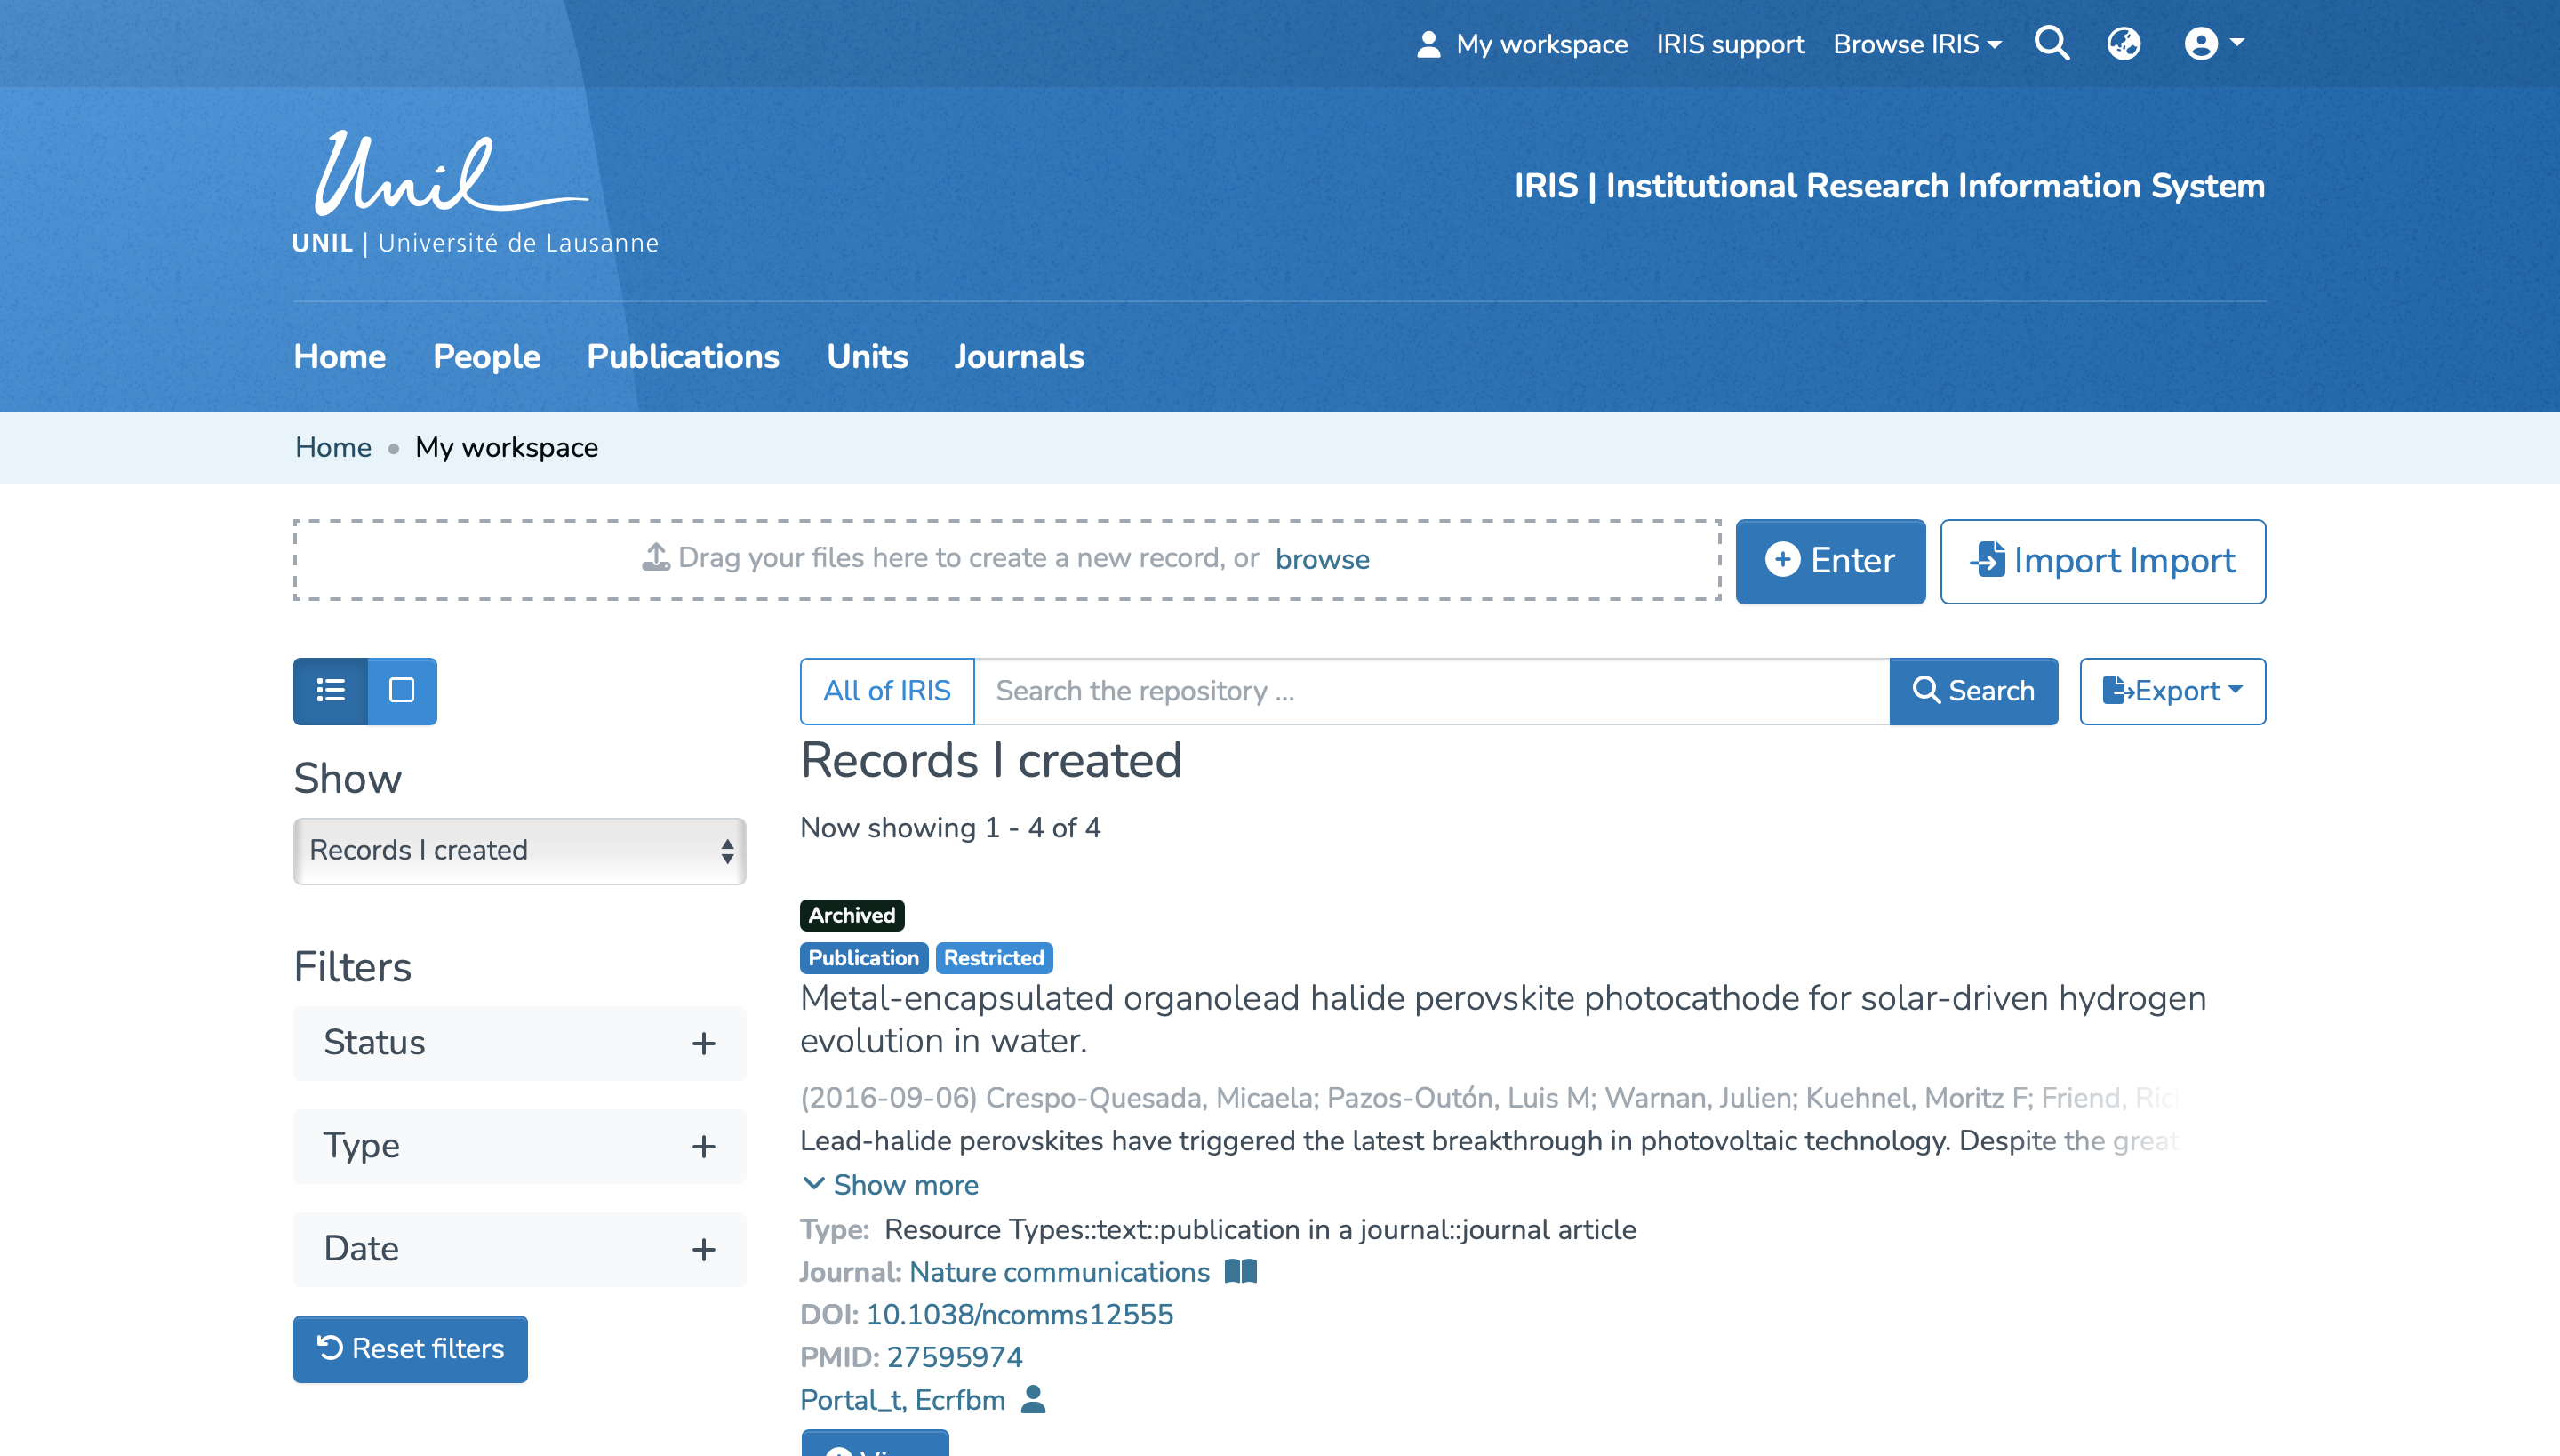
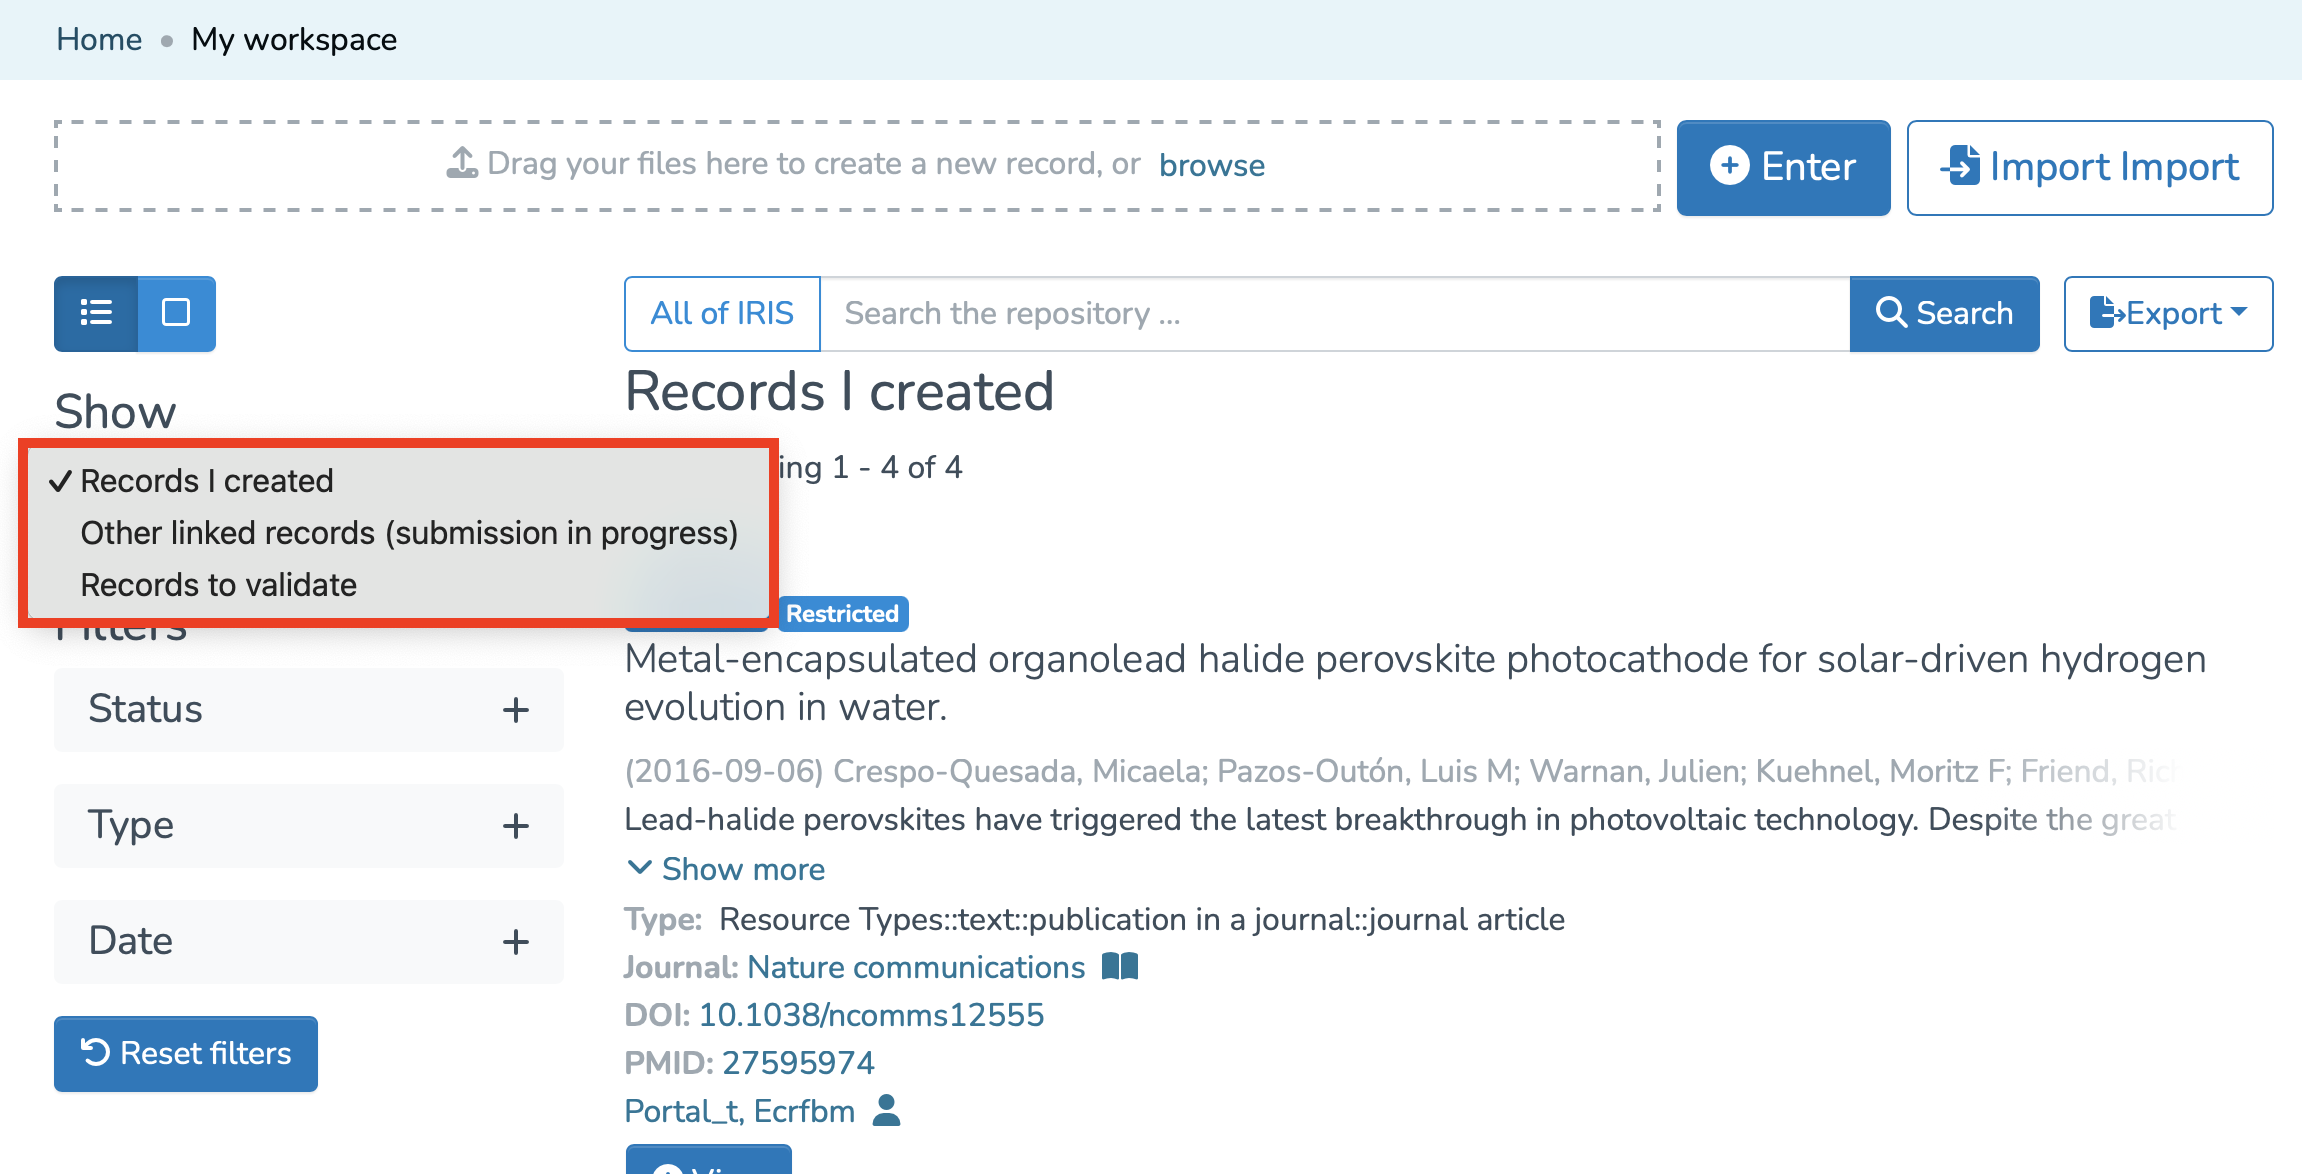
It is divided into three sections:
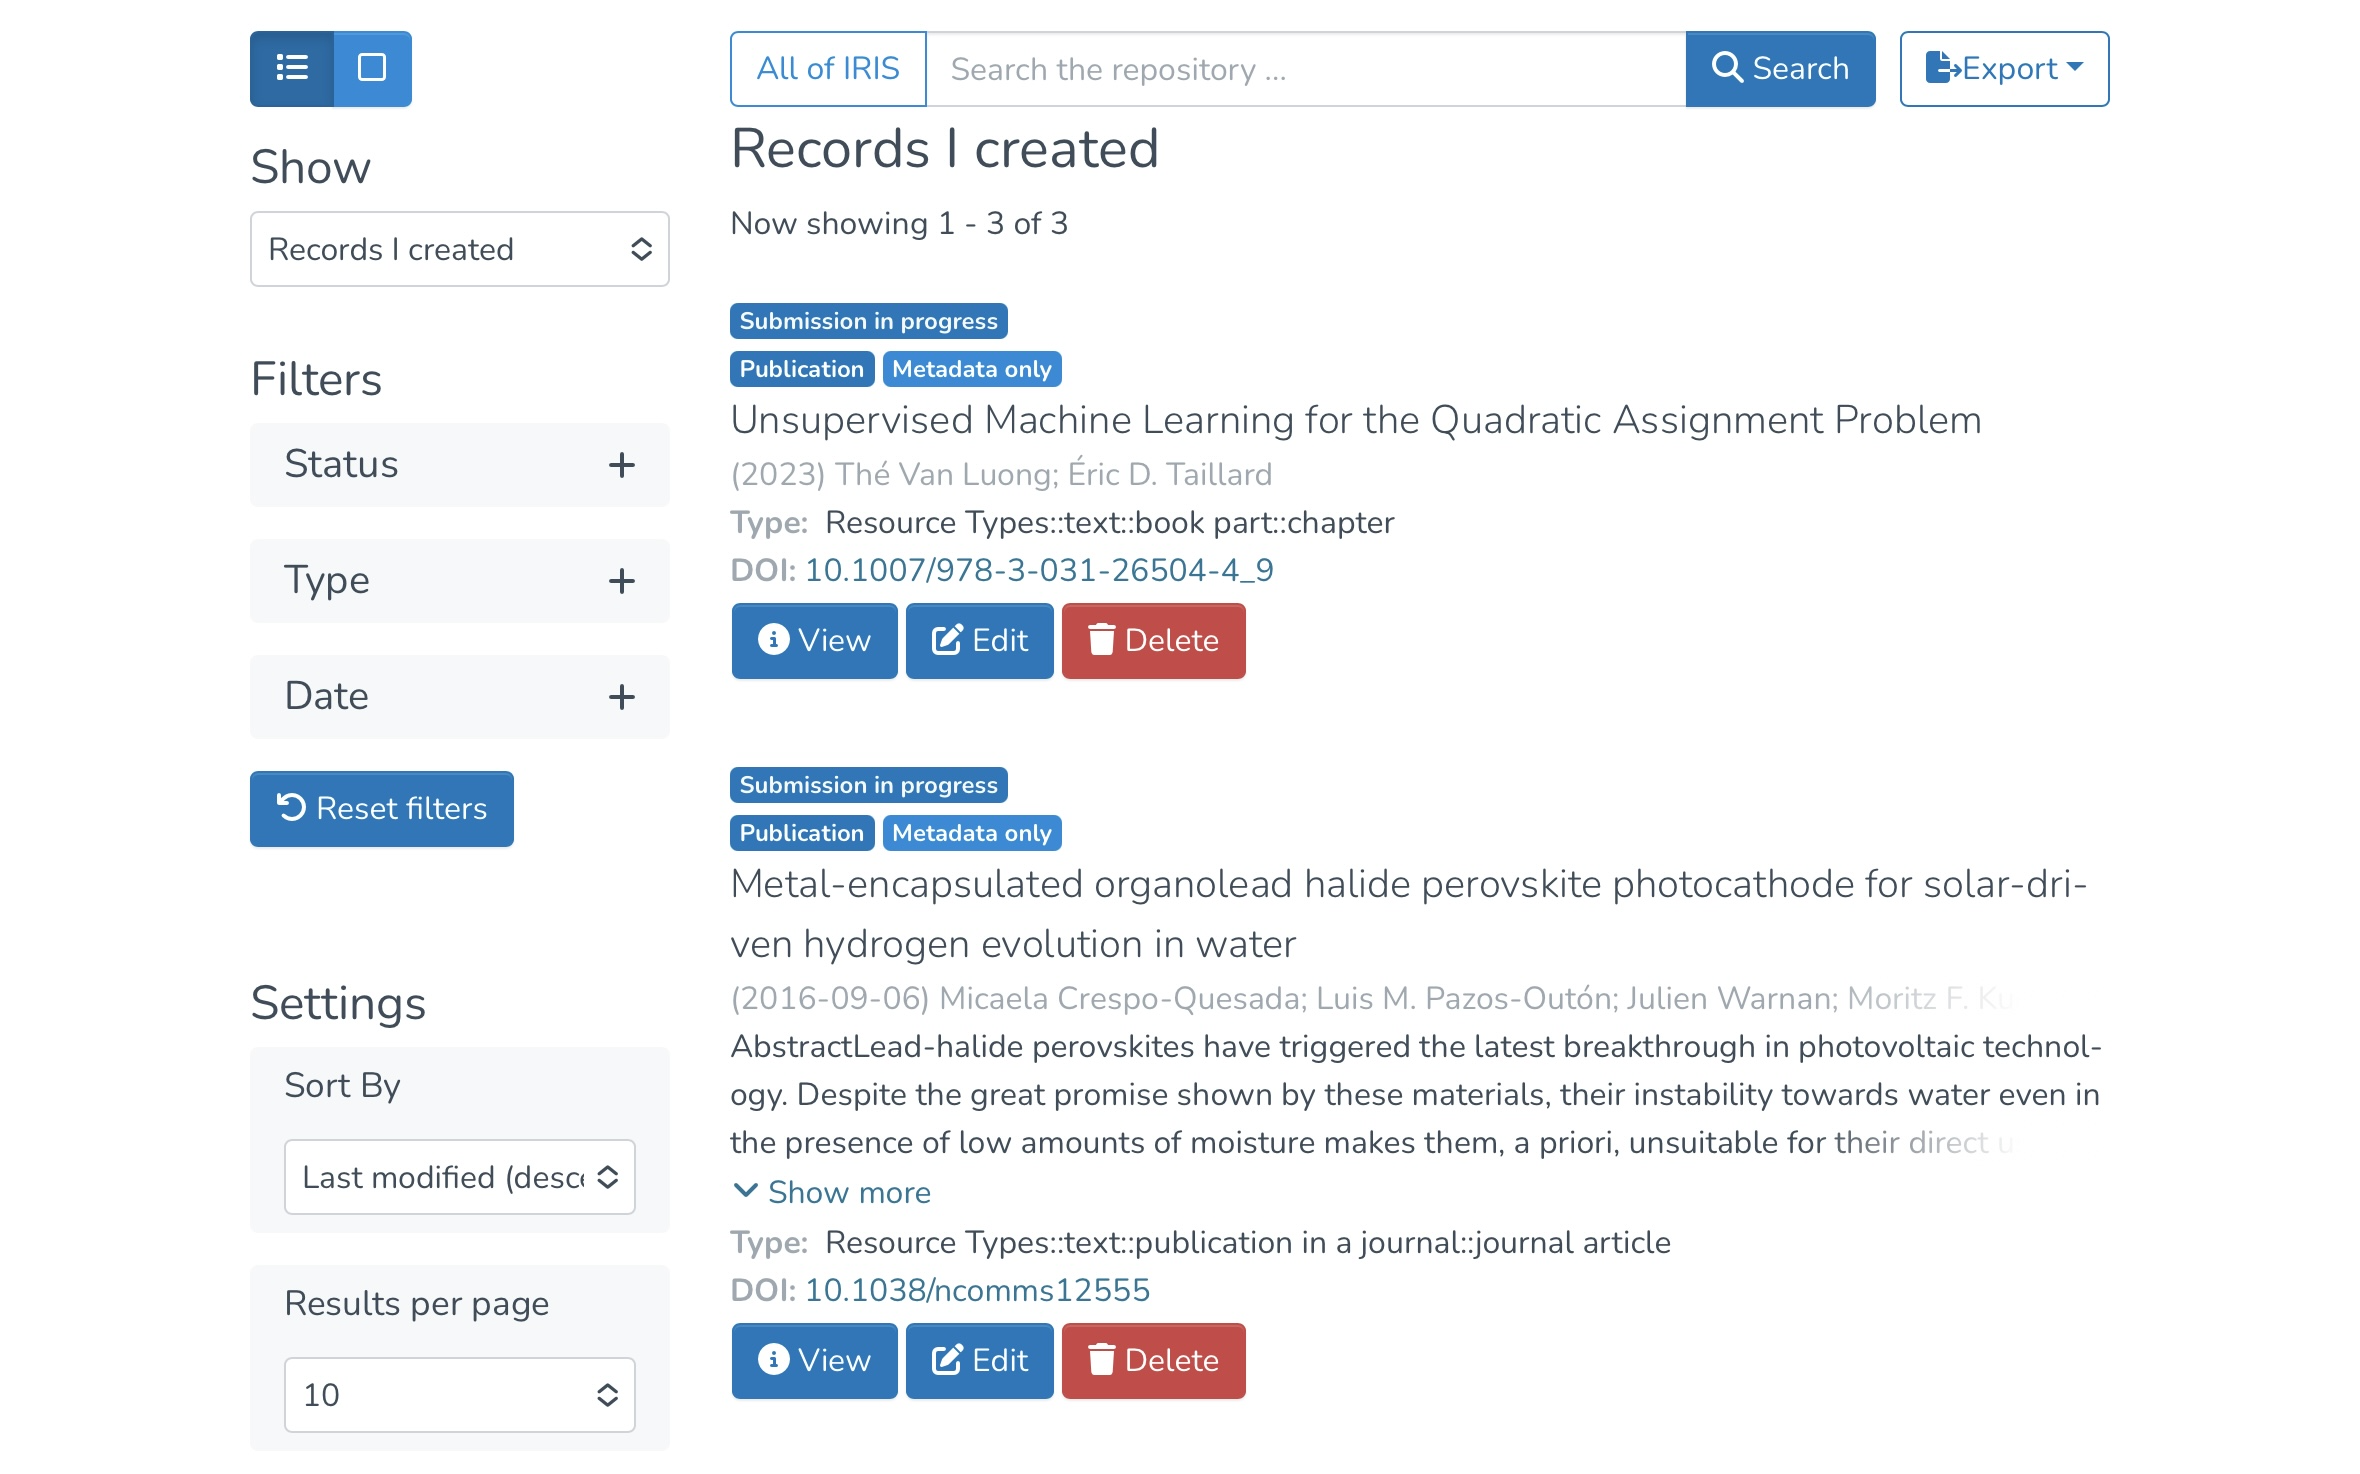
1. Records I created: This view includes only the records you have entered yourself. You will find records at all stages (draft, in progress, archived), which you can edit, complete, or track.
2. Other linked records (submission in progress): This section displays only records currently in progress to which you are linked, but which you did not create yourself. Records that have already been archived do not appear here.
3. Records to validate: If you are a validator, this section lists the records awaiting your review. You can take them in charge, edit them, approve them, or reject them, as needed.
To display all records you are linked to that are in archived status, you need to access your researcher profile.
Data entry and editing
Learn here how to create, modify and structure content on IRIS. This section details the data entry steps, the fields to fill in, the formatting options and the rules to follow to ensure the consistency and quality of the information.
Entering a publication manually
The voice in this video was generated by artificial intelligence.
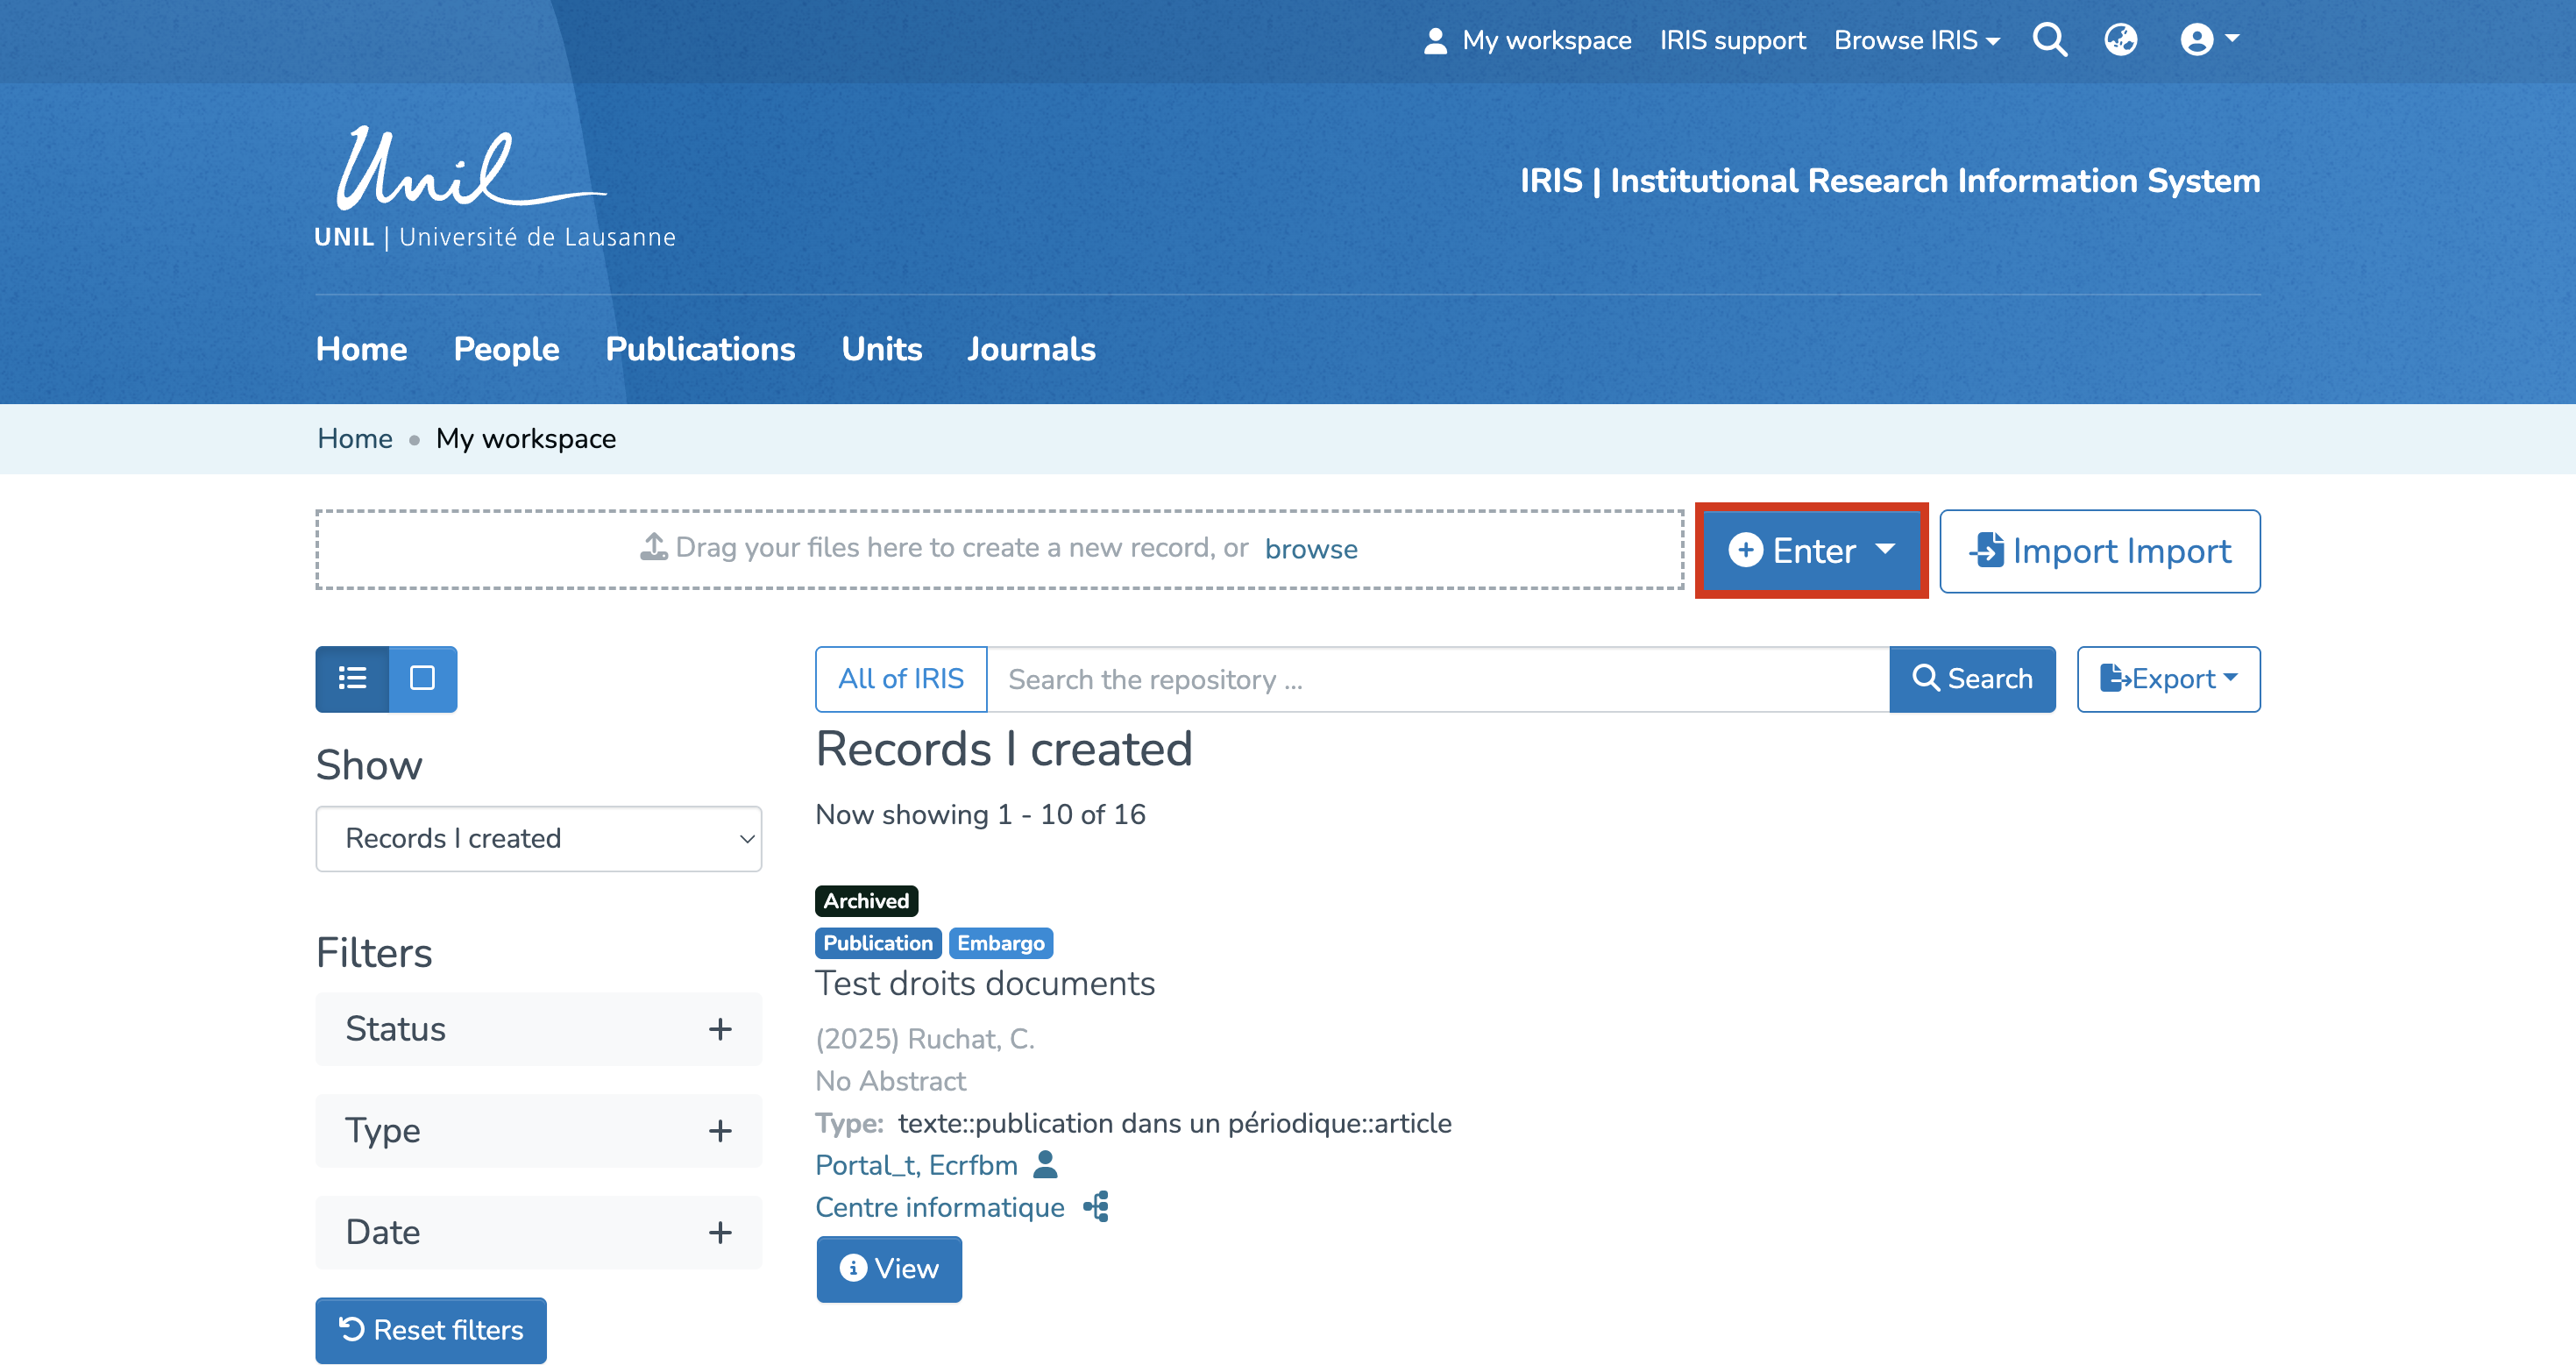
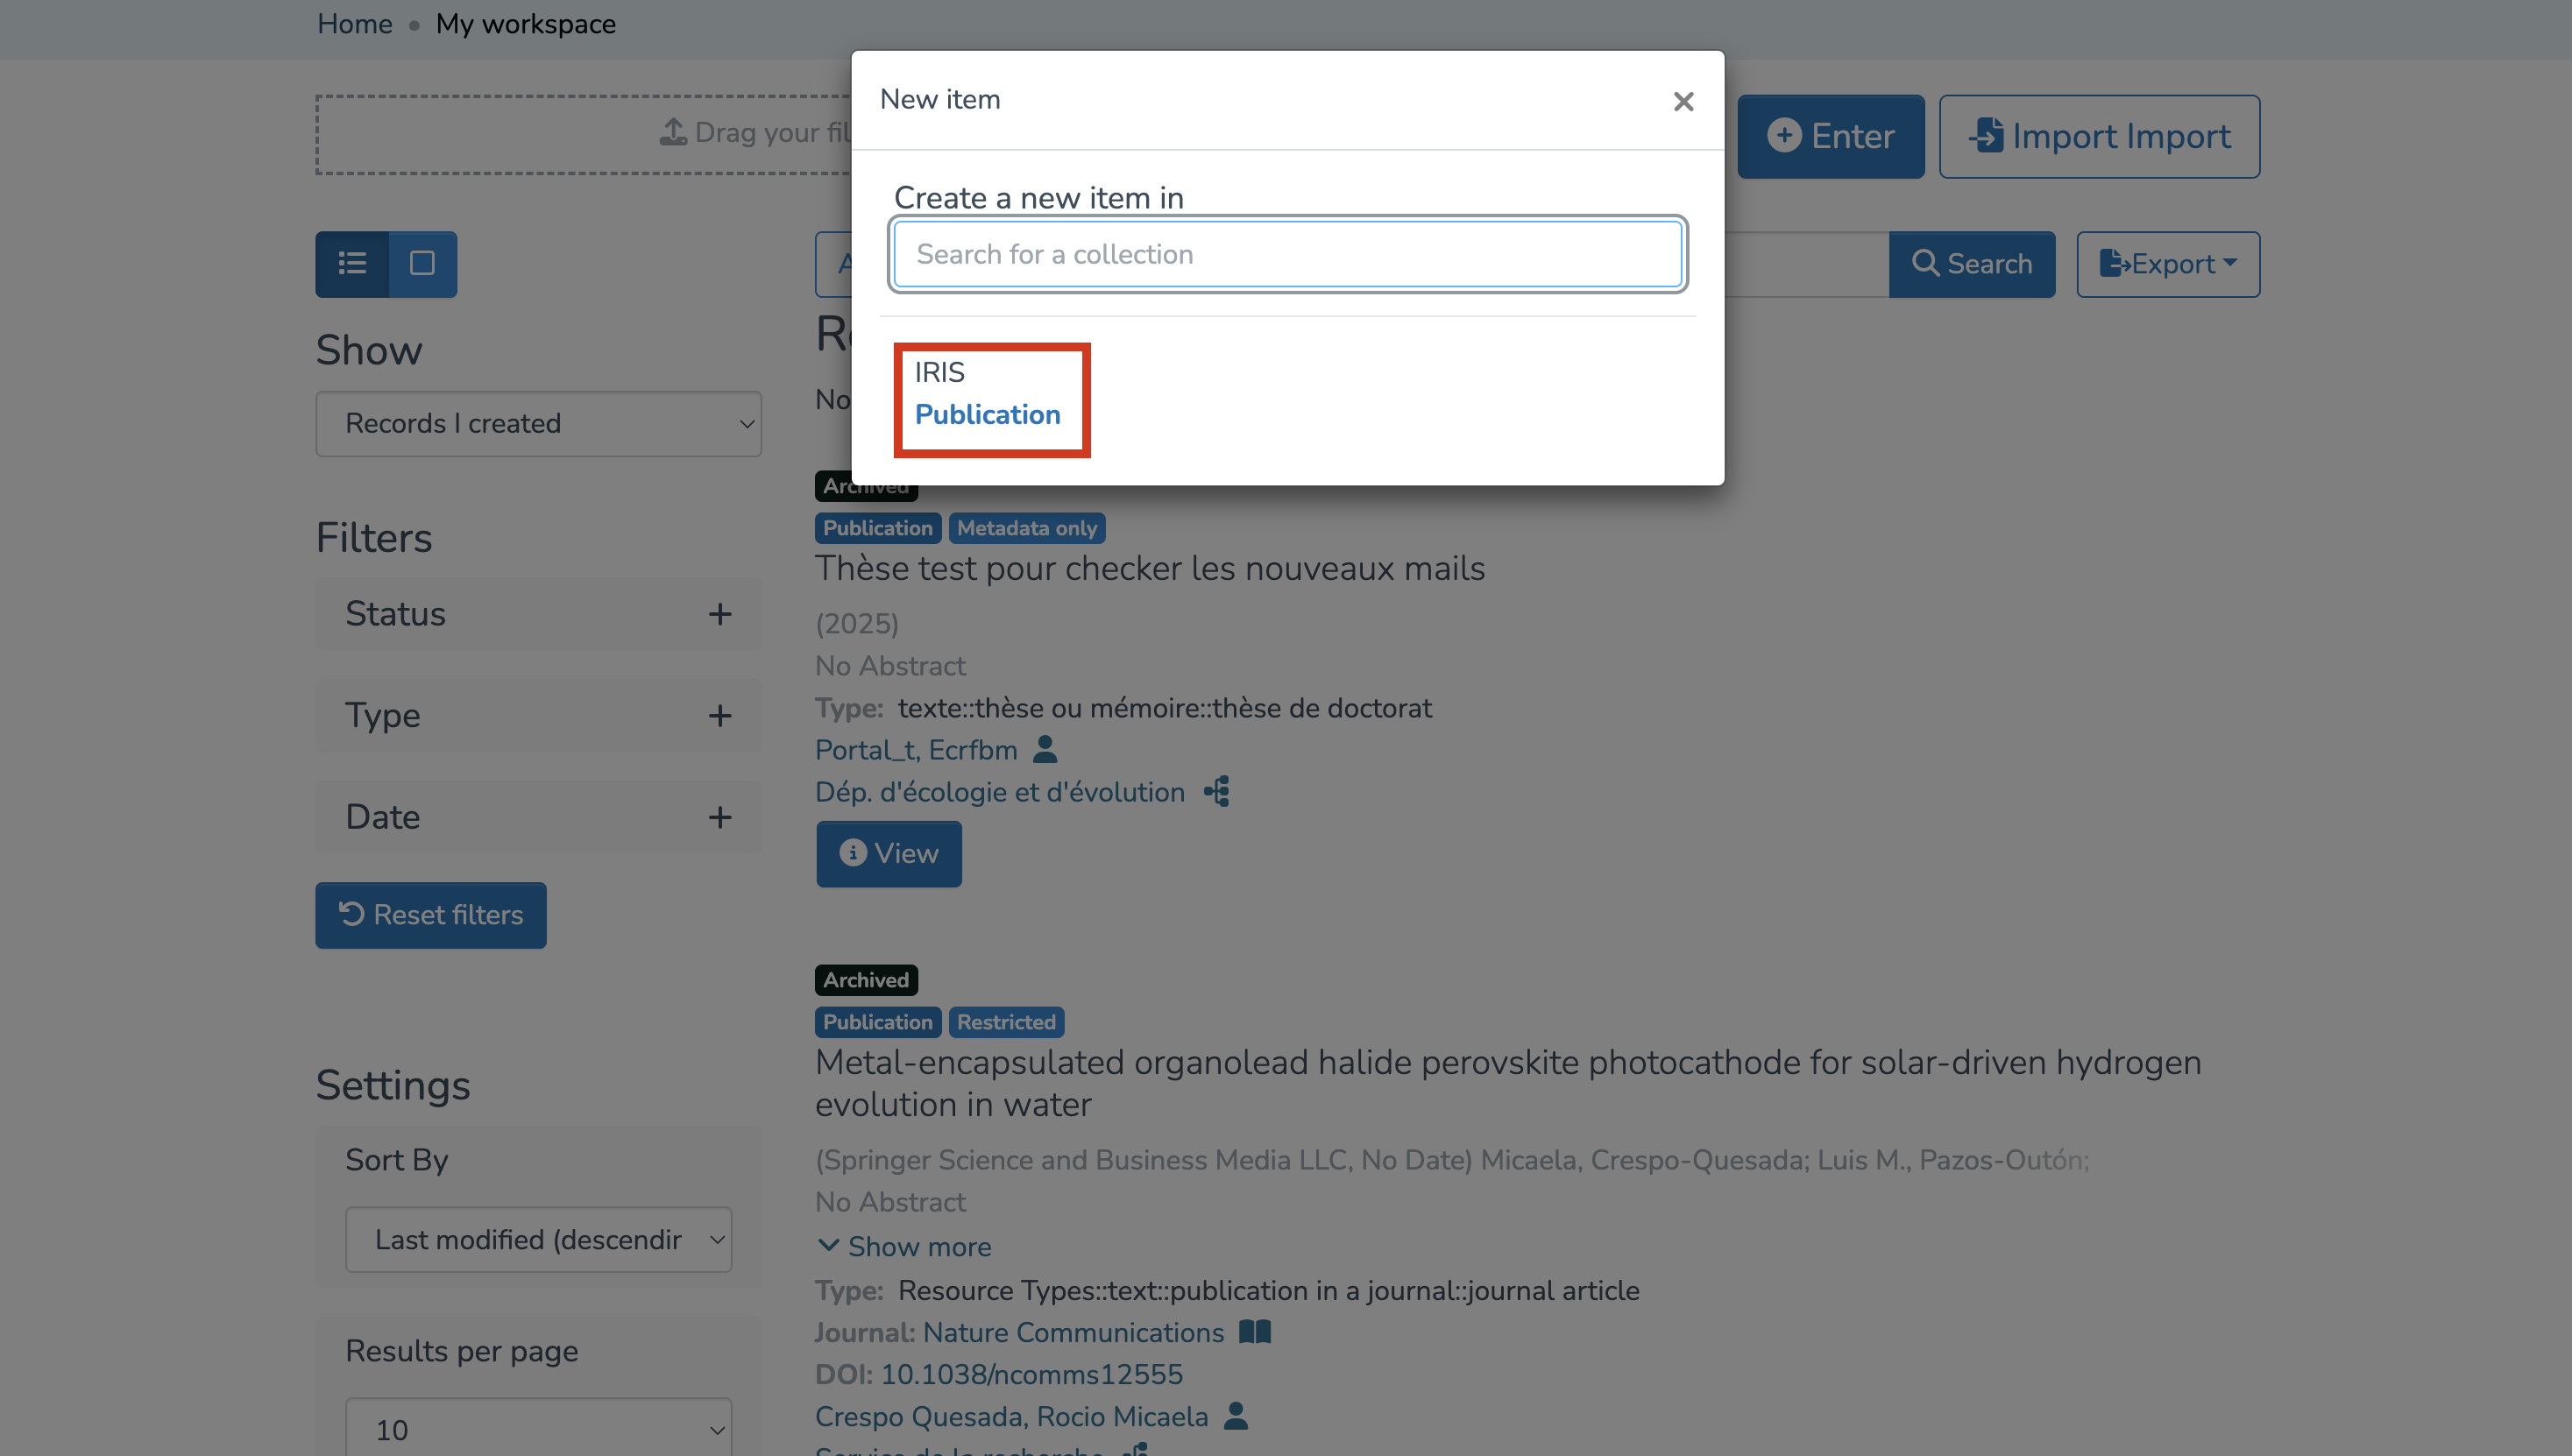
Enter a new publication
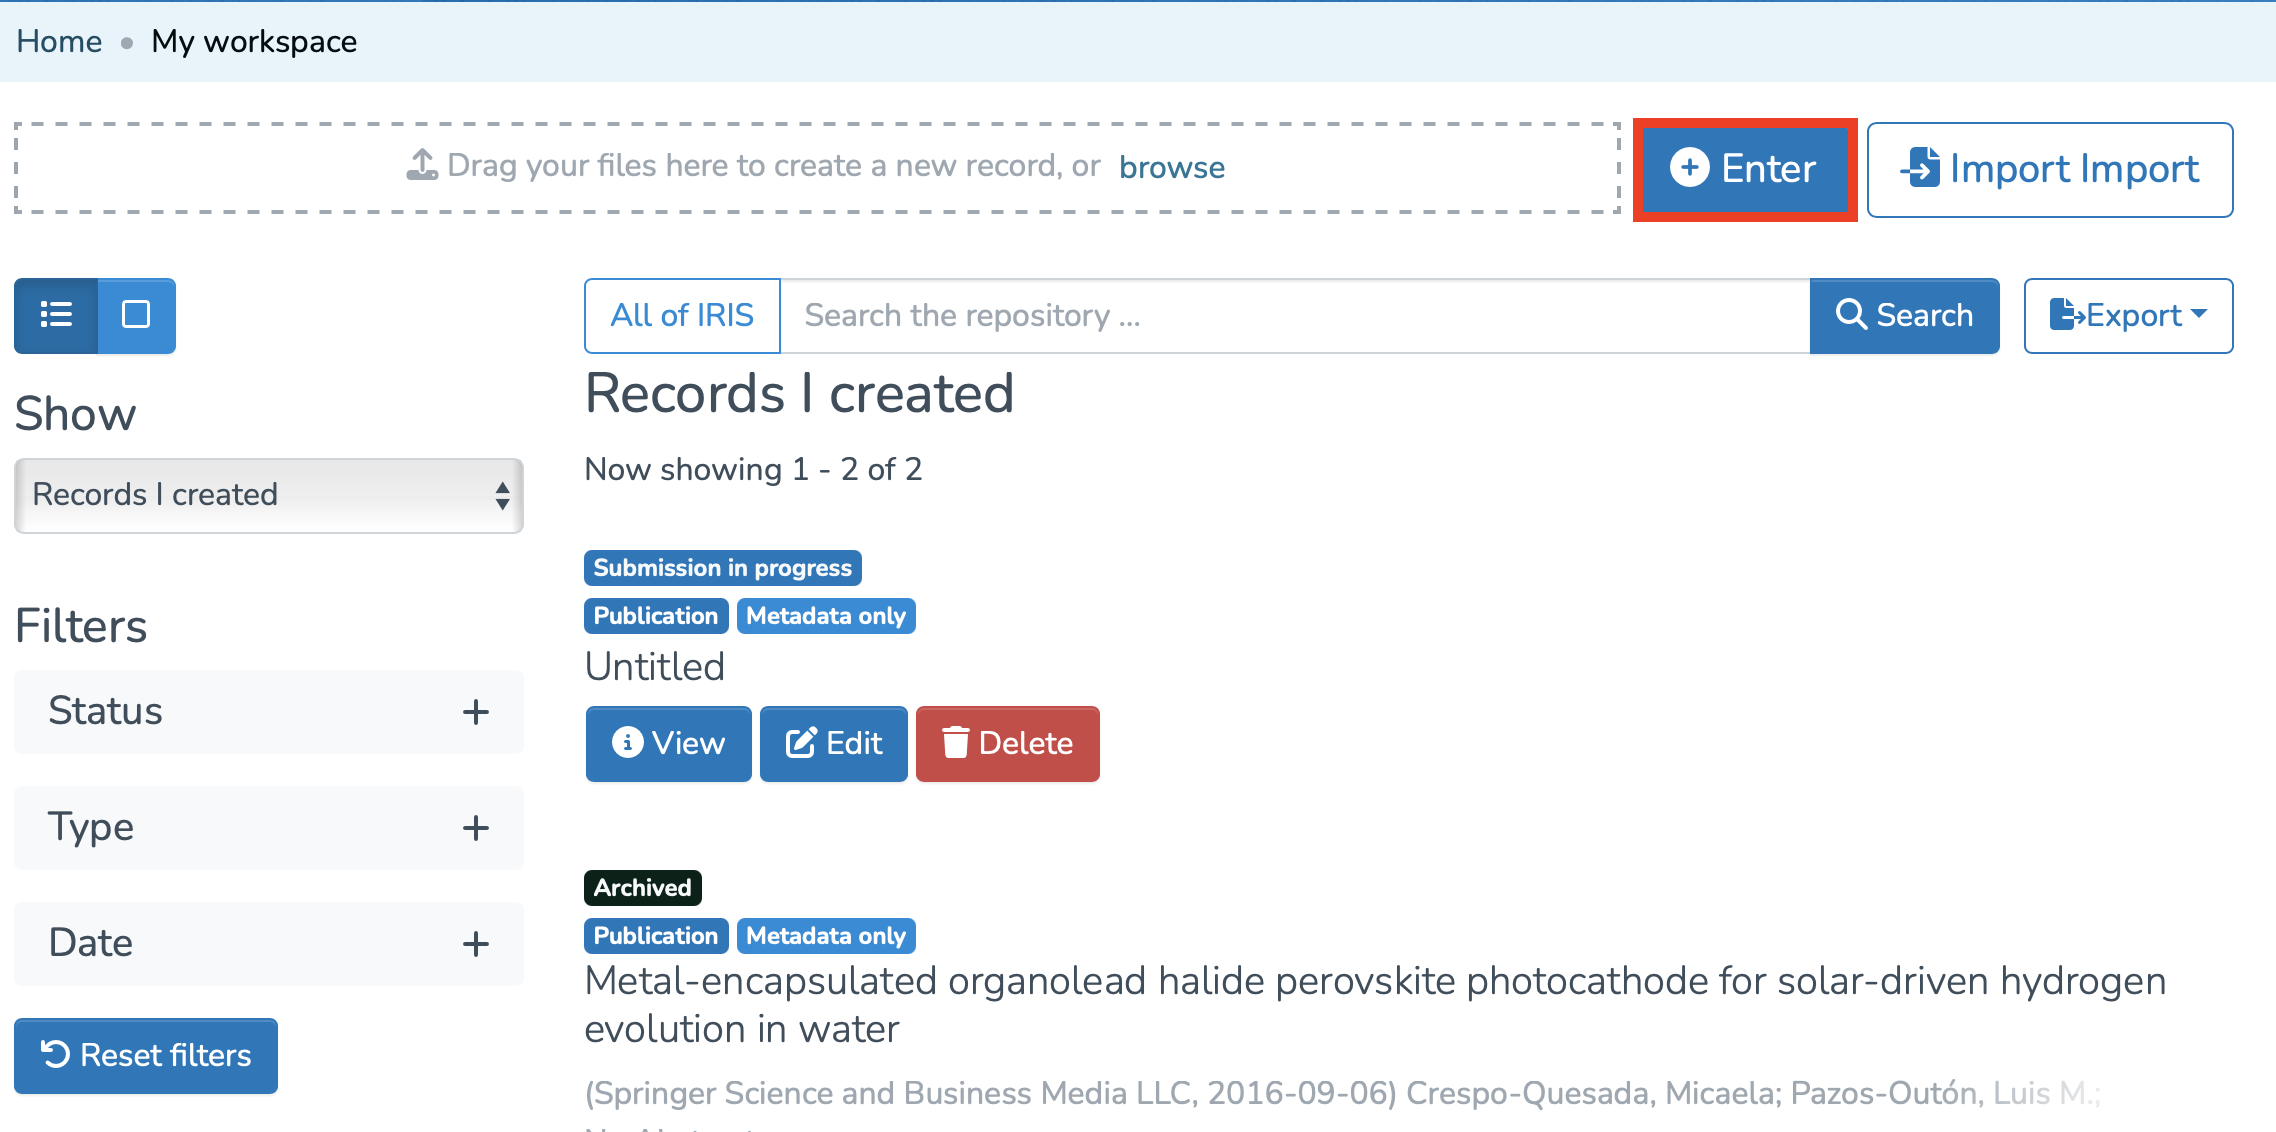
- Click on “My workspace.”

- Click on “Enter.”

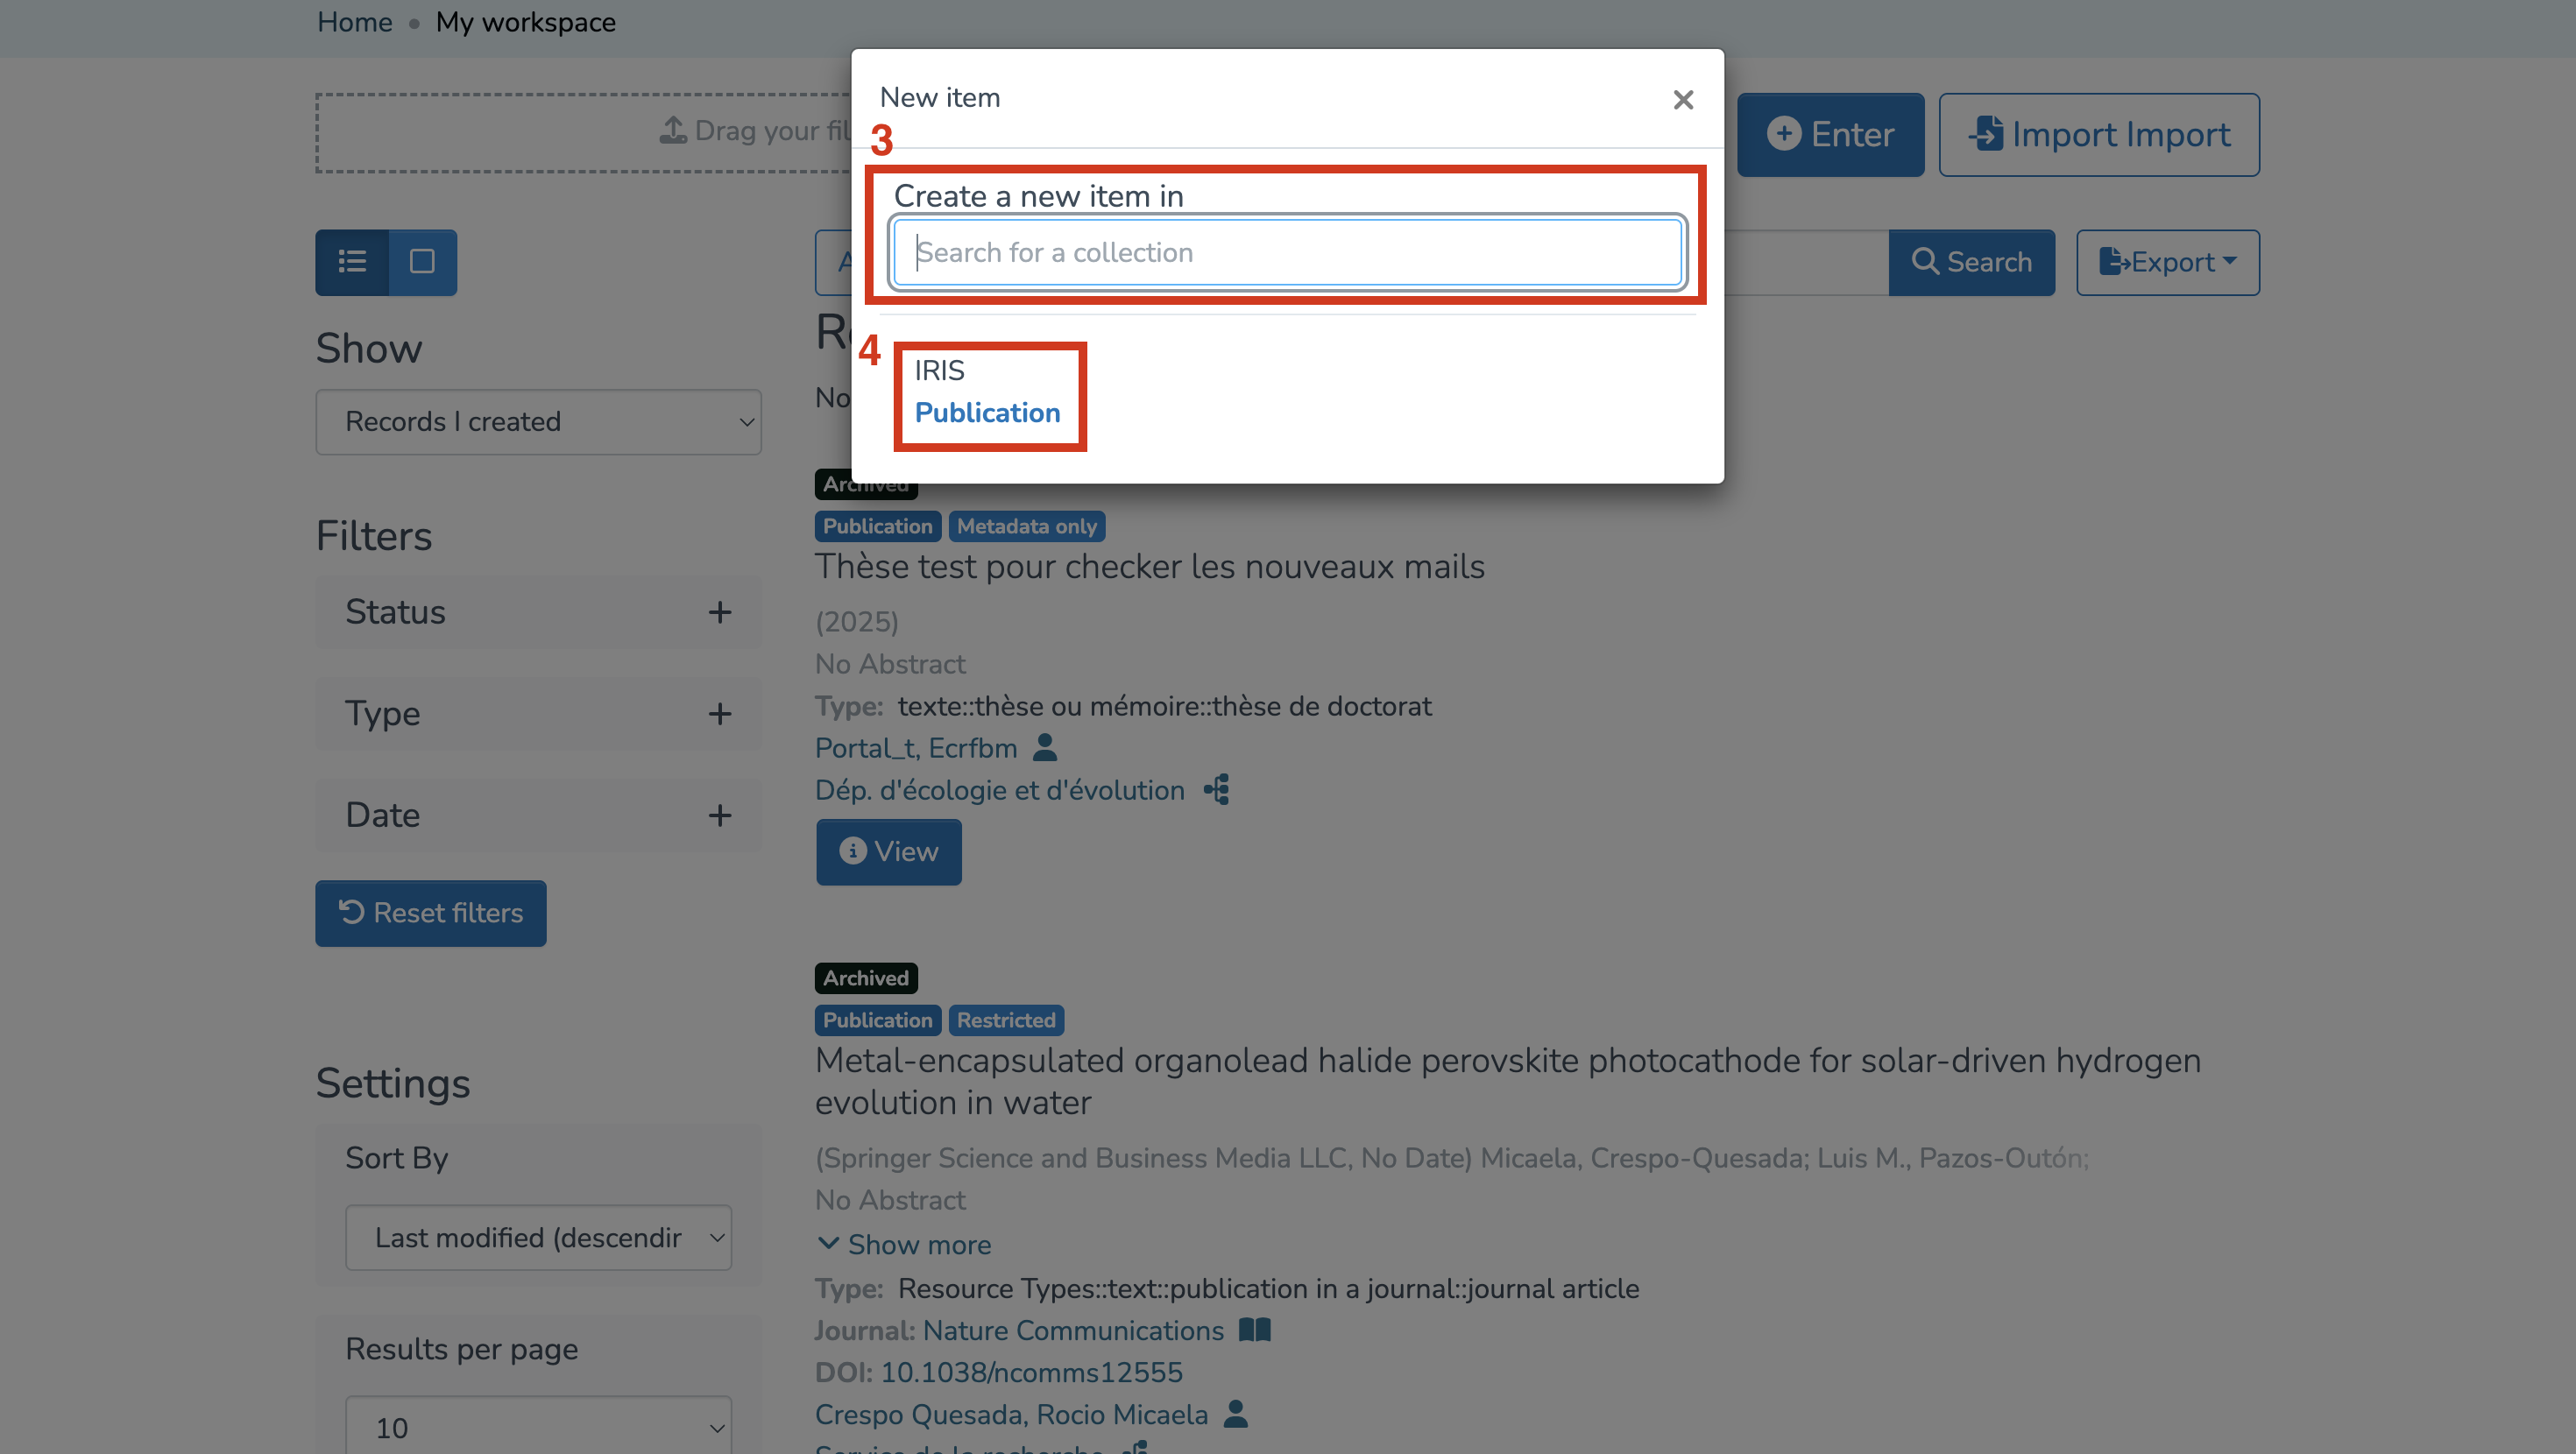
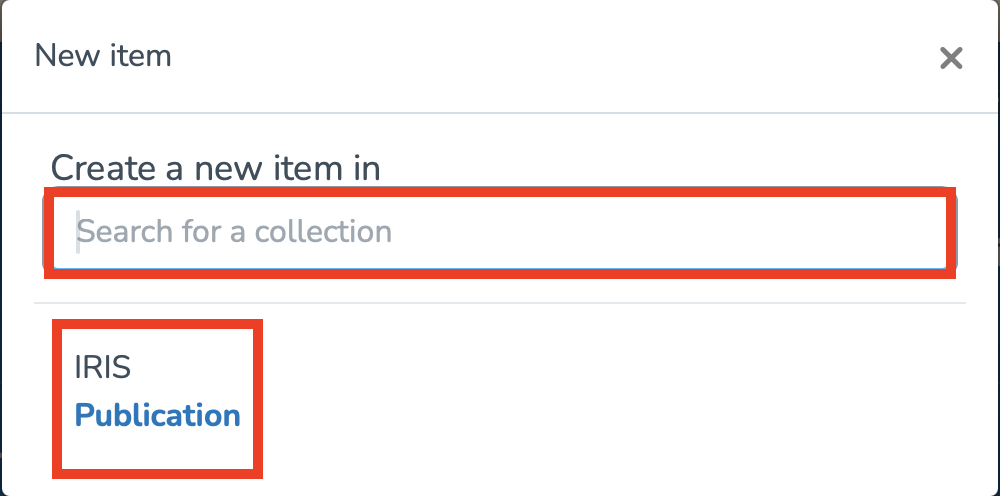
- Search for the collection where you want to create the record, then select it.
- Click on “Publication” to access the entry form.

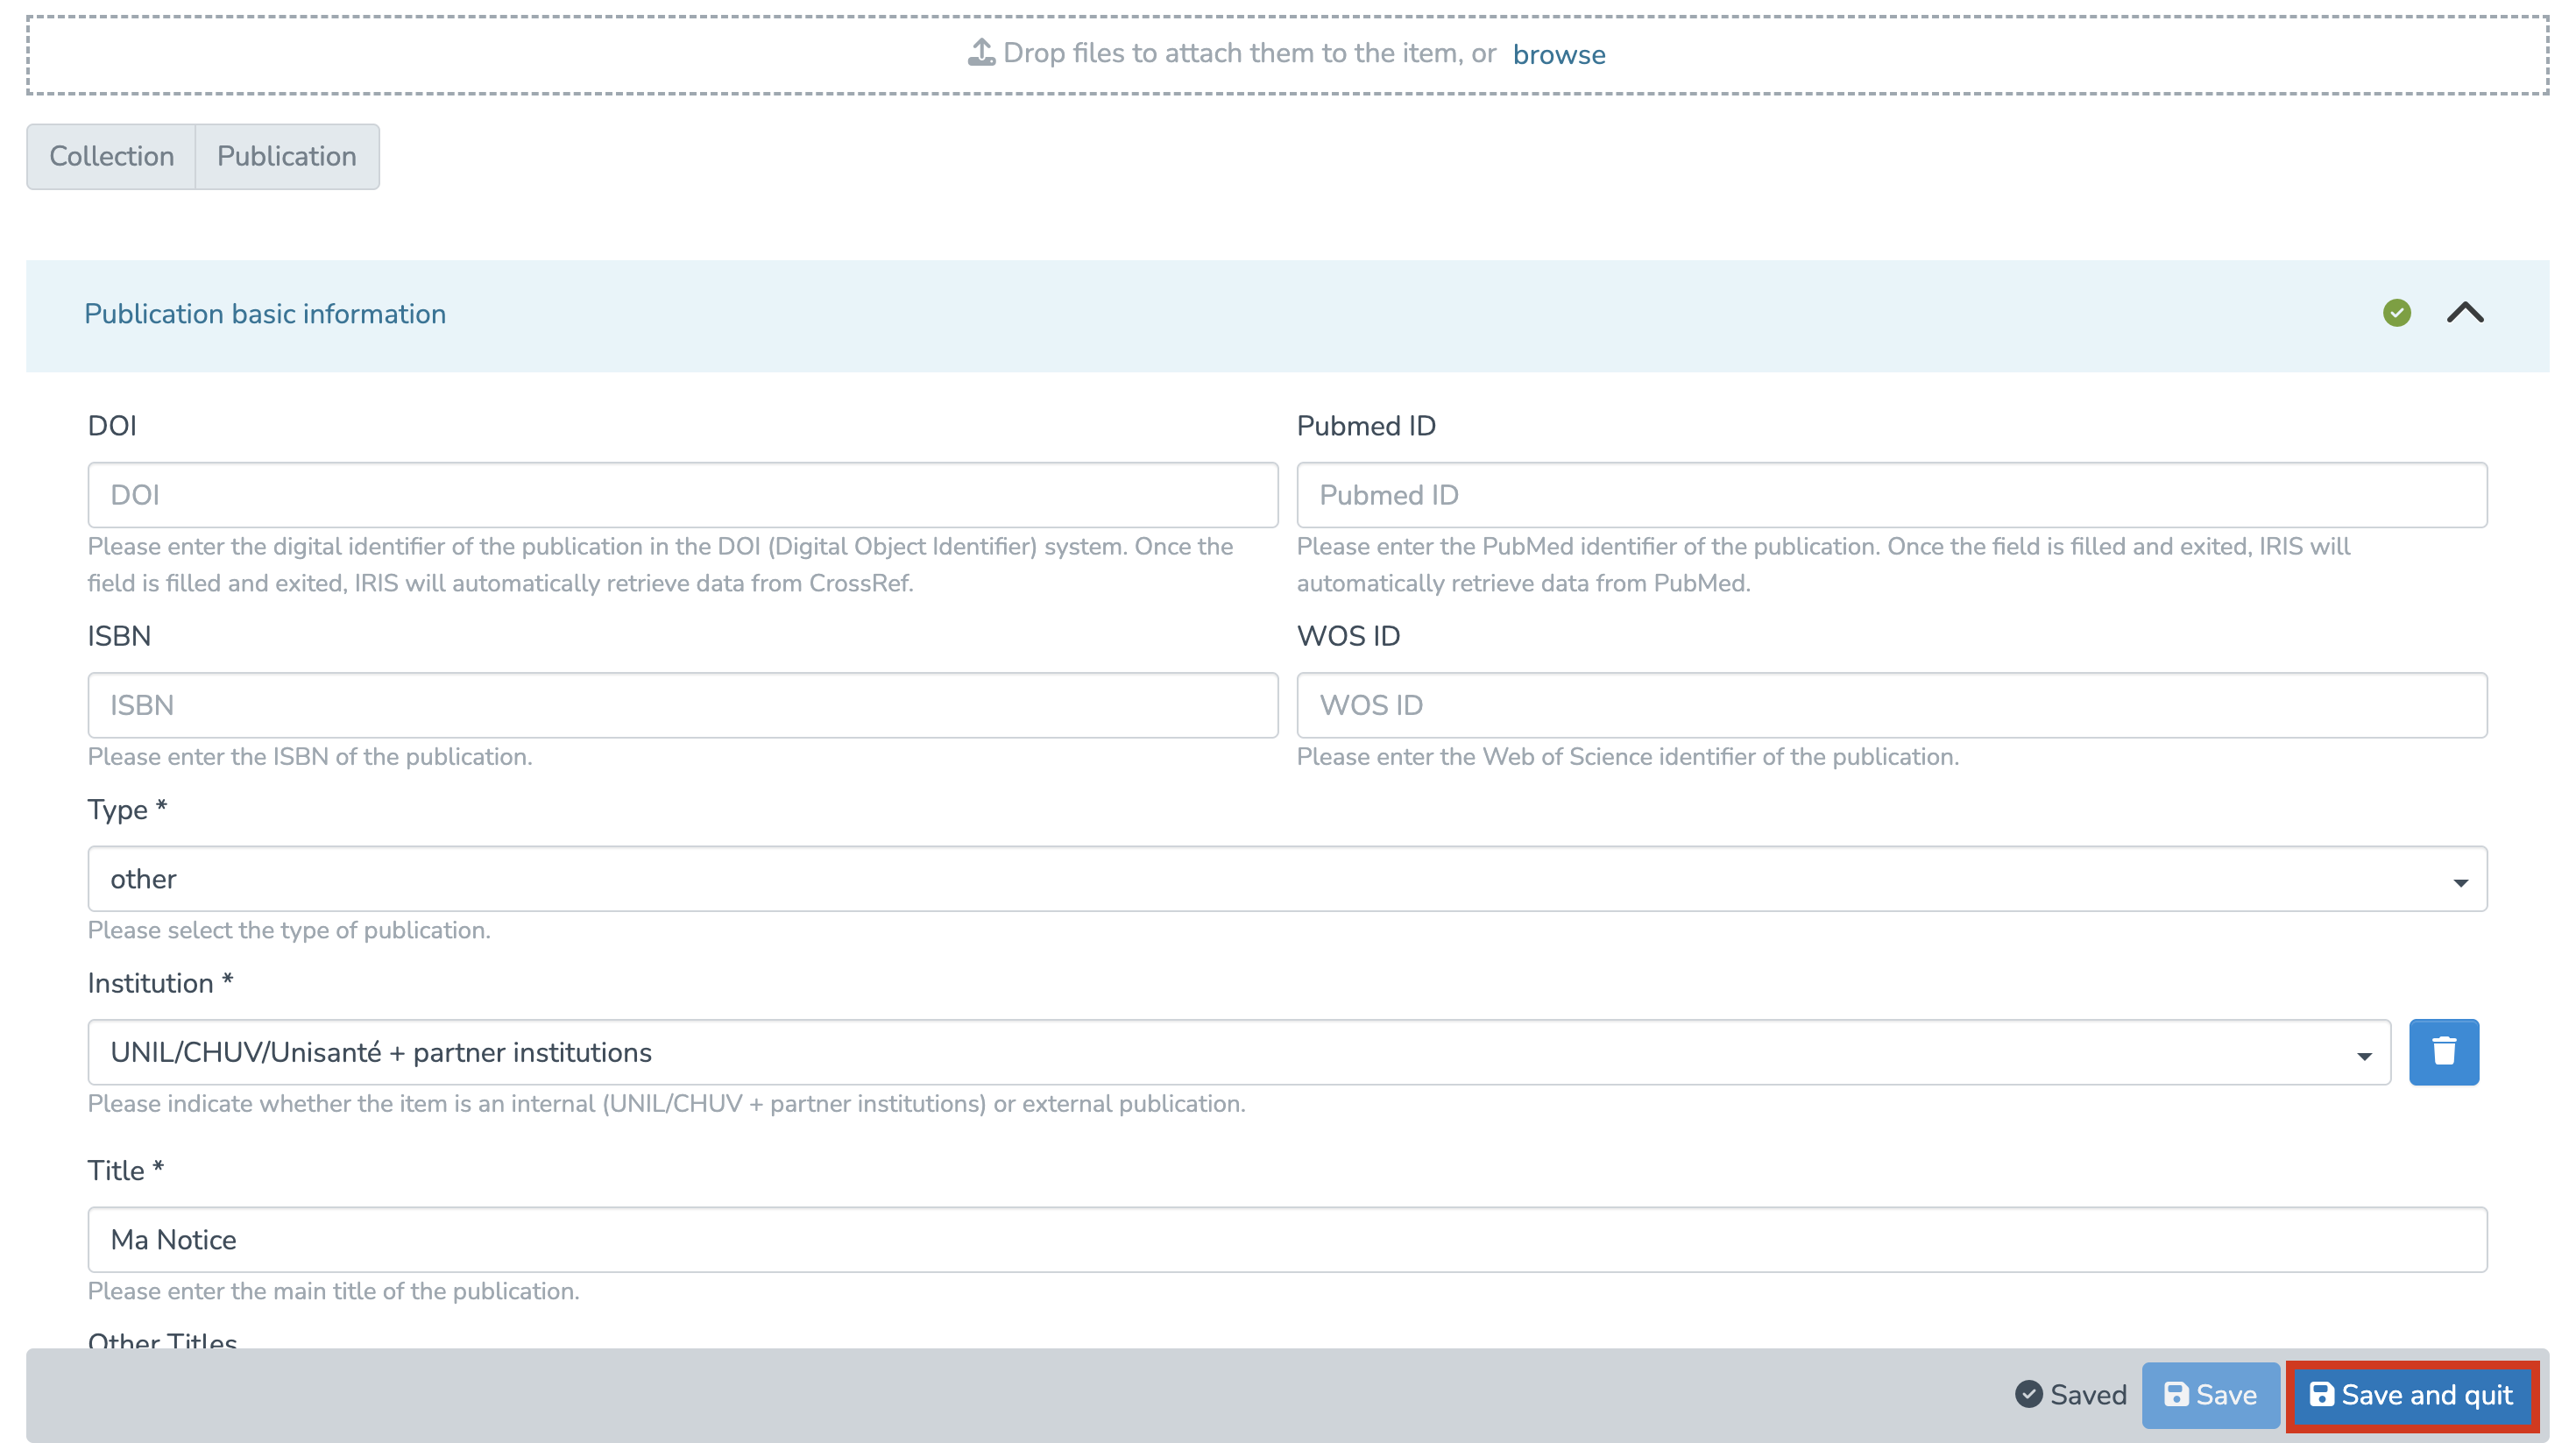
Fill in the required fields
In the form, enter the publication’s information, especially the required fields (marked with an asterisk *), which include:
- Type of publication
- Institution where the research was conducted
- Title
- Date of issue
- Editorial state

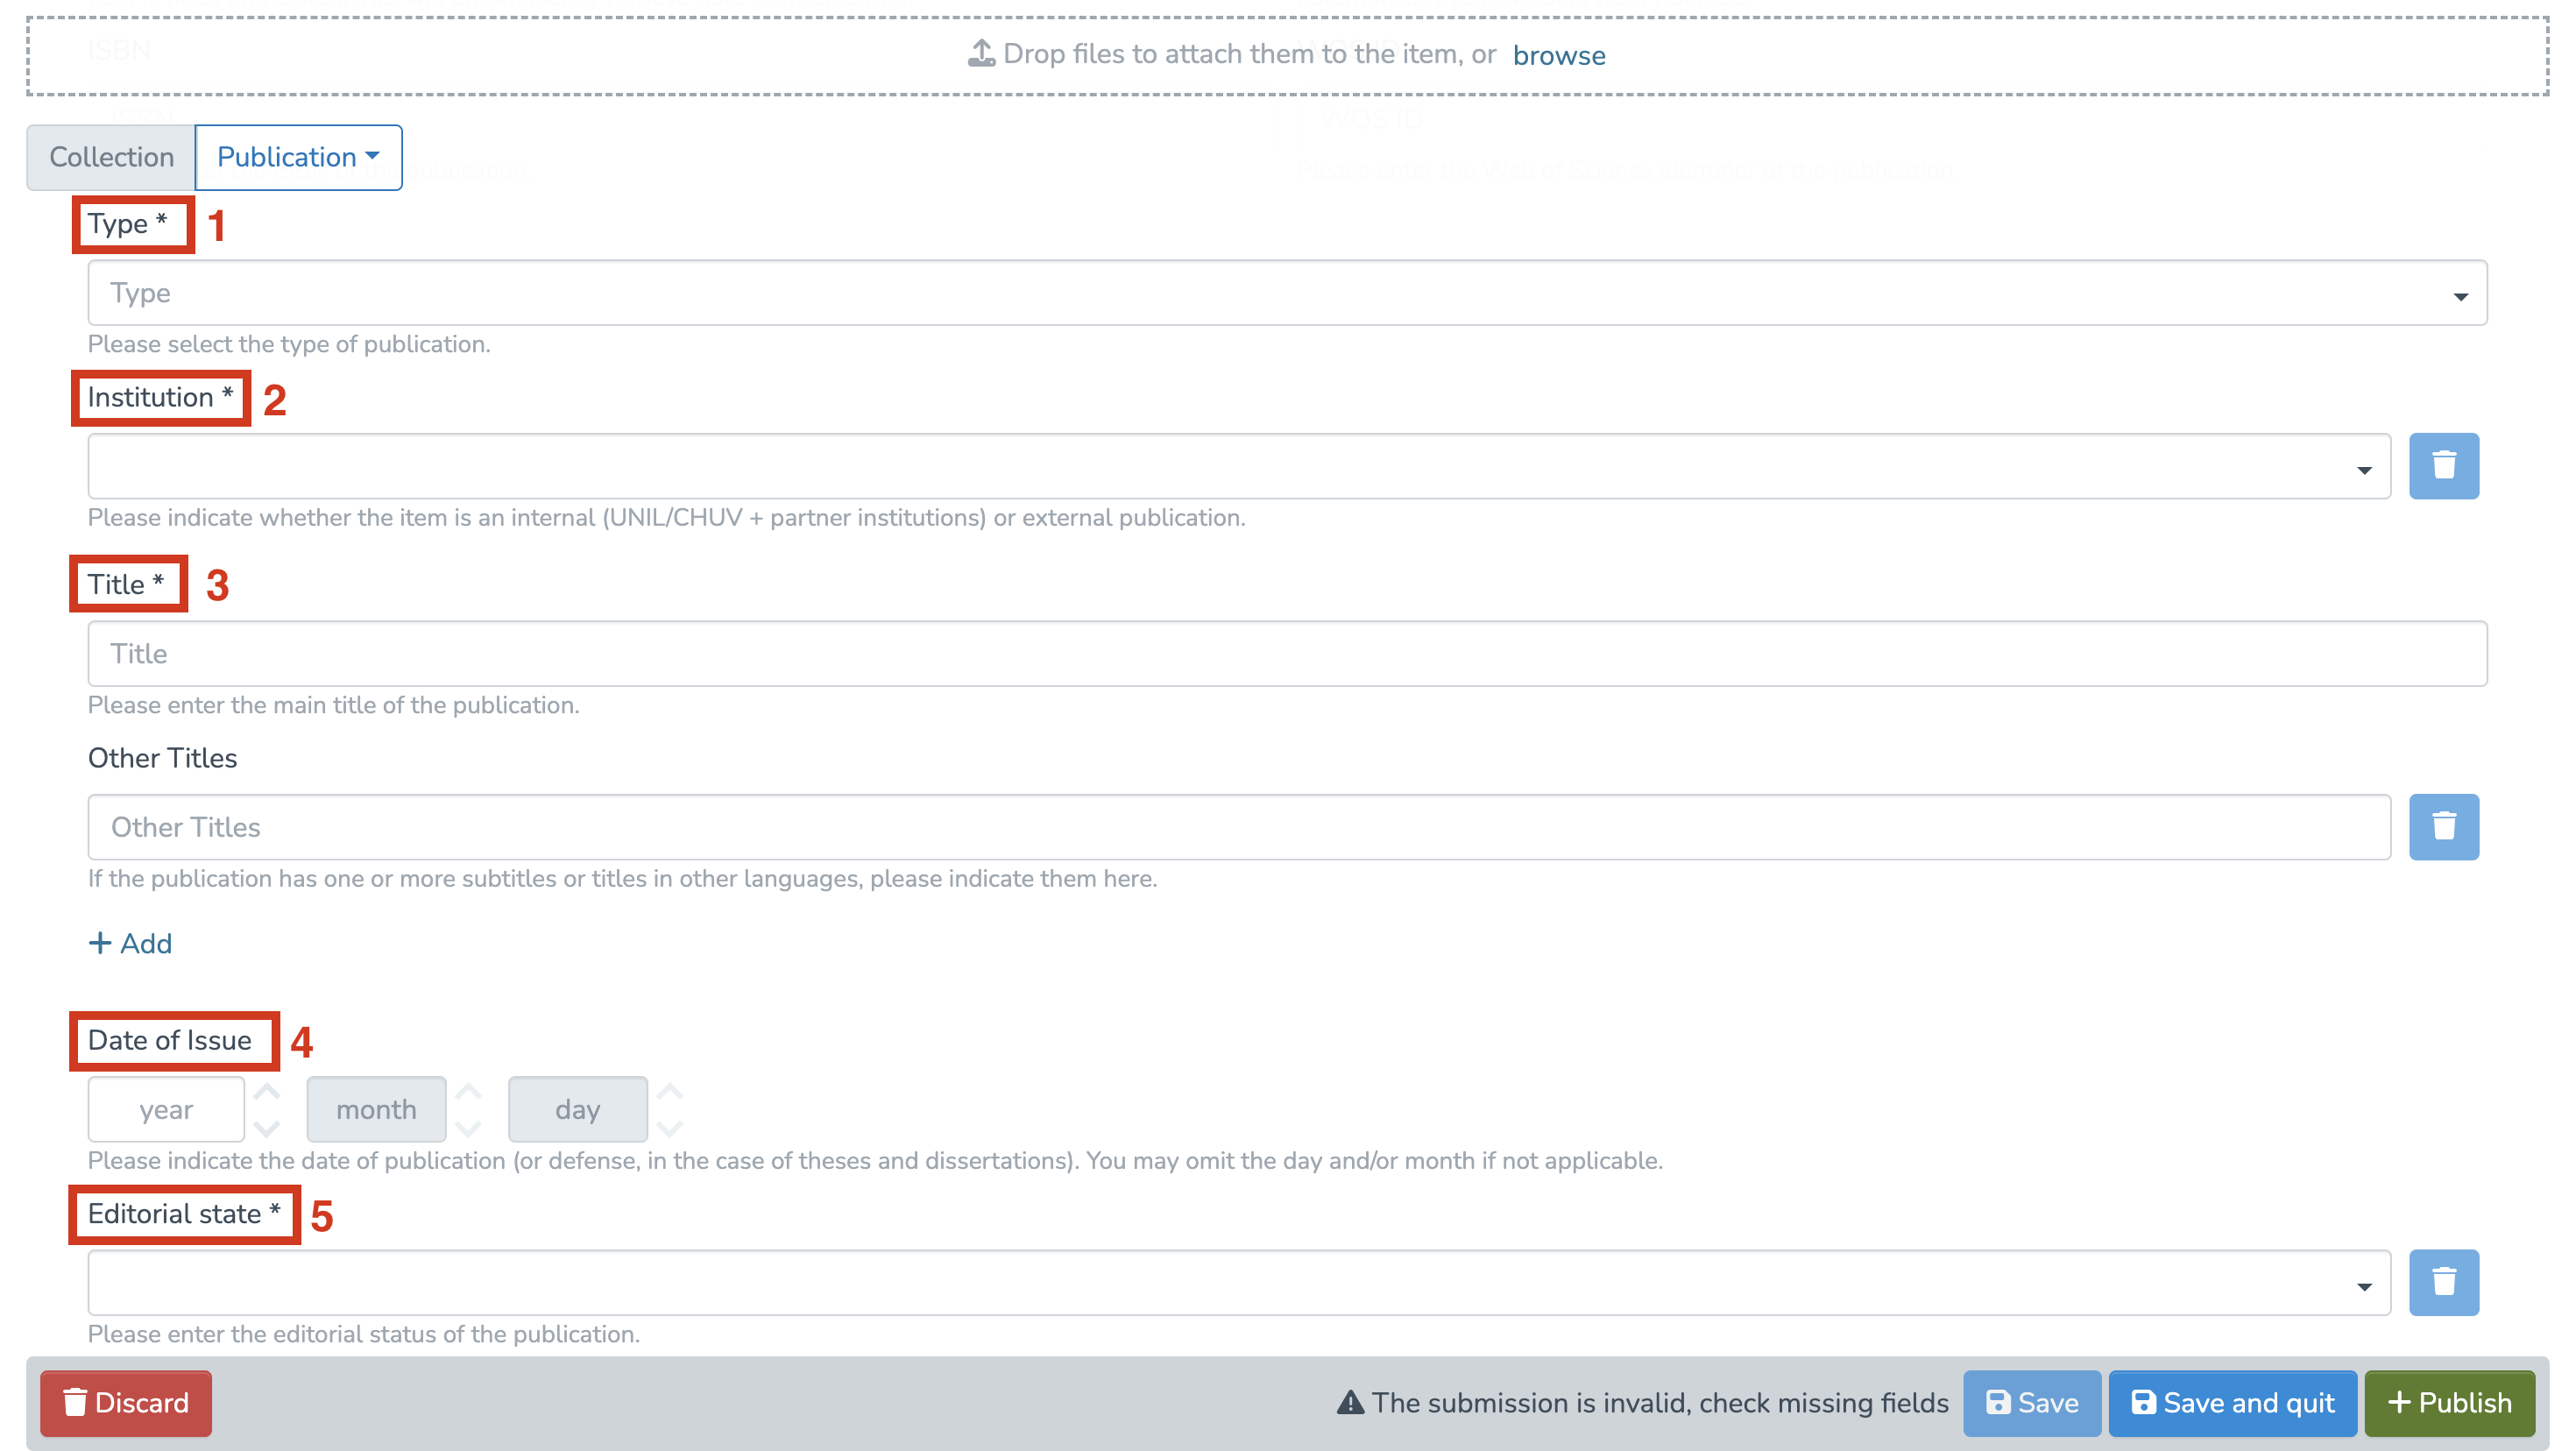
These 5 fields are mandatory to create the record. The remaining fields are highly recommended.
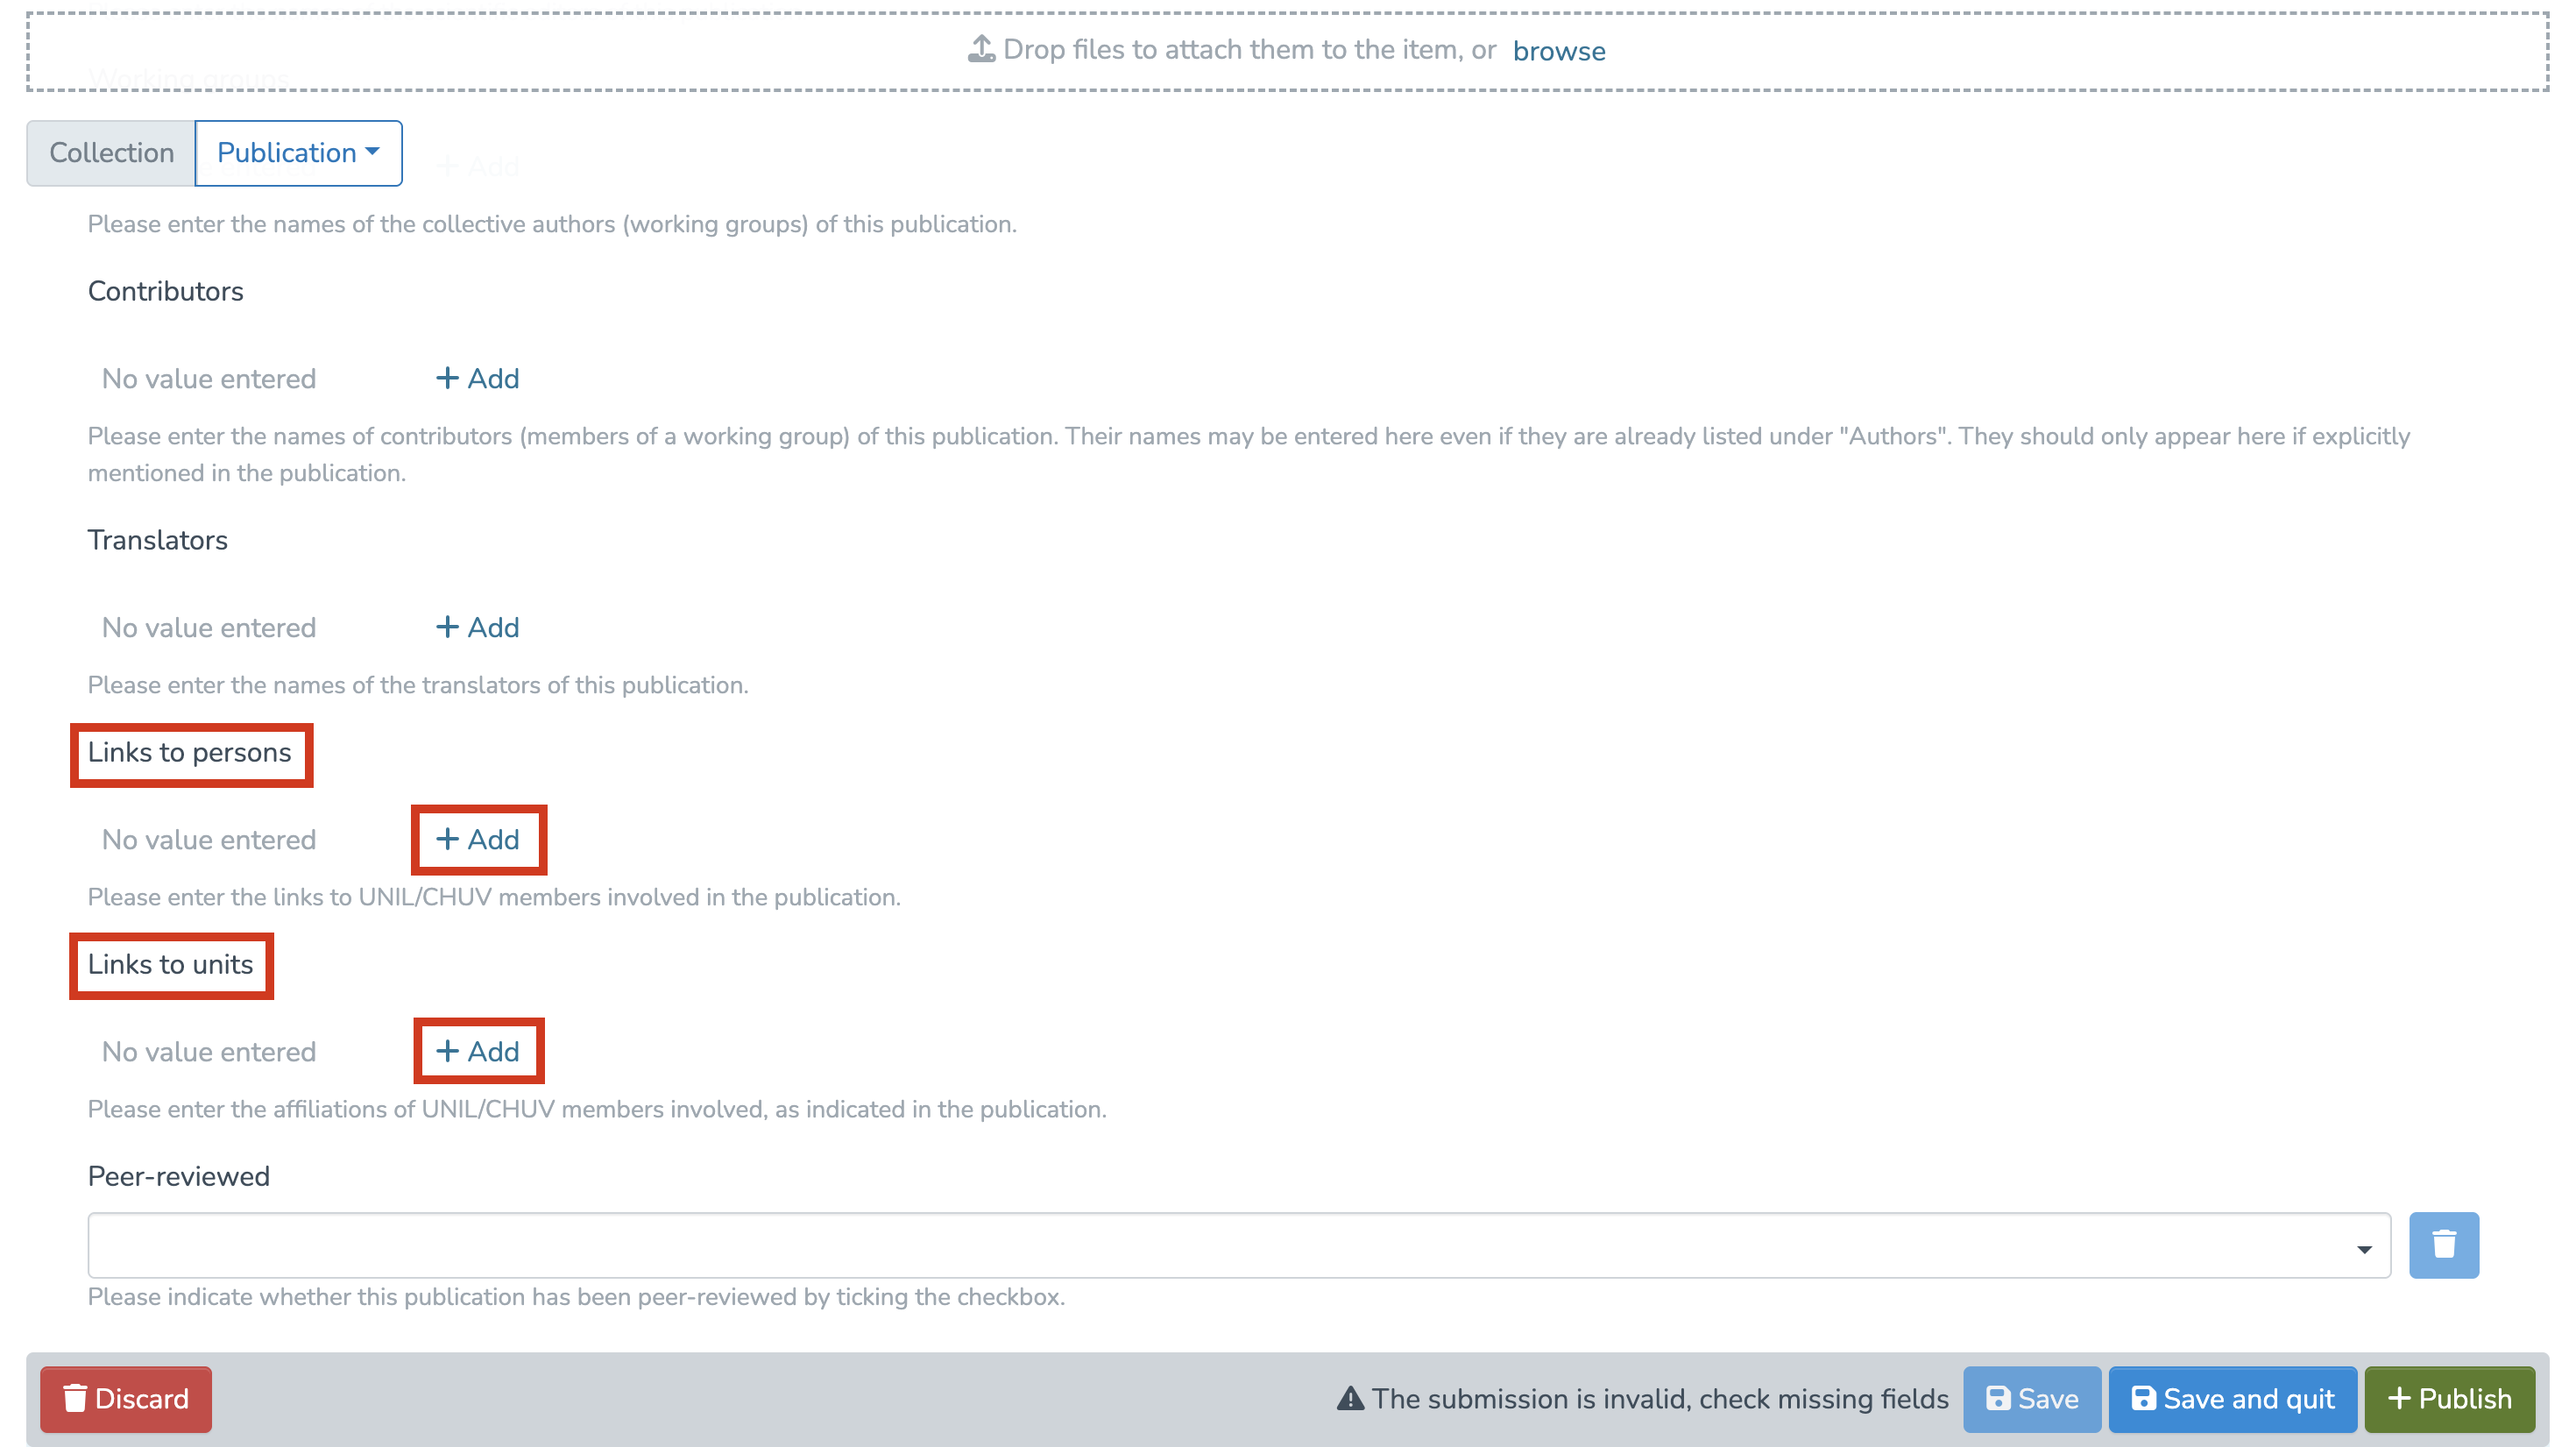
Link people and units
In IRIS, by default, the person who enters a record does not have the right to edit it. Only the individuals linked to the record have this permission. Make sure to properly link all relevant persons to the record.
This step allows you to associate the publication with your researcher profile, your co-authors, and the relevant research unit.
To correctly attribute publications to authors and their units, ensuring they appear in their respective profiles, please follow these guidelines:
- For publications internal to UNIL/CHUV:
- A link to a unit is mandatory.
- A link to the associated persons must be entered whenever possible.
- For external publications:
- A link to at least one person is mandatory.
- No link to a unit is allowed.
- Don’t forget to link yourself to the record — otherwise, it won’t appear in your researcher profile.
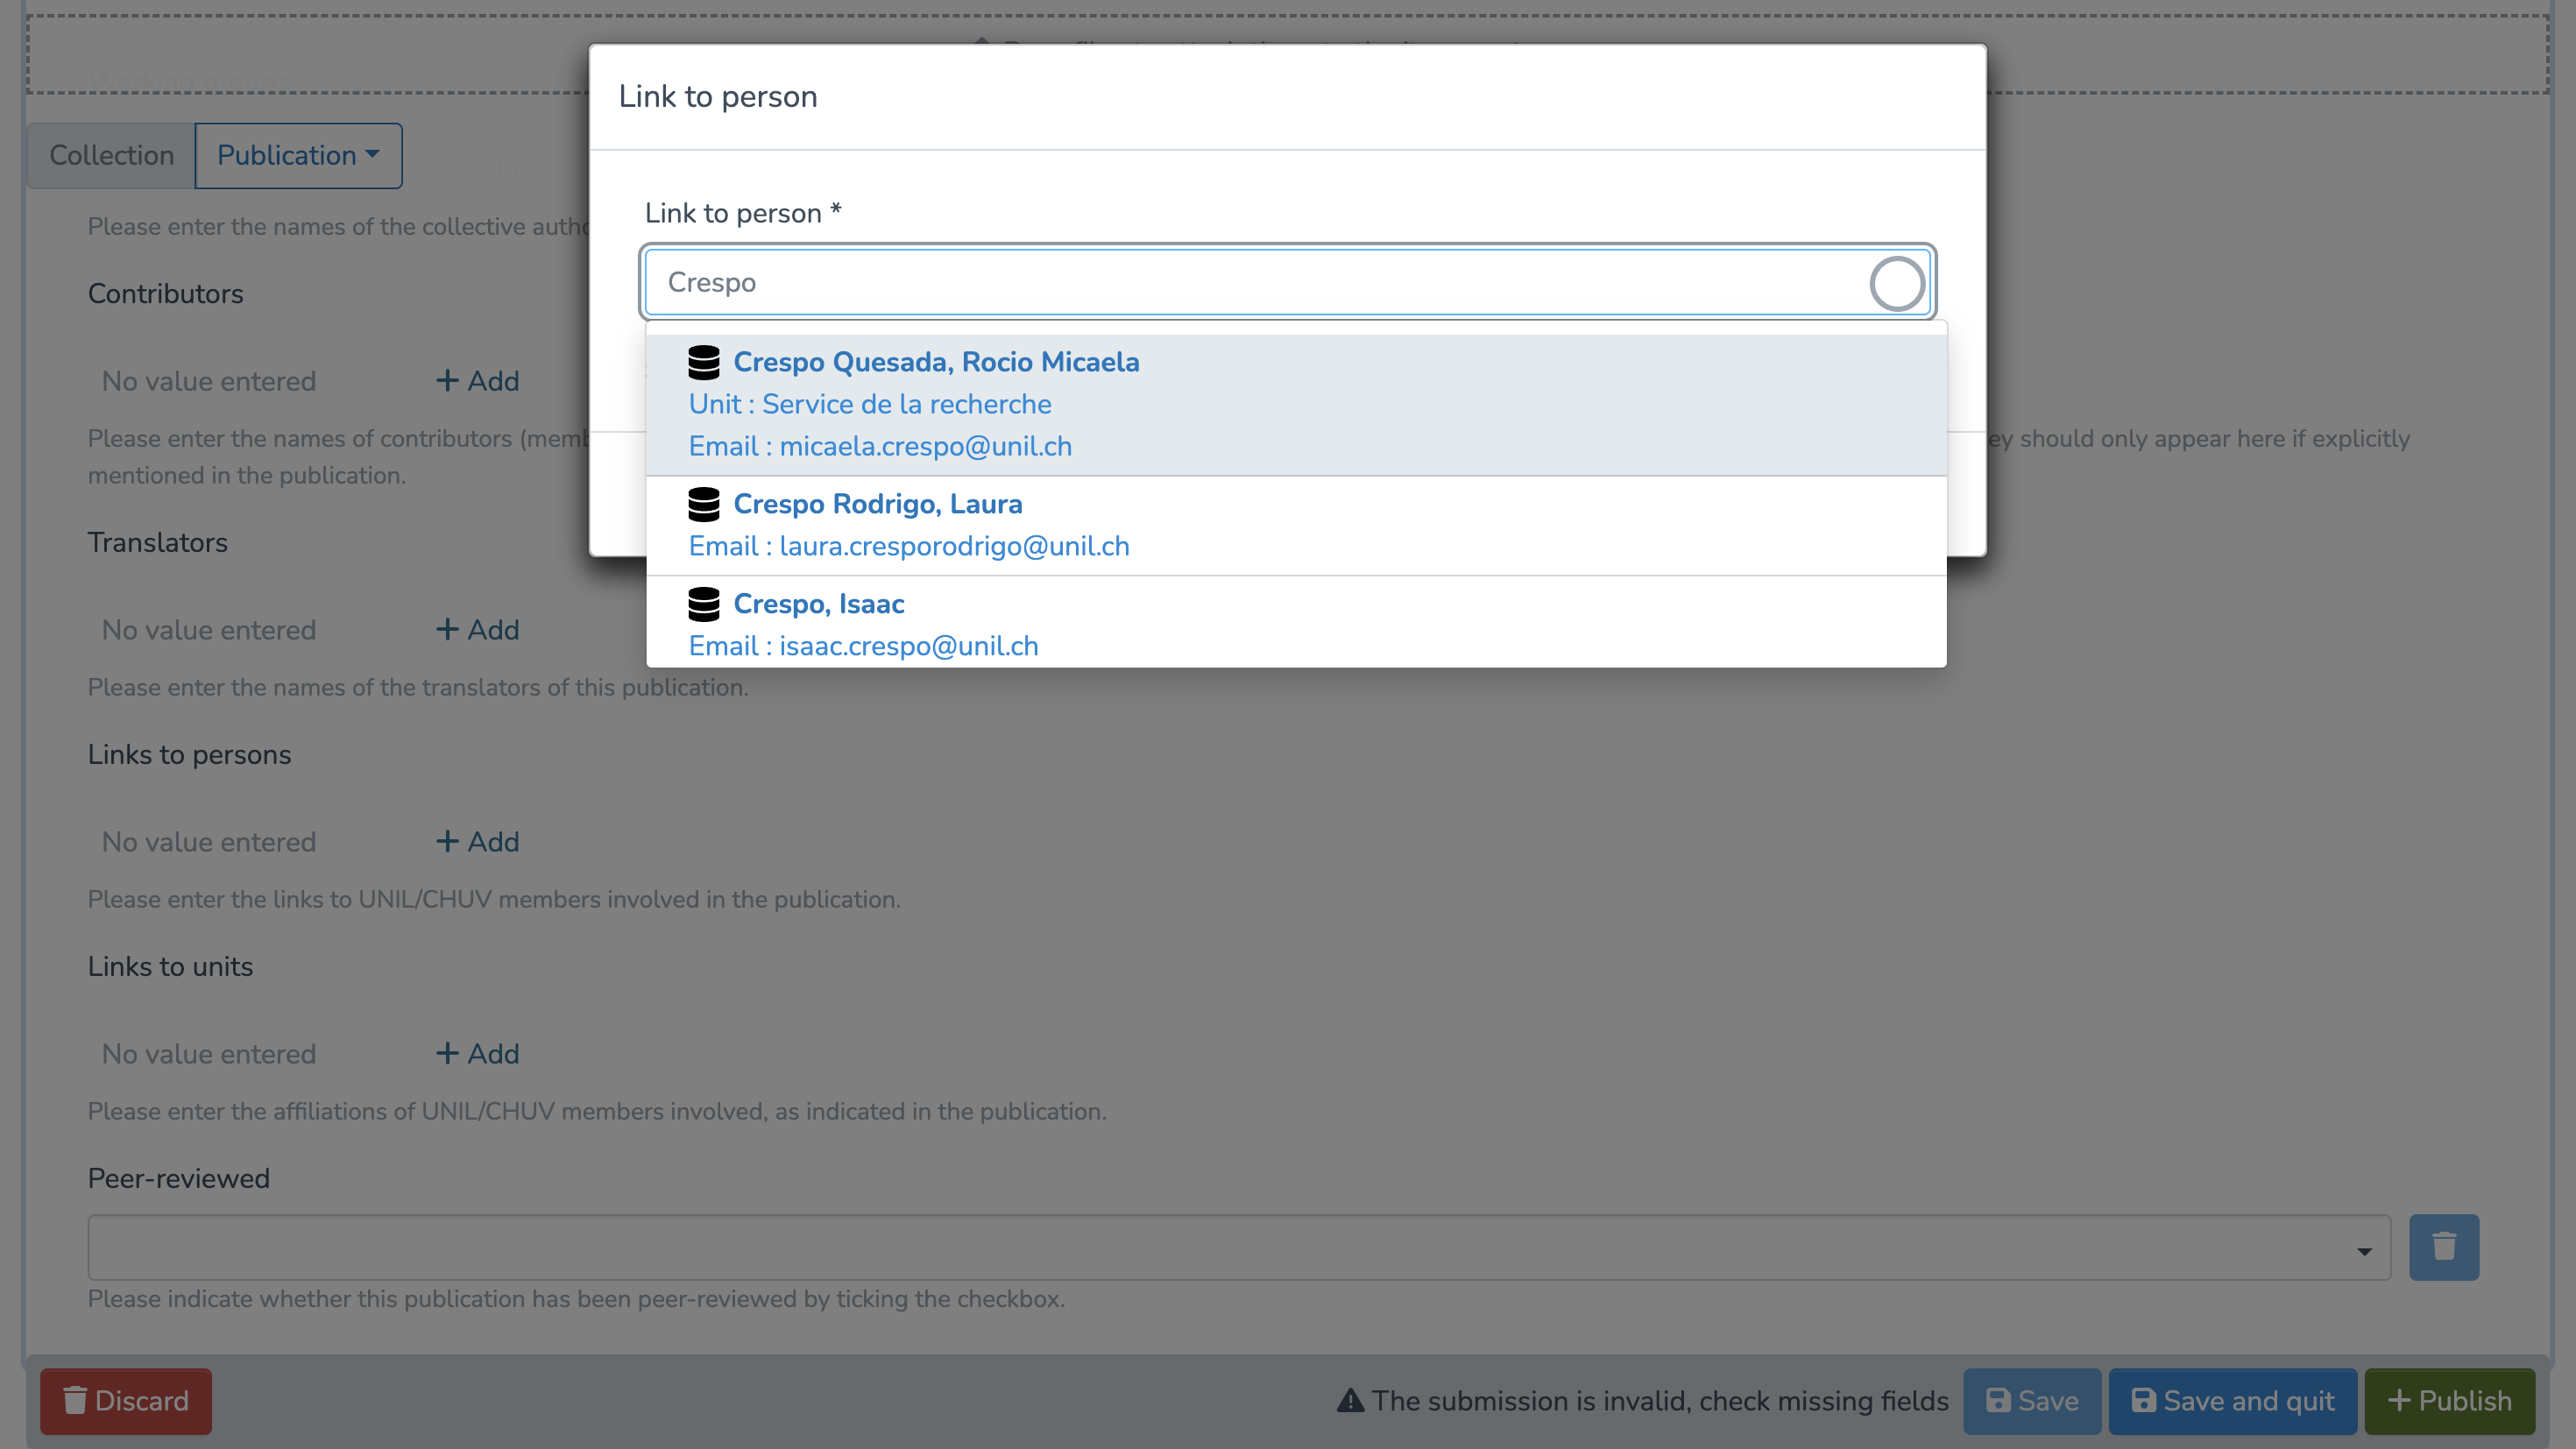
- In the corresponding section, click on “Add.”

- Type the name of the person or unit, then select it.

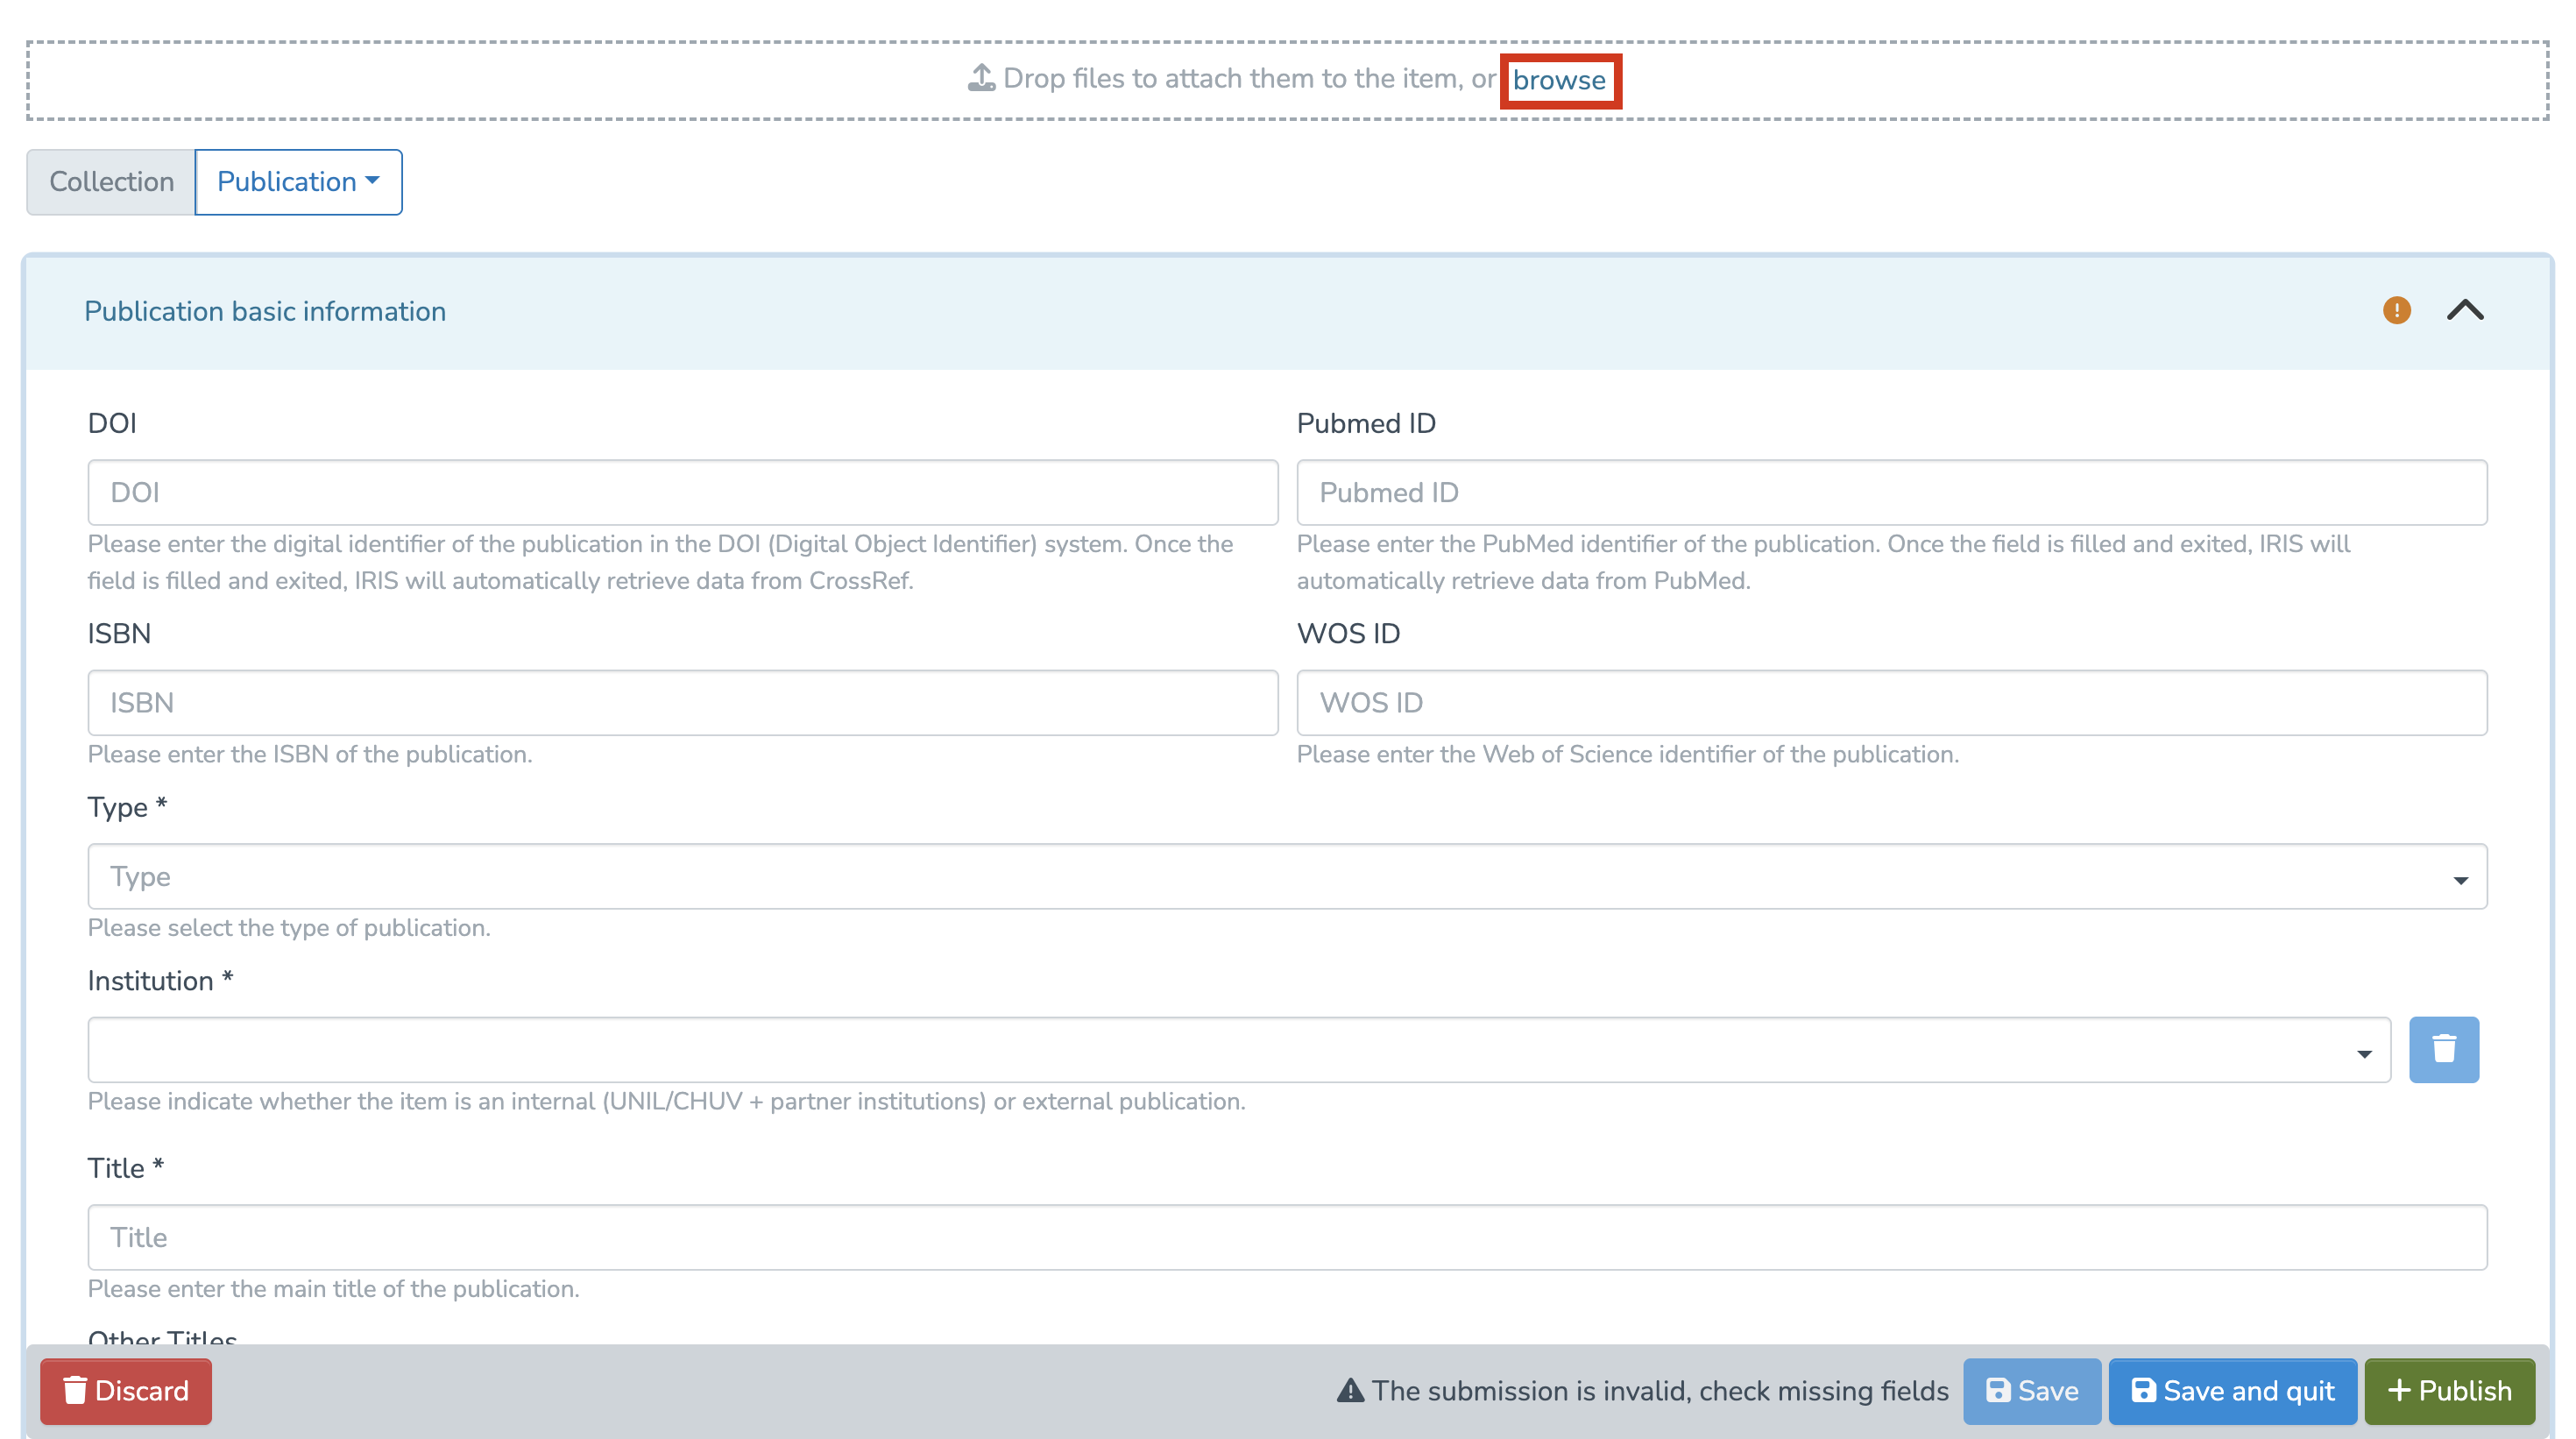
Add full text and/or secondary documents
- You can add full-text files and/or secondary documents by clicking on “Browse” and selecting the desired file from your library.

- Alternatively, you can scroll down to the “Documents” section and simply drag and drop your file onto the page.

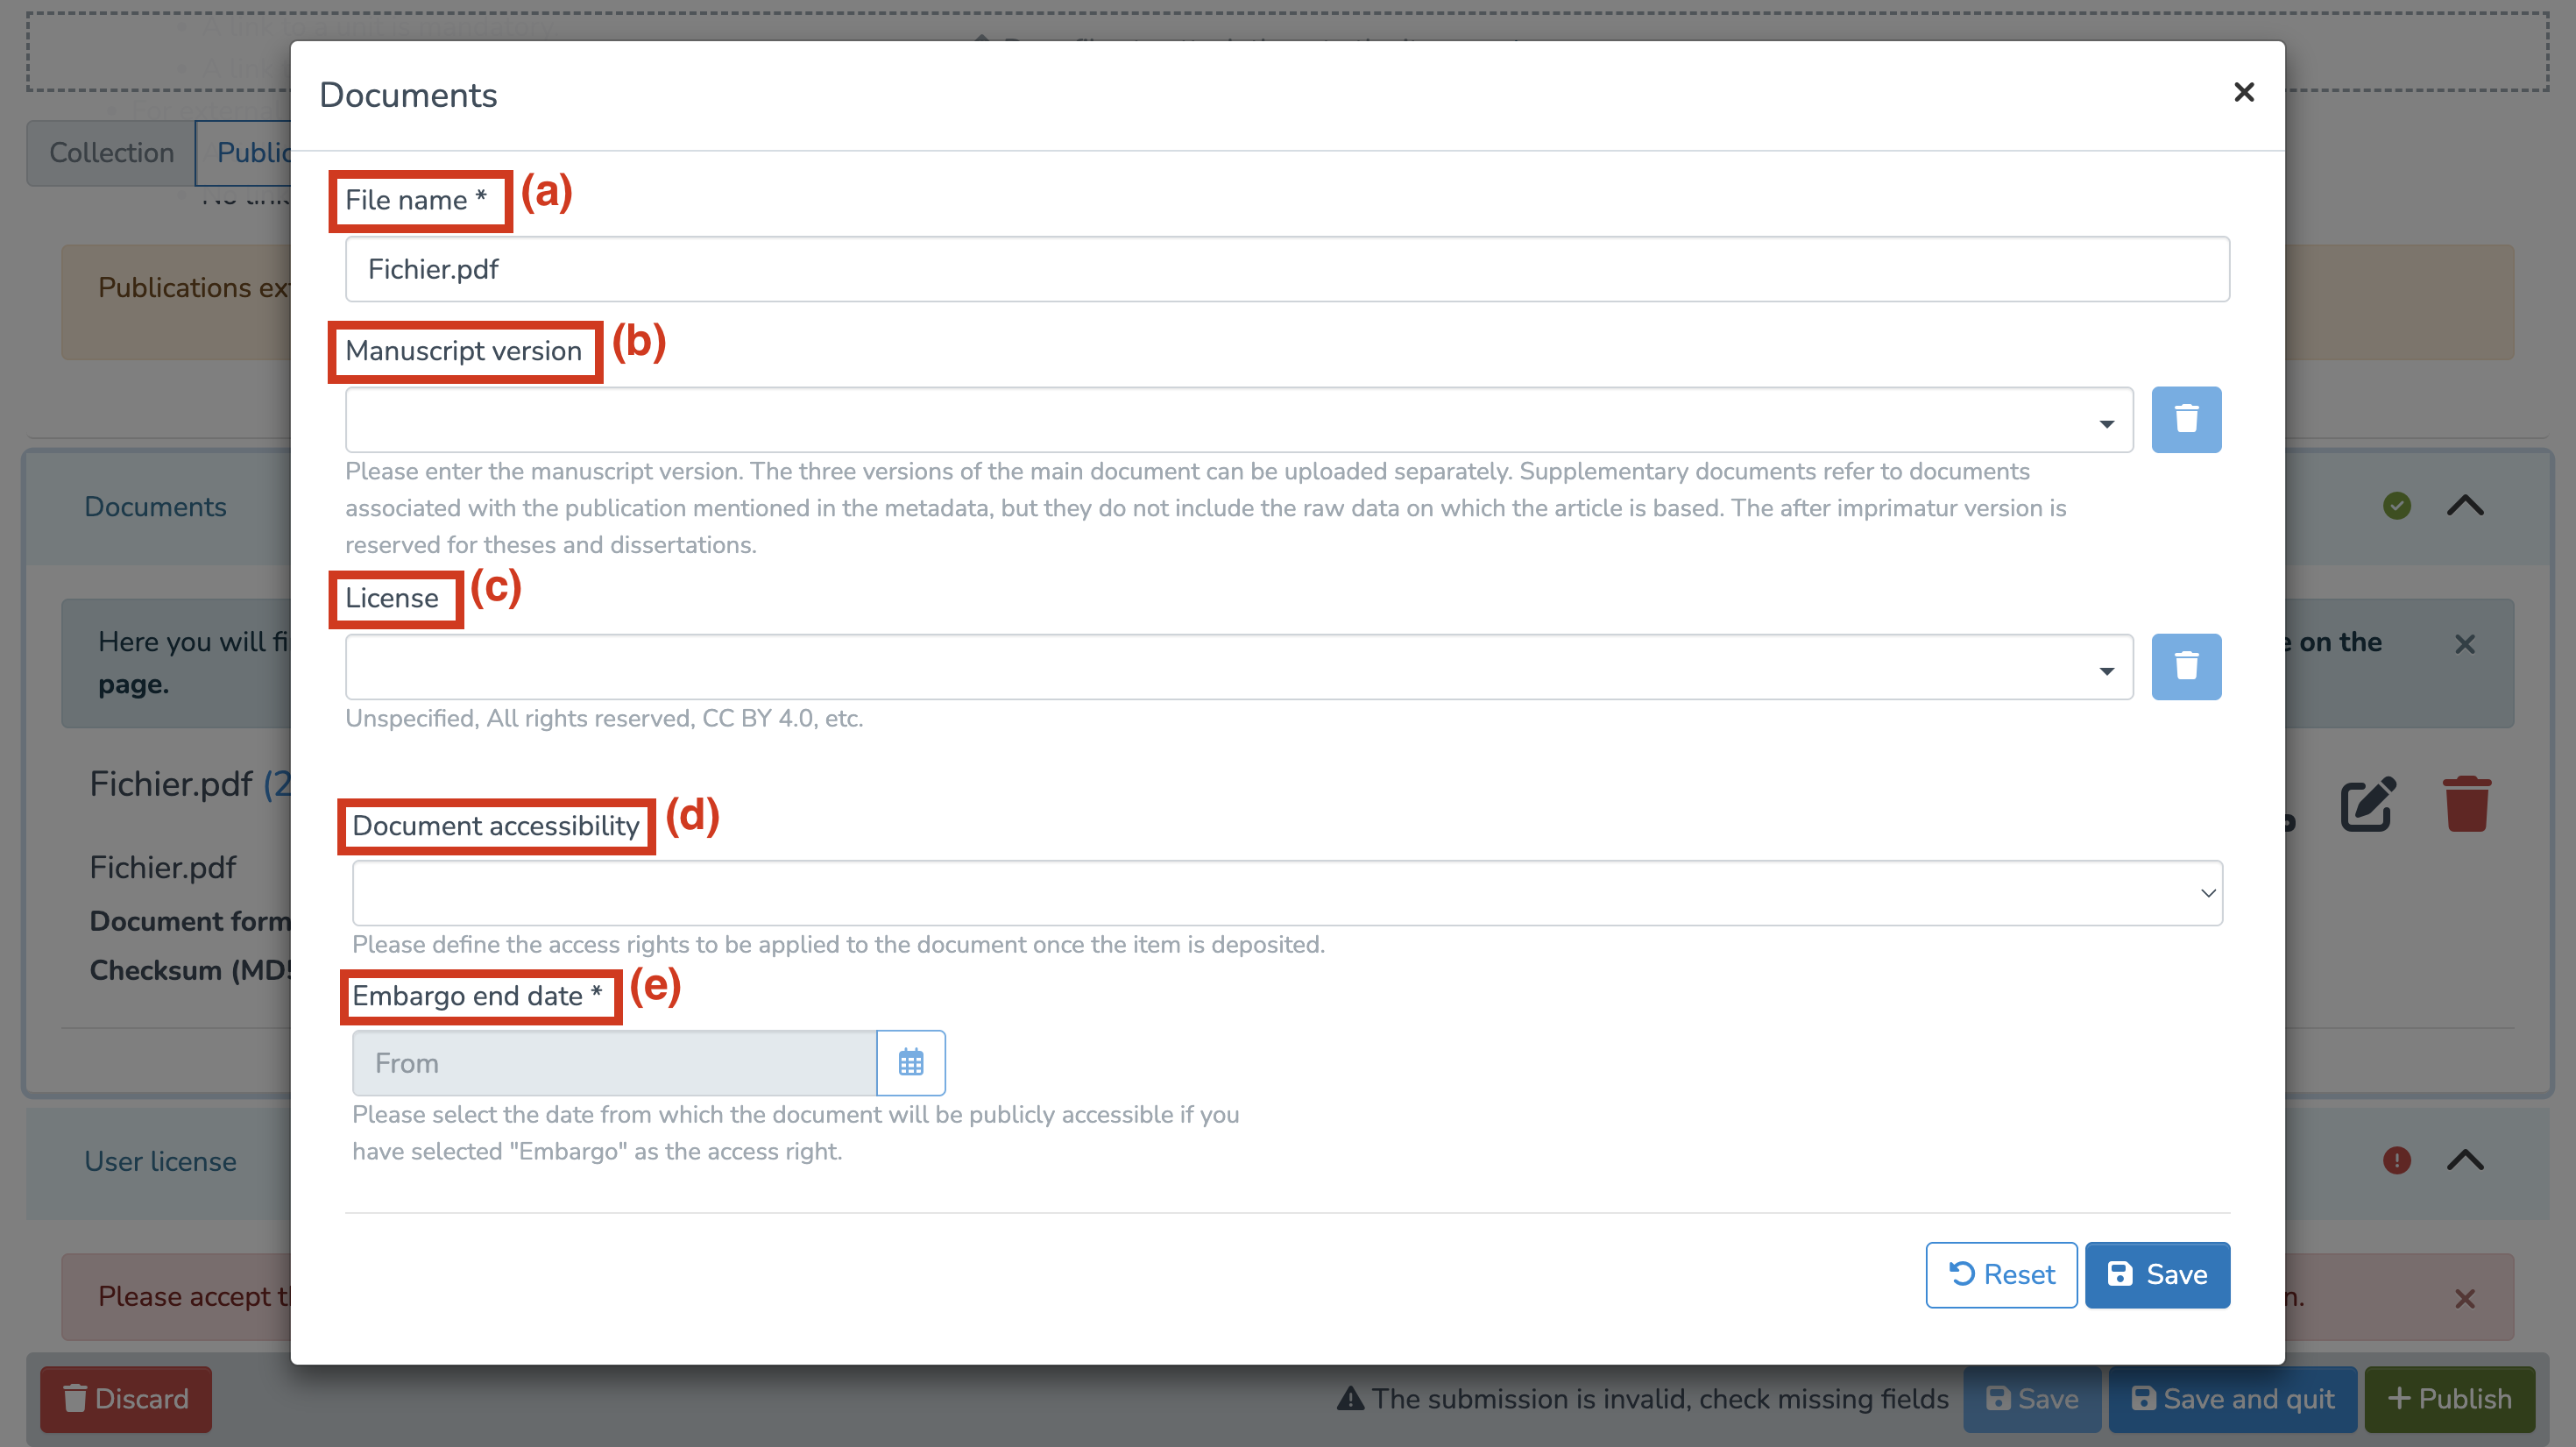
- Once uploaded, you can edit the document’s metadata by clicking the corresponding icon.

- You can edit the following fields:

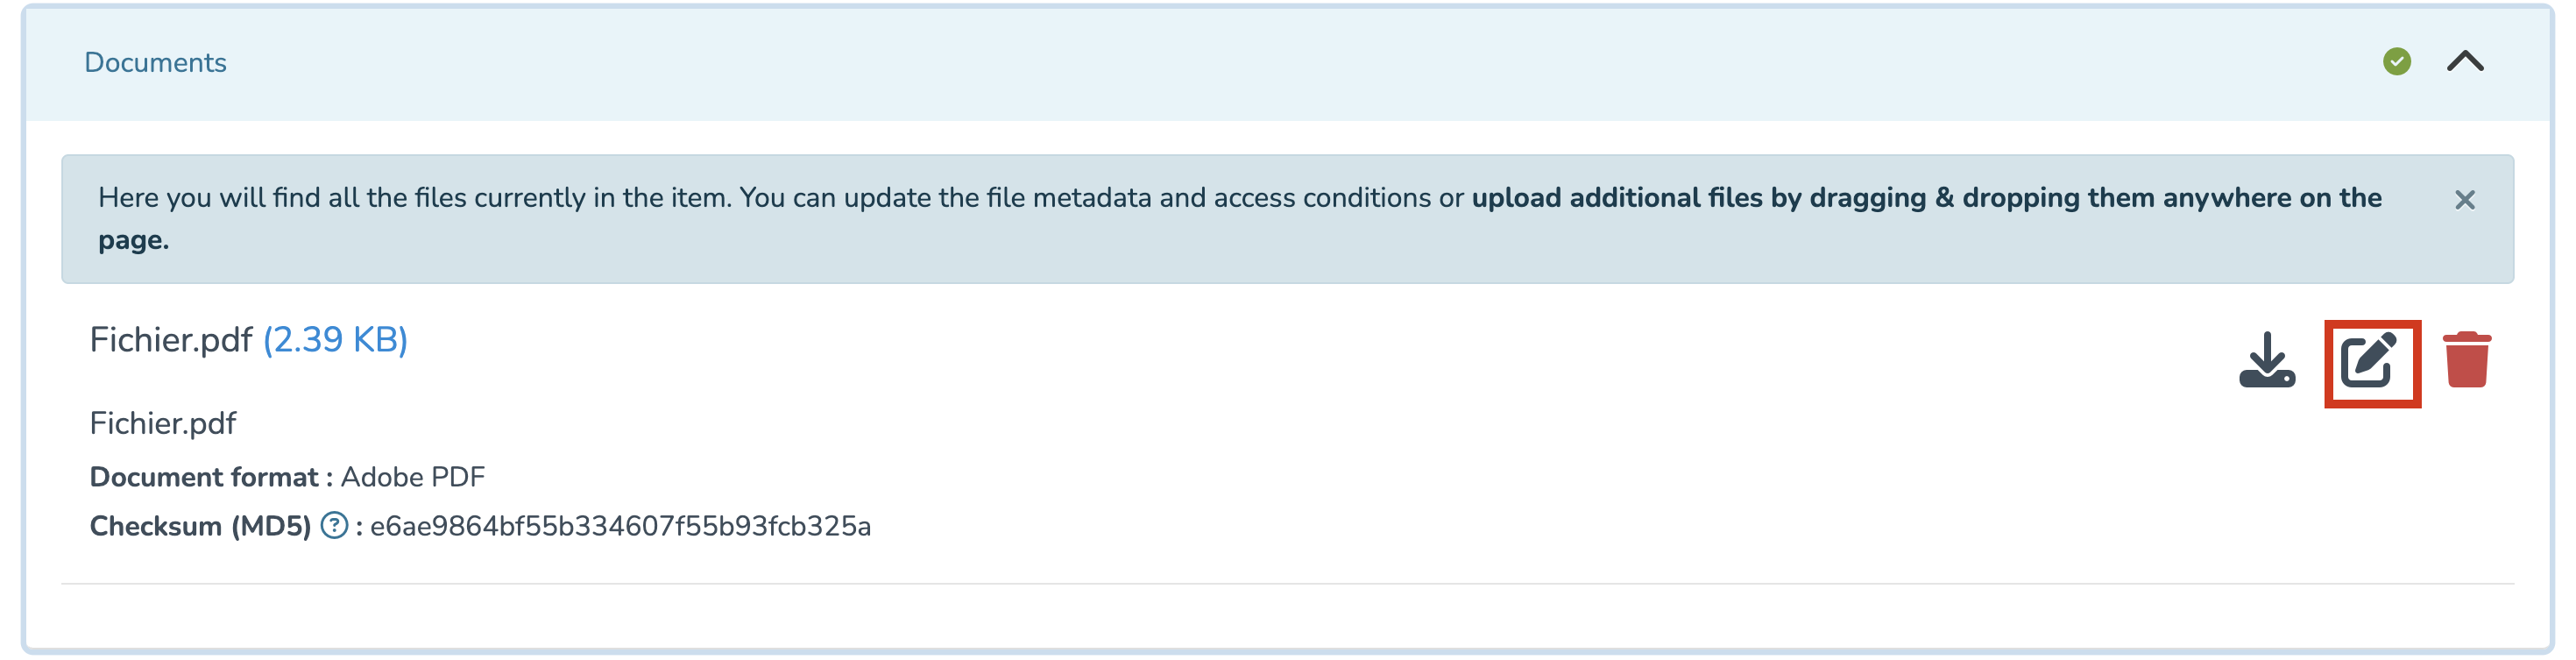
(a) File name
(b) Manuscript version
(c) License
(d) Document accessibility (open access / embargo / UNIL restricted)
(e) If you select “embargo”, set the embargo end date, after which your document will become publicly accessible.
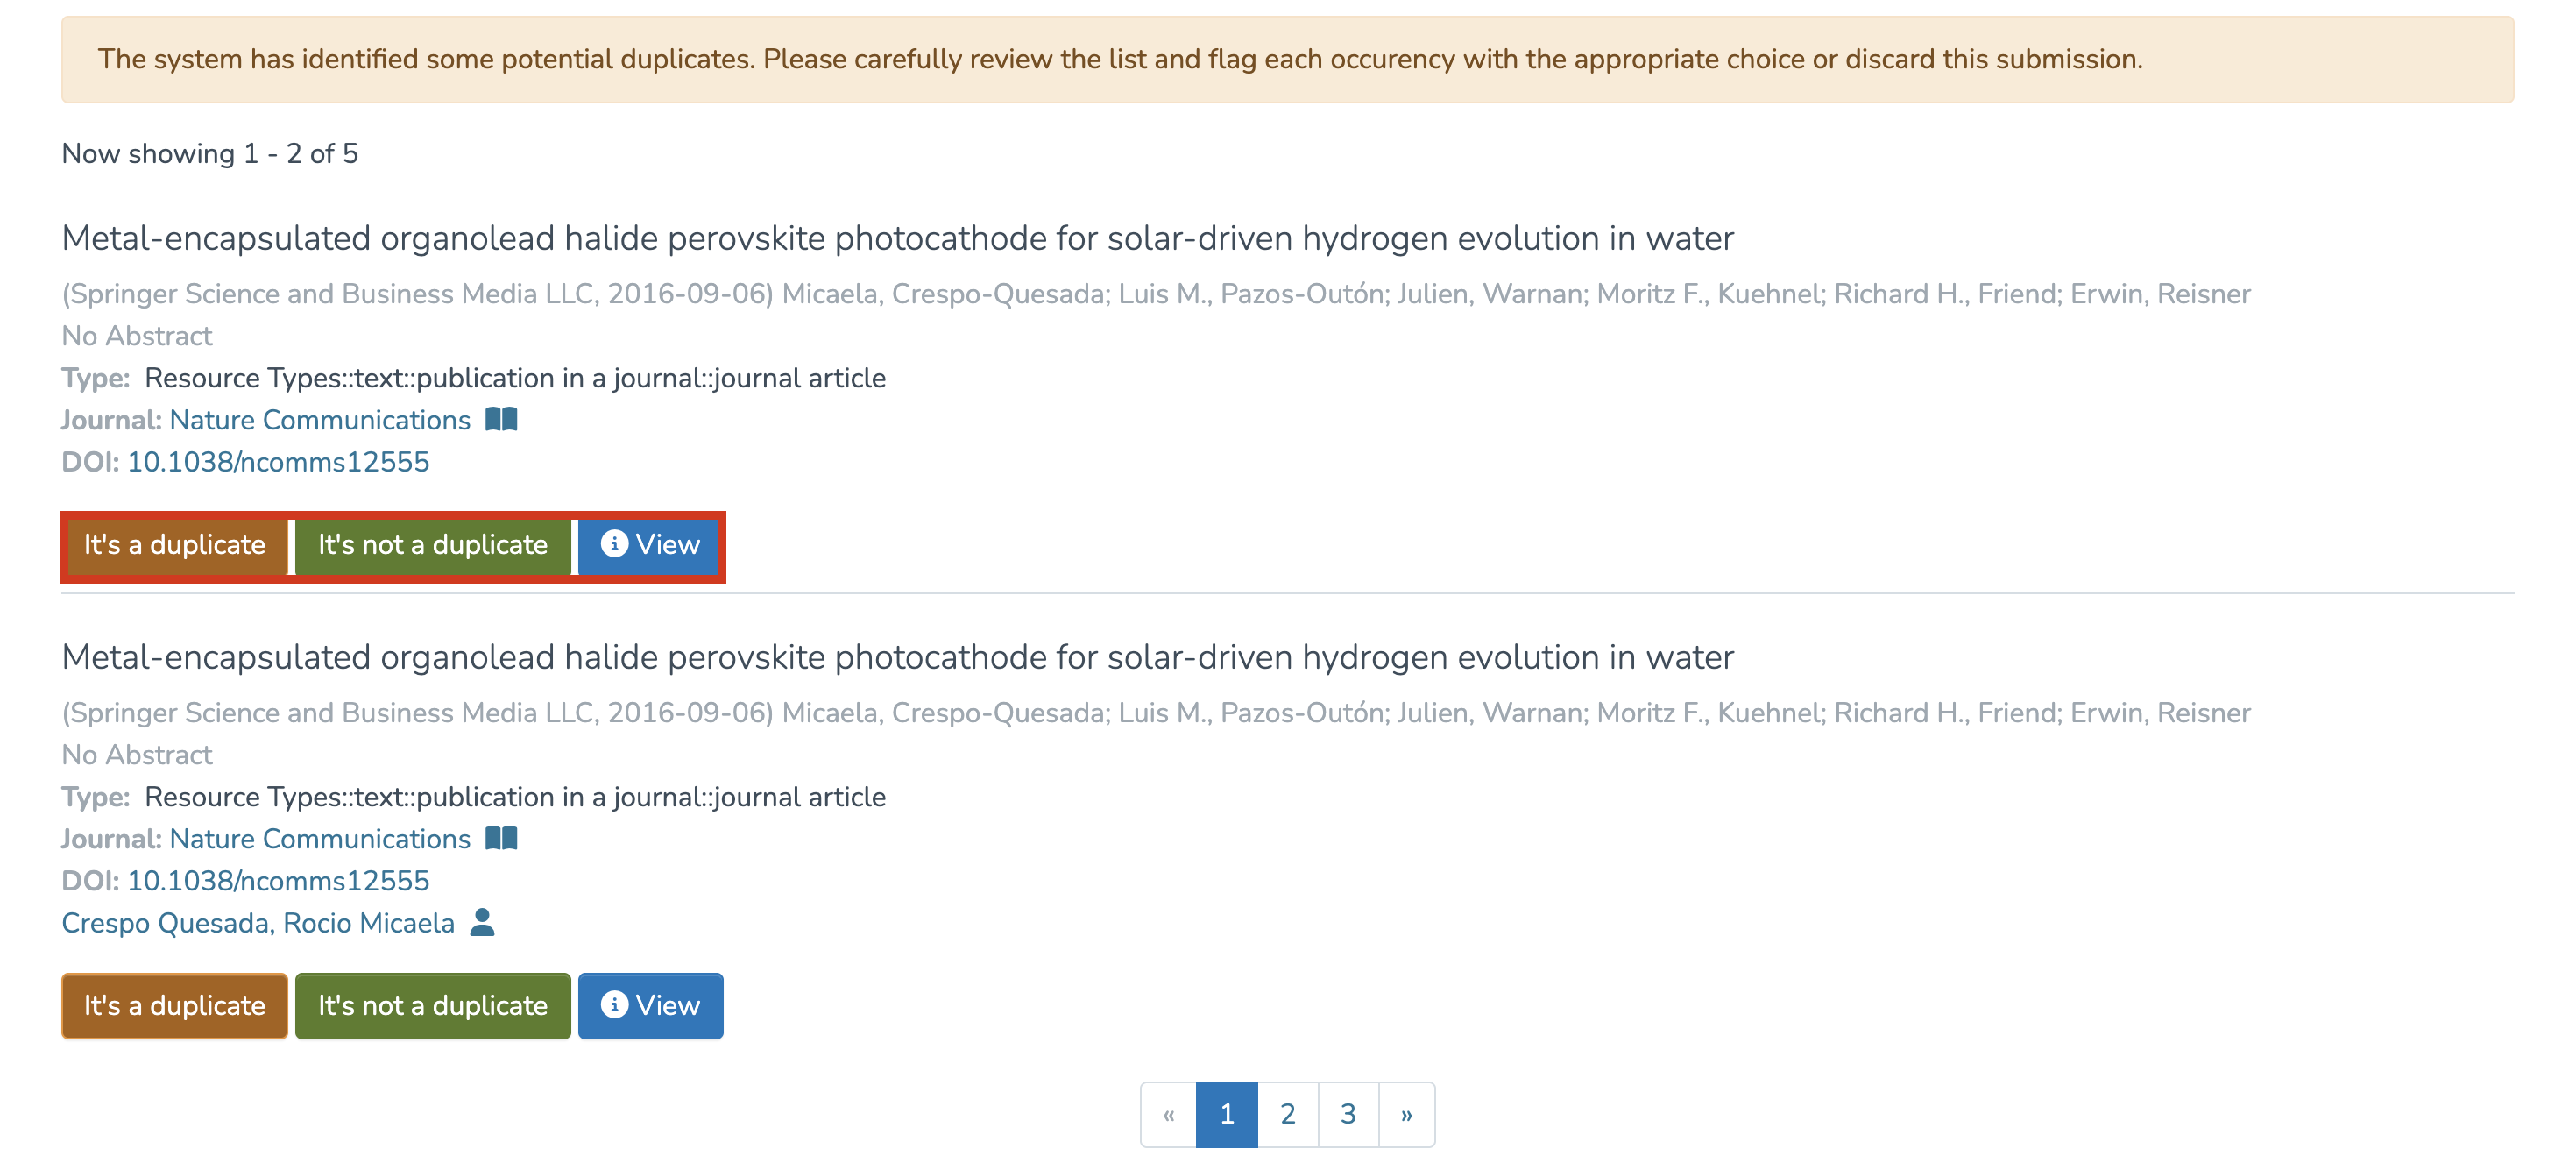
Check for duplicates
The system will display a list of potential duplicates. For each item, click on “It's a duplicate” or “It's not a duplicate” as appropriate.
Finalize the submission
- If you’re uploading a full-text document, you will need to approve the user license.
- Once your publication entry is complete, choose “Save” or “Save and quit” to save the record, or click “Publish” to immediately publish it.


Entering a publication by DOI/PMID
The voice in this video was generated by artificial intelligence.
Entry
1. Firstly, you should access your workspace
2. Then, you should click on “Enter.”
3. Search for the collection in which you want to create the record, then select it, or click on the one already suggested to access the entry form.
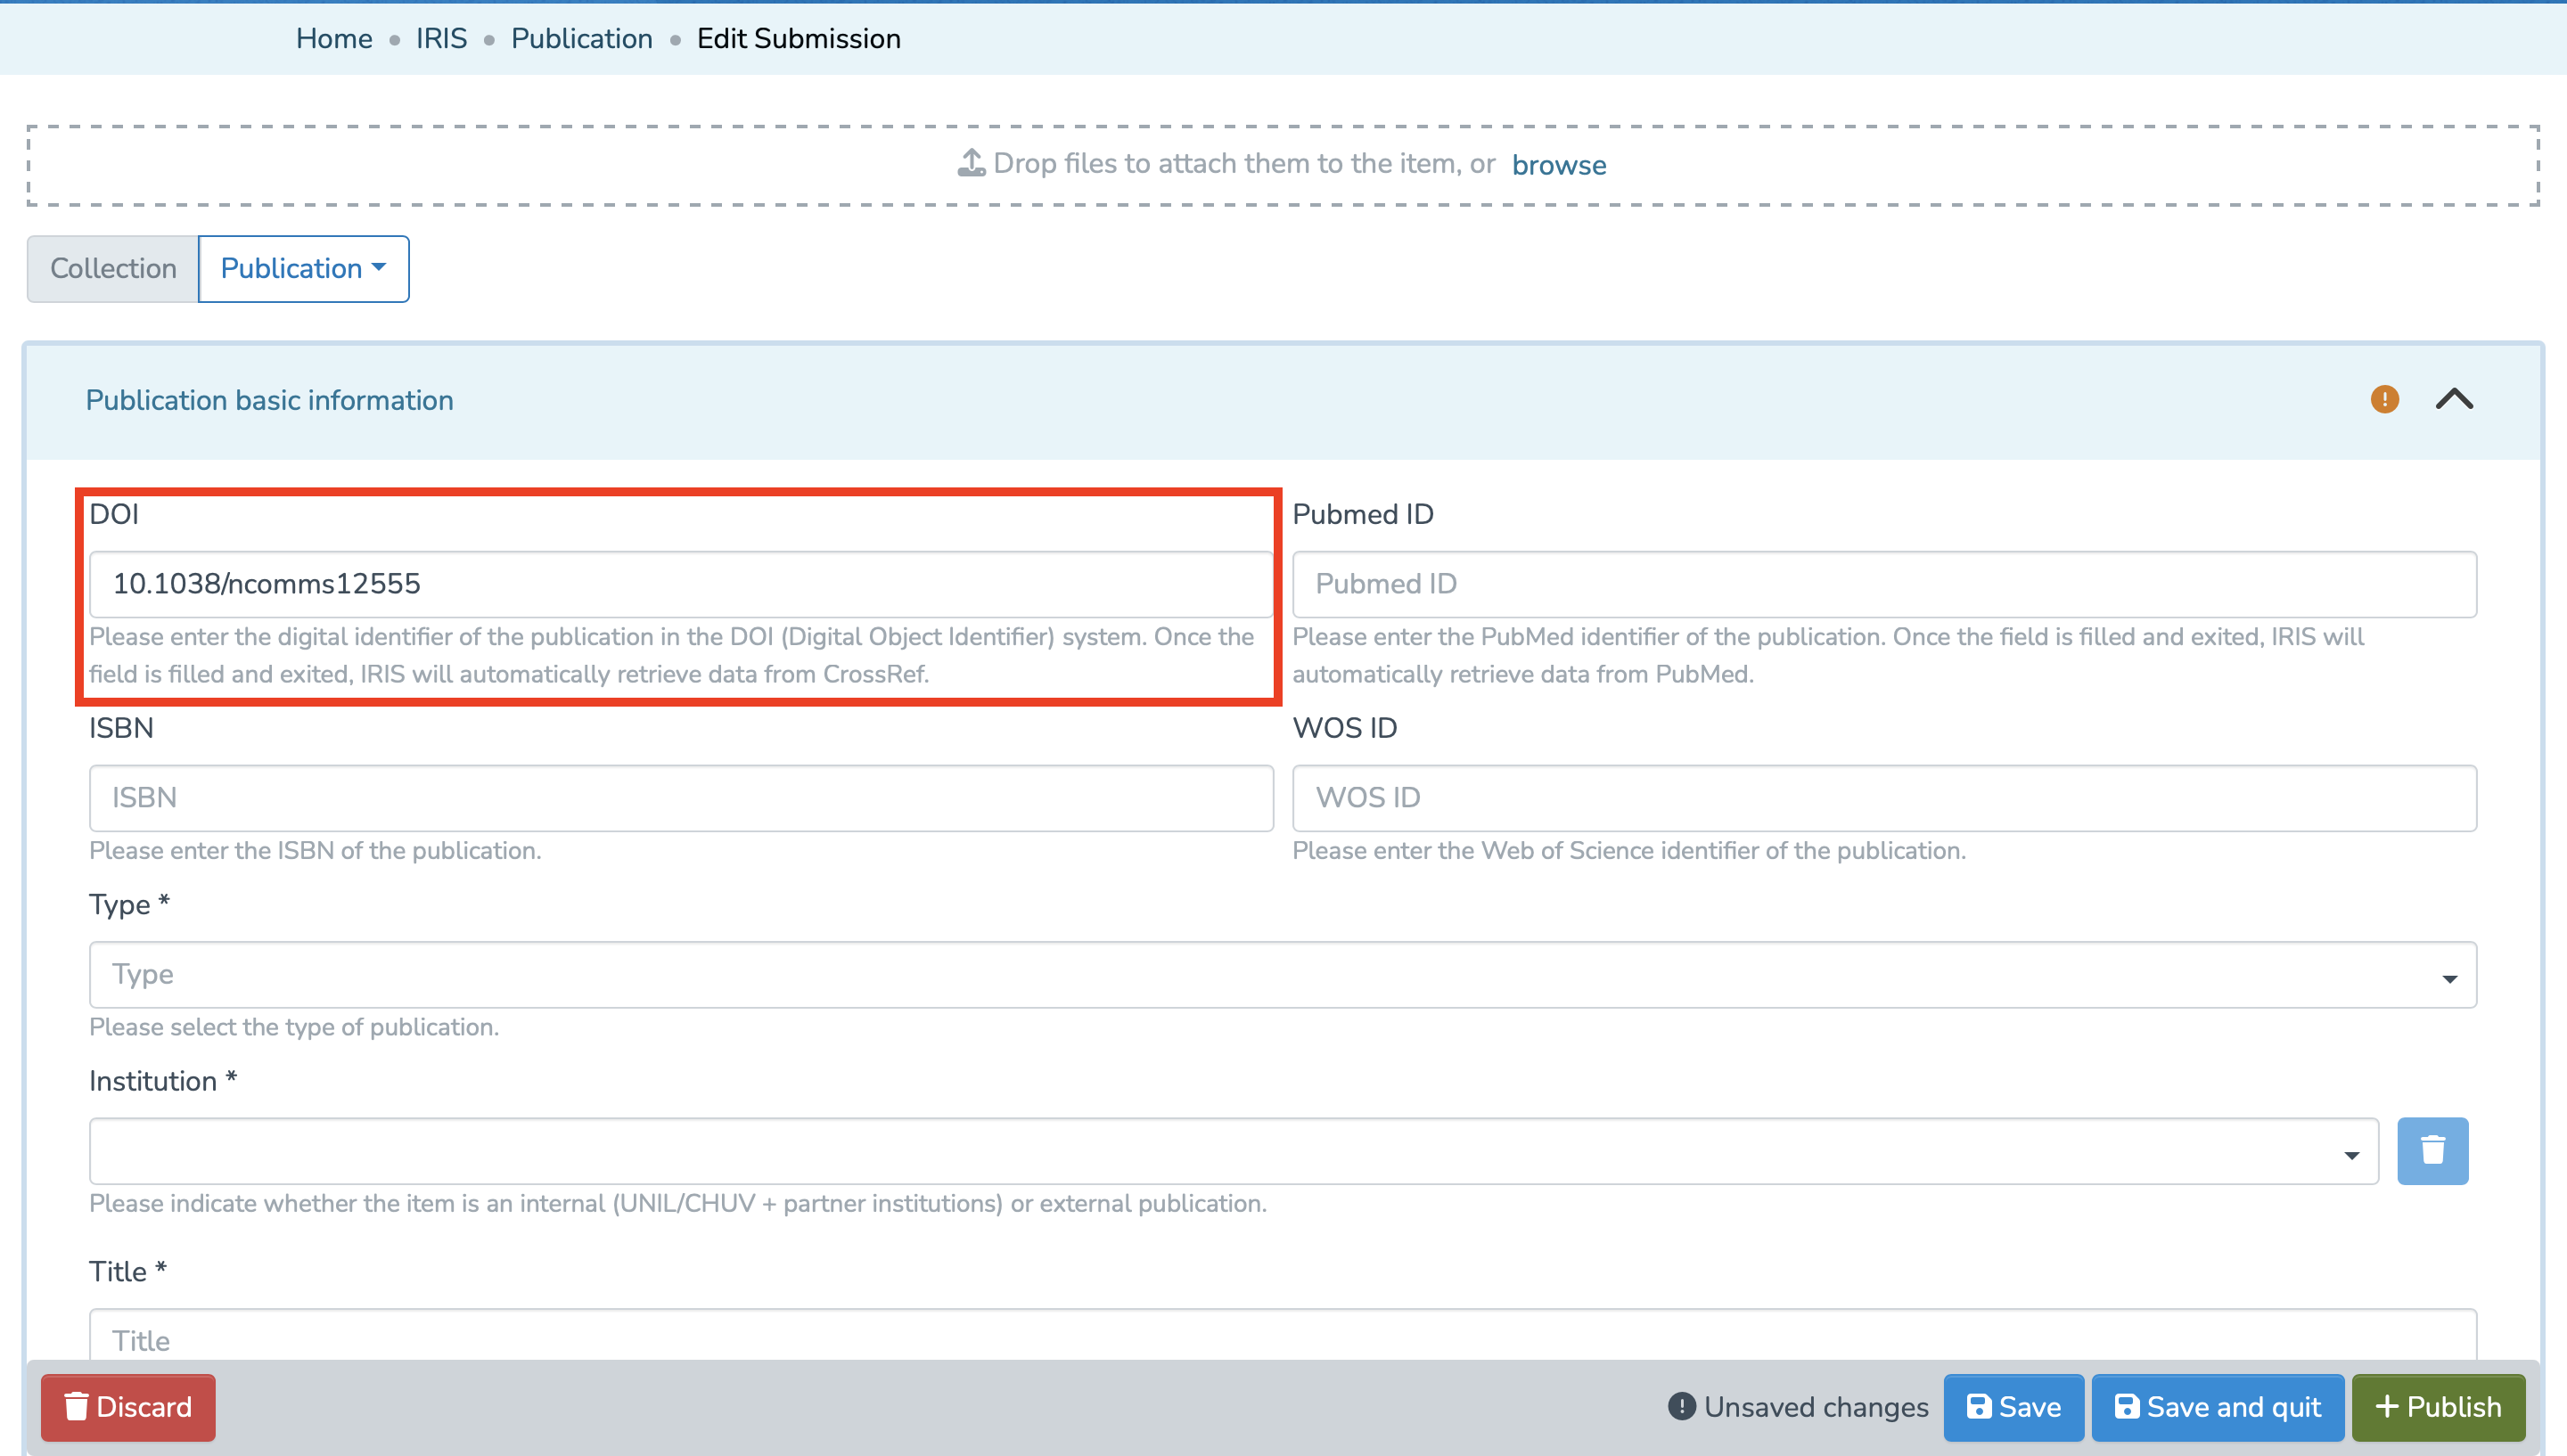
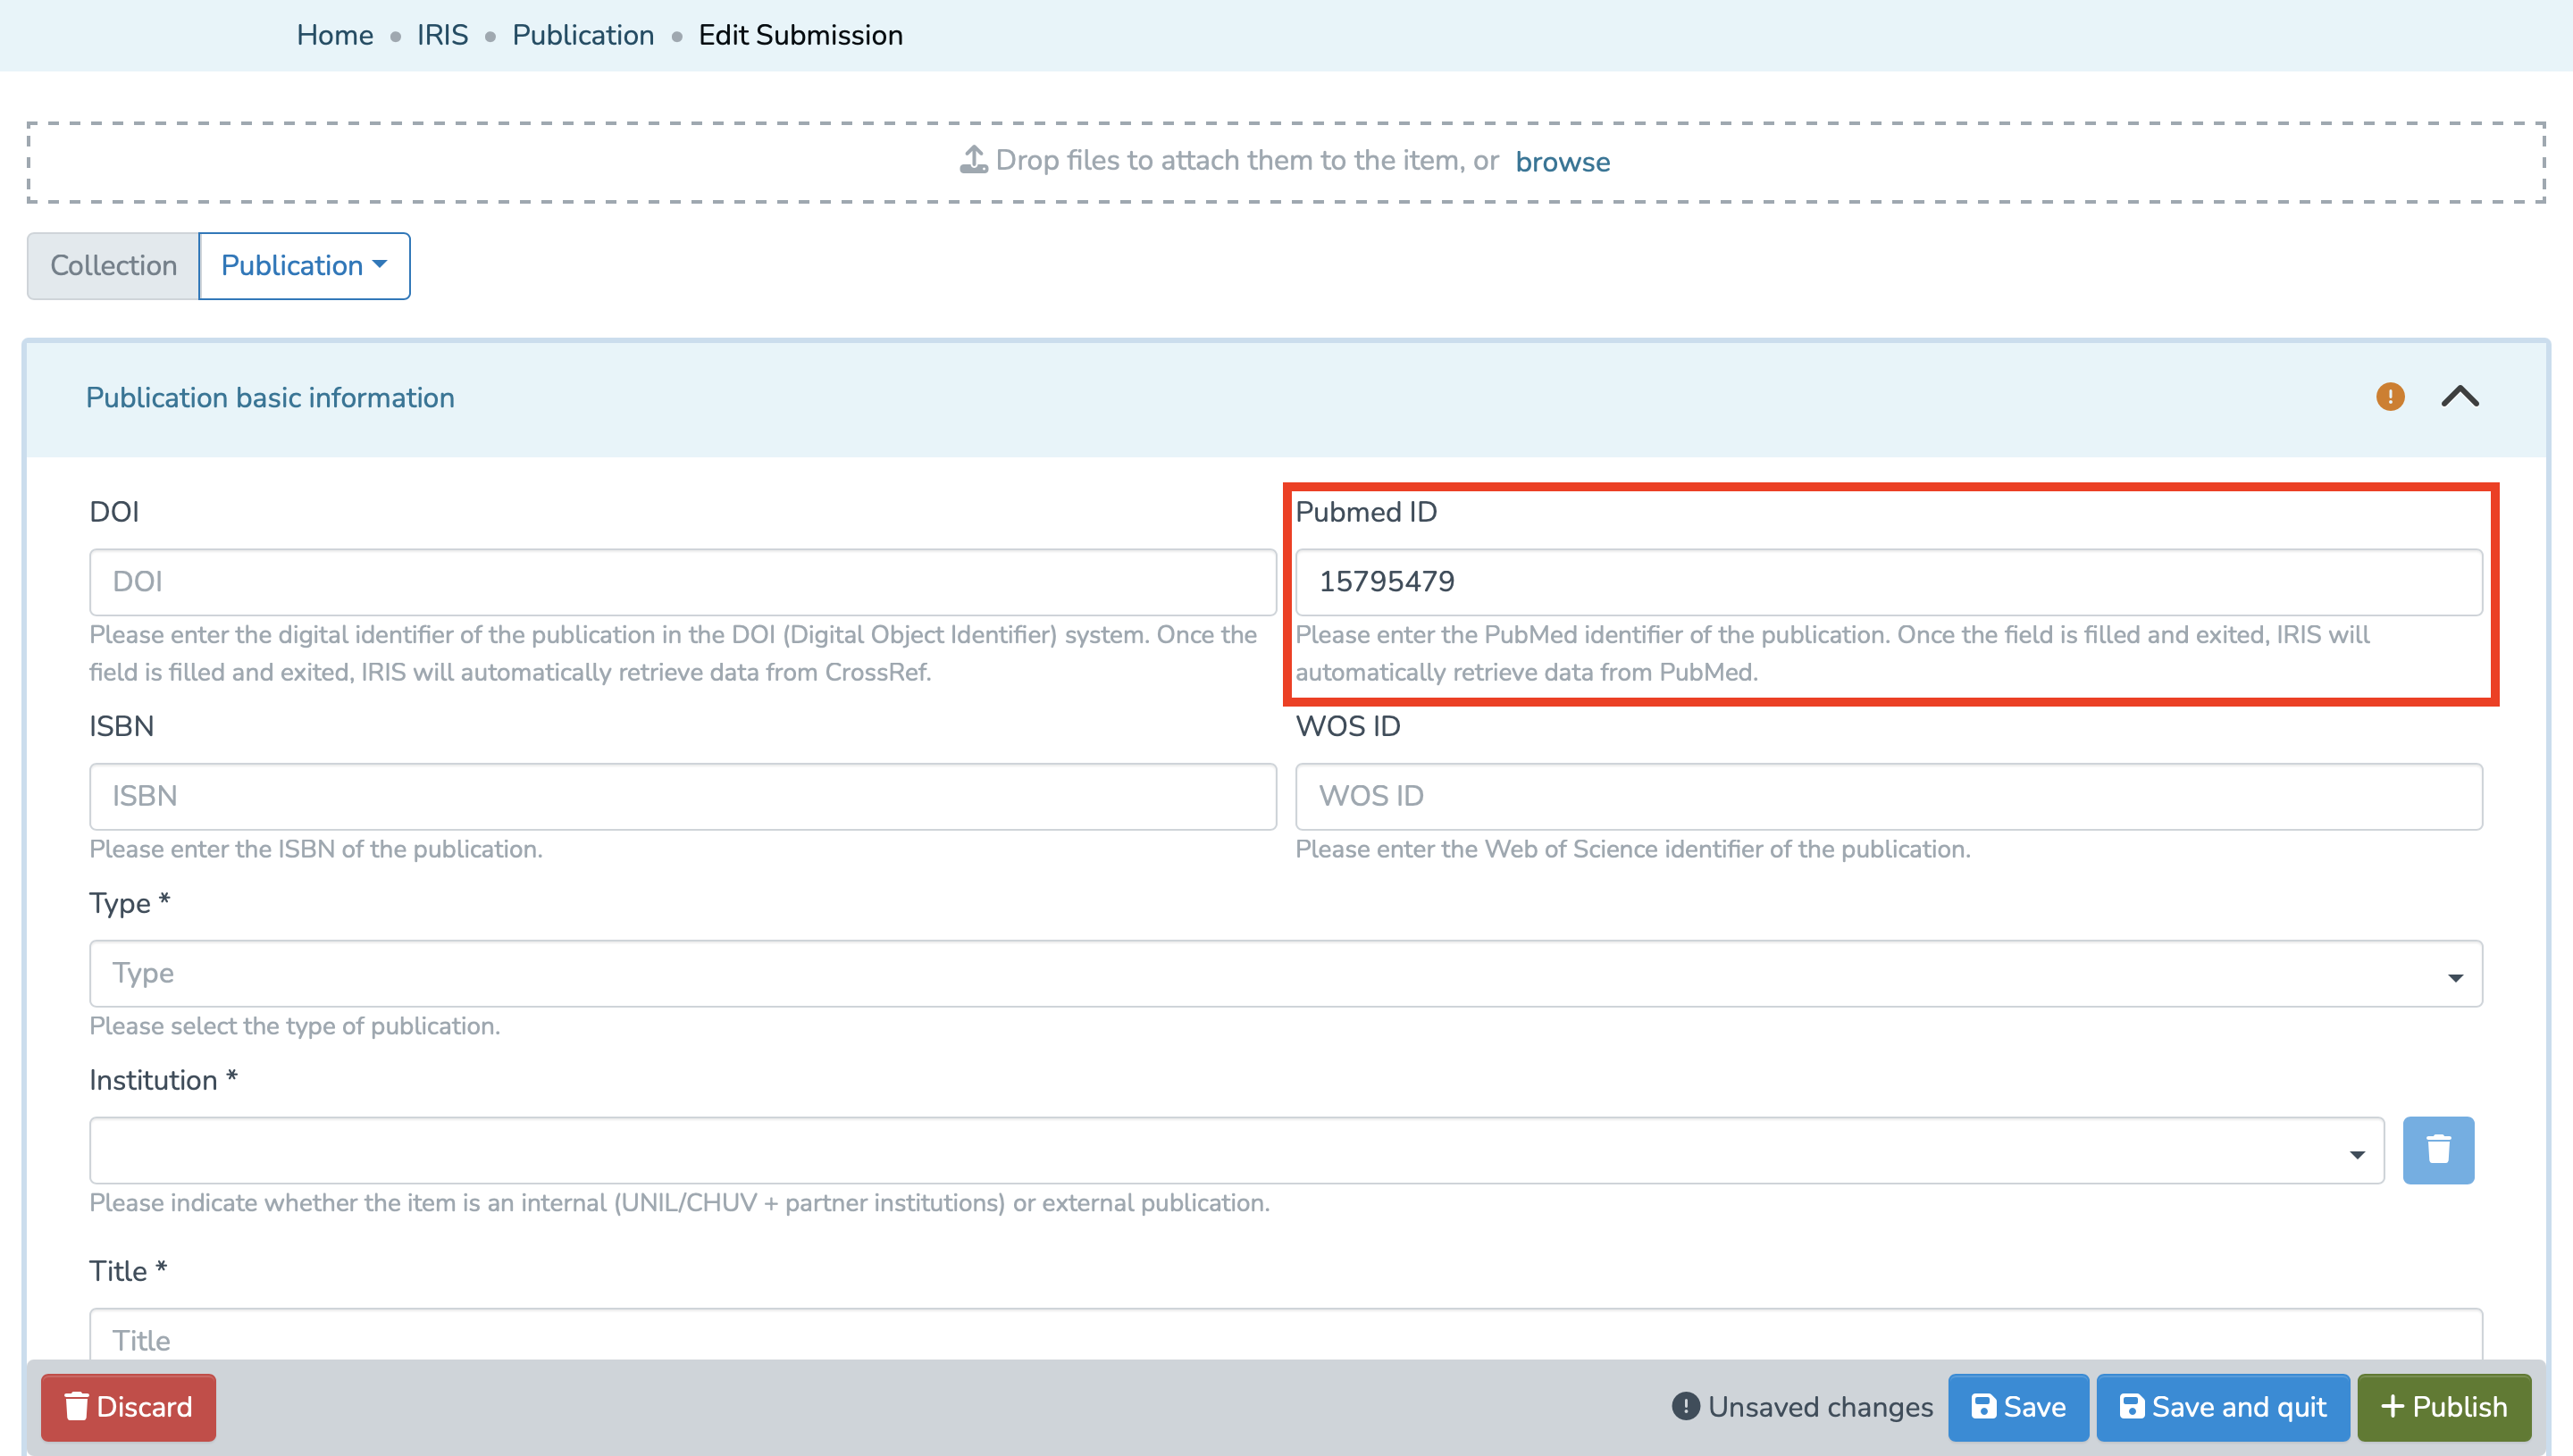
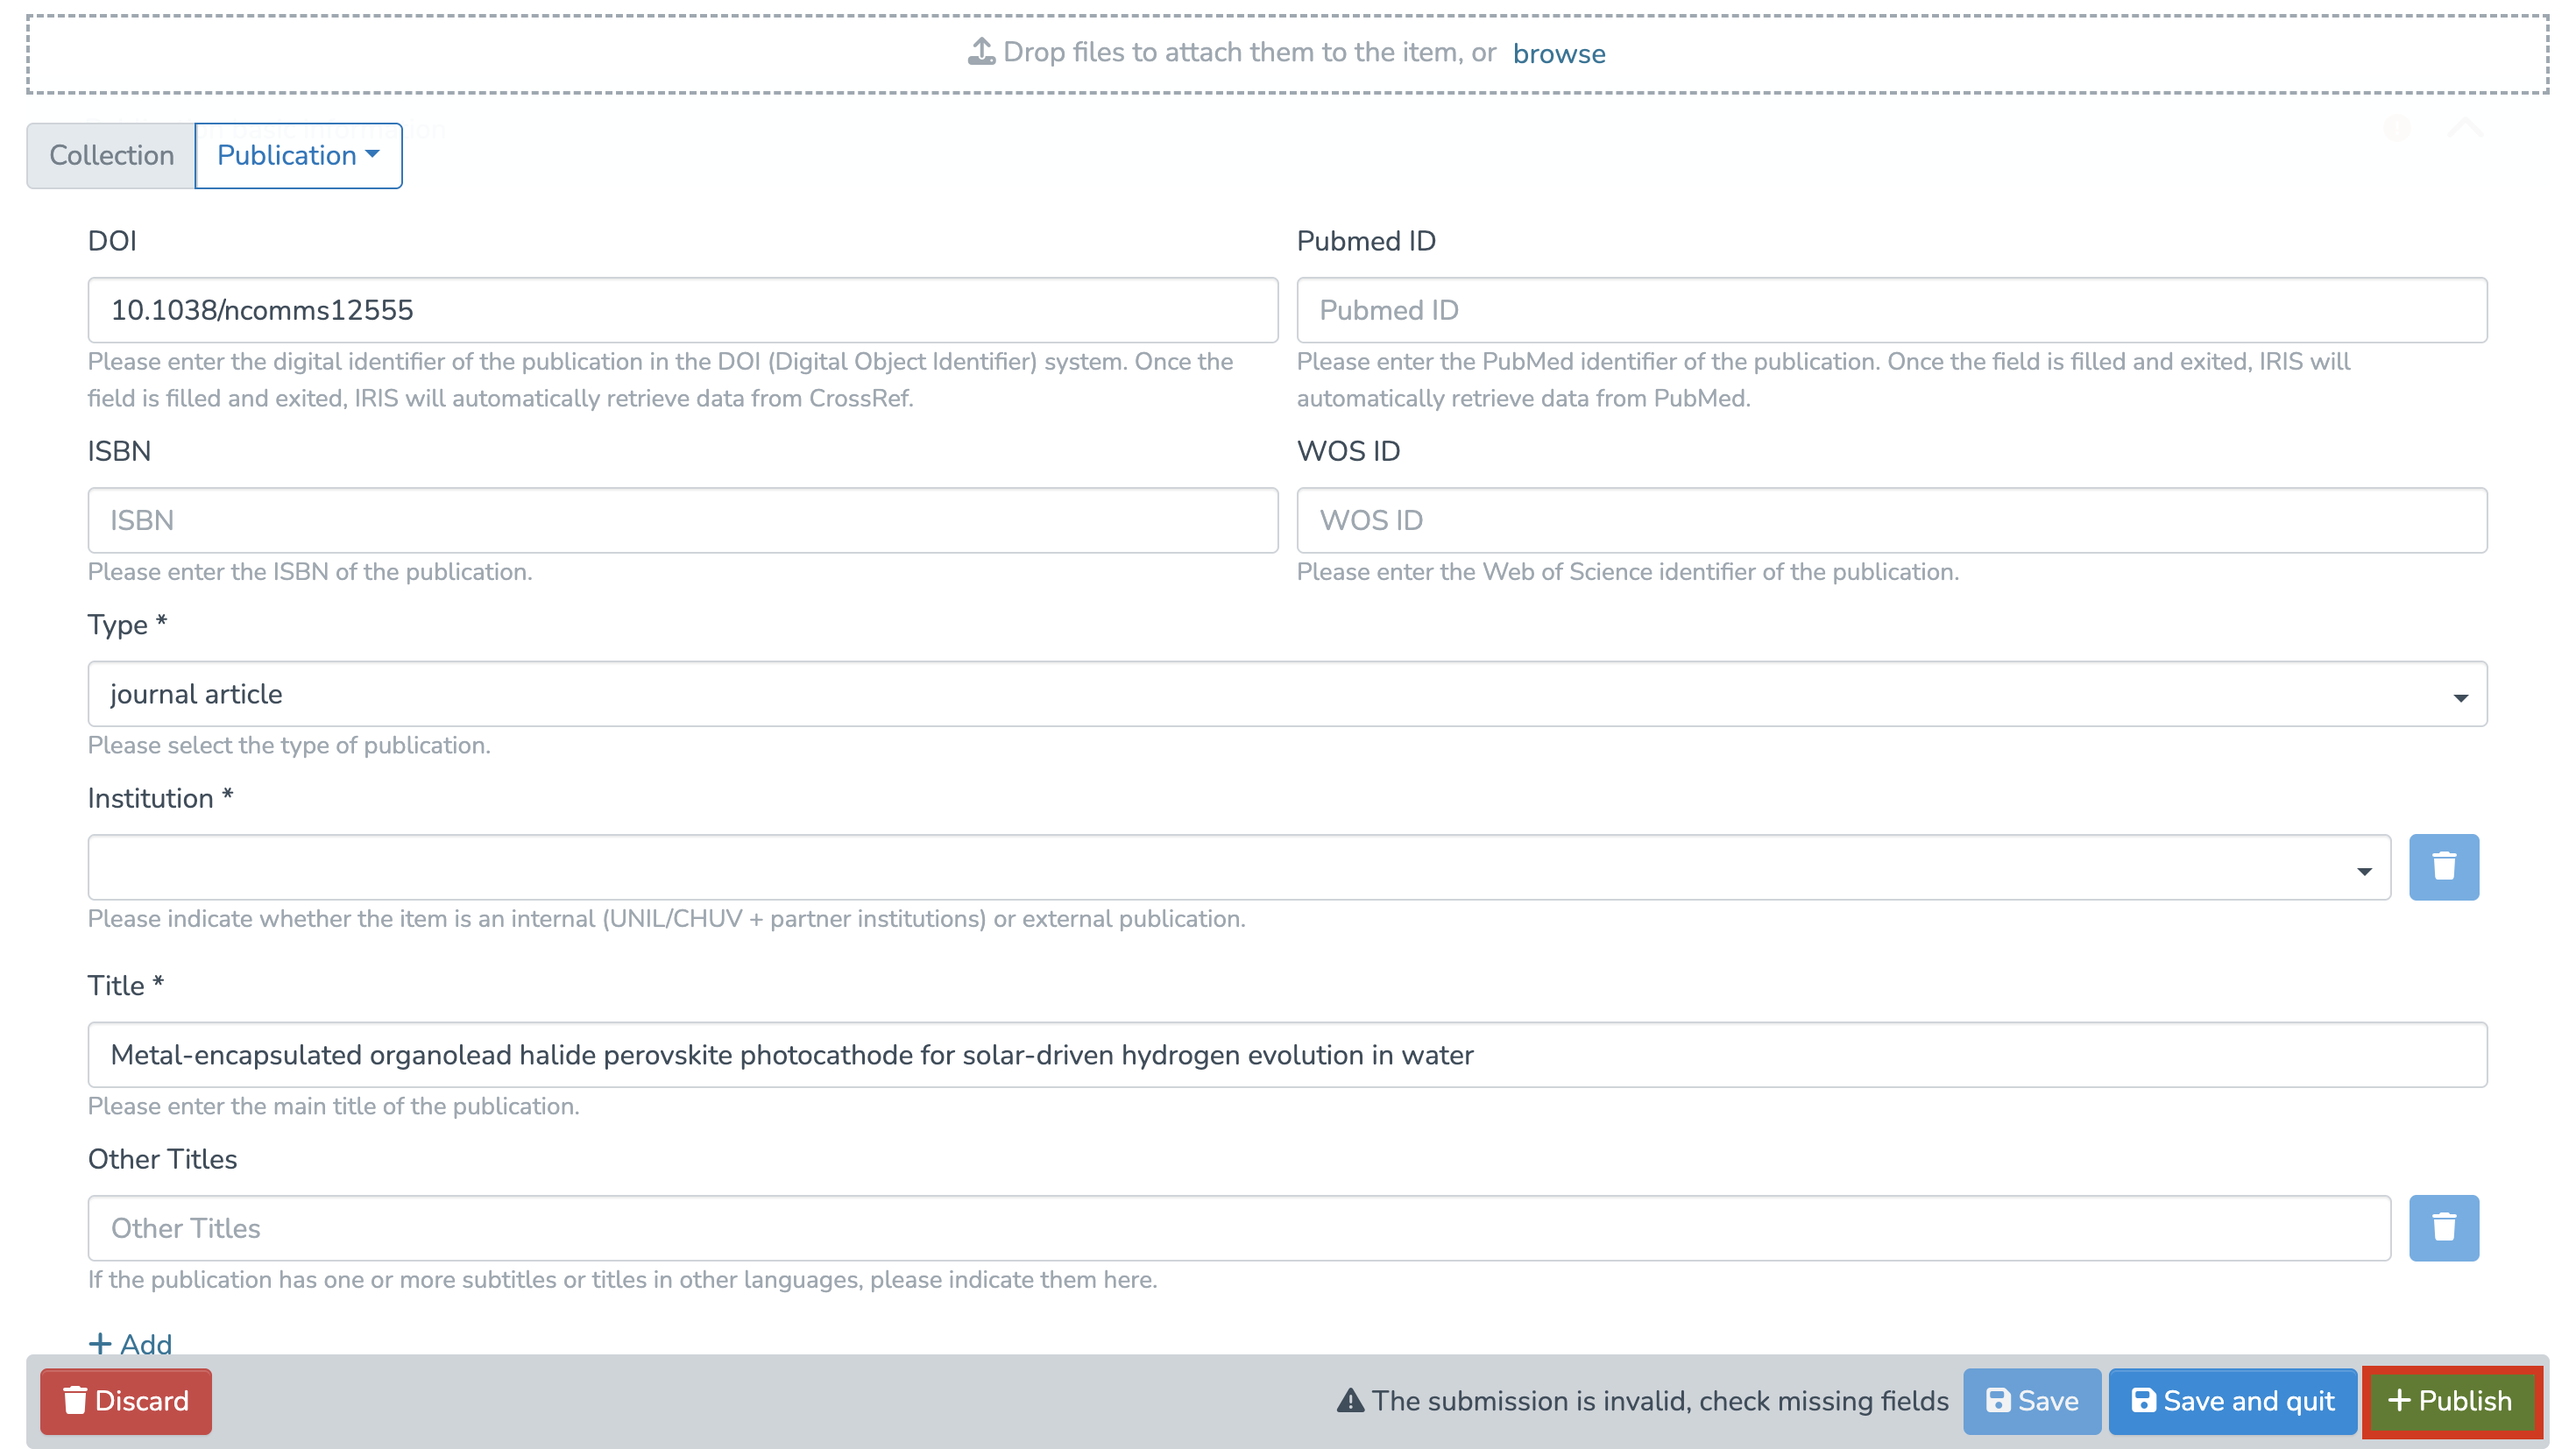
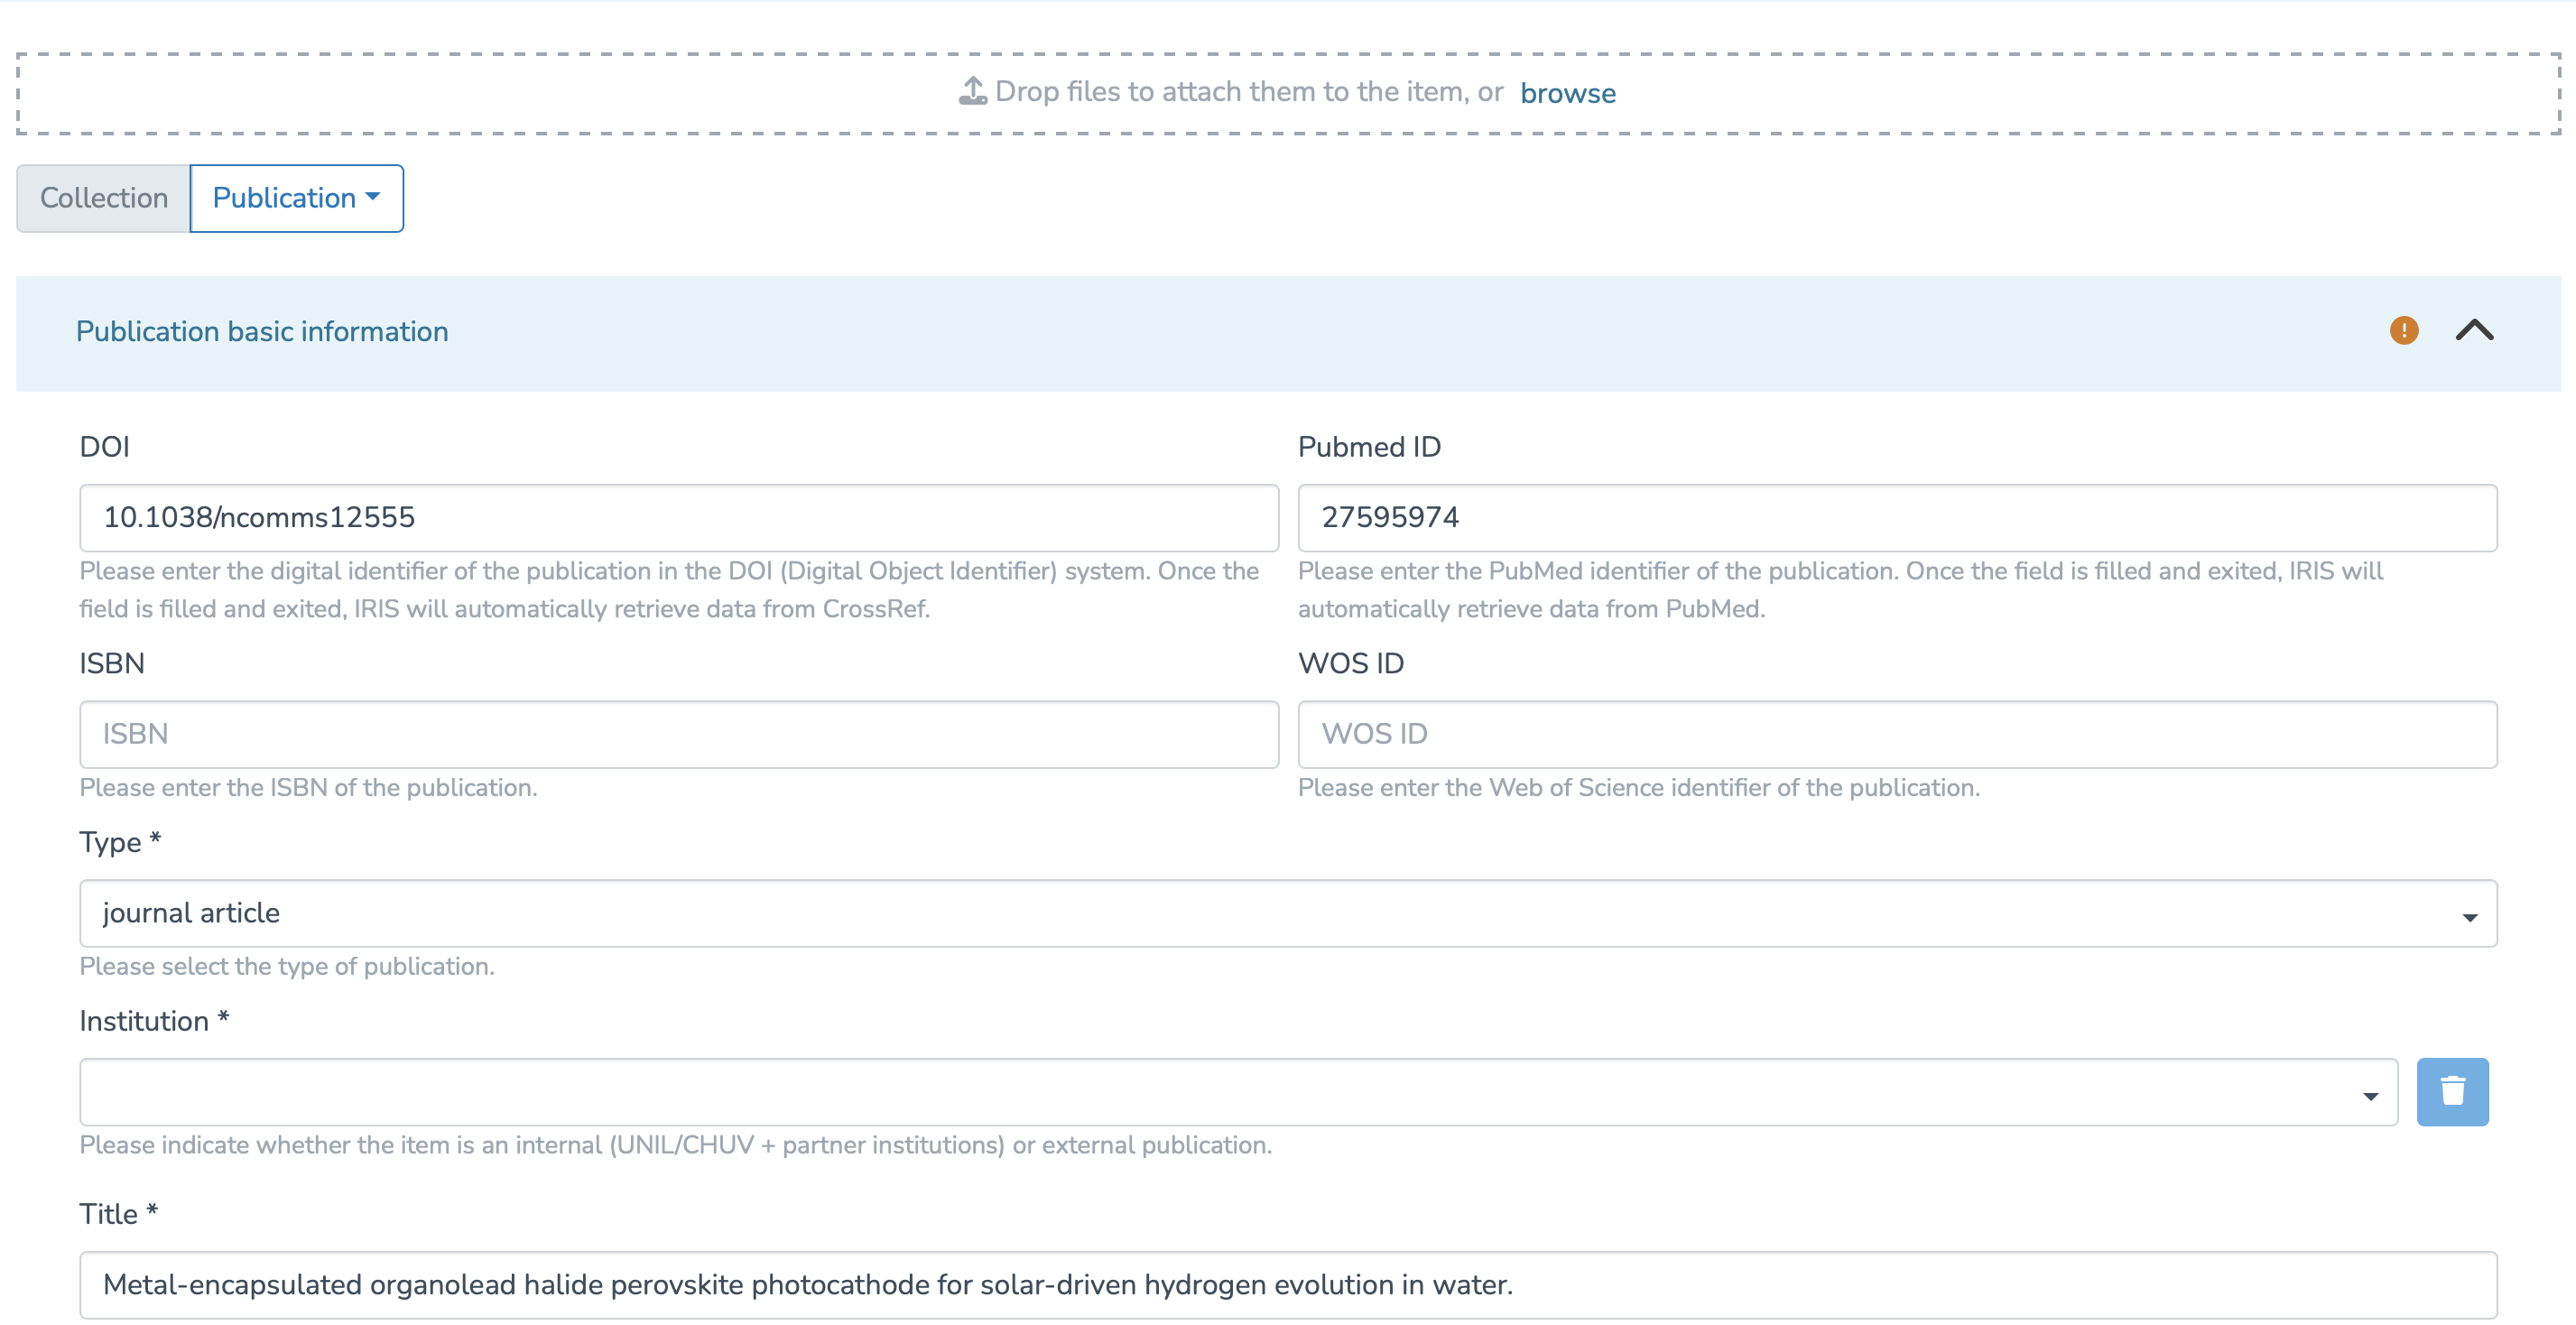
Entering the DOI/PMID
In this case, we are interested in the publication by DOI (1) or PMID (2). In the form, you will need to enter the DOI (Digital Object Identifier) or the PubMed ID. IRIS will then automatically link the data. However, you must move your cursor away from the DOI or PMID input field and click elsewhere so that the metadata is populated.
Note: Fields marked with a " * " are mandatory and must be completed if they are not already filled in.
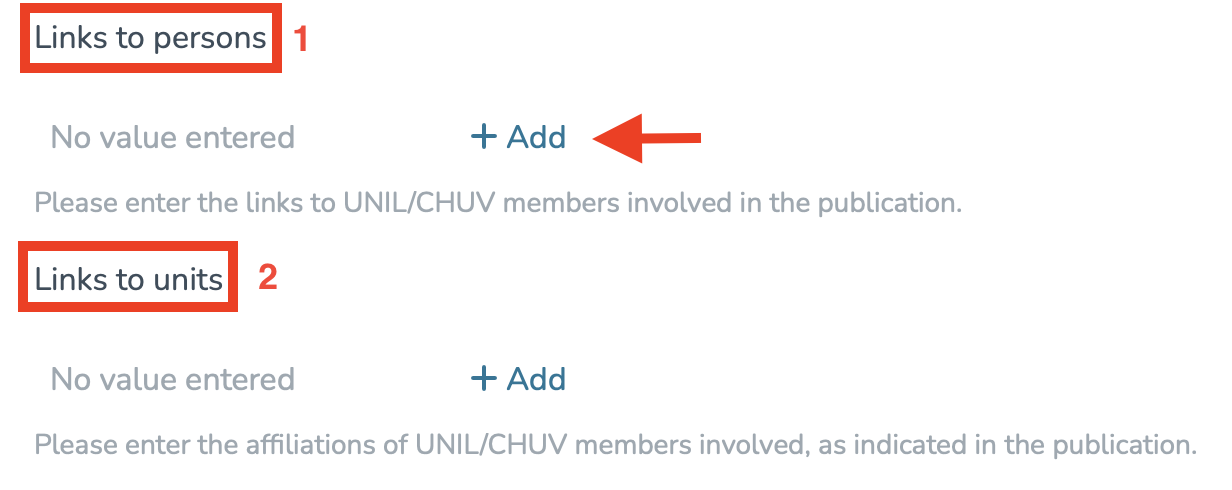
Linking People and Units
In IRIS, by default, the person who enters a record does not have the right to edit it. Only the individuals linked to the record have this permission. Make sure to properly link all relevant persons to the record.
Make sure to fill in the following two fields by clicking “Add”:
1. Links to people (Internal & external publication to UNIL/CHUV/Unisanté).
2. Links to units (Only internal publication to UNIL/CHUV/Unisanté).
Checking for Duplicates
The system will suggest a list of potential duplicates. You will need to go through each suggested publication and specify whether it is a duplicate by clicking “It is a duplicate” or “It is not a duplicate,” as appropriate.
Note: Make sure to go through each publication, as several pages may be available.
Once these steps are completed, you will need to:
1. Approve the license by ticking the indicated checkbox.
2. Choose whether to save or publish your entry immediately.

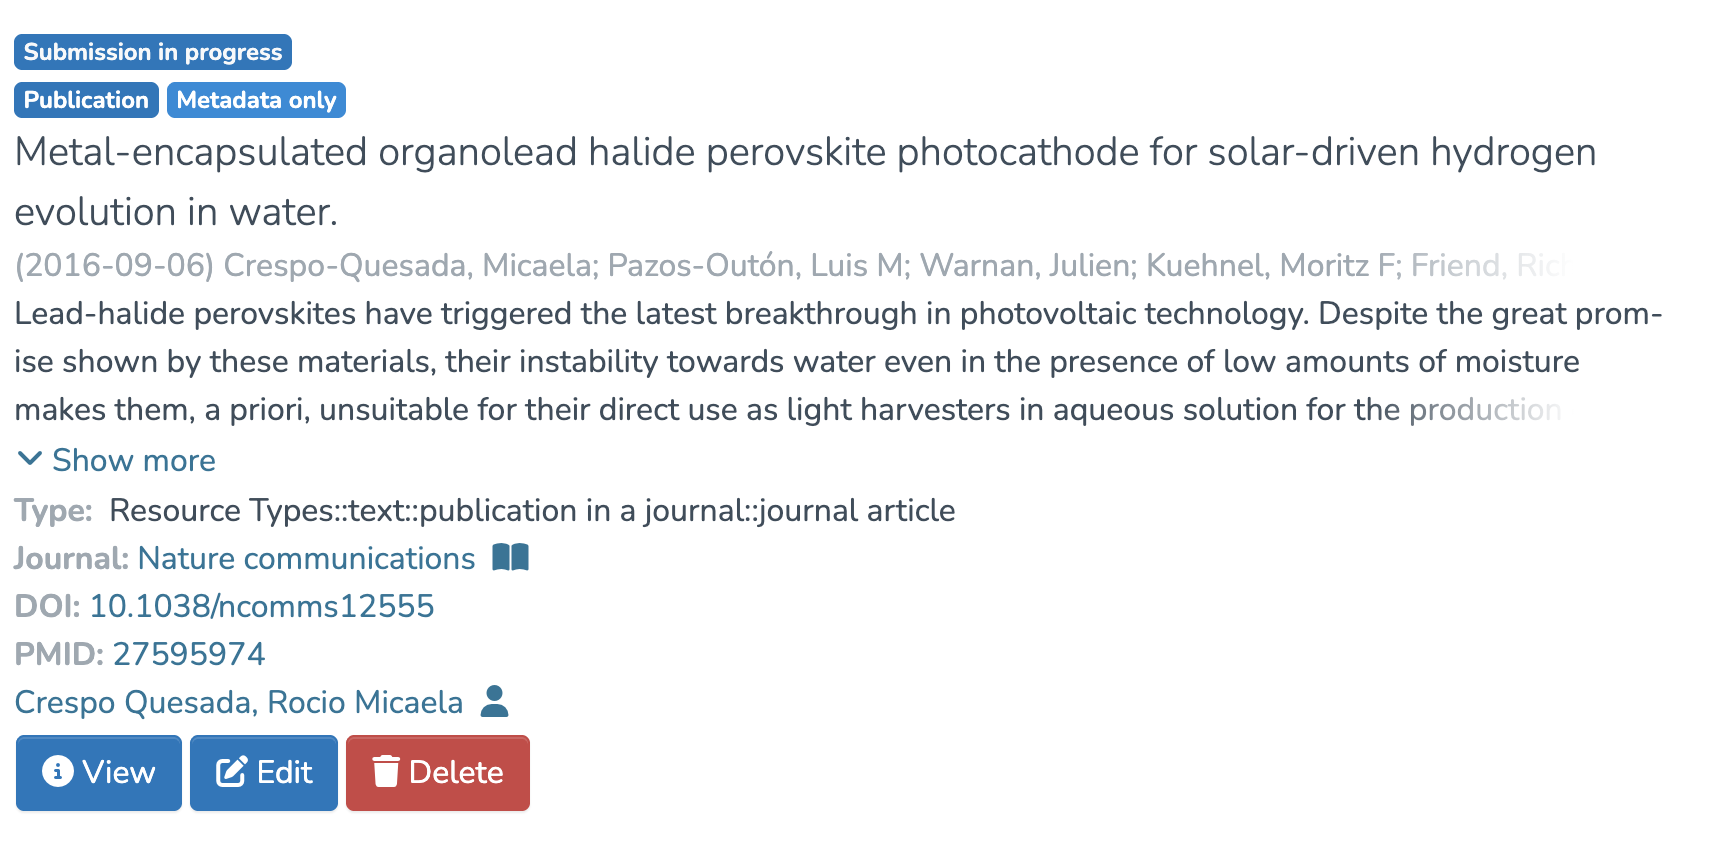
After publishing your entry, you can access its metadata as follows:
-
Access your workspace.
-
Click “View” under the title of the corresponding publication.

To display all metadata, click on “...”, then on “Show all metadata.”
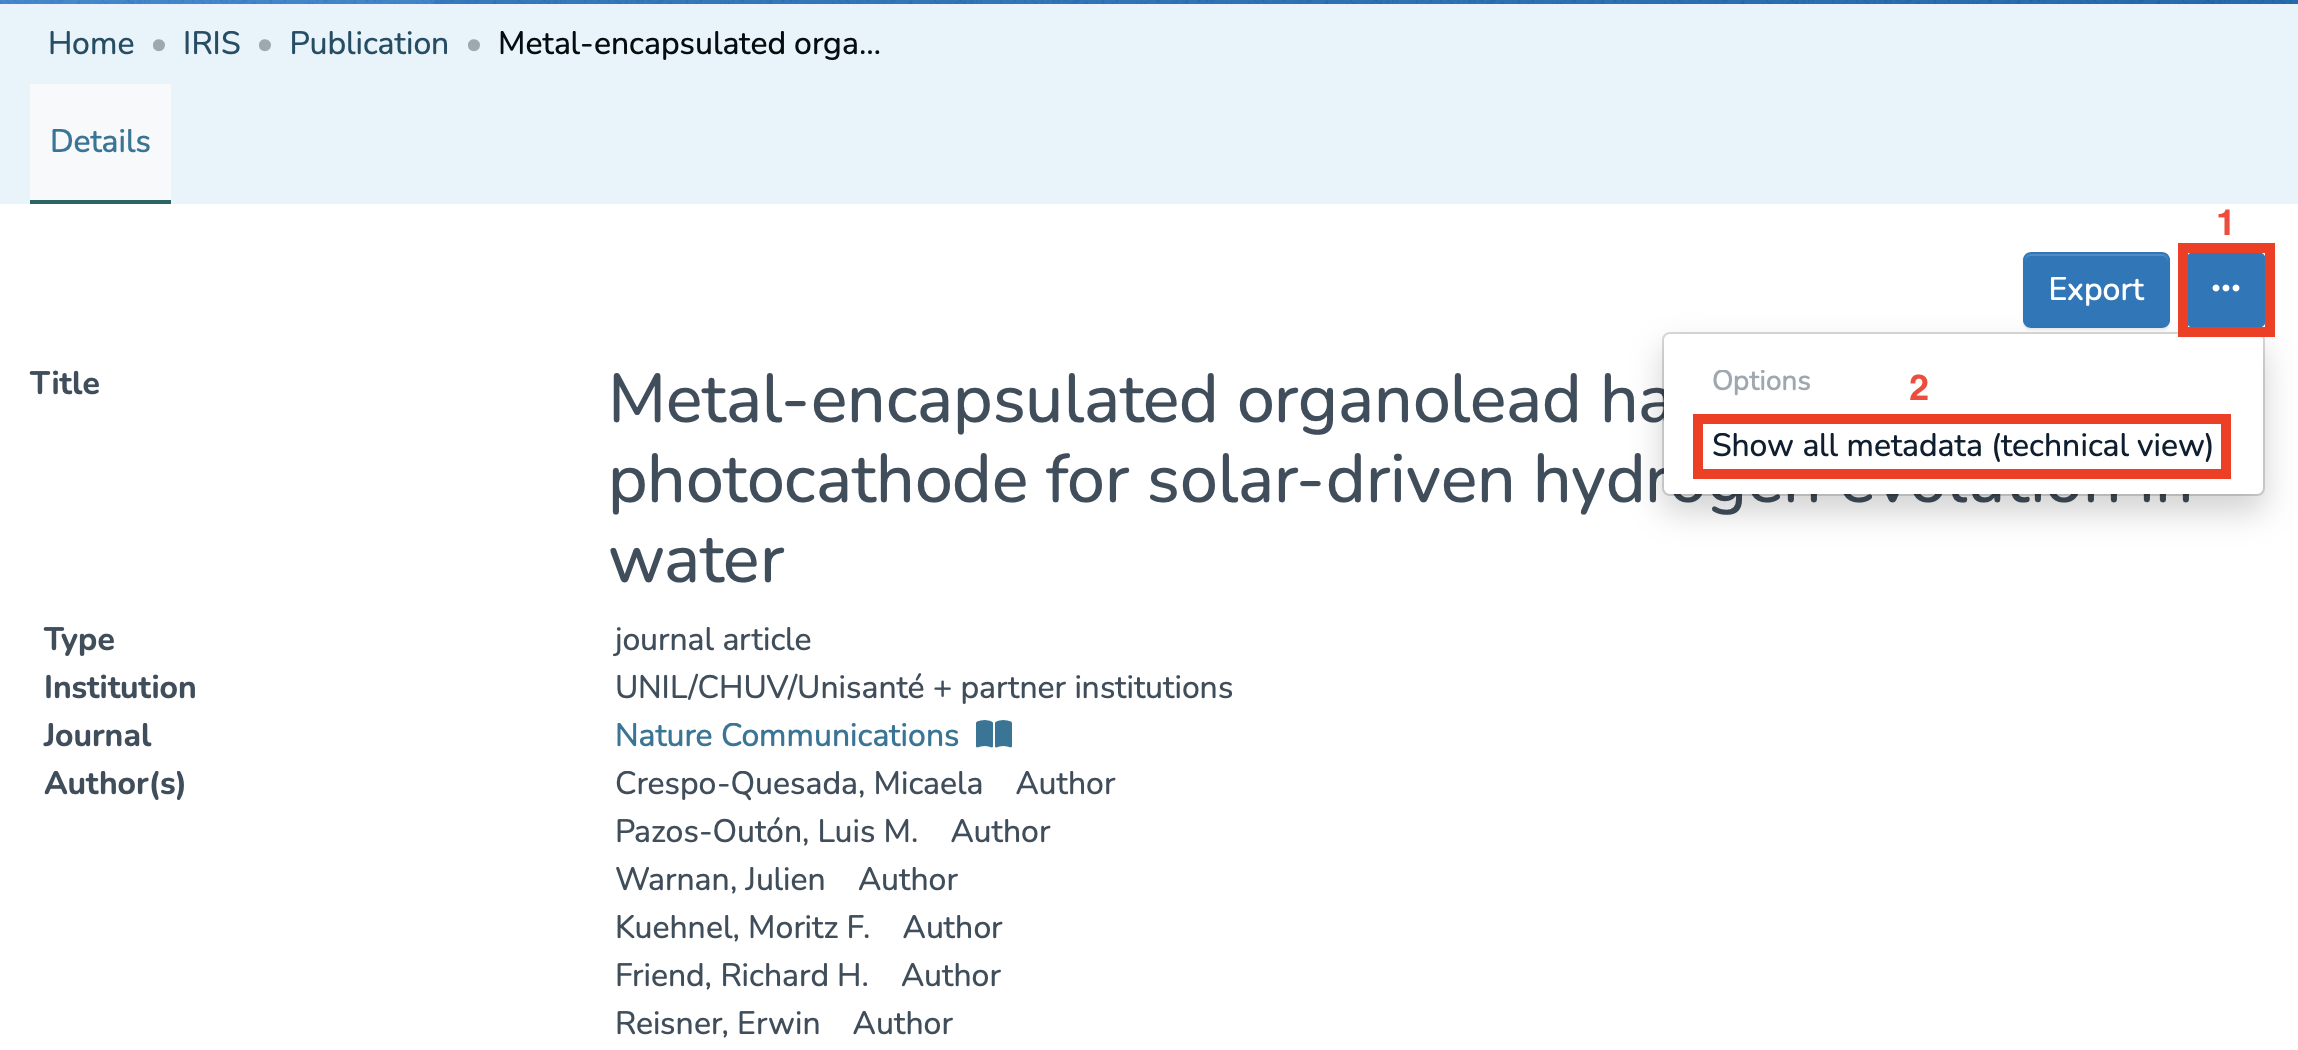
You will then have access to a detailed page displaying all the metadata of the item.
Adding full text and/or secondary documents
The voice in this video was generated by artificial intelligence.
Access your researcher profile
Accessing Your Profile via the Login Menu
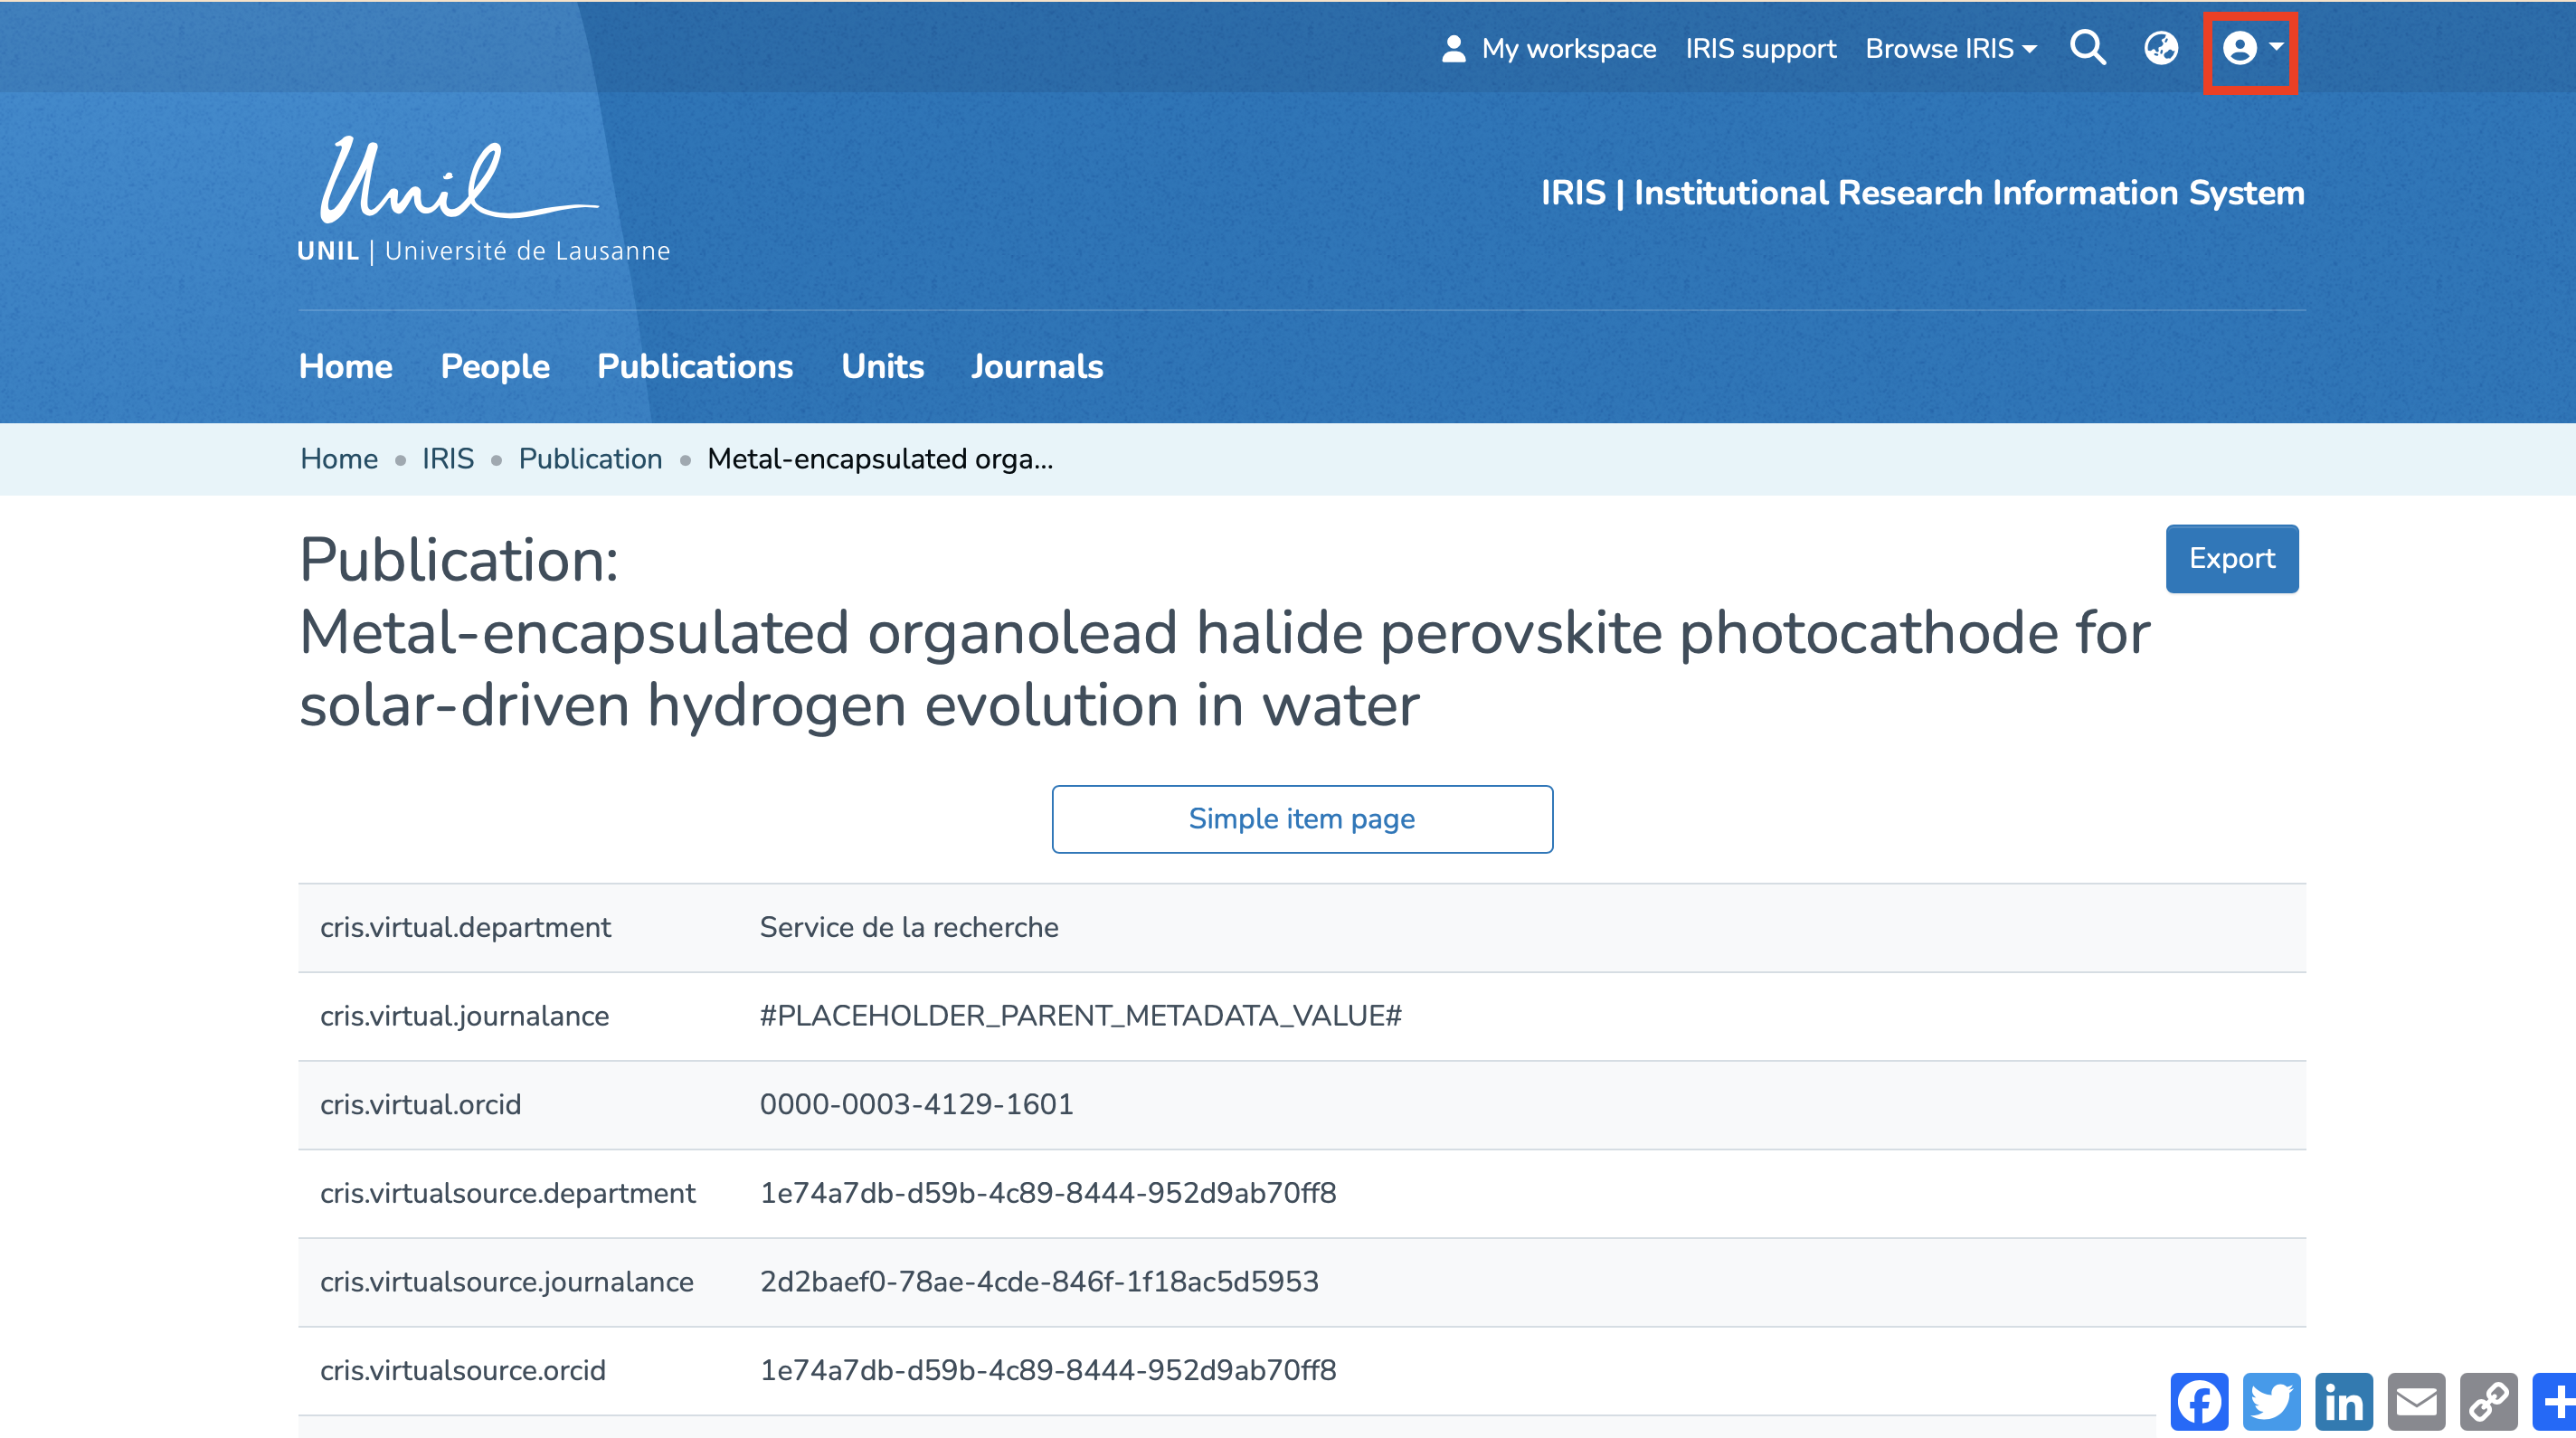
- From the IRIS homepage, click on the login menu.
- In the dropdown menu, select “My account and profile.”
- You’ll be redirected to a page titled “Update Profile”. Click on “View” to open the full version of your profile.
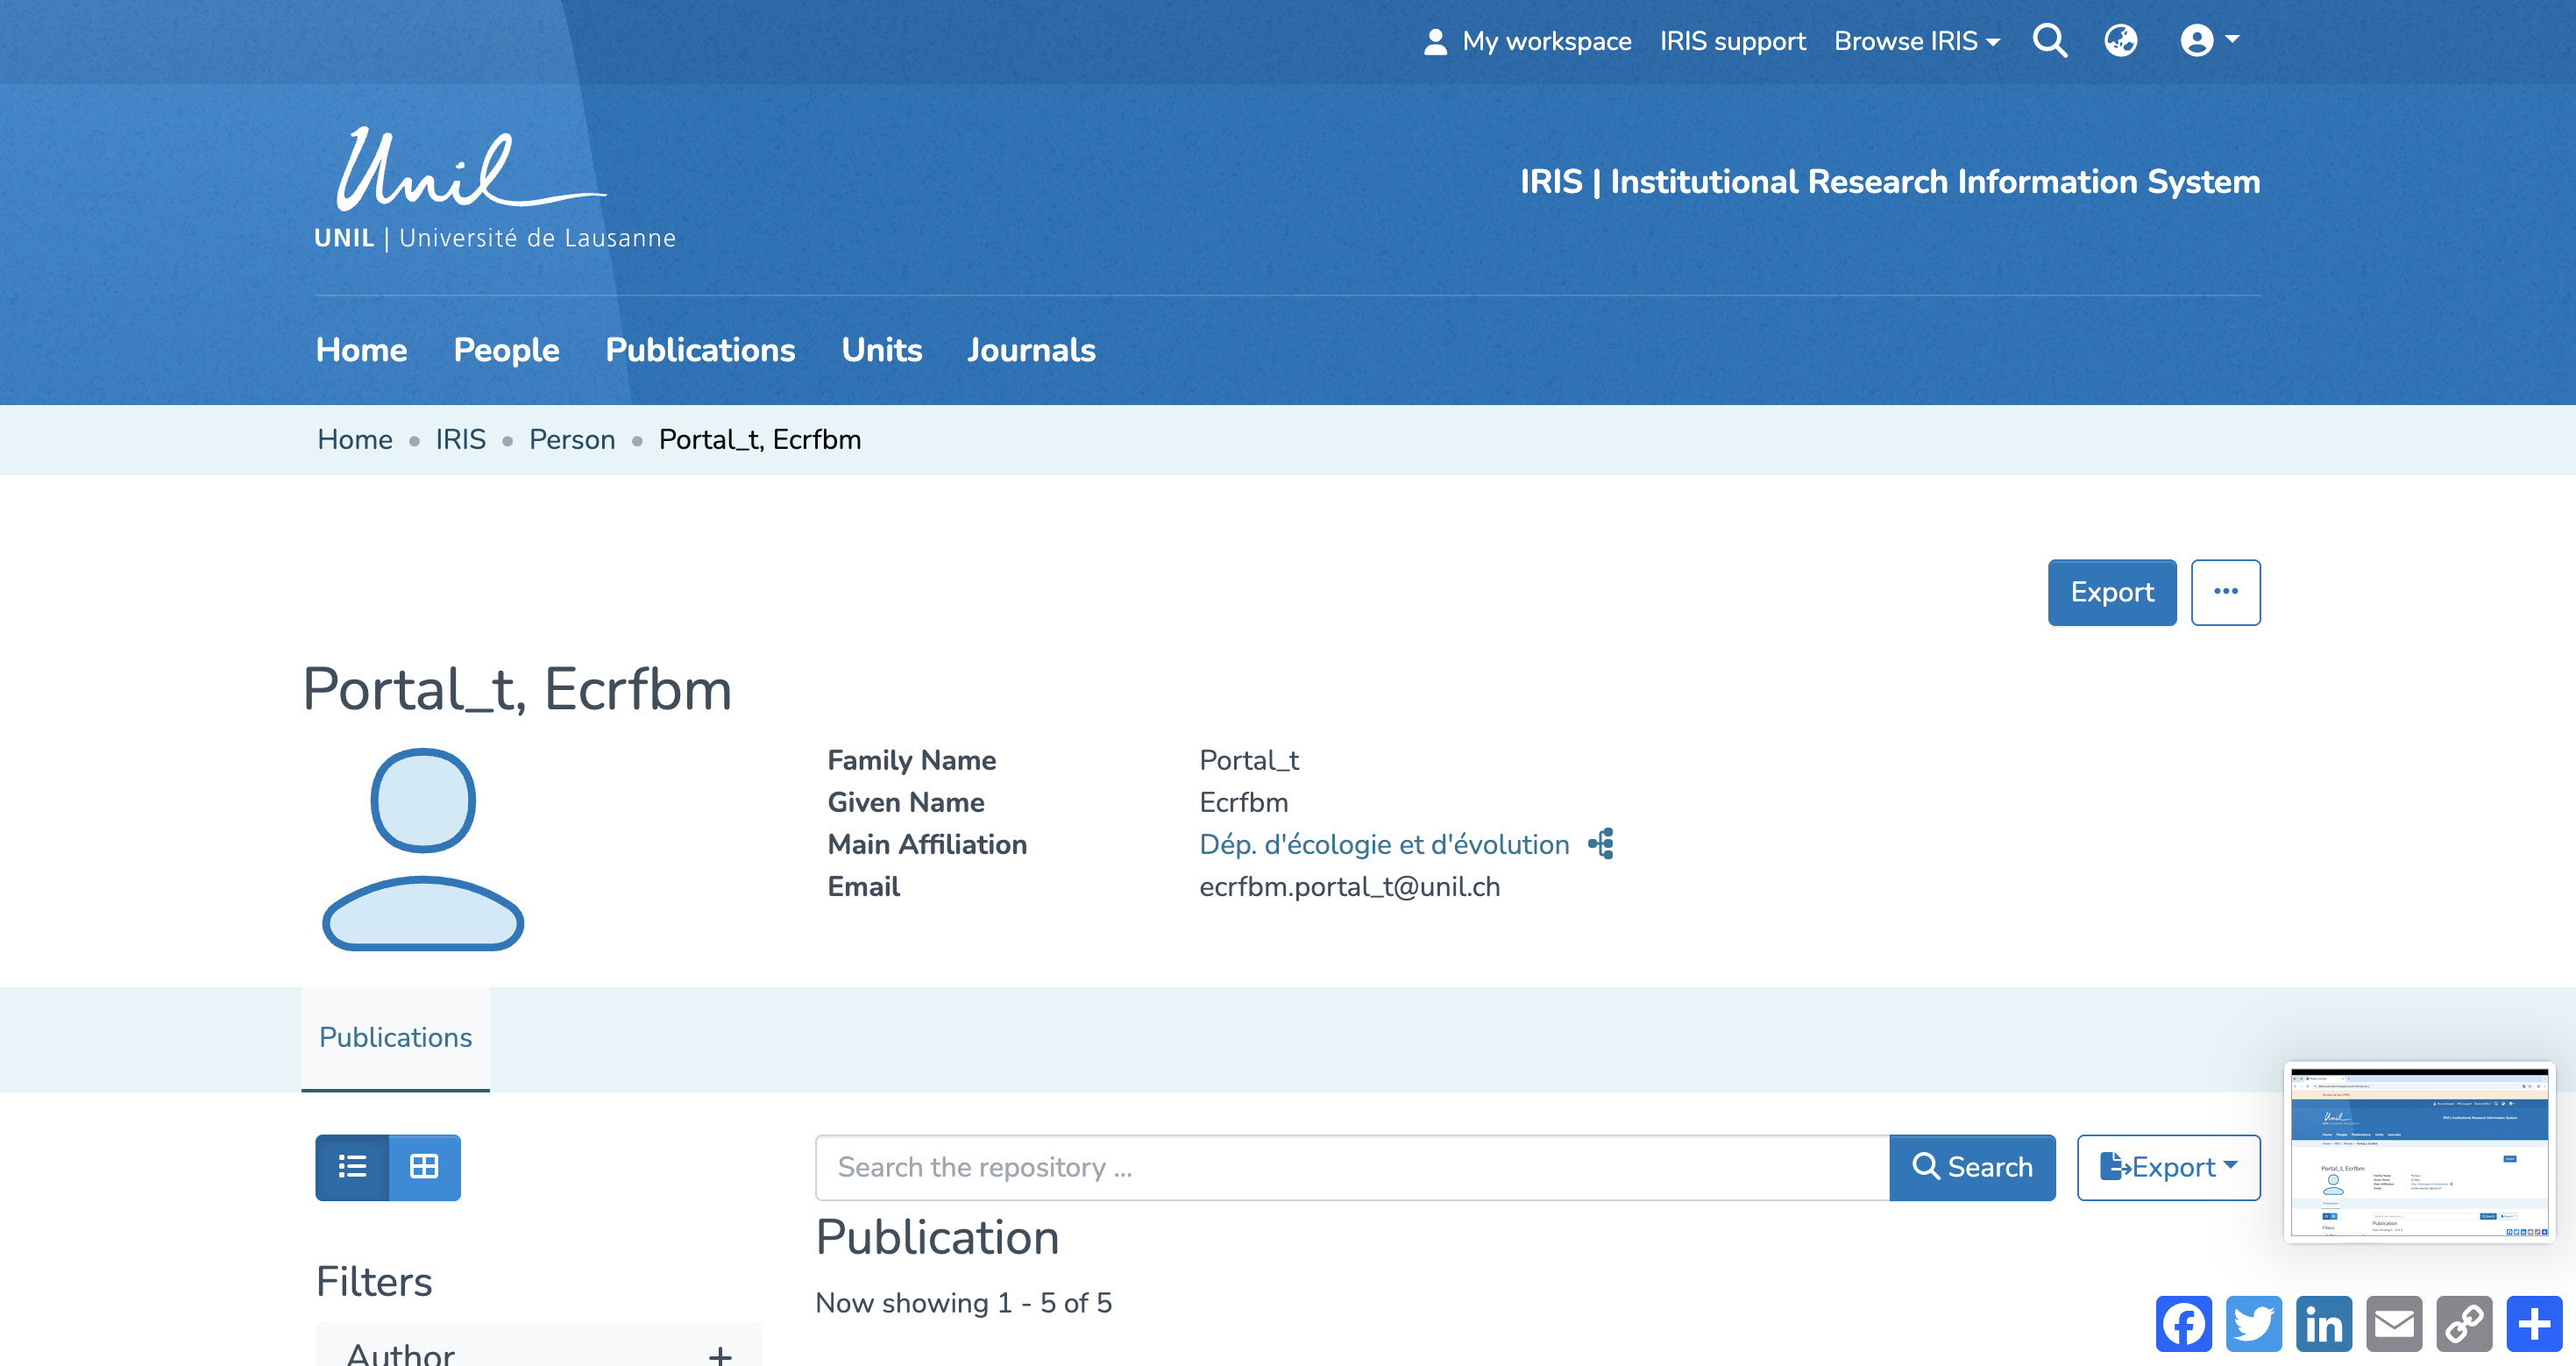
Accessing Your Profile via Search
- From the IRIS homepage, click on “People.”
- In the search bar that appears, enter your name (a), then click “Search” (b).
- Once the search is complete, your profile will appear in the results. Click on your name (c).
Access the relevant record
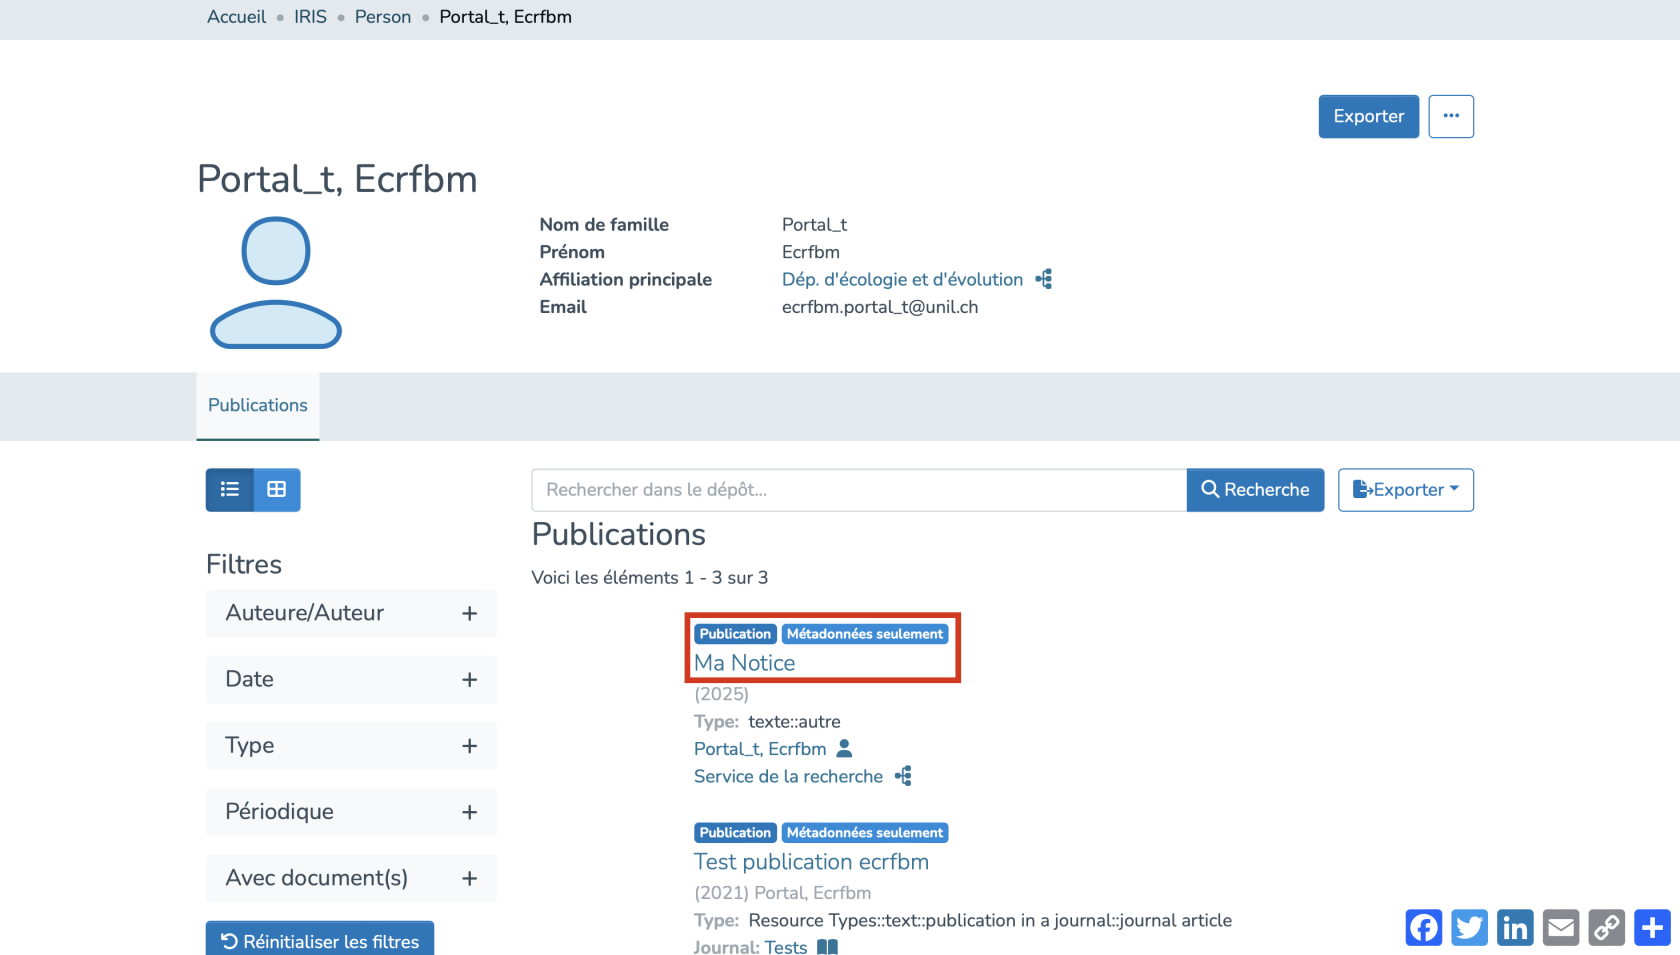
- You are now on your researcher profile page. Under the “Publications” section, you’ll find both the records you have created and those you are linked to.
- Identify the desired record and click on its title.

- You are now on the record detail page. Click on the three dots icon, then select “Edit.”

Add full text and/or secondary documents
- You are now in the publication entry form.
- If no file has been added yet, you can upload one by clicking on “Browse” and selecting the desired file from your library.
- Alternatively, you can scroll down to the “Documents” section and simply drag and drop your file onto the page.
- If a document is already present, you can edit its metadata by clicking on the corresponding icon.
- You can edit the following fields:
(a) File name
(b) Manuscript version
(c) License
(d) Document accessibility (open access / embargo / UNIL restricted)
(e) If you select “embargo”, set the embargo end date, after which your document will become publicly accessible.
Finalize the submission
- To complete your submission, you will need to approve the user license.
- Then, you can choose to click “Save” or “Save and quit” to save the record, or click “Publish” to archive the publication immediately.
Adding and/or correcting links in a record
The voice in this video was generated by artificial intelligence.
1. Find the record you would like to edit
-
In "submission in progress" status —> if you created it (they are located in your workspace)
-
In "archived" status —> only if you are linked to it (you can find them either in your workspace or in your researcher profile)
Find your records in your researcher profile
Access your researcher profile via the login menu
From the IRIS homepage, click on the login menu.
You will be redirected to a page titled “User account.” Click on “View” to access the full view of your profile.
Access your researcher profile via the search function
From the IRIS homepage, click on “People.”
In the search field that appears, enter your name (a) and click on “Search” (b).
Once the search is complete, your profile will appear in the results. Click on your name (c) to access your researcher profile.
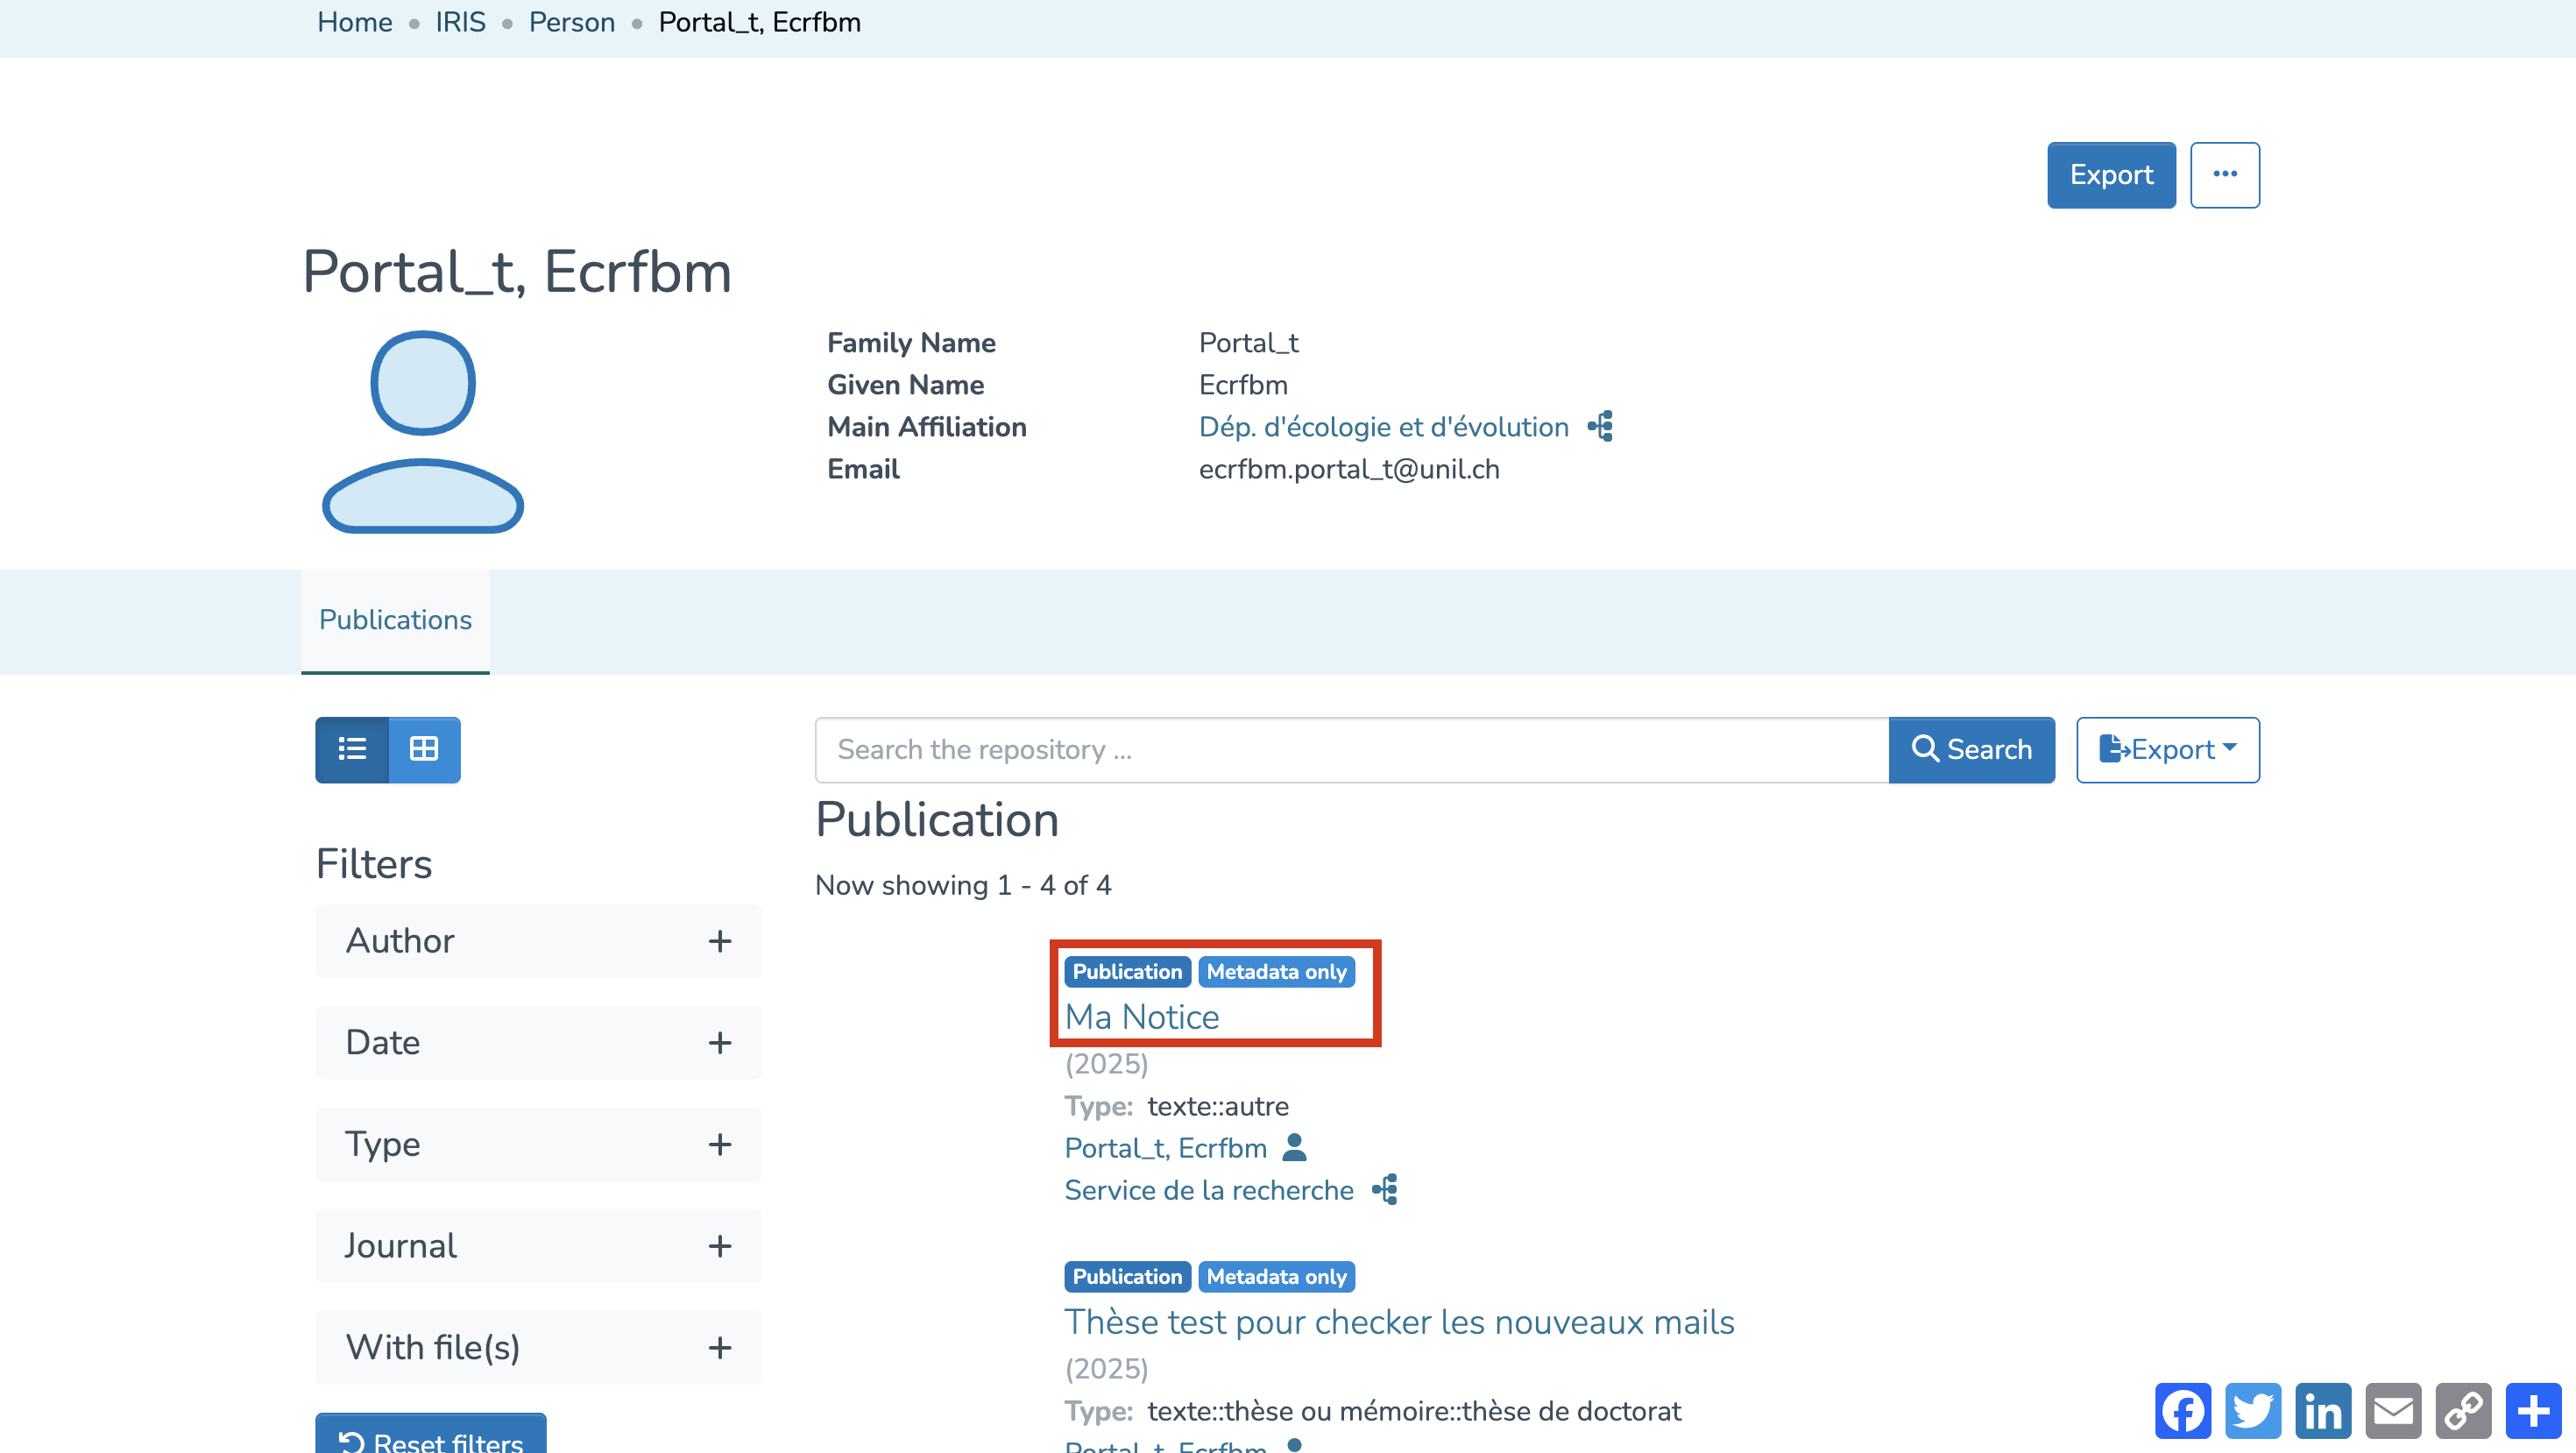
Locate the record to edit
Your profile will be displayed. Under “Publications,” you will find all the records you have created as well as those to which you are linked.
Locate the record you are interested in, then click on its title. You will then be taken to the page with the details of this record.
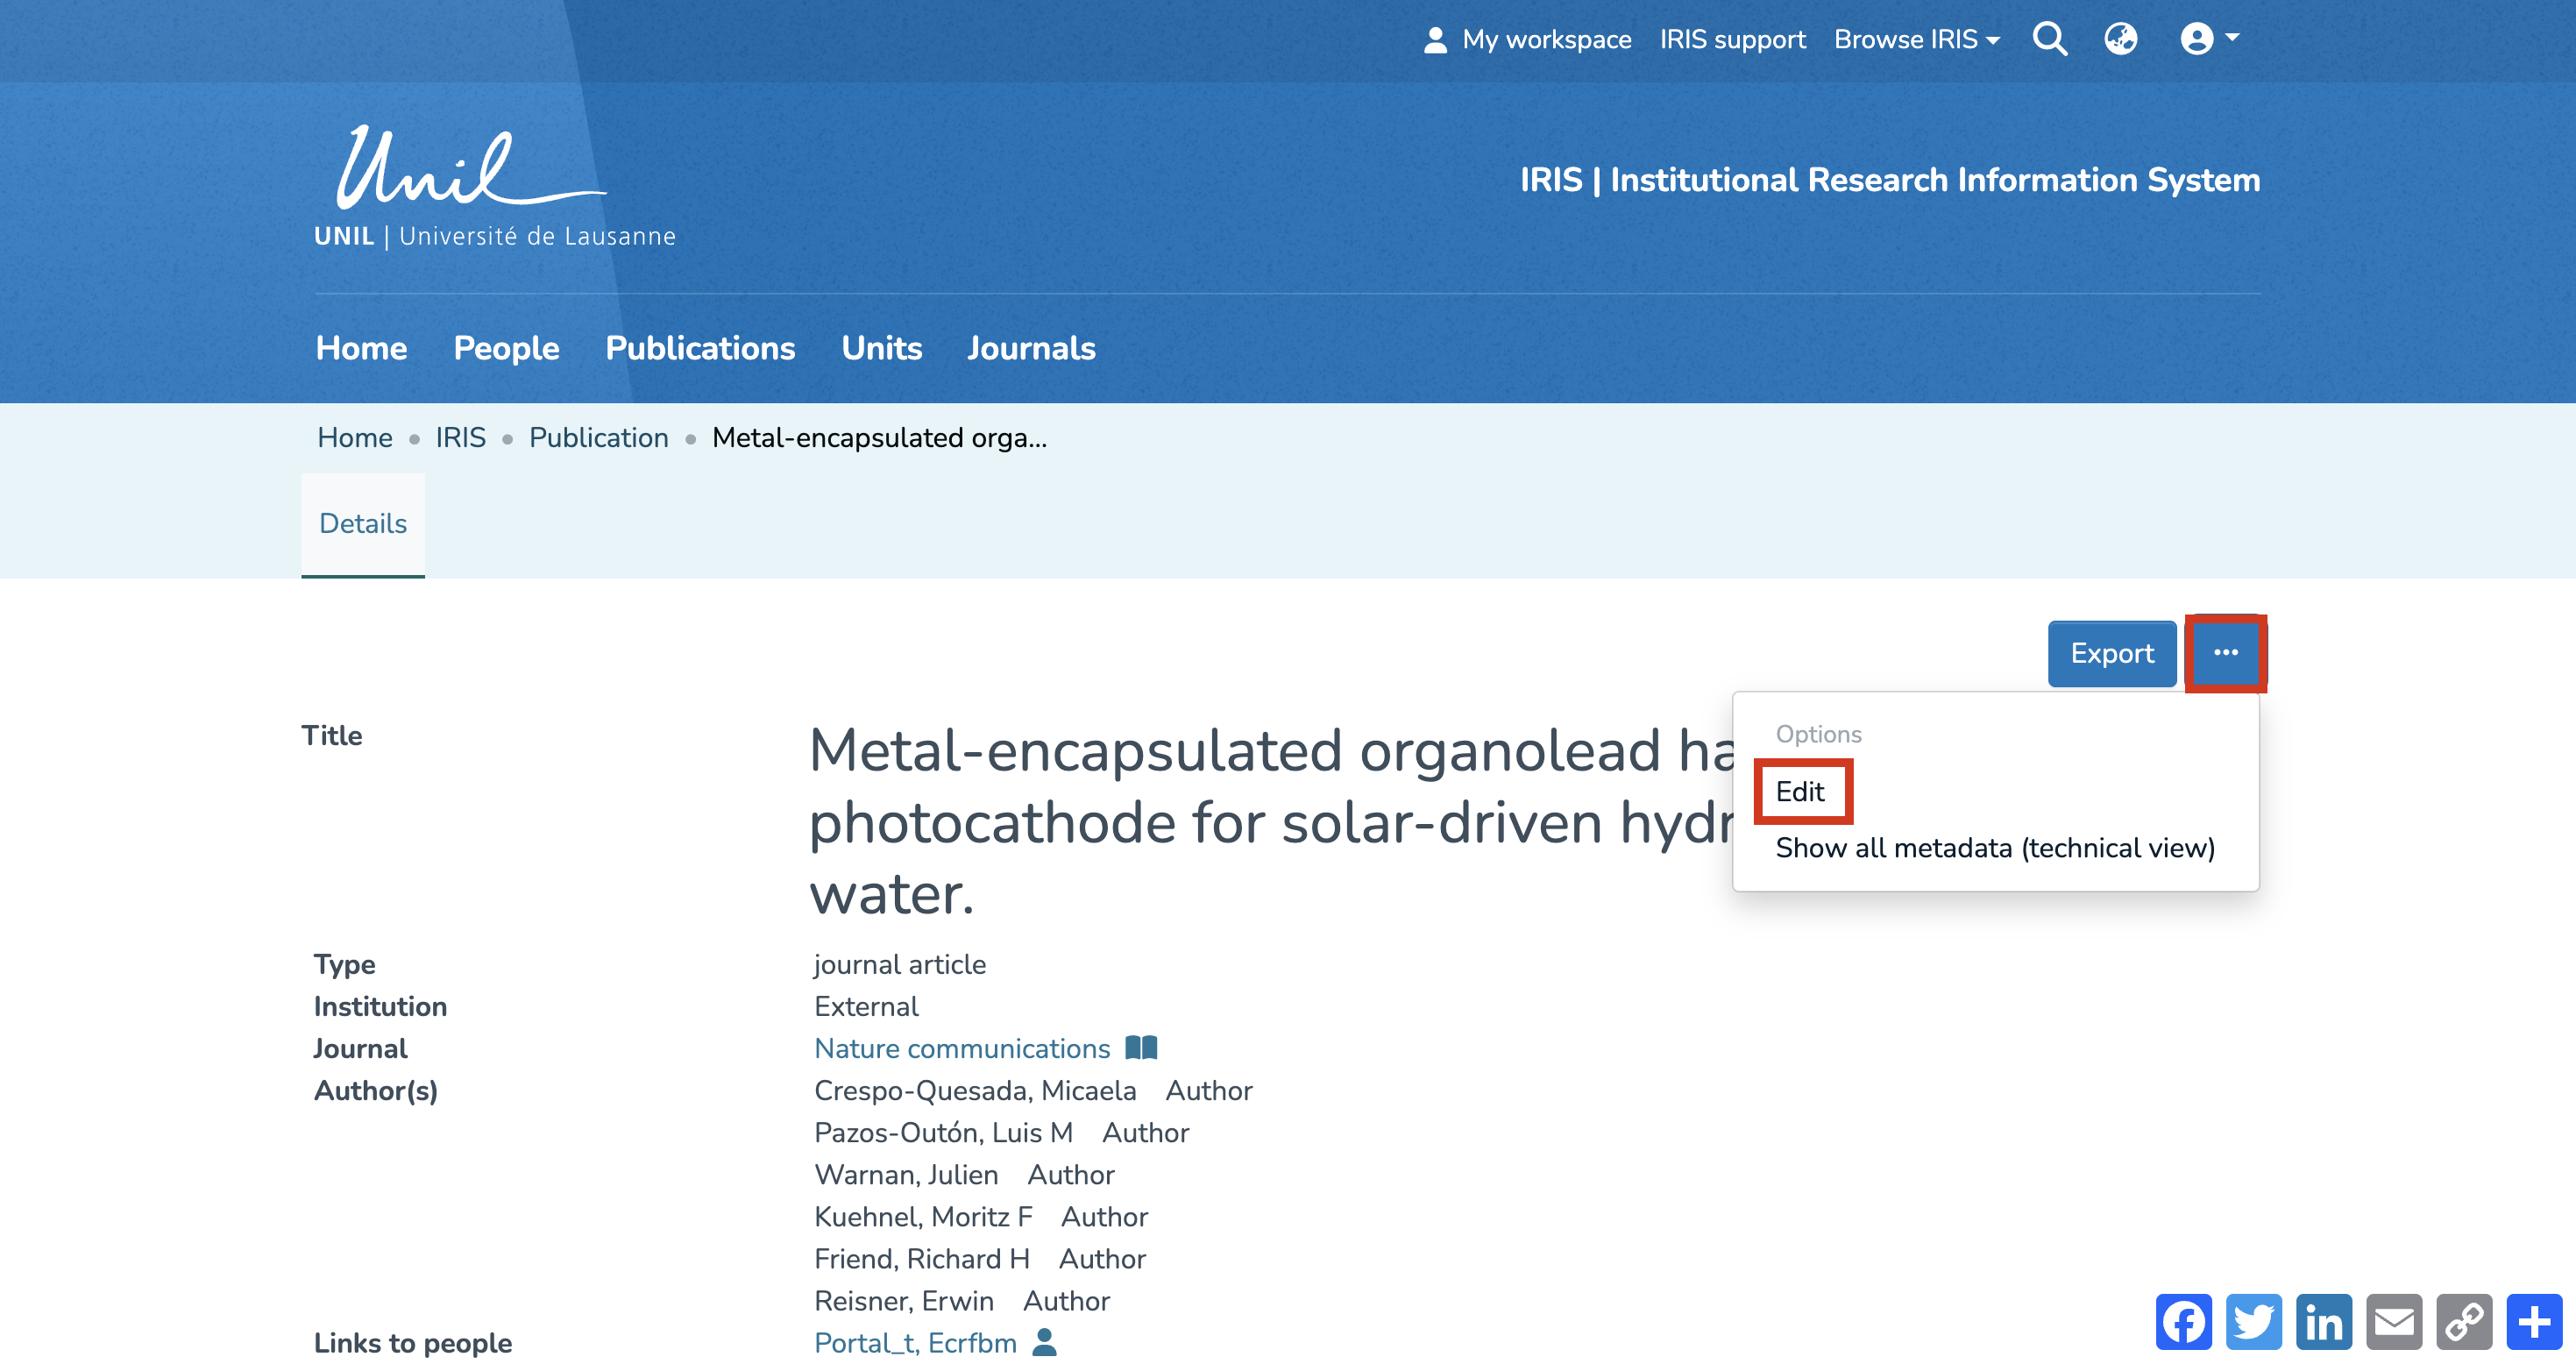
2. Access the record editing page
On the detail page, click on the three-dot icon to open the options menu.
Then select “Edit.”

If you prefer to retrieve the record via your workspace rather than your researcher profile, simply click on “Edit” to modify it.

3. Add the corresponding link
In IRIS, by default, the person who enters a record does not have the right to edit it. Only the individuals linked to the record have this permission. Make sure to properly link all relevant persons to the record.
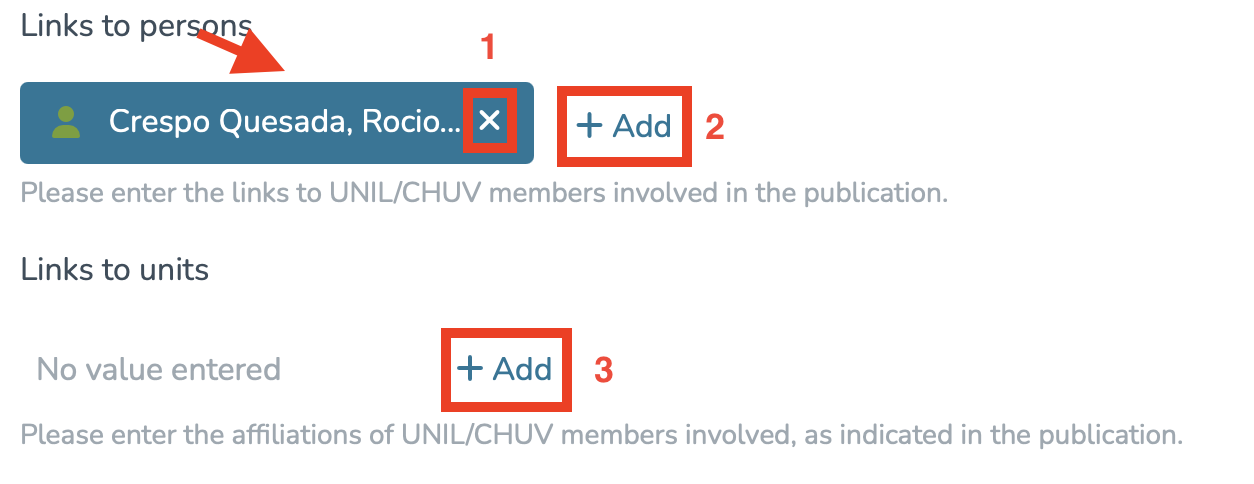
To add a link to a person or unit, click on “Add” as indicated by numbers 2 and 3.
To remove a link, click on the cross (1).
You can directly edit the link by clicking on the person or unit highlighted in blue (see arrow).

Publish a record I have created that is in the « submission in progress » status
The voice in this video was generated by artificial intelligence.
Accessing Your Workspace
Once you're logged into IRIS:
- Click on “My workspace.”
- You’ll be redirected to the page “Records I created.”
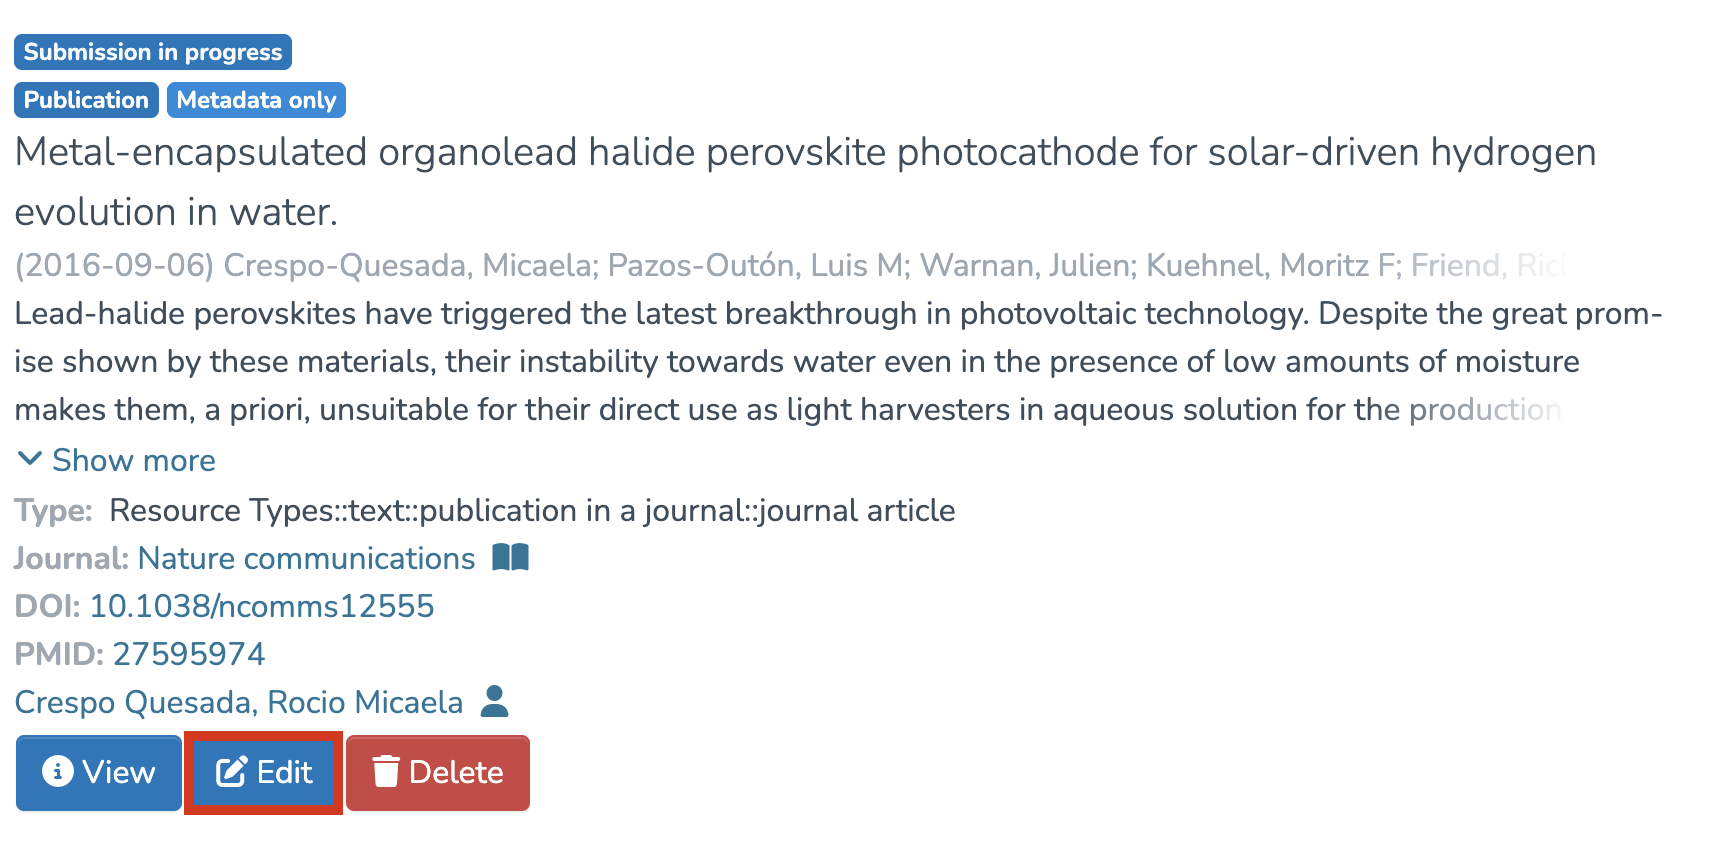
Review/Edit the Record
- Find the record you wish to publish in the list.
- You can edit it by clicking on “Edit.”


Publish the Record
- Make sure all required fields are completed and that the record is properly linked to the corresponding people and units.
- Once the changes have been made, scroll down to the bottom of the page and click on “Publish.”

Delete a record I have created that is in the « submission in progress » status
The voice in this video was generated by artificial intelligence.
Access Your Workspace
- Click on “My workspace.”
- You will be redirected to the “Records I created” page, where you will find the record you saved as “Submission in progress.”

Delete the Record
- Click on the red “Delete” button located beneath the relevant record.

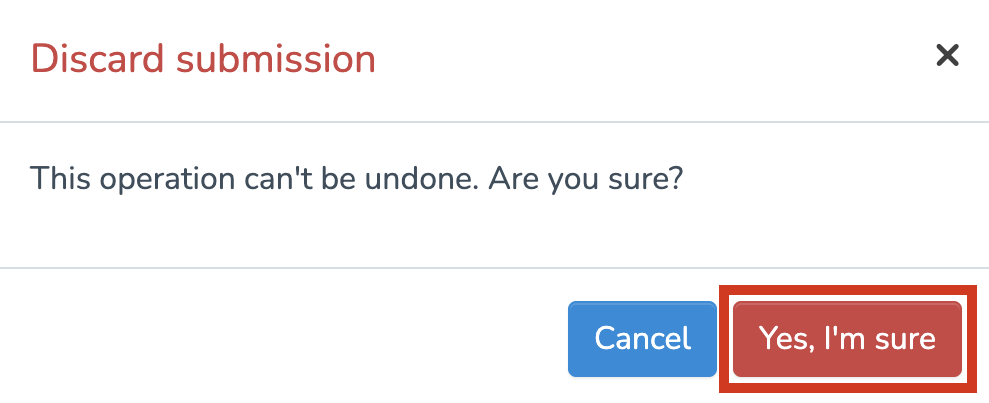
Confirm Deletion
- A warning message will appear: “This operation can't be undone. Are you sure?”
If you are sure you want to delete the record, click “Yes, I’m sure.”
Confirmation
The record will then be permanently deleted and will no longer appear in your workspace.
Edit a record in "archived" status
The voice in this video was generated by artificial intelligence.
1. Find the Record You Want to Edit
- You created it (you’ll find it either in your workspace or in your researcher profile).
- You are linked to it (you’ll find it only in your researcher profile).
Find Your Records in Your Researcher Profile
Accessing Your Profile via the Login Menu
- From the IRIS homepage, click on the login menu.
- In the dropdown menu, select “My account and profile.”
- You’ll be redirected to a page titled “User account”. Click on “View” to open the full version of your profile.
Accessing Your Profile via Search
- From the IRIS homepage, click on “People.”
- In the search bar that appears, enter your name (a), then click “Search” (b).
- Once the search is complete, your profile will appear in the results. Click on your name (c).
Locate the Record You Want to Edit
- Your profile will be displayed. Under “Publications,” you will find all the records you have created, as well as those you are linked to.
- Find the record you are interested in, then click on its title. This will take you to the page displaying the details of the record.
2. Access the record editing page
- On the record detail page, click on the three-dot icon to open the options menu.
- Select “Edit.”
If you prefer to retrieve the record via your workspace rather than your researcher profile, simply click on “Edit” to modify it.
3. Edit the content
- You’ll be redirected to the entry form, identical to the one used when the record was first created.
- You can now update any necessary fields.
4. Save Your Changes
- Once you’ve finished editing, scroll to the bottom of the page and click on “Save and quit.”
- Your changes will be saved, and you’ll automatically be redirected back to the record’s detail page.

Entering your thesis in IRIS
1. Introduction
Entering the thesis into IRIS is a compulsory step in obtaining the doctorate degree. This process helps to preserve and enhance the value of doctoral students' research work. You will find all the information you need to obtain a doctorate in Directive 3.10 issued by the UNIL Direction.
You can also review the thesis distribution conditions.
This guide will take you through the various stages of submission, from creating an account to the final submission of your thesis for validation.
If you have any questions, you can contact theses@bcu.unil.ch
2. Entering your thesis
- Click on “My workspace.”
- Click on “Enter.”
- Click on “Publication” to access the entry form.

Fill in the required fields
-
Type of publication: in this case, select Doctoral thesis
-
Institution where the research was conducted: choose UNIL/CHUV/Unisanté + partner institutions
-
Your affiliated faculty
-
Title
-
Date of issue: enter the date of the public dissertation defense
-
Editorial state (Accepted)

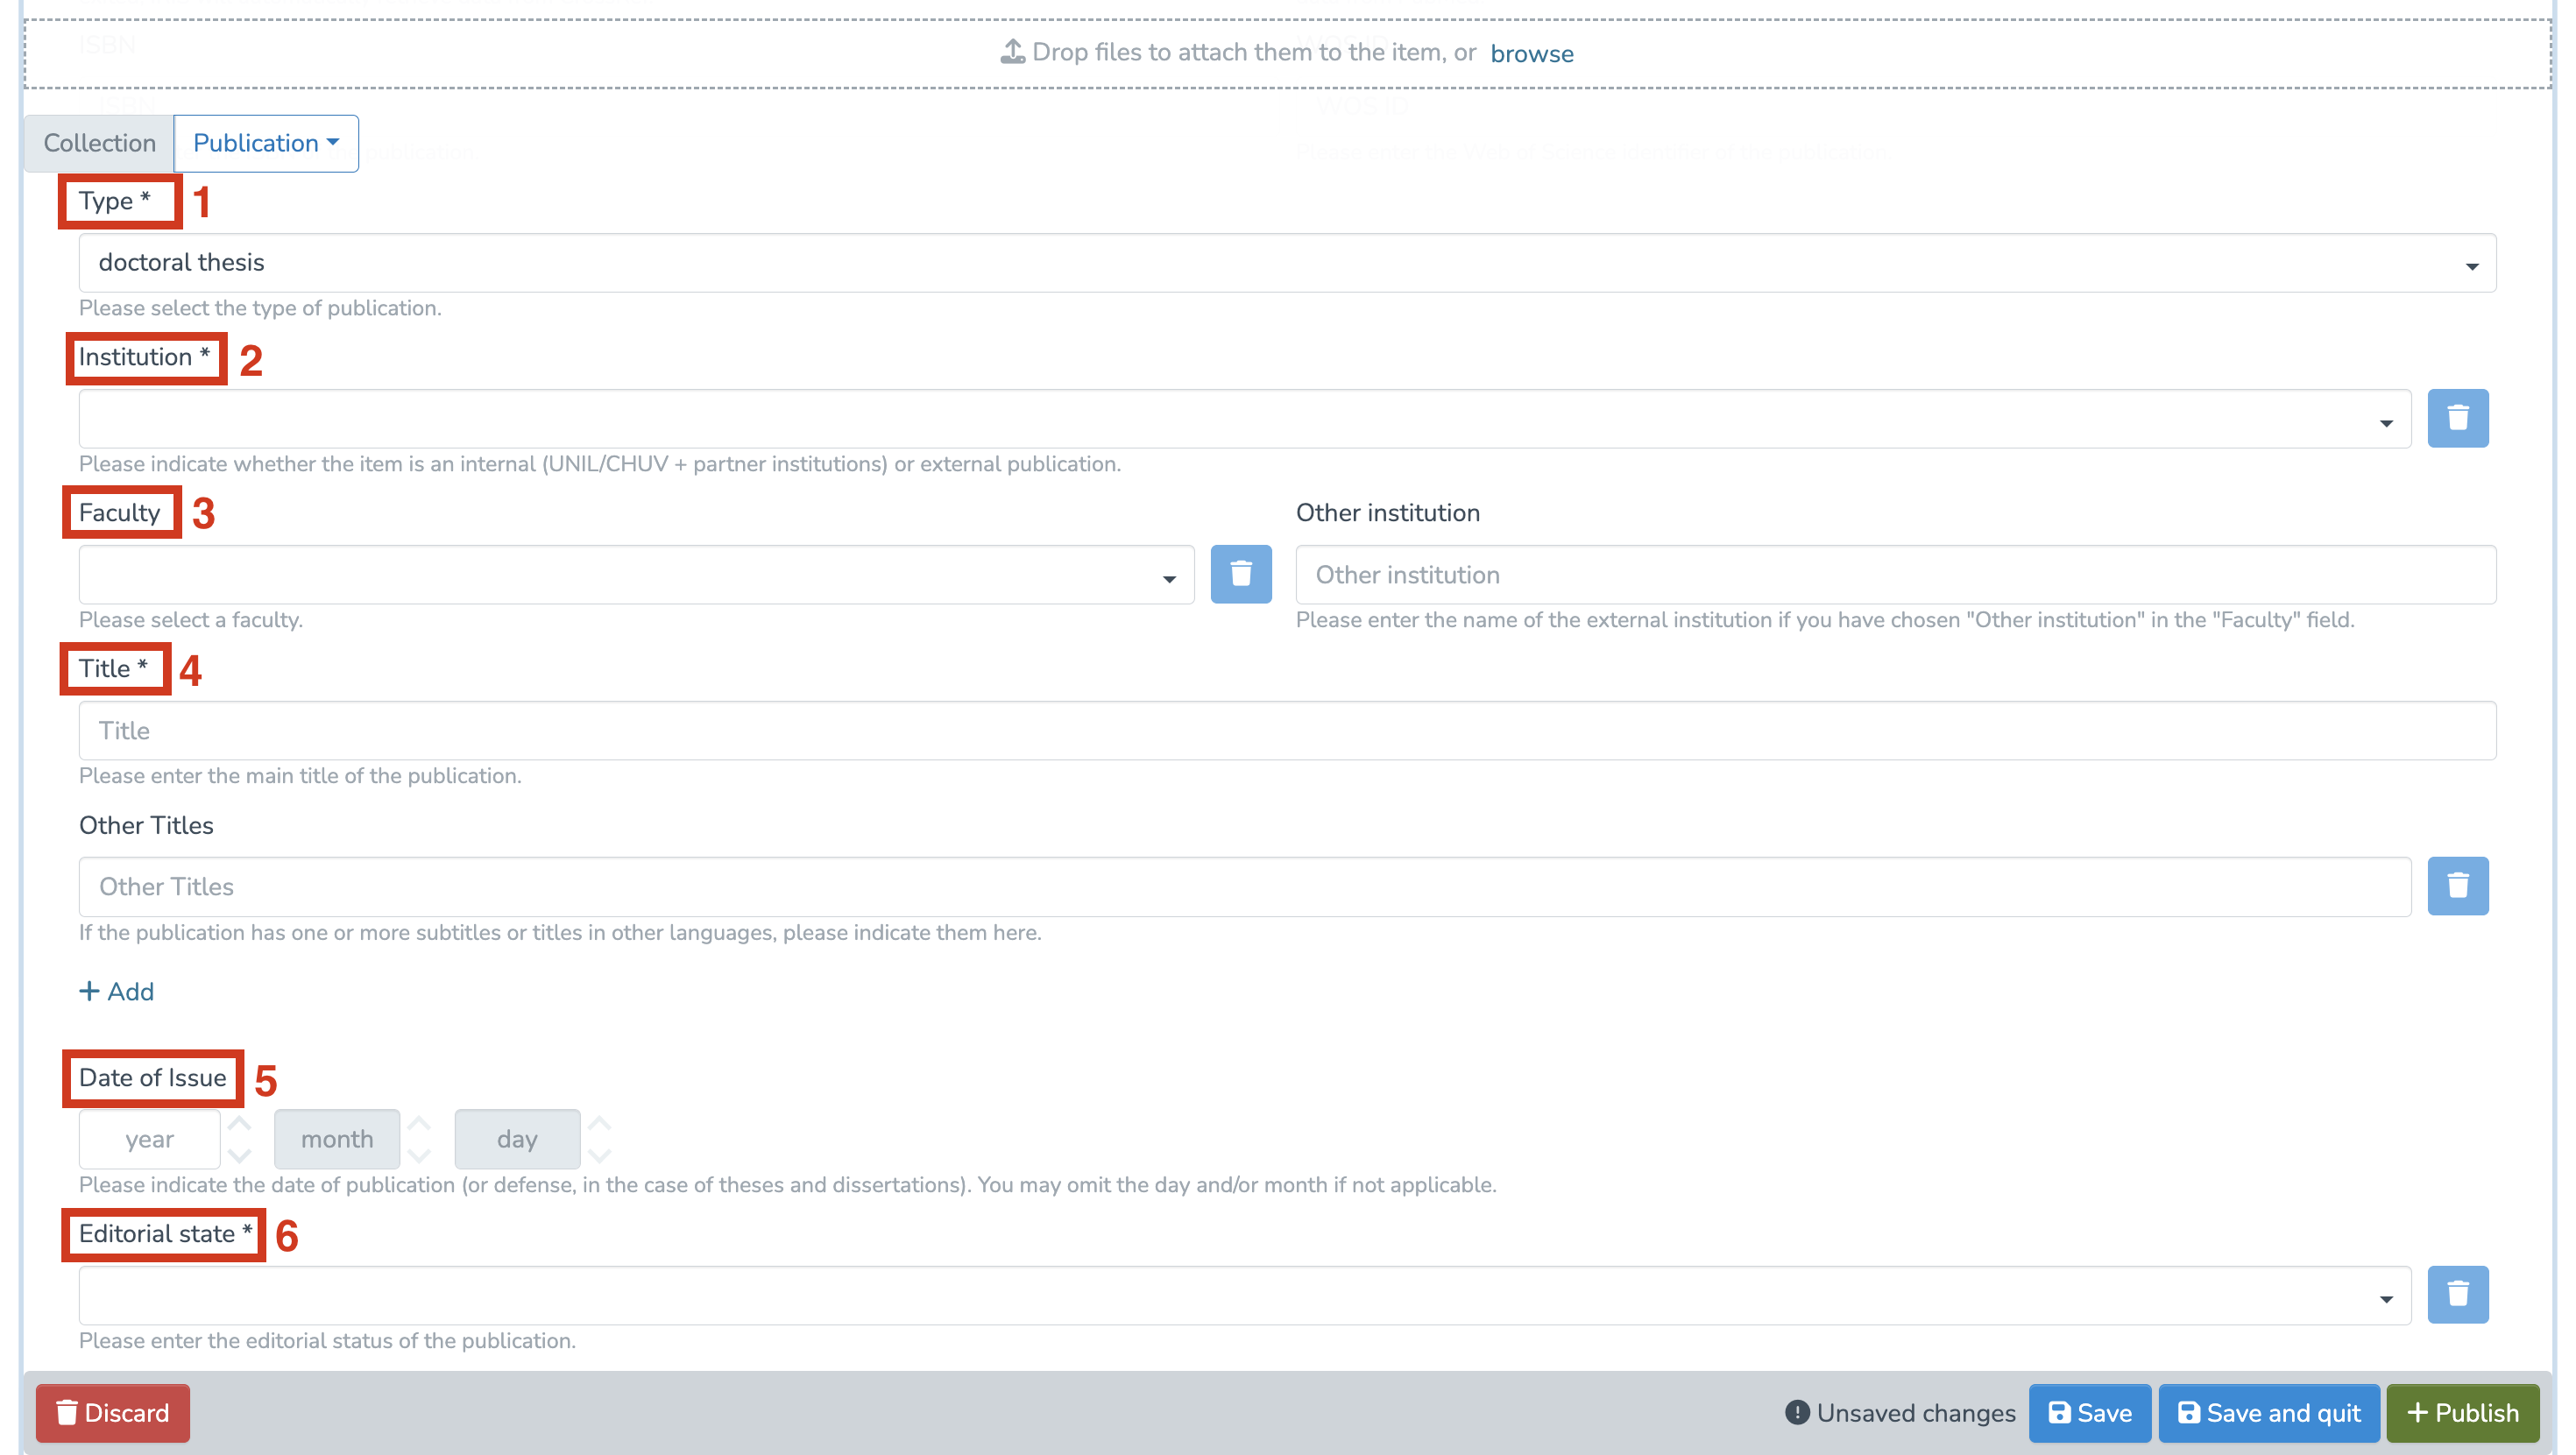
These 6 fields are required in order to create the record. The remaining fields are strongly recommended. It is also important to fill in the following:
-
Language ;
-
Thesis abstract (recommended to improve the indexing of your thesis) ;
-
Keywords ;
Link people and units
This step allows you to link the publication to your researcher profile, your co-authors, and the relevant research unit. Make sure to properly link all individuals involved in the thesis (author, thesis supervisor, etc.) and their respective units.
- In the corresponding section, click on "Add".
- Type the name of the person or unit, then select it from the list.
Upload PDF of your thesis
To finalize the deposit, you must add the full text of the thesis in PDF format. UNIL's Directive 3.10 requires that the cover page and imprimatur be added to the PDF. Please ensure that these documents are added to the PDF of your thesis before submission.
Please ensure with your supervisor that the file you are about to submit is acceptable (image resolution, corrections, etc.).
- You can add the full text of your thesis by clicking on “Browse” and selecting the desired file from your library.
- Alternatively, you can scroll down to the “Documents” section and simply drag and drop your file onto the page.
- Once the file is uploaded, you can edit its metadata by clicking on the corresponding icon.
- You can edit the following fields:
(a) File name
(b) Manuscript version : it must always be the version after the imprimatur.
(c) License : select the appropriate license for the distribution of the document, depending on any potential third-party rights (see below).
(d) Document accessibility :
-
-
-
- Restricted UNIL (default - accessible only to authenticated UNIL personnel) ;
- Public ;
- Under embargo (accessible only to authenticated UNIL personnel until the end of the embargo);
- Restricted UNIL (default - accessible only to authenticated UNIL personnel) ;
-
-
(e) If you select “embargo”, set the embargo end date, after which your document will become publicly accessible.
Check for duplicates
IRIS automatically detects potential duplicates.
Before you can save your entry, a list of potentially similar publications will be displayed : if a publication derived from your thesis (article, book, etc.) has a similar title and has already been entered into the repository, it may appear as a duplicate, even though it is not. Please review each suggestion carefully and indicate whether it is indeed a duplicate (by clicking “It's a duplicate”) or not (by clicking “It's not a duplicate”).
Licenses
In general, the thesis is uploaded to Serval under a Creative Commons Attribution 4.0 International license (CC BY 4.0 - https://creativecommons.org/licenses/by/4.0/) or another Creative Commons license of the author's choice, so that any interested user can access it.
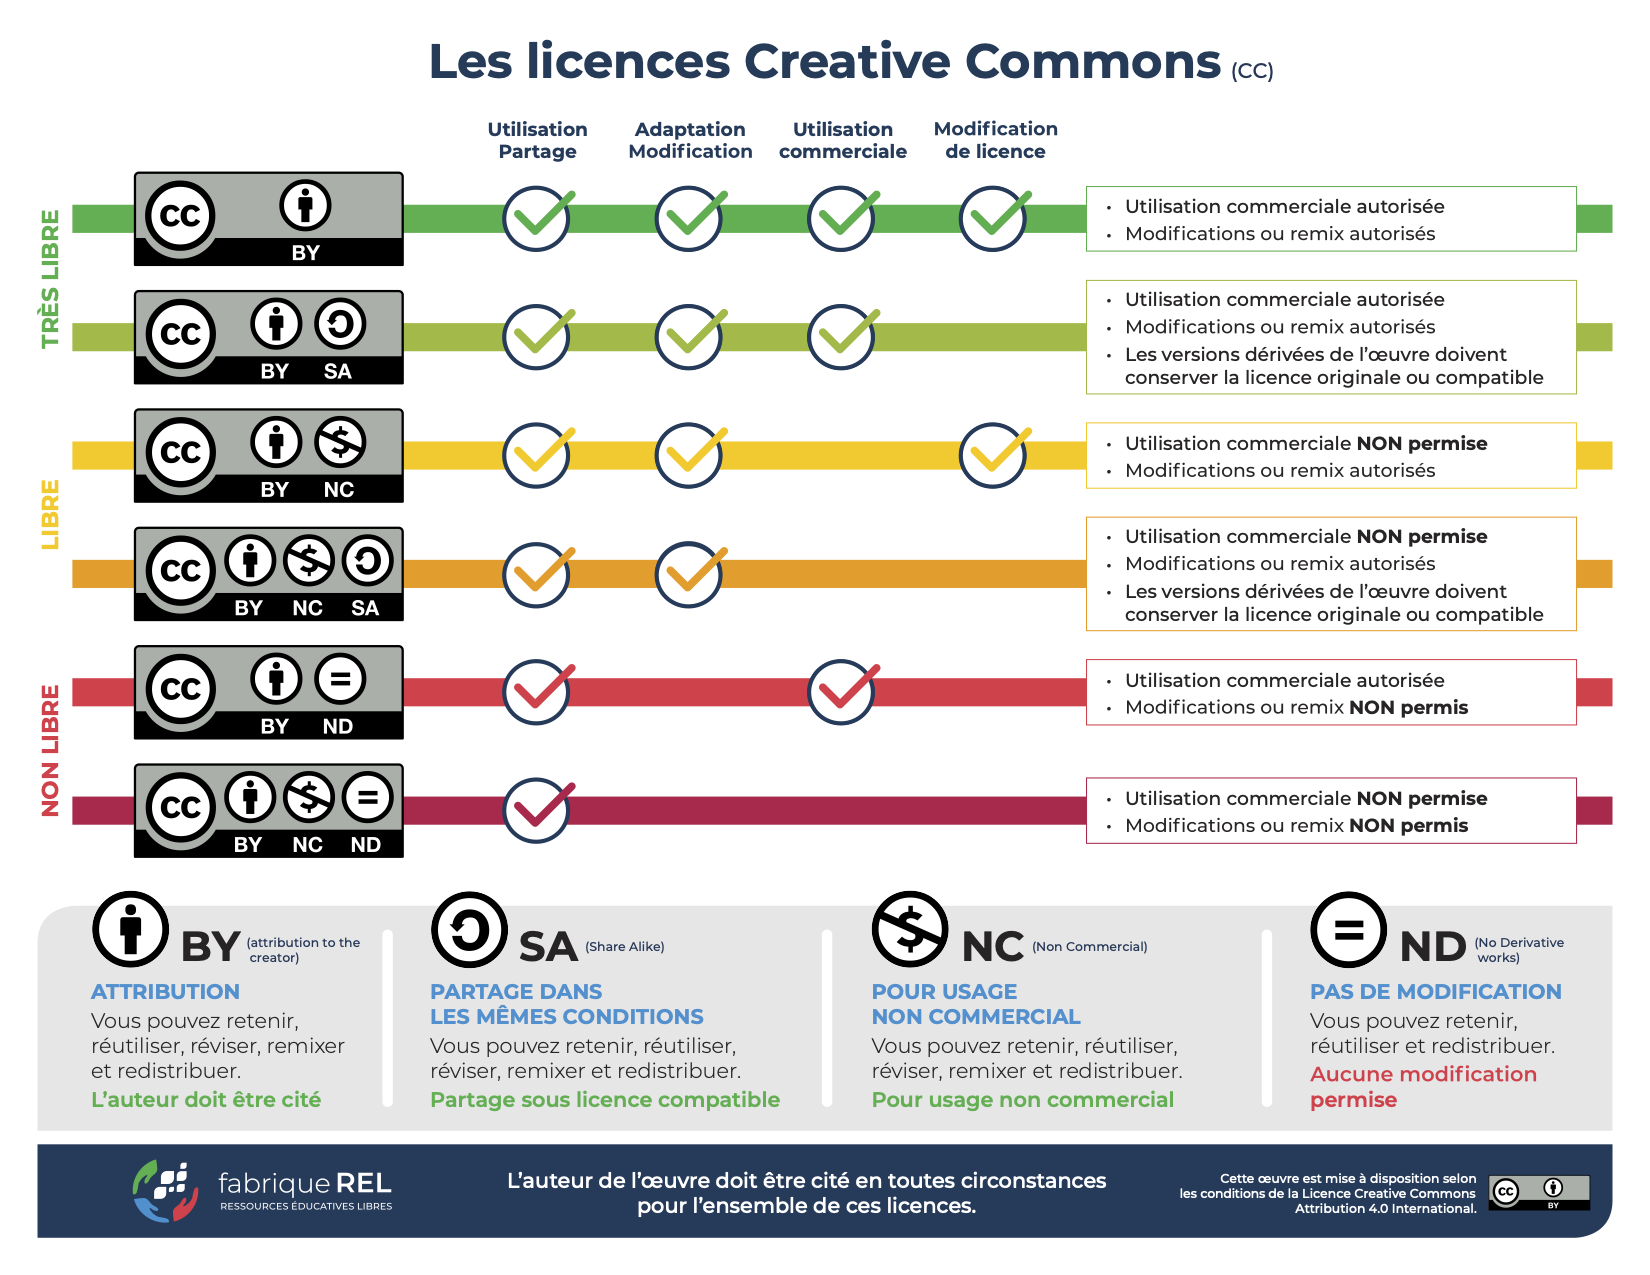
If third-party rights, such as those of publishers or co-authors, prevent distribution under a Creative Commons license, the author may grant UNIL a simple (non-exclusive) and free license to put the thesis online in the institutional repository after the end of any embargo (choose “all rights reserved”).
3. Finalize the submission
- Before you can submit your thesis for validation, you must accept IRIS’s user licence.
- Once your publication entry is complete, choose “Save” or “Save and quit” to save the record, or click “Publish” to immediately publish it.
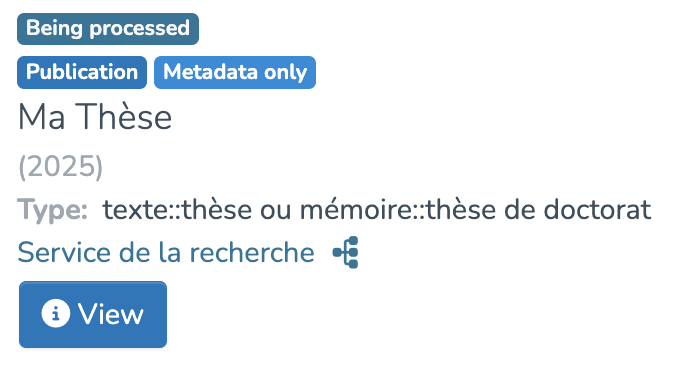
- After publishing your entry, it will move into processing and be pending validation. While awaiting validation, you can find your thesis under “My workspace.” You will receive an automatic email confirming the validation once your submission has been processed.

4. Finalize the degree order
You can now return to your degree order and finalize it.
Validating a record
The voice in this video was generated by artificial intelligence.
Introduction
You will receive an email as soon as a record is available for validation. You can then access the platform to process it. To do so, simply follow the instructions below
Workspace
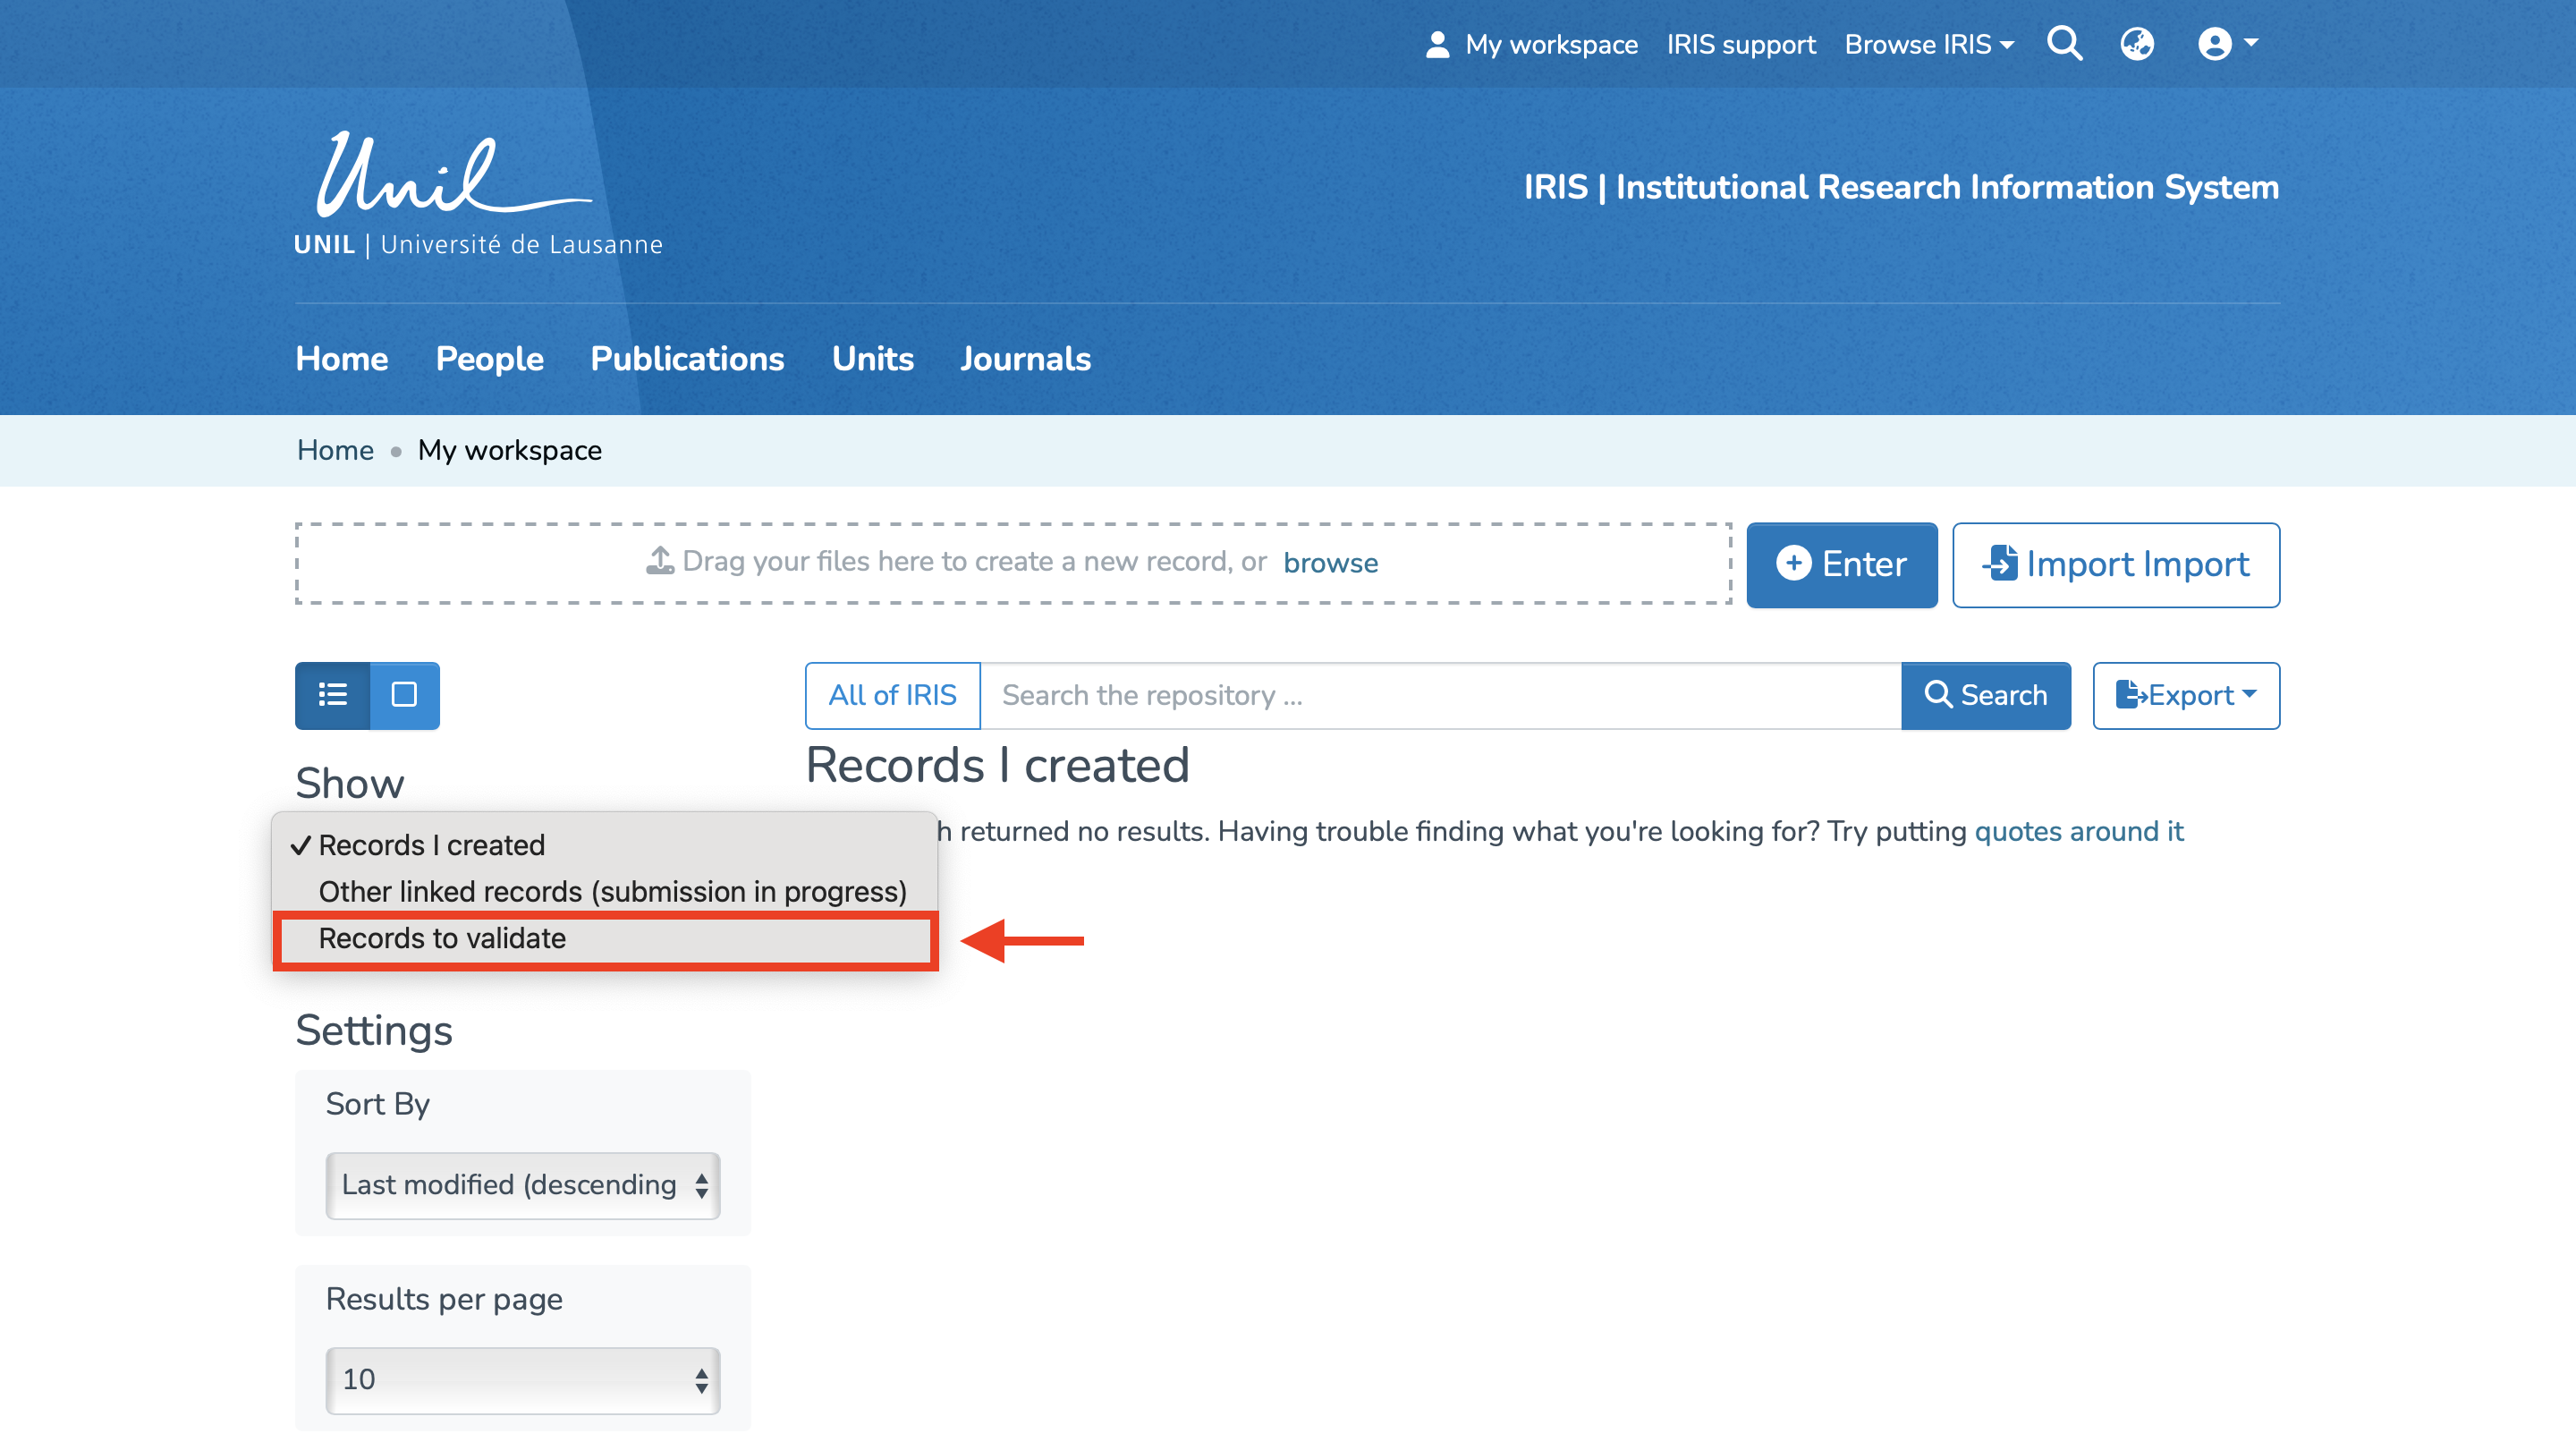
First, you will need to access your workspace by clicking on “My Workspace.”
Accessing Records to Validate
You will automatically be redirected to the page containing the records you have created. To access other records, click on the button highlighted in red.
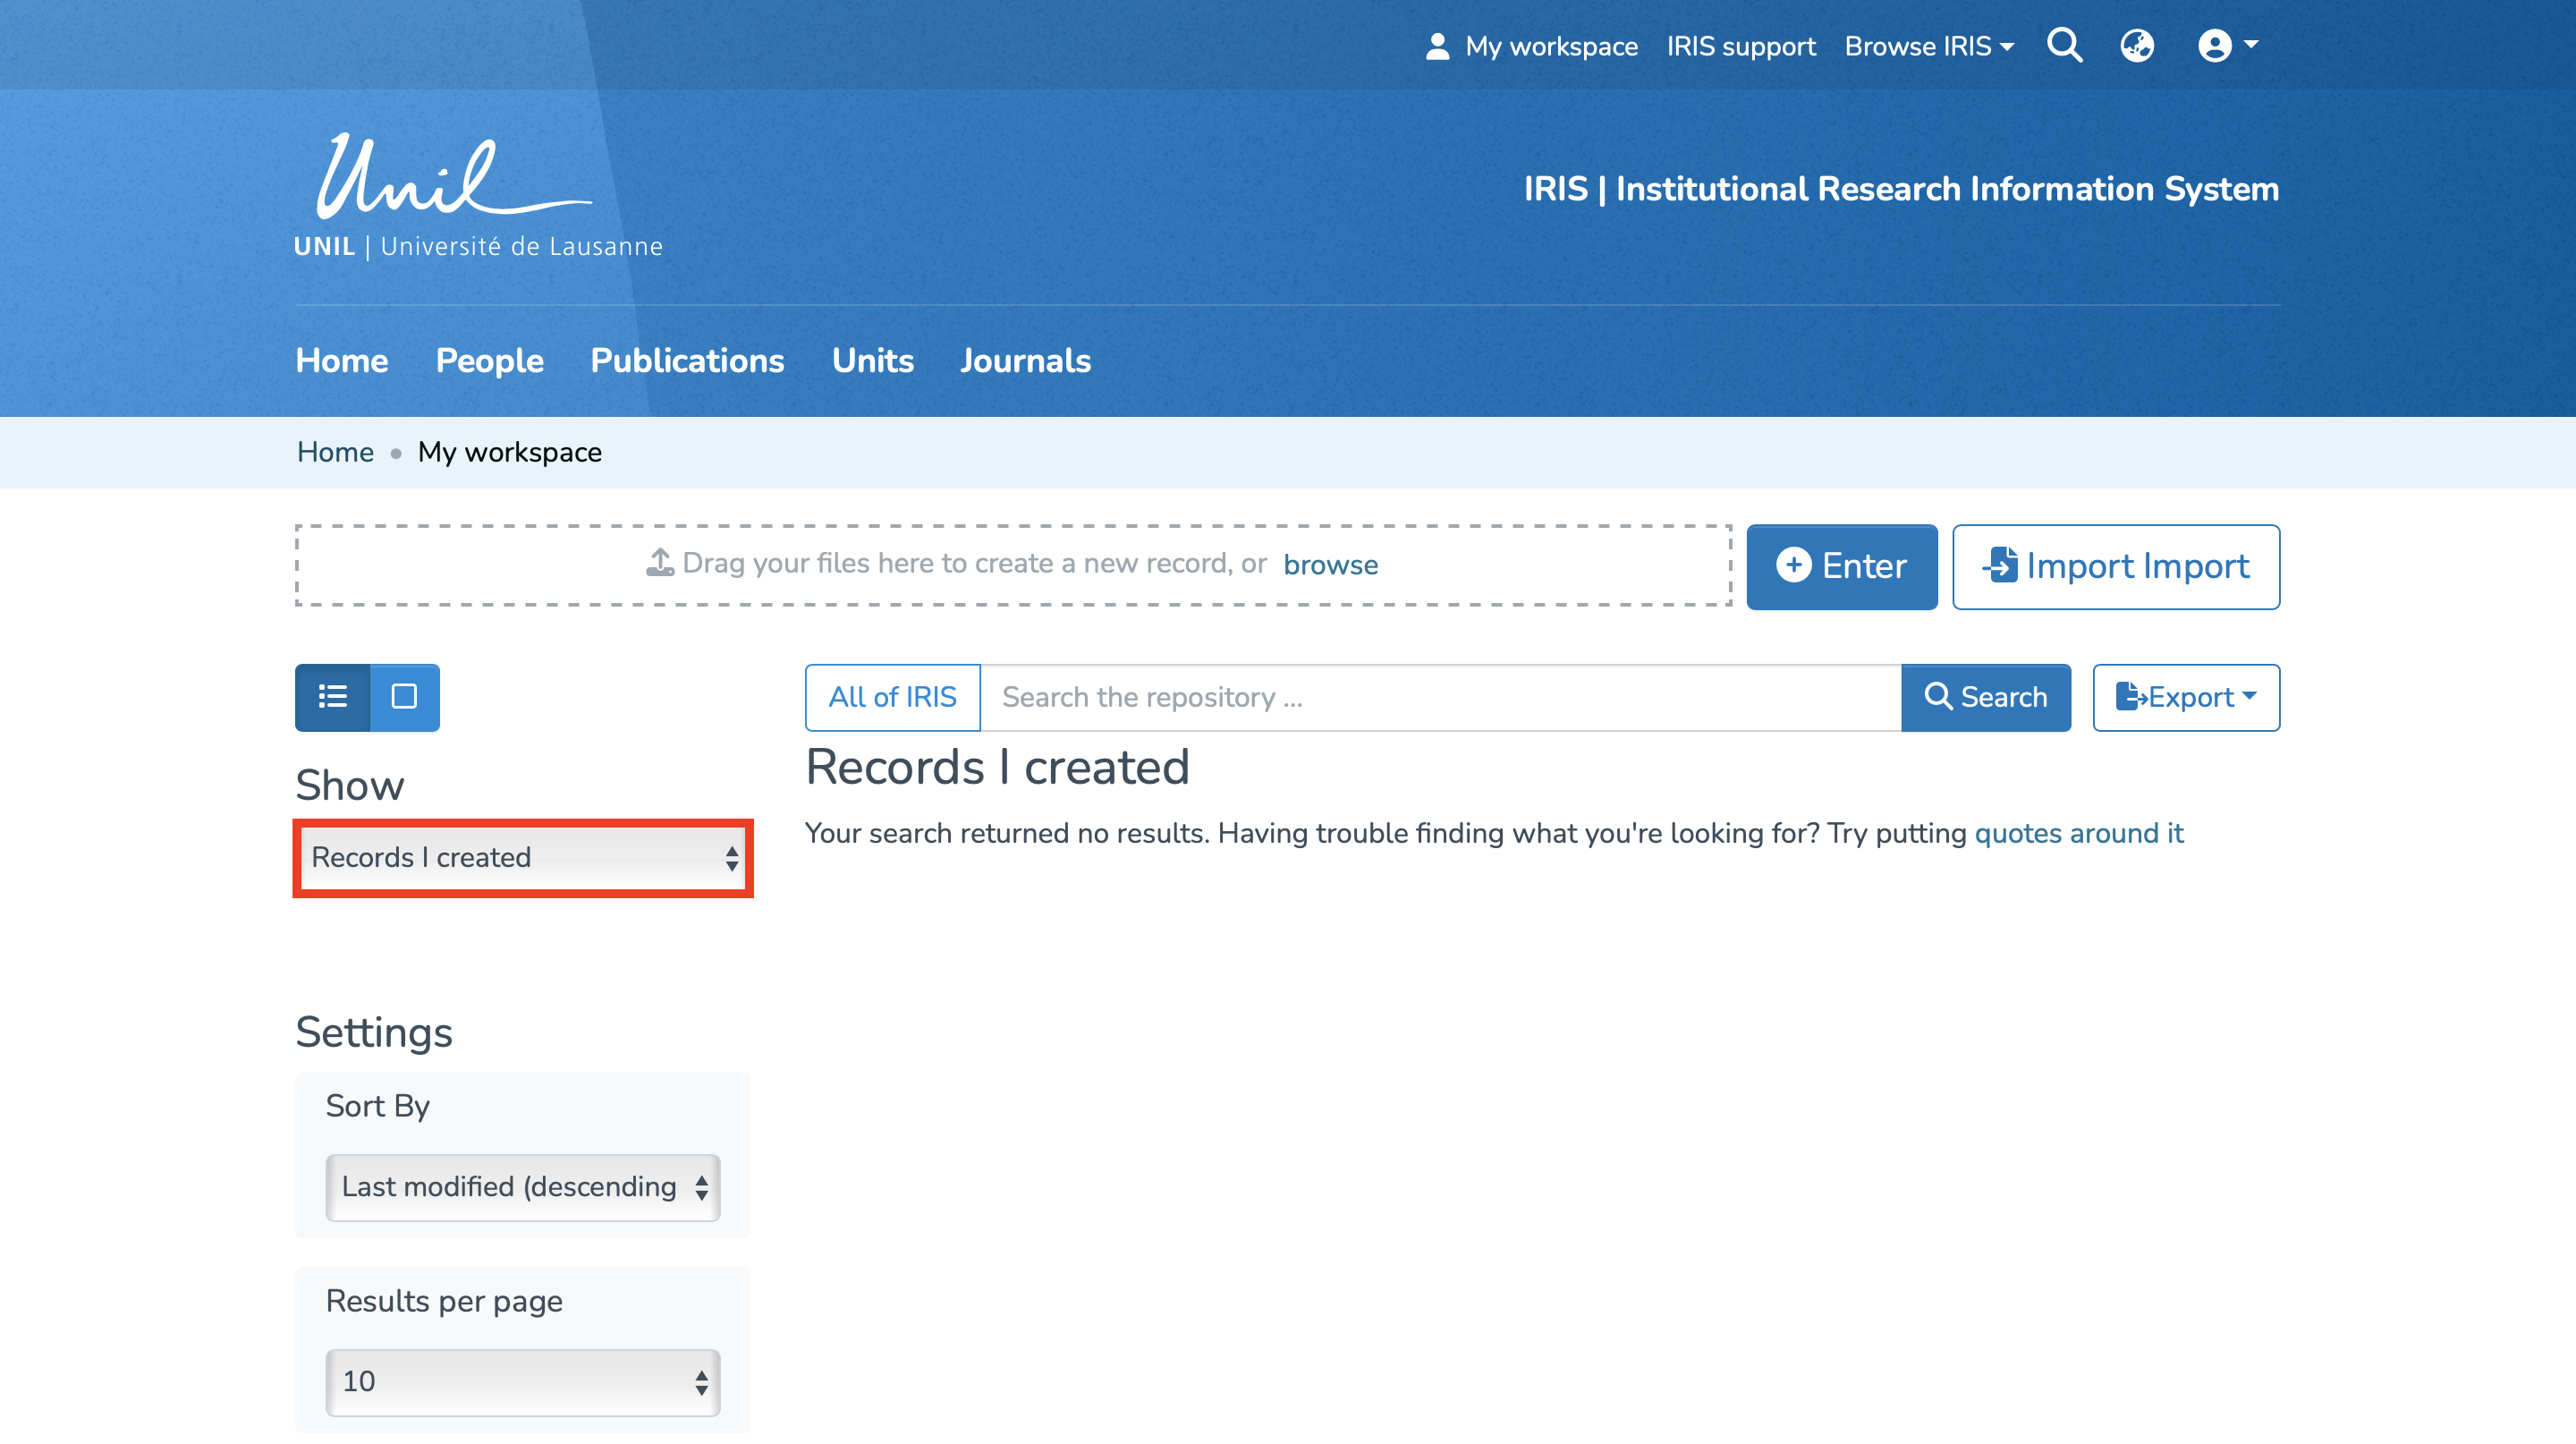
Once you have done this, a dropdown menu will appear with several types of records. Select “Records to Validate” to view those that require validation. The page will automatically refresh with the corresponding records.
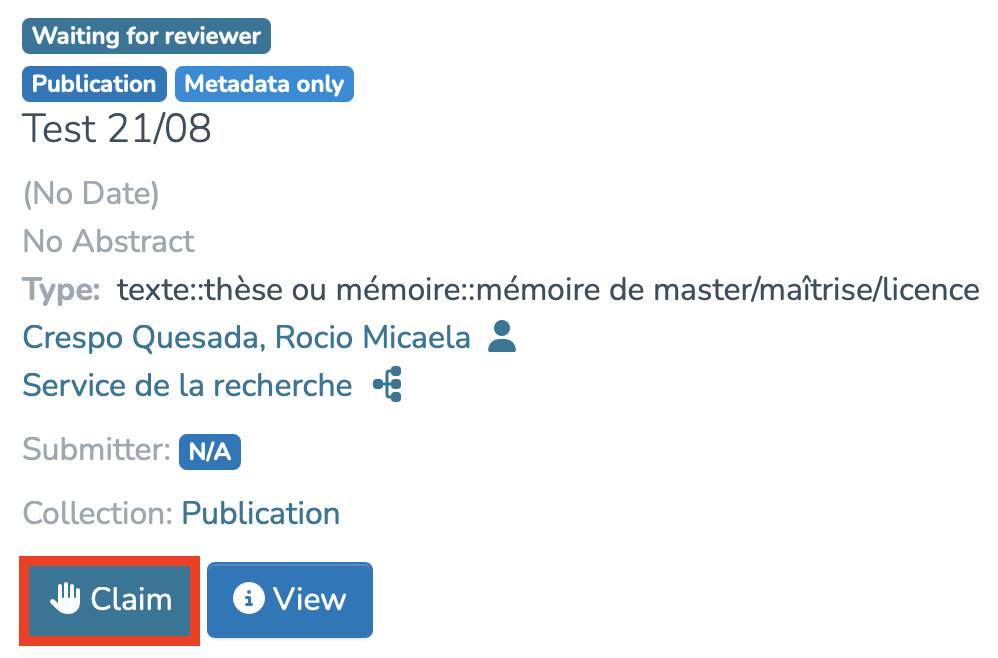
Available Features
You are now on the page containing all the records you need to validate. To start the validation, first click on “Claim” under the relevant record.
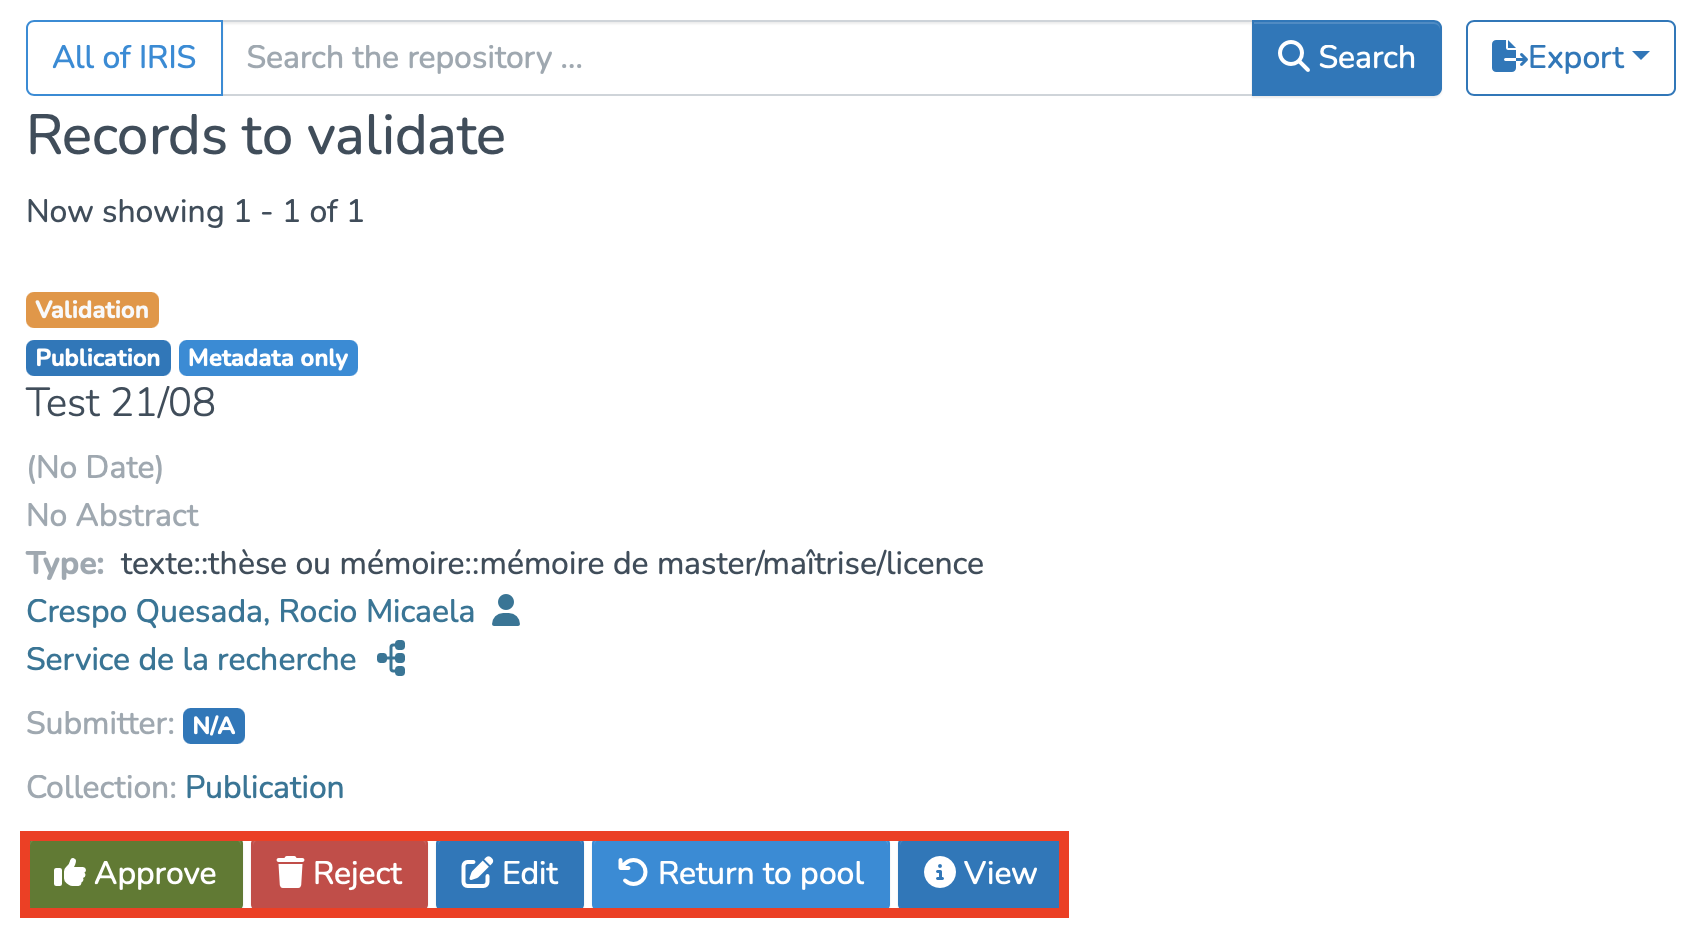
You can then perform several actions by clicking on the following buttons:
-
Approve : If you have reviewed the item and it is suitable for inclusion in the collection.
-
Reject : If the reviewed item is not ready to be included in the collection. You will be asked to indicate the reason for the rejection and further edits the user should make before resubmission.
-
Edit : If you wish to modify the item’s metadata.
-
Return to pool : If you wish to return the task to the pool so that another user may perform the task
-
View : If you wish to display the item’s metadata.
Publications: type descriptions
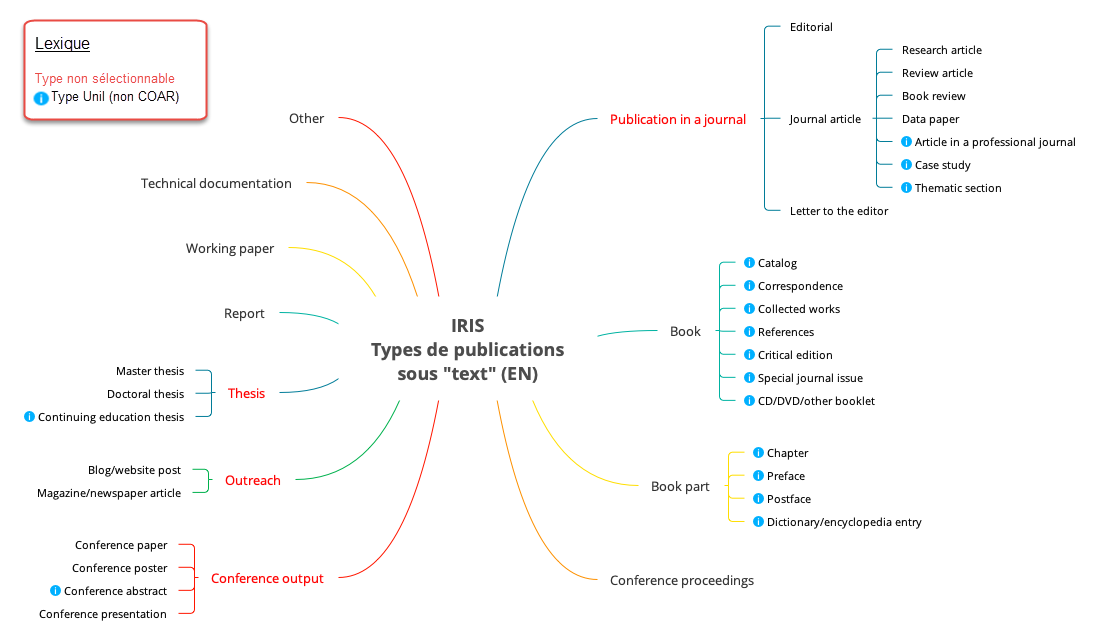
In this diagram, the red nodes are not selectable in IRIS: they are only used to organize the different categories. The elements marked with a blue circle correspond to specific publication types that are unique to UNIL.
| Type | Description |
| Text | Resource composed mainly of text, including books, letters, memoirs, poems, newspapers, articles and mailing list archives. Facsimiles or images of texts are also considered texts. |
| Publication in a journal | Article or content published in a scientific or professional periodical, intended to disseminate original research and recent developments. |
| Editorial | Short essay expressing the opinion of the editor(s) of a journal on a topical scientific, political or cultural subject. |
| Journal article | Research article reporting the results of an original study, published in a scientific journal. |
| Research article | Article presenting the methods and results of original research carried out by the authors. |
| Review article | Comprehensive, critical analysis of available knowledge on a subject, based on a review of existing literature. |
| Book review | Critical evaluation of a book, focusing on its content, quality and scope. |
| Data paper | Article describing a specific dataset, its characteristics, access and potential for reuse. |
| Article in a professional journal | Article aimed at practitioners in a specific field, often more applied than a scientific article. |
| Case study | In-depth analysis of a particular case, generally used in the social sciences, medicine or management. |
| Thematic section | Structured set of articles gathered around a single theme within a periodical. |
| Letter to the editor | Letter commenting on or discussing an article published in a periodical, or presenting a point of interest to its readers. |
| Book | Non-periodical work, published in one or more volumes. |
| Catalog | Descriptive publication listing works of art, often as part of an exhibition or collection. |
| Correspondence | Collection of letters exchanged between different people. |
| Collected works | Collection of publications on one or more themes by one or more authors. |
| References | A work designed for occasional consultation (dictionary, encyclopedia, etc.). |
| Critical edition | Version of a text annotated and commented by a specialist. |
| Special journal issue | Special edition of a magazine devoted entirely to a specific theme or event. |
| CD/DVD/other booklet | Explanatory document accompanying an audio or video medium, such as a CD or DVD. |
| Book part | Chapter or defined section of a book. |
| Chapter | Distinct part of a book, often with its own title. |
| Preface | Introductory text of a book, often written by the author or an expert. |
| Postface | Concluding text of a book, often written after publication. |
| Dictionary/encyclopedia entry | Entry or article presenting concise, structured information on a term, concept, person or event. |
| Conference proceedings | Collection of papers presented at a conference/colloquium. |
| Conference output | Papers presented at a conference, including articles, posters and oral communications. |
| Conference paper | Article published in the proceedings of a conference/colloquium, reporting original research. |
| Conference poster | Graphic presentation of research results, displayed at a conference/symposium. |
| Conference abstract | Abstract of a paper presented at a conference. |
| Conference presentation | Slides or any other visual aid used for an academic presentation, particularly at a conference or symposium. |
| Outreach | Publication intended for a non-specialist audience, aimed at explaining scientific concepts. |
| Blog/website post | Text published on a blog or website. |
| Magazine/newspaper article | Article published in a newspaper or magazine, covering a variety of subjects. |
| Thesis | An academic document presenting the results of research carried out as part of a university degree. |
| Master thesis | A dissertation reporting on a research project undertaken as part of a higher education course leading to a Master's degree. |
| Doctoral thesis | A thesis reporting on research undertaken during a period of higher education leading to a doctorate. |
| Continuing education thesis | A dissertation reporting on work undertaken during a period of study leading to a further education diploma. |
| Report | A formal document presenting the results of a study, research or analysis. |
| Working paper | A working or discussion paper circulated publicly or among a group of peers. Some disciplines publish working papers in series. |
| Technical documentation | Technical documentation refers to any type of documentation that describes the handling, functionality and architecture of a technical product or a product under development or use. |
| Other | A type of resource that is not included in the existing terms under the higher concept “Text”. |
Importing et exporting
This section explains how to import data into IRIS from external files, and how to export content in different formats. It also includes accepted formats, constraints to be respected and advice on how to avoid common errors.
Exporting items from IRIS
The voice in this video was generated by artificial intelligence.
Introduction
This tutorial provides a step-by-step guide to exporting items from the IRIS platform.
Several types of items can be exported: your personal profile, your own publications, as well as collections such as other researcher profiles, publications, units, or periodicals (academic journals that group several publications).
Depending on your needs, you can:
-
Export an individual item by accessing its dedicated page
-
Use search filters to export a set of items matching specific criteria (e.g. all publications in English or from several specific periodicals)
In the following sections, you'll find detailed procedures for each export type.
Using Filters to Export a Set of Entities
As with exporting specific entities, you should first select the desired entity type from the homepage. Then, you can apply the filters relevant to your needs.
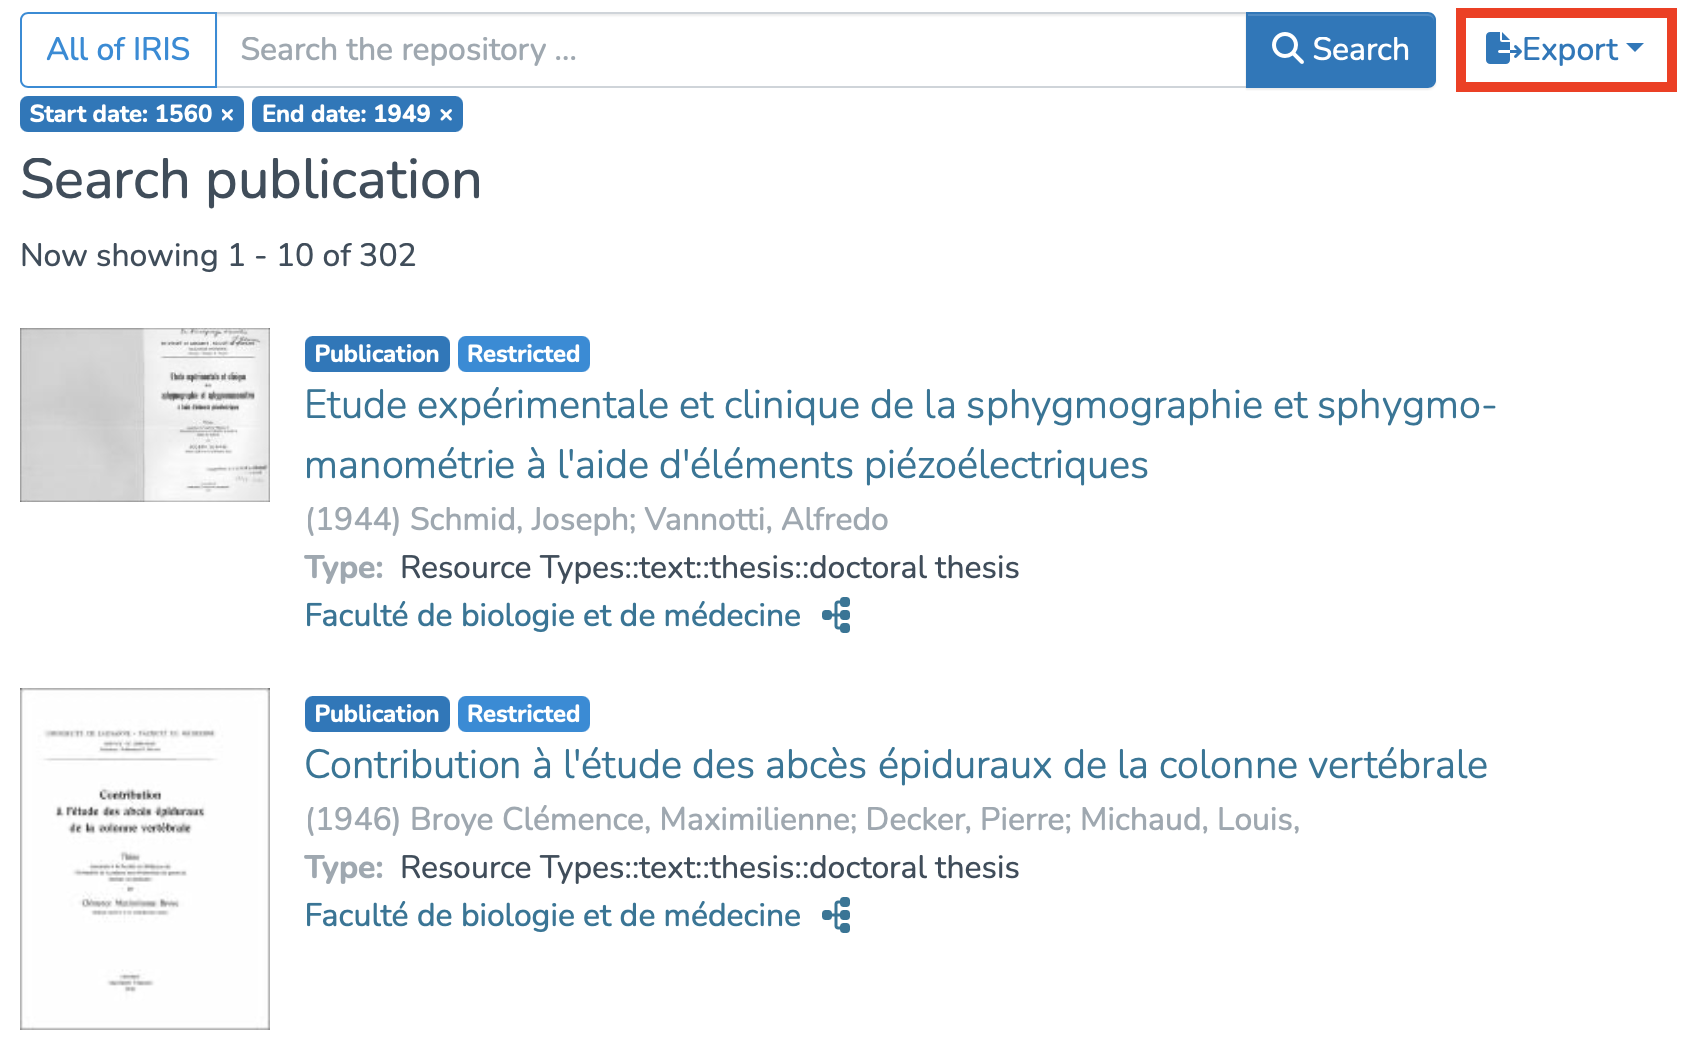
In the following example, we are exporting all publications from 1560 to 1949.
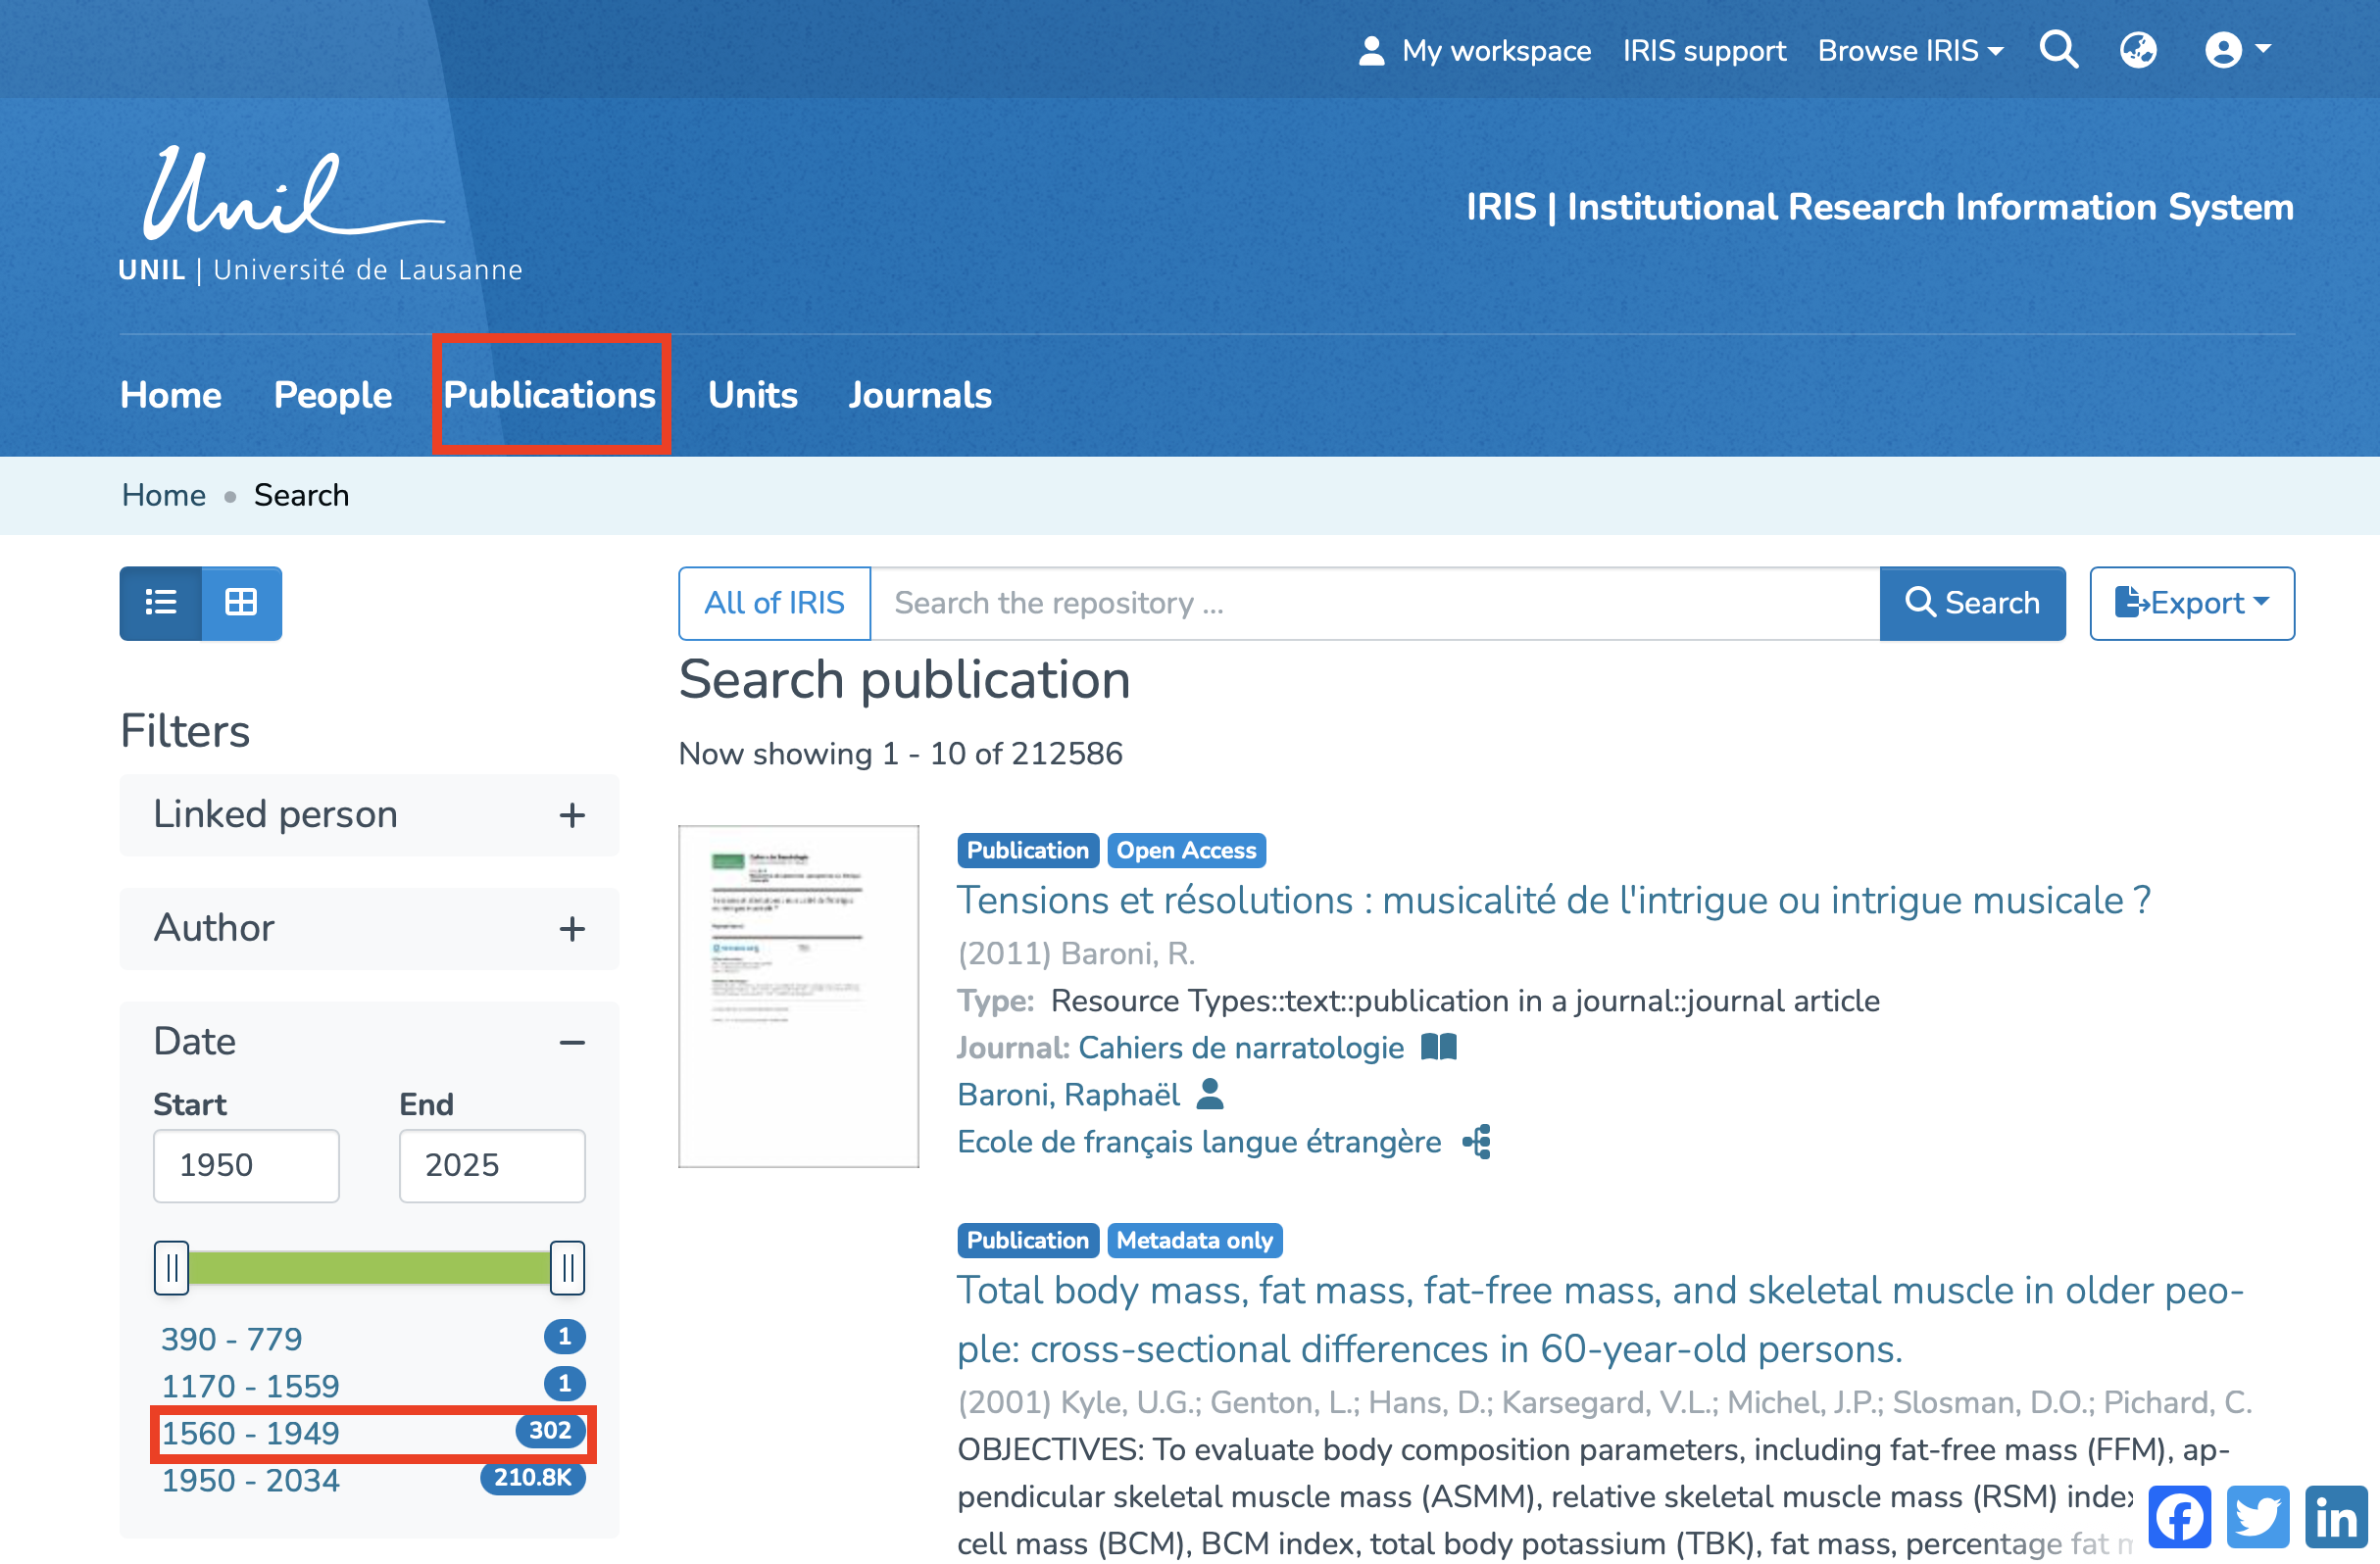
Once your search is filtered, simply click the "Export" button. Multiple entity types may be proposed. In this case, since we’re already in the "Publications" category, you just need to select it. However, if your search is more general and returns multiple collections (profiles, units, periodicals, etc.), you will first need to select the specific type you want to export.
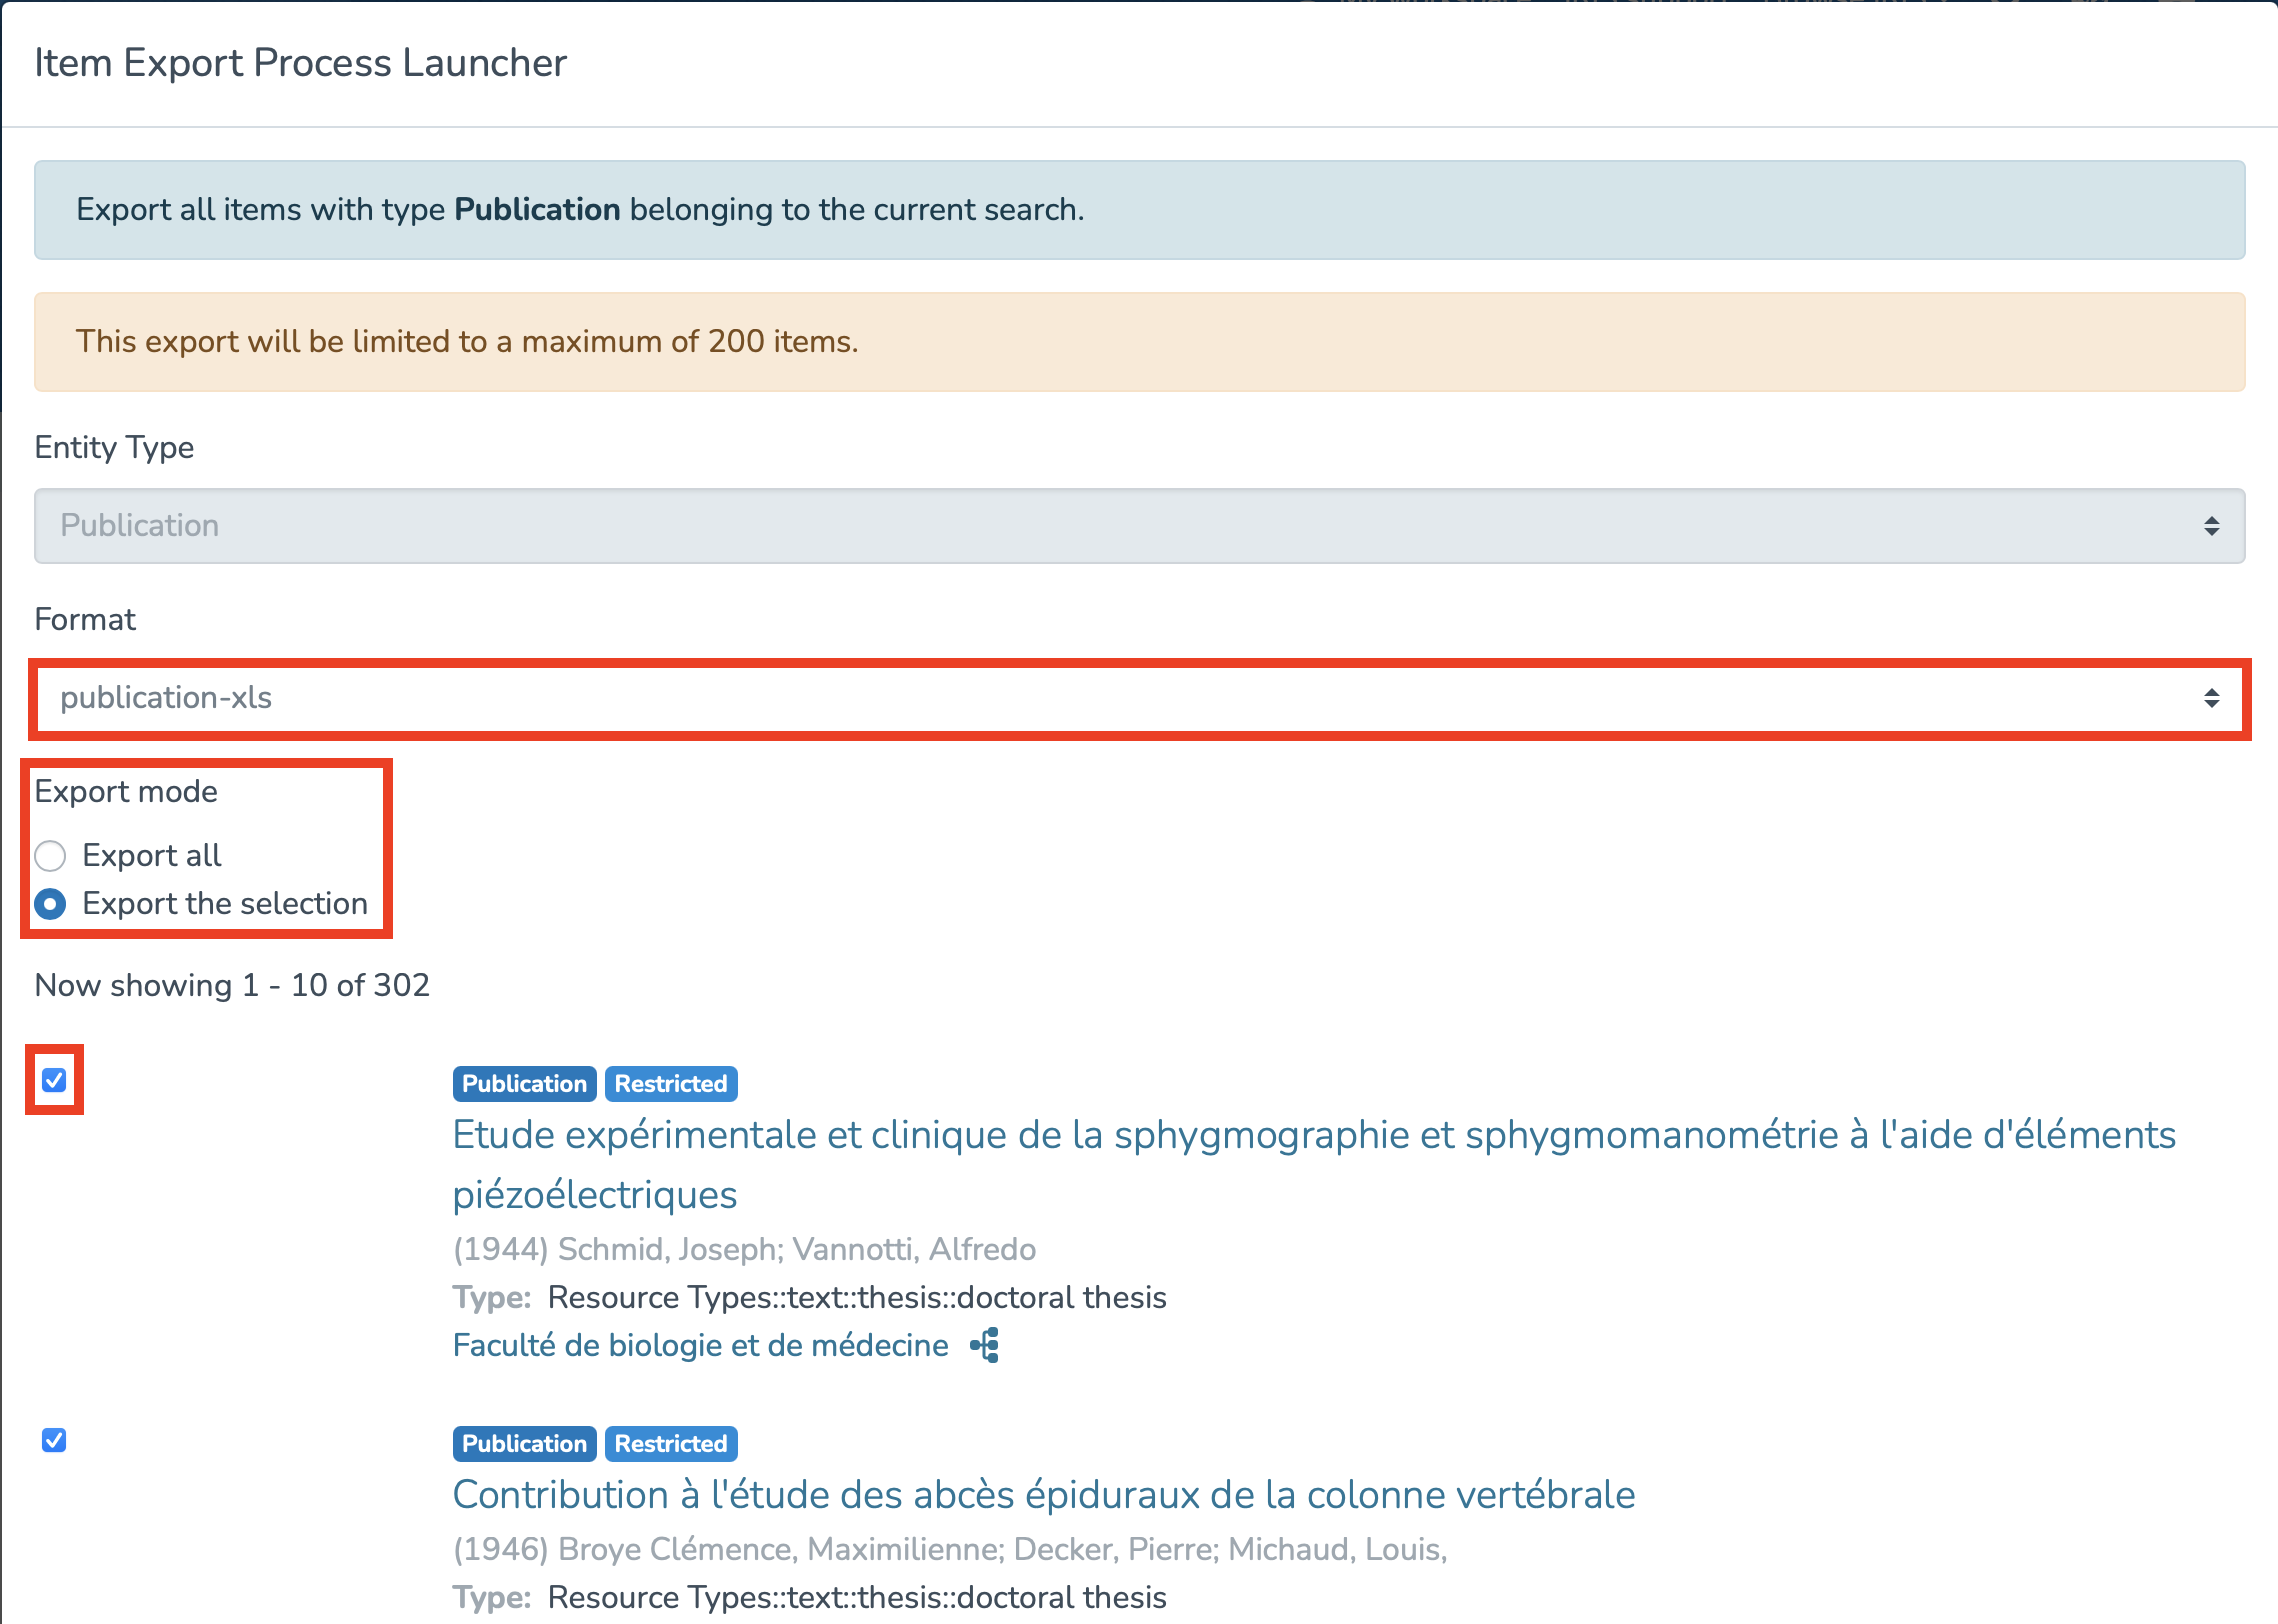
You will then access the "Item Export Process Launcher". You must:
-
Choose the output file format
-
Select the export mode – either export all results or only a selection
-
If you wish to export only selected items, you will need to check them manually one by one
-
Once these steps are completed, click the "Export" button in the bottom-right corner and a downloadable file will be generated.
N.B : From your workspace, you can only export the records you have created yourself, not those you are merely linked to.
Exporting Your Own List of Publications
You can also export your own list of publications by following these steps:
1. Search for your own profile using the general search bar.
2. In order to access the publications you are linked to, you will need to select the corresponding linked person using the following filter.
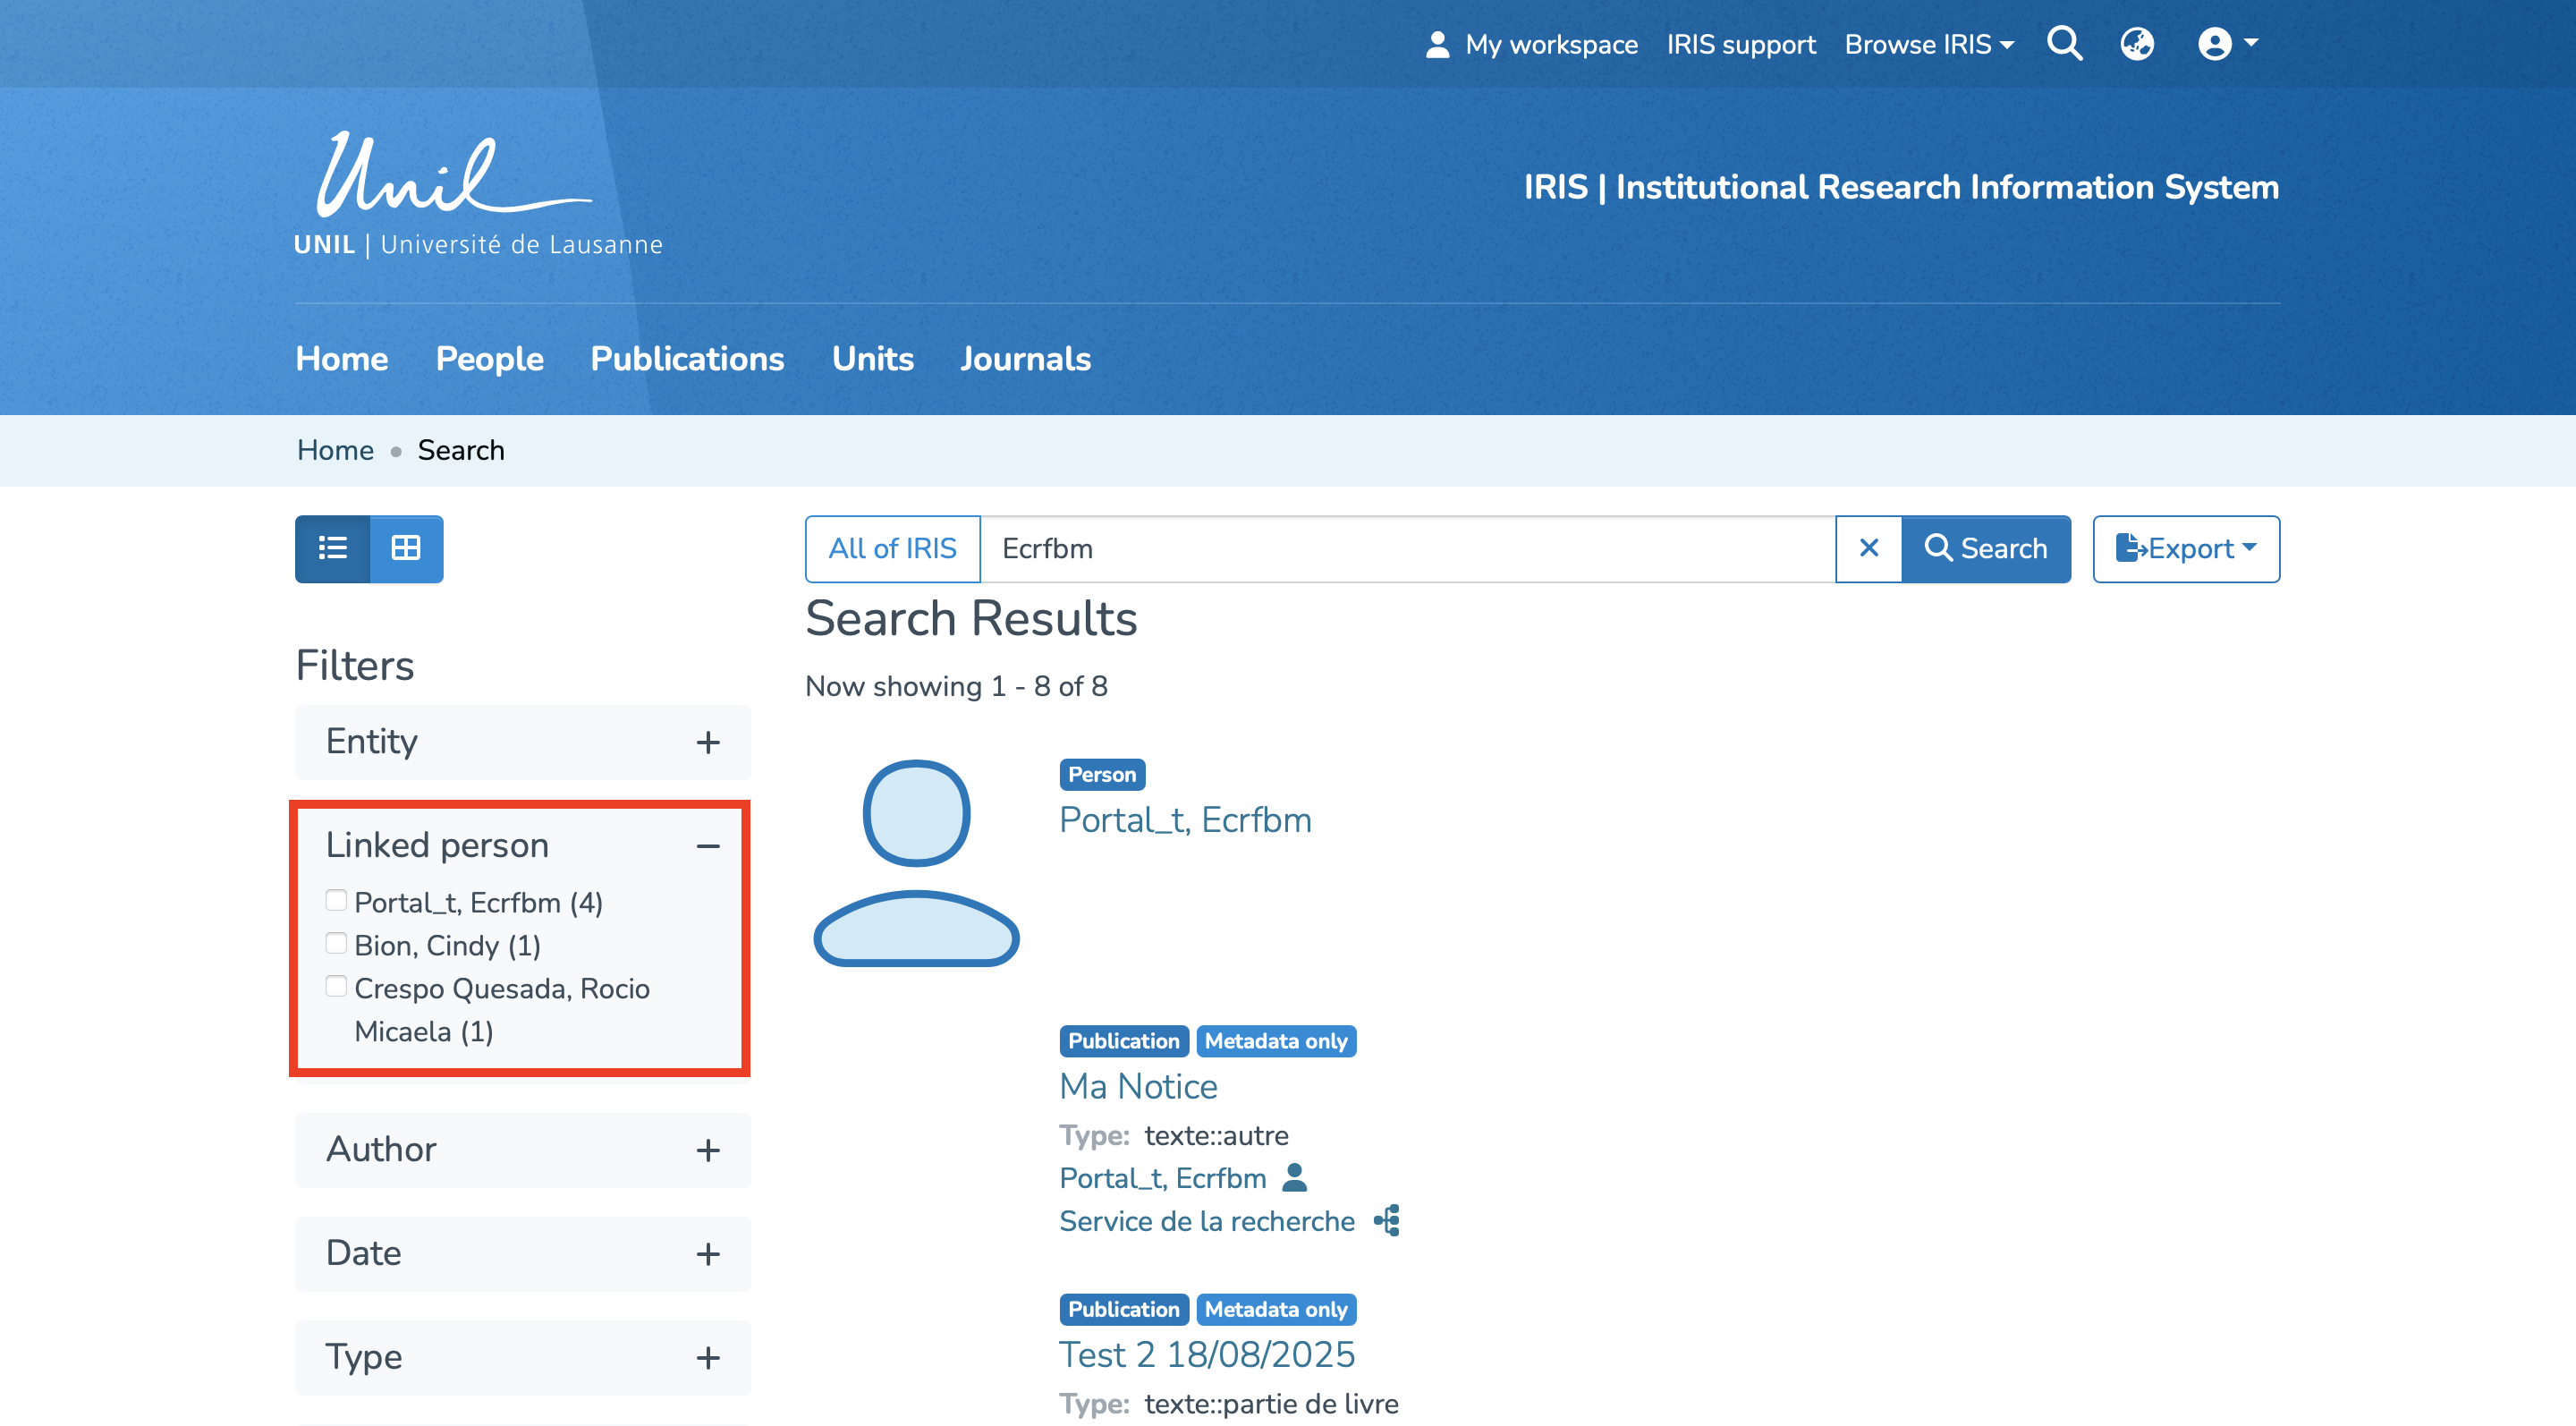
3. You will then have access to the publications linked to your profile. Click on the “Export” button, then select “Publications.”
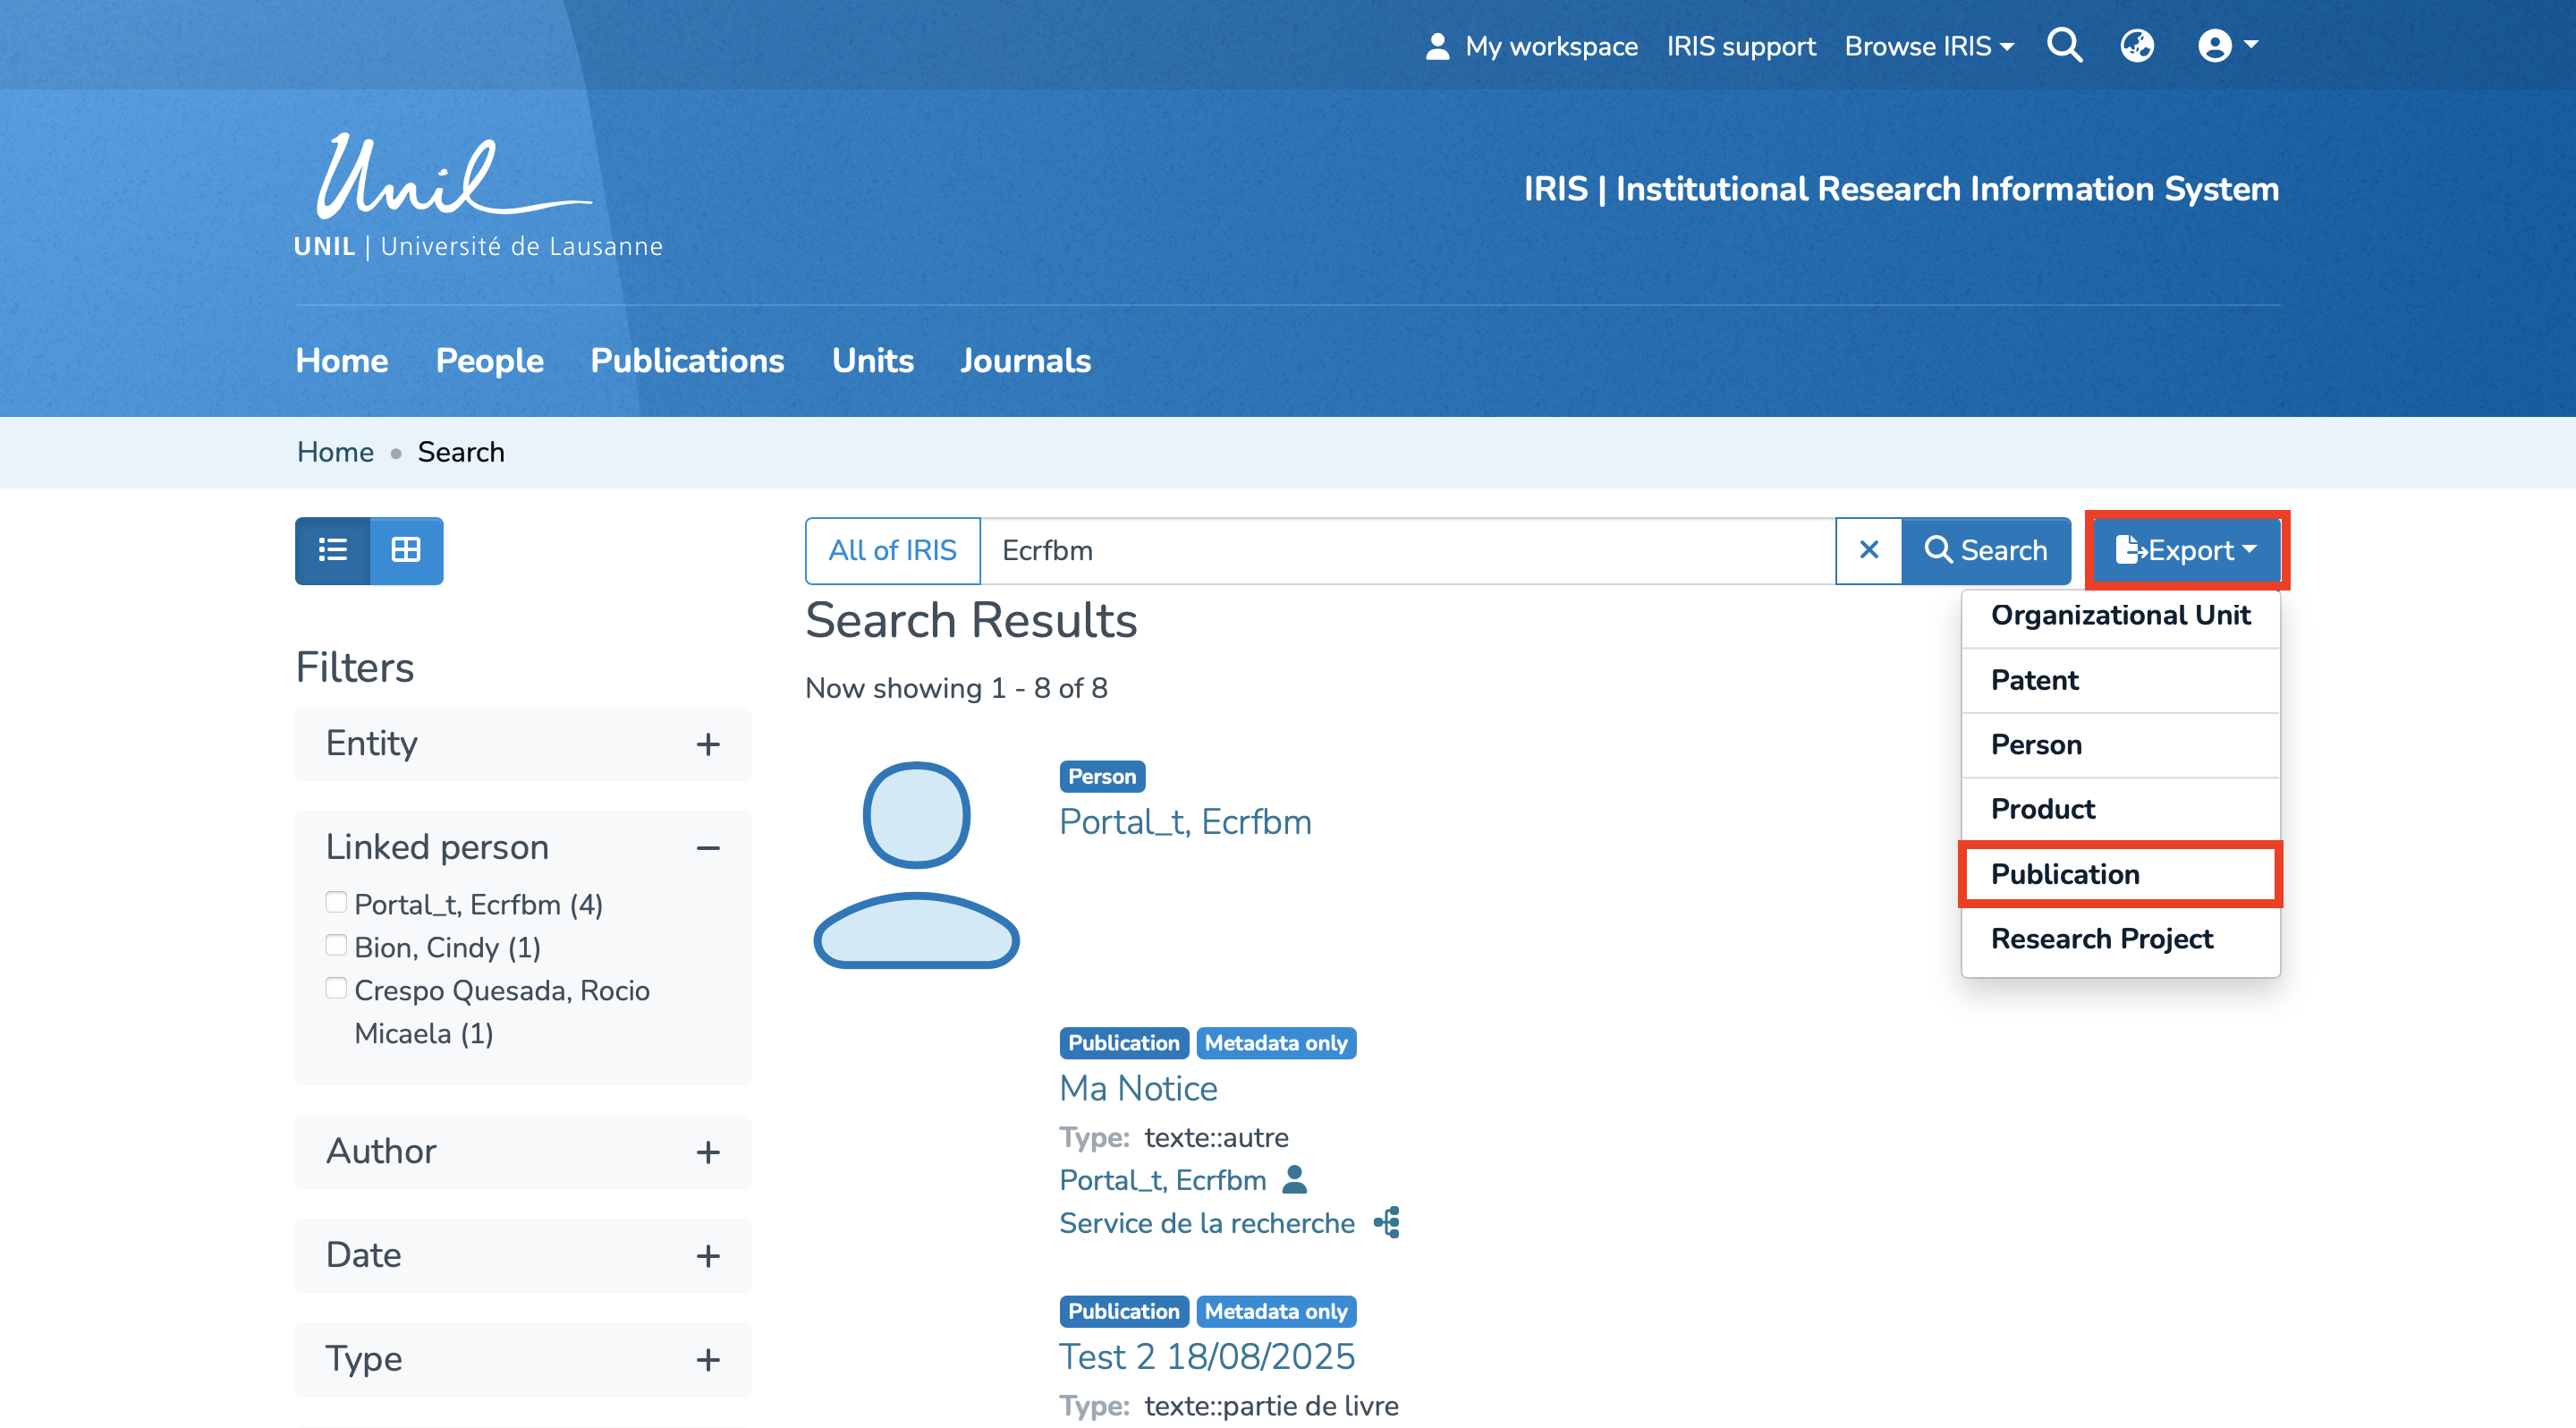
This will open the Item Export Process Launcher.
You will need to:
1. Select the output file format.
2. Choose the export mode: whether you want to export all results or only a selection from your list.
3. If you only want to export a selection, you must manually check each item you want to include.
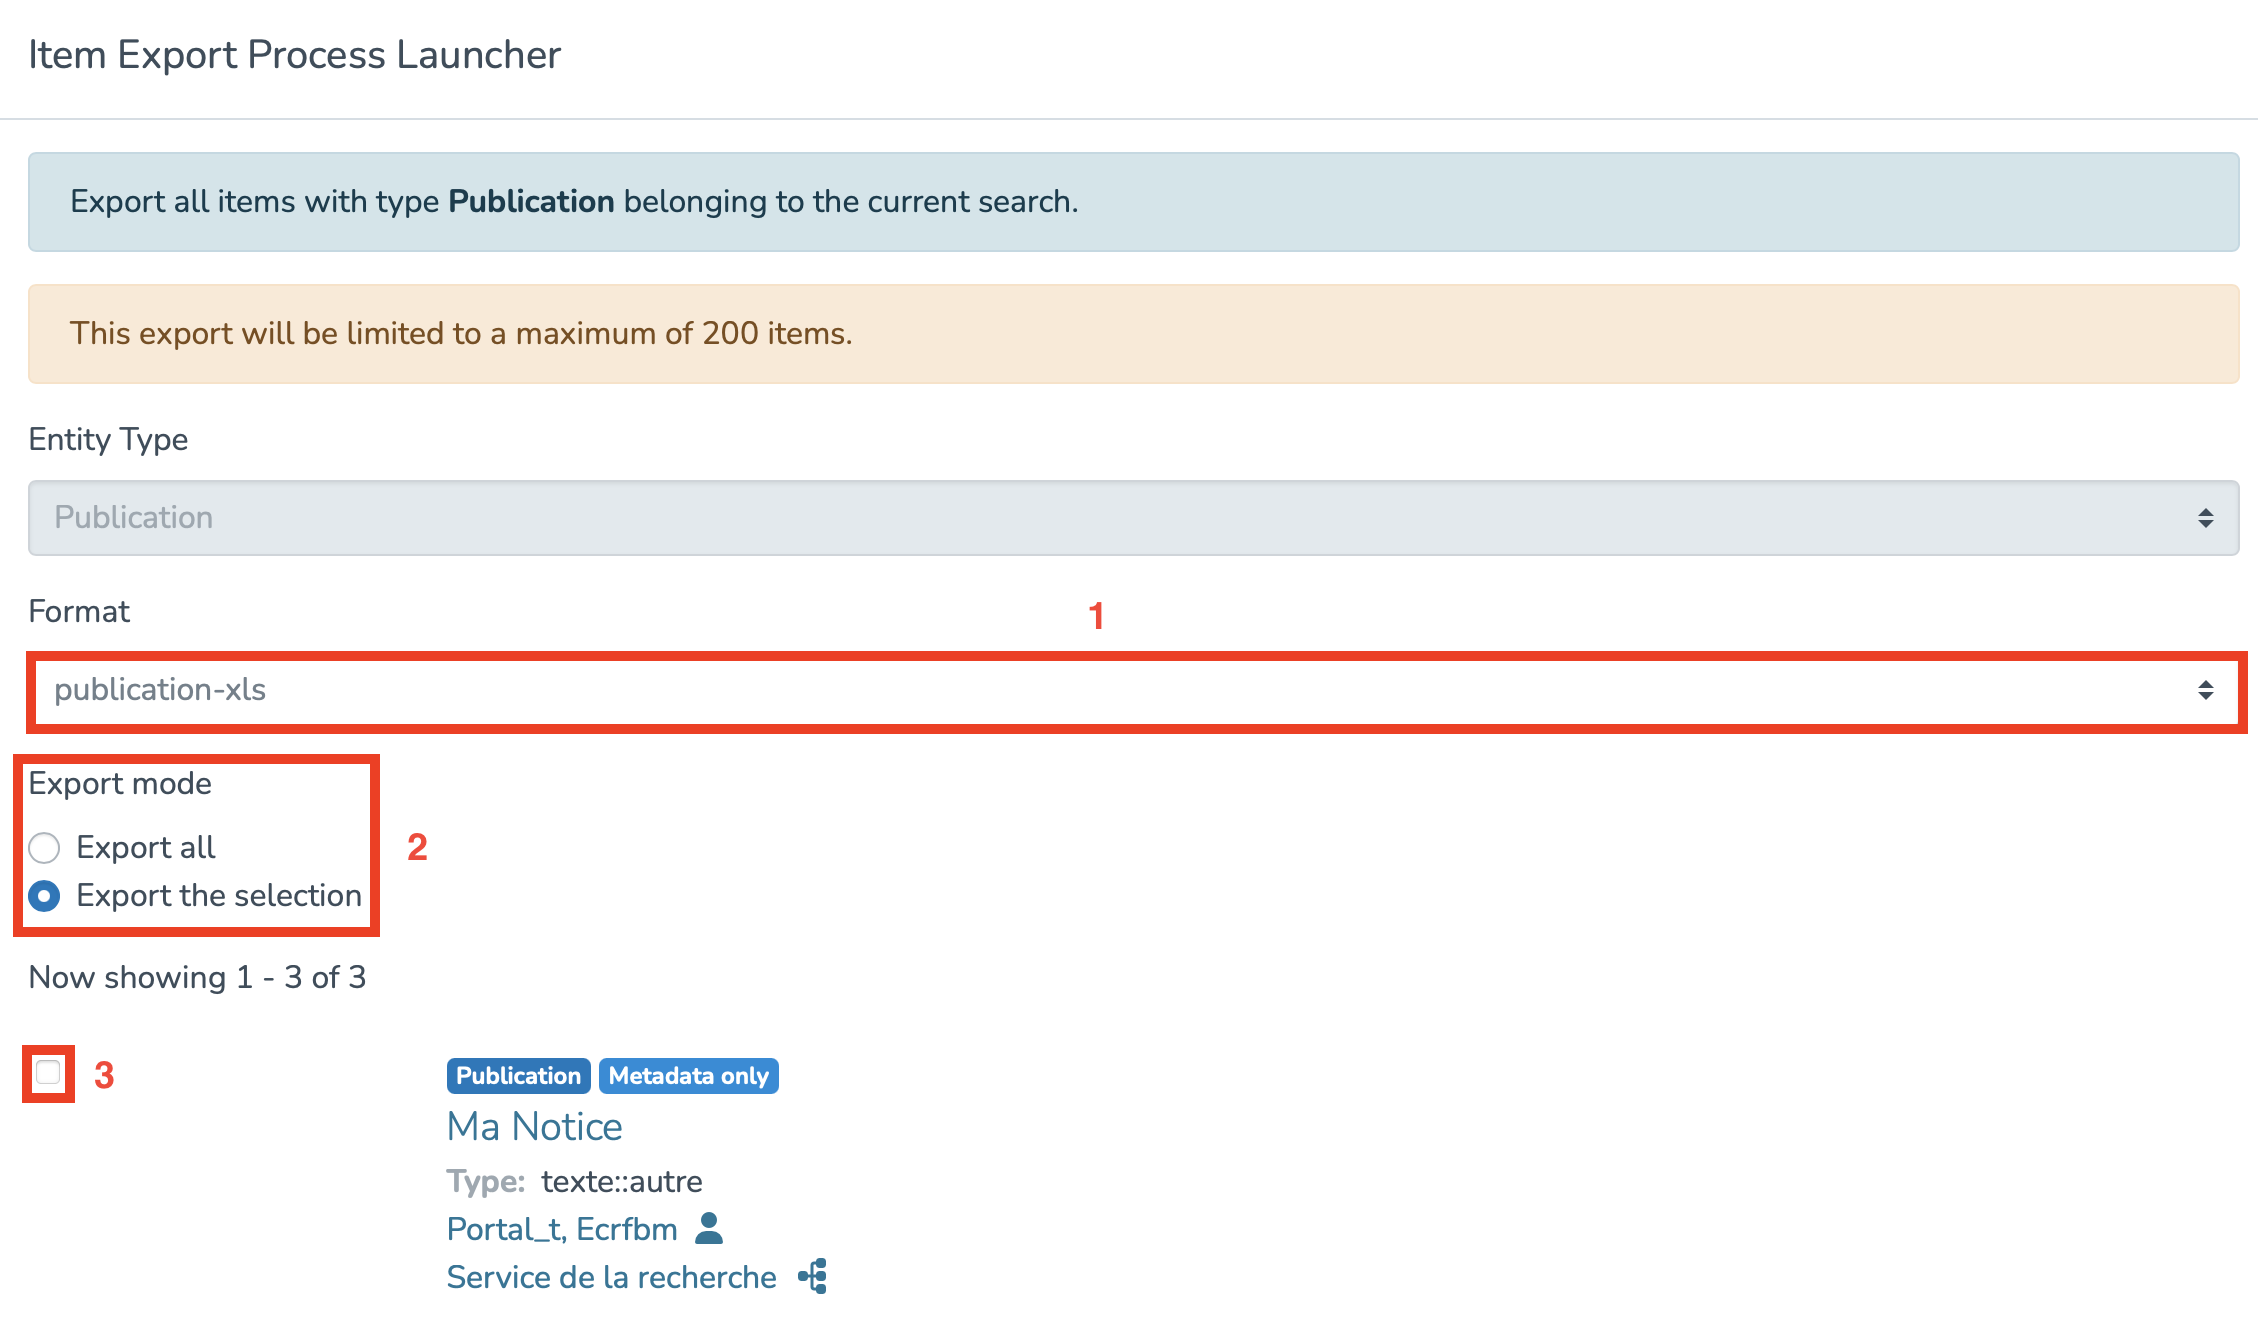
Once these steps are completed, click on the “Export” button at the bottom right, you will then be able to download your file.
Exporting a specific item
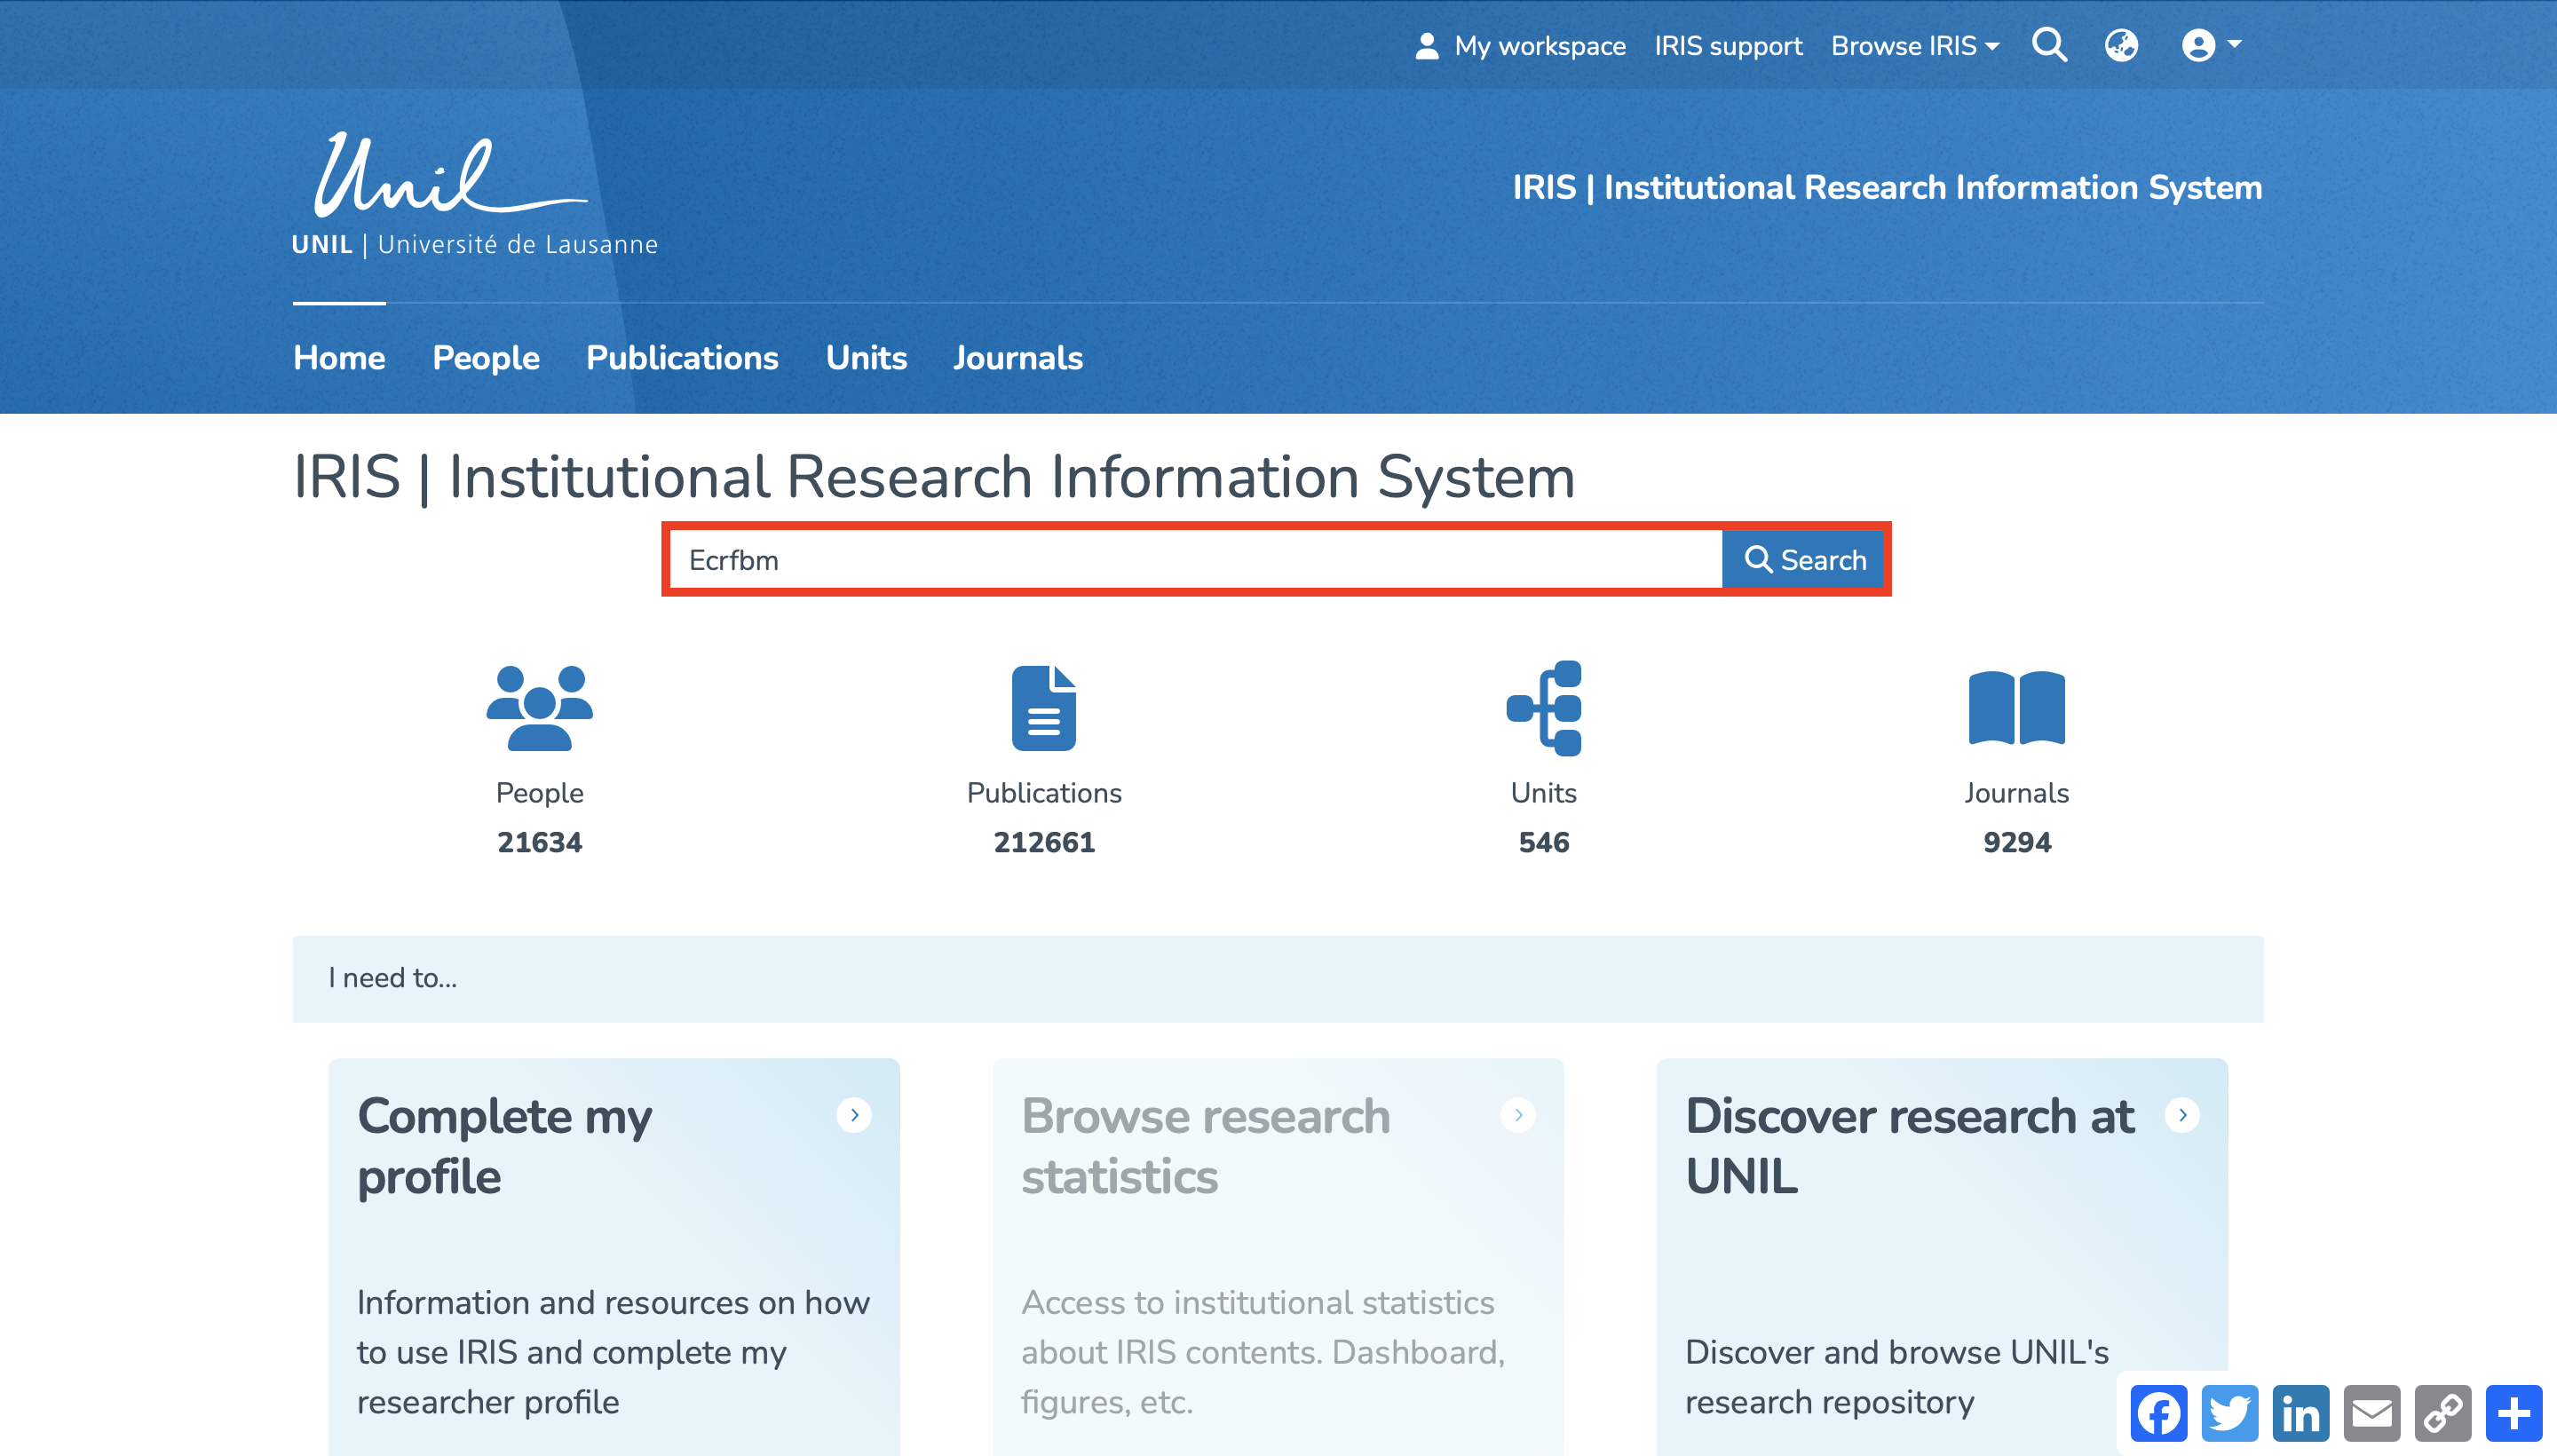
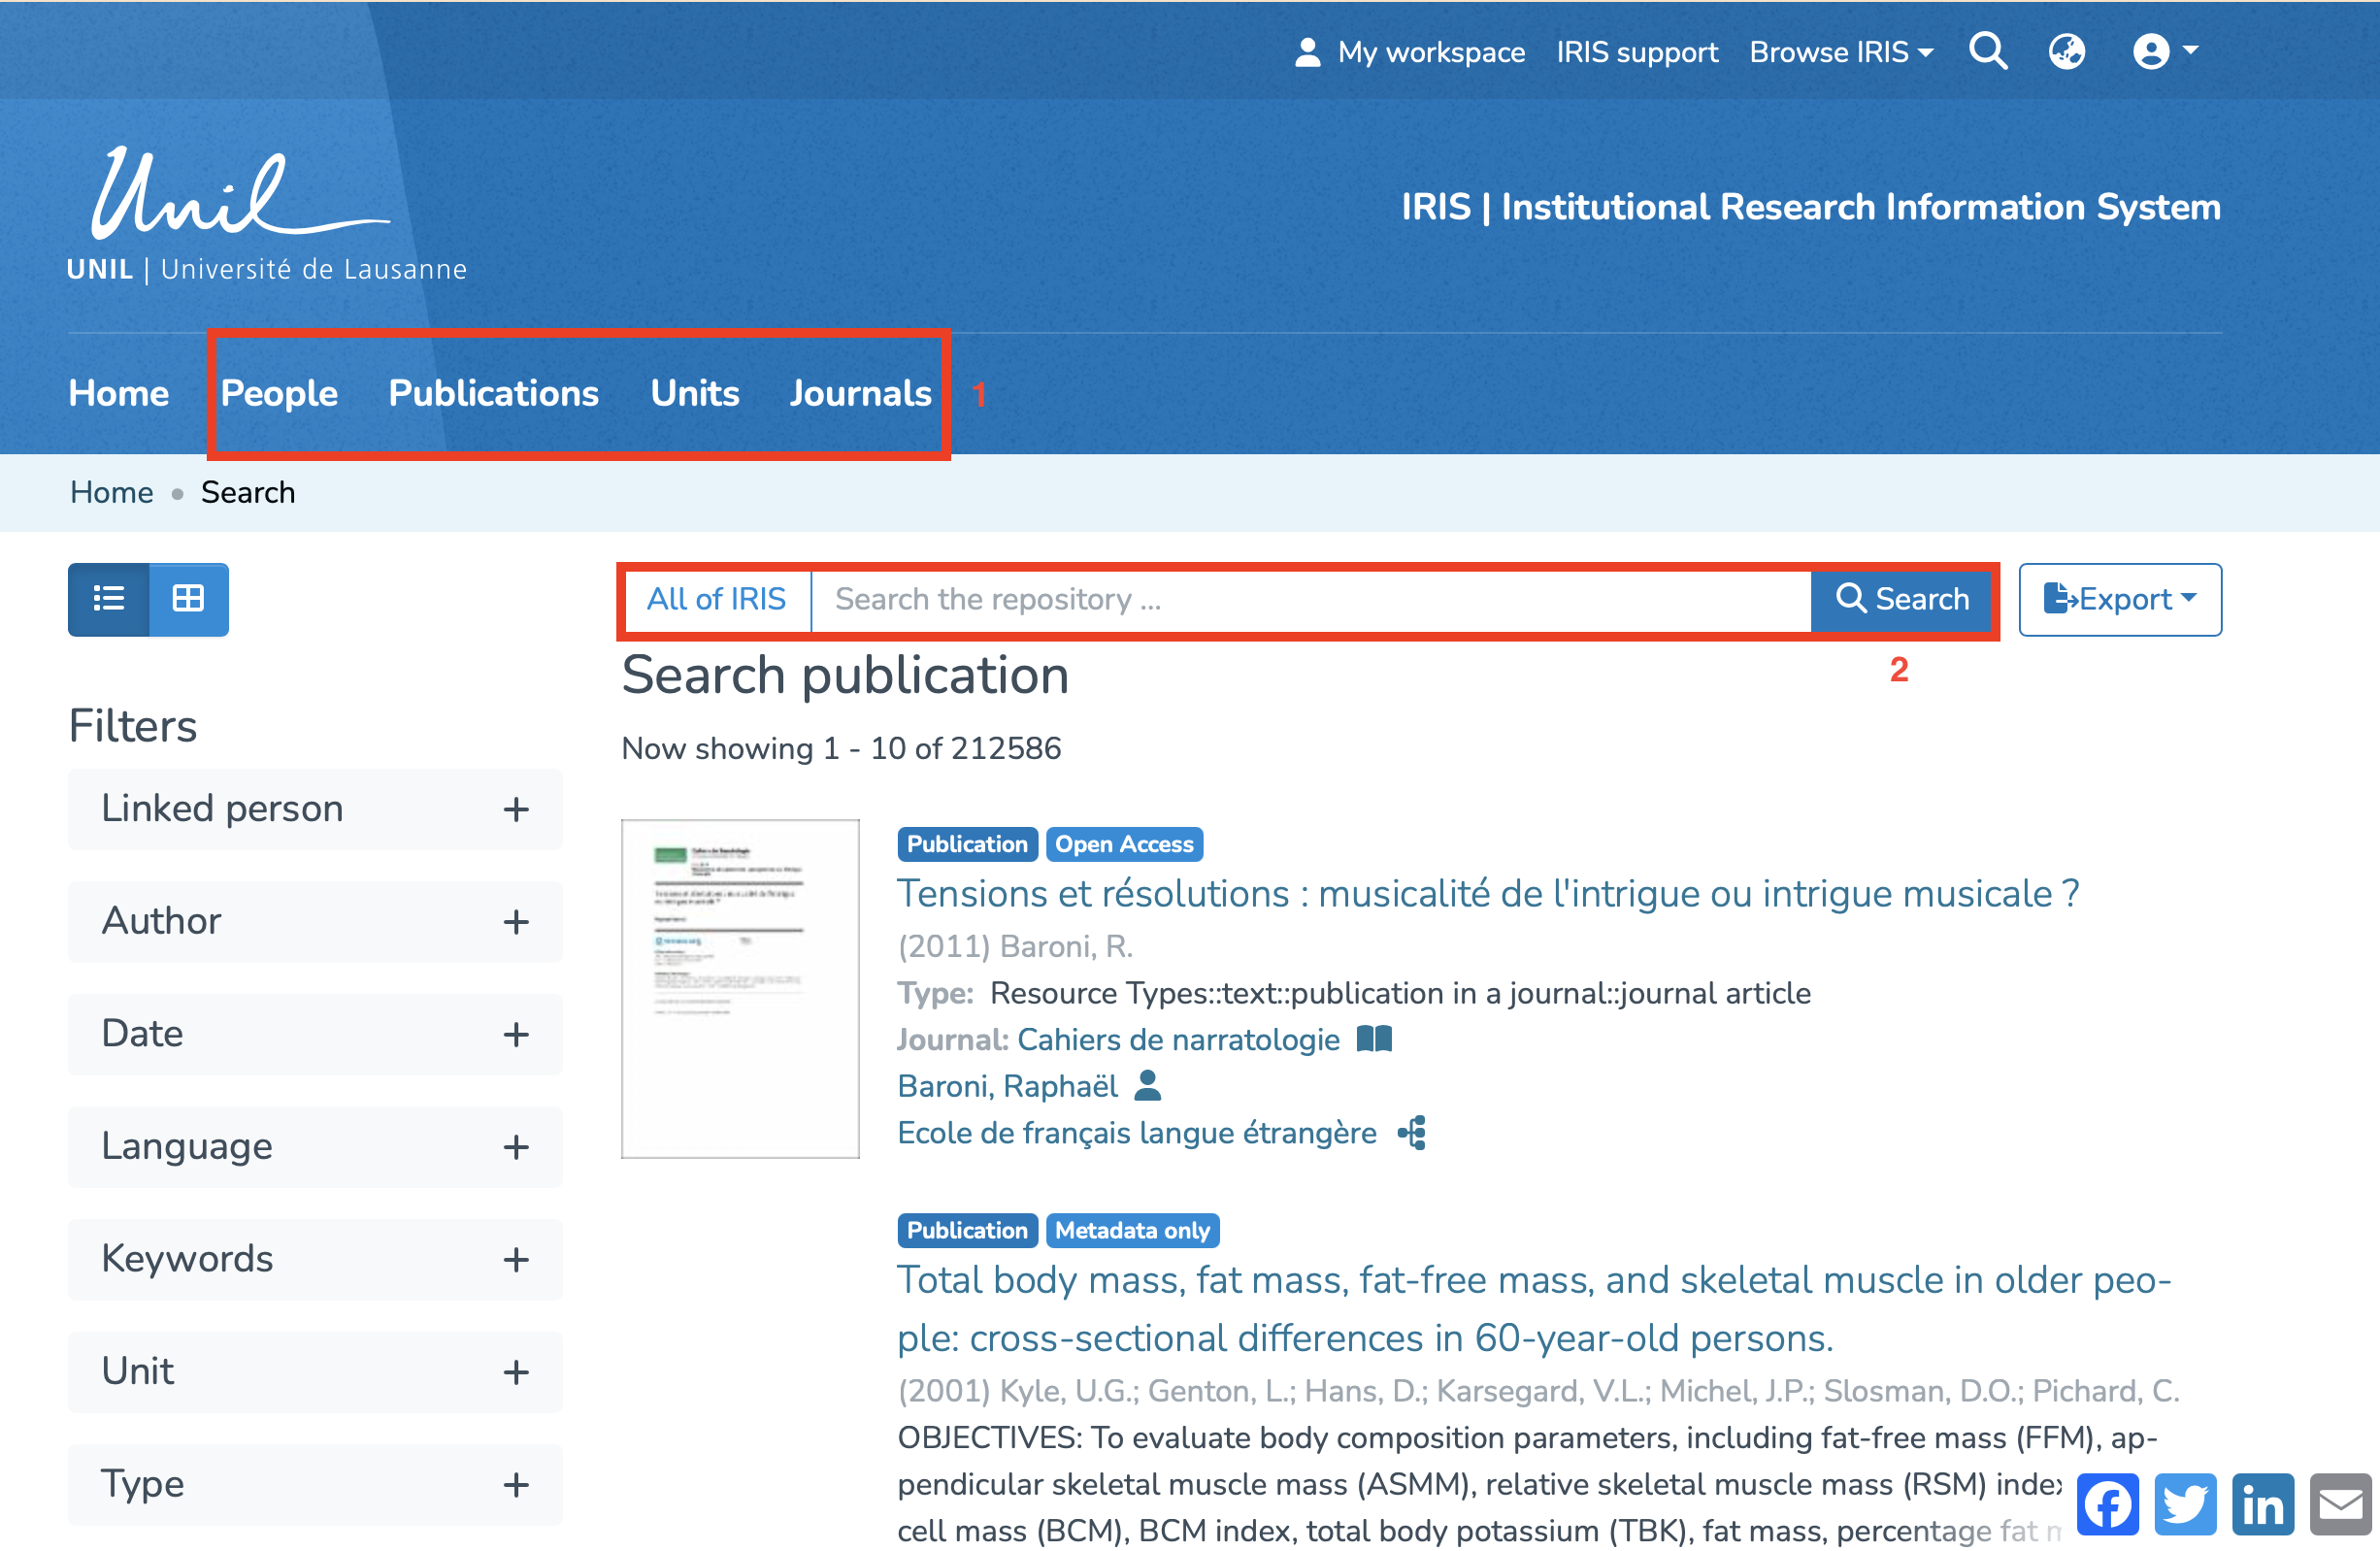
From the homepage, you can search for an item either by selecting its type (1) and launching the search (2), or simply by entering keywords directly in the main search bar.
Once you have selected the desired entity, click on it to open its page, then click the "Export" button in the top-right corner.
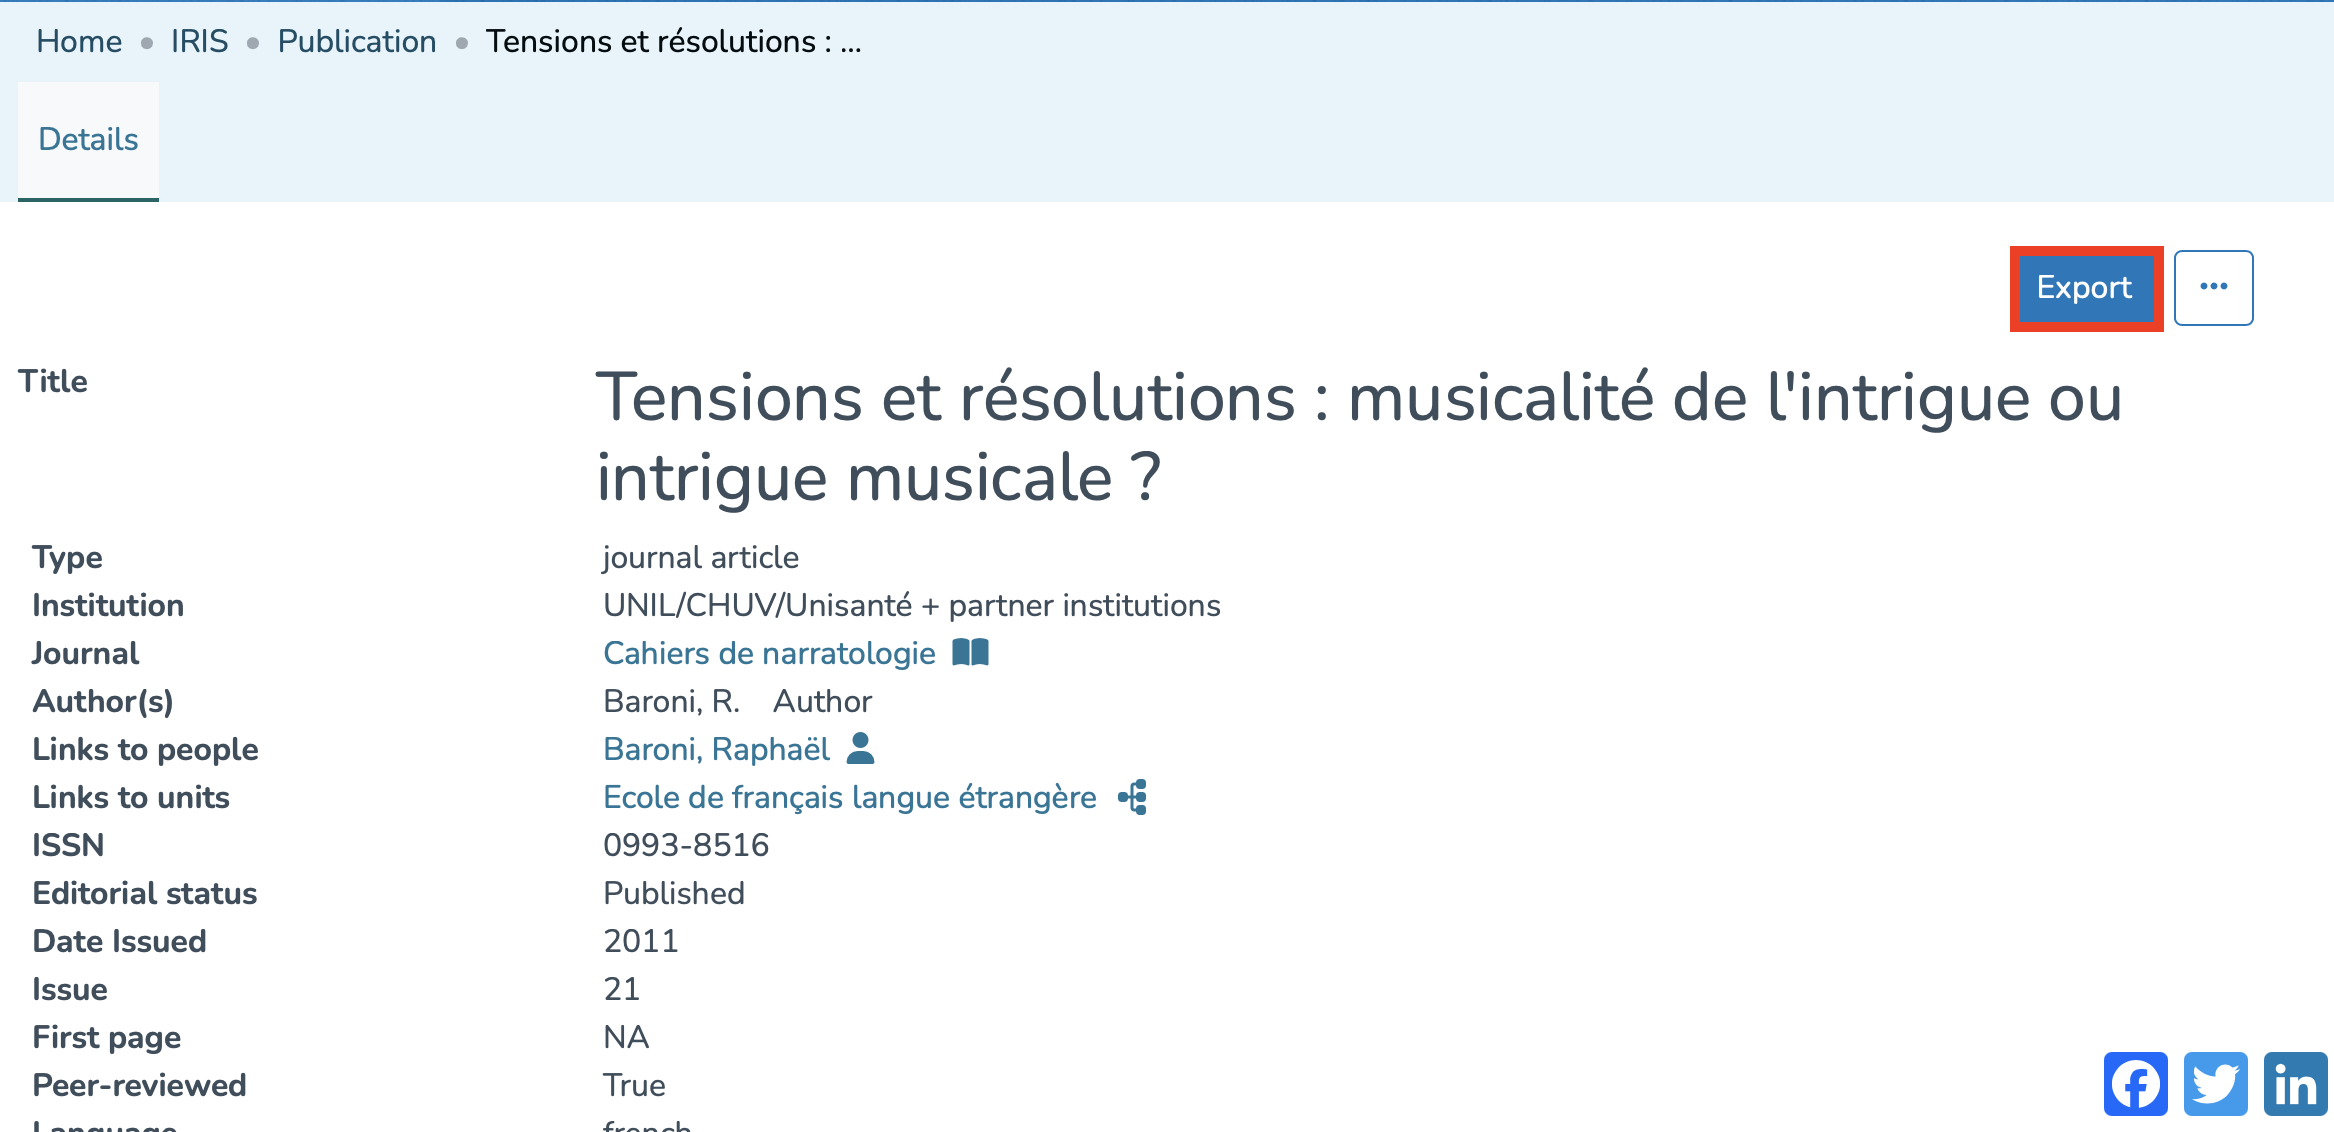
You will then be prompted to choose the output file format (1), and click the "Export" button.
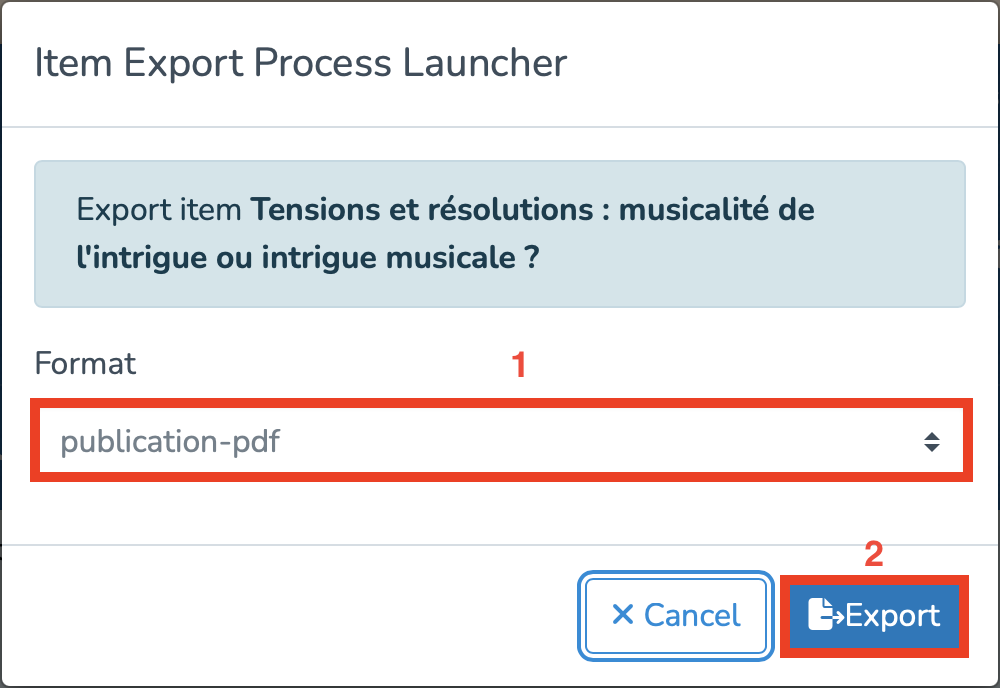
A download message will appear in the bottom-left corner of your screen. Once the download is complete, click on the file name to open it, as shown below.
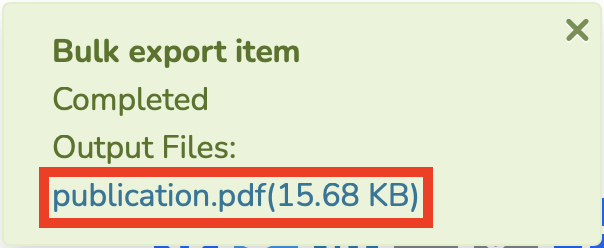
You will then access a file generated in the selected format, as illustrated here:

Linking your ORCID account with IRIS
The voice in this video was generated by artificial intelligence.
Create an ORCID Account (if you haven't already)
- Go to the official website: https://orcid.org
- This will allow you to obtain a unique identifier through which your research contributions can be reliably tracked.
Access your researcher profile
Accessing Your Profile via the Login Menu
- From the IRIS homepage, click on the login menu.
- In the dropdown menu, select “My account and profile.”
- You’ll be redirected to a page titled “Update Profile”. Click on “View” to open the full version of your profile.
Accessing Your Profile via Search
- From the IRIS homepage, click on “People.”
- In the search bar that appears, enter your name (a), then click “Search” (b).
- Once the search is complete, your profile will appear in the results. Click on your name (c).
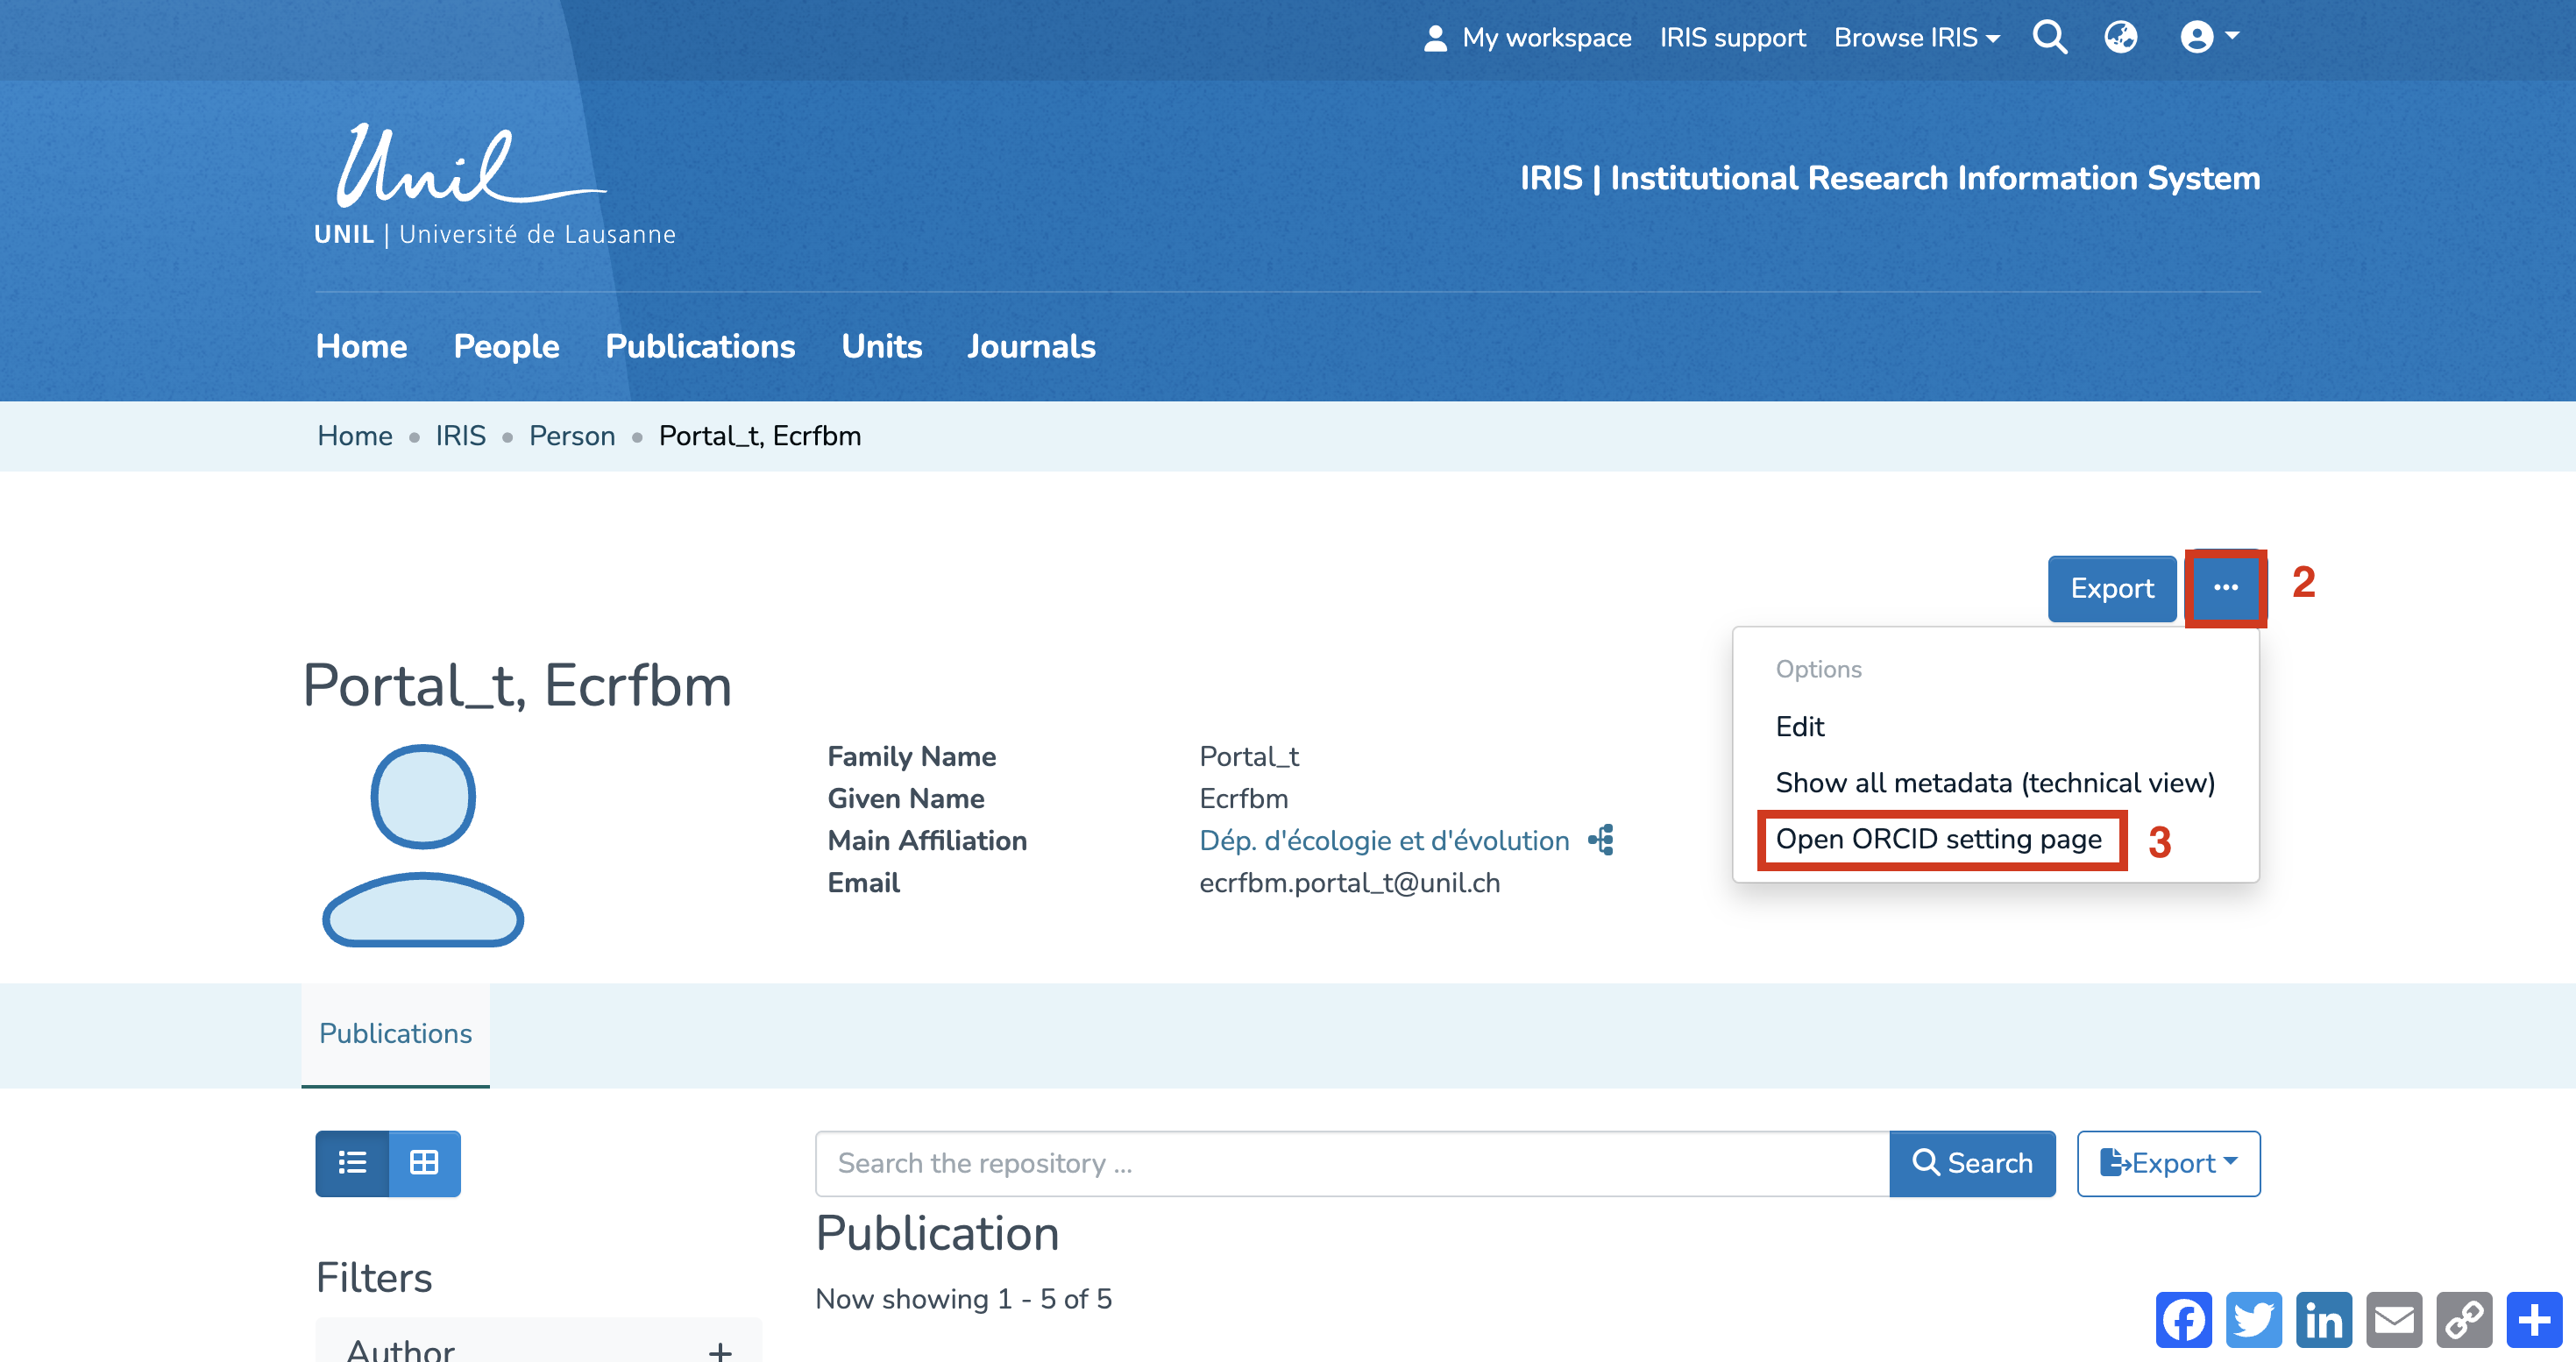
Open ORCID Settings
- You are now on your researcher profile page.
- Click on the three-dot icon to open the options menu.
- Select “Open ORCID setting page.”

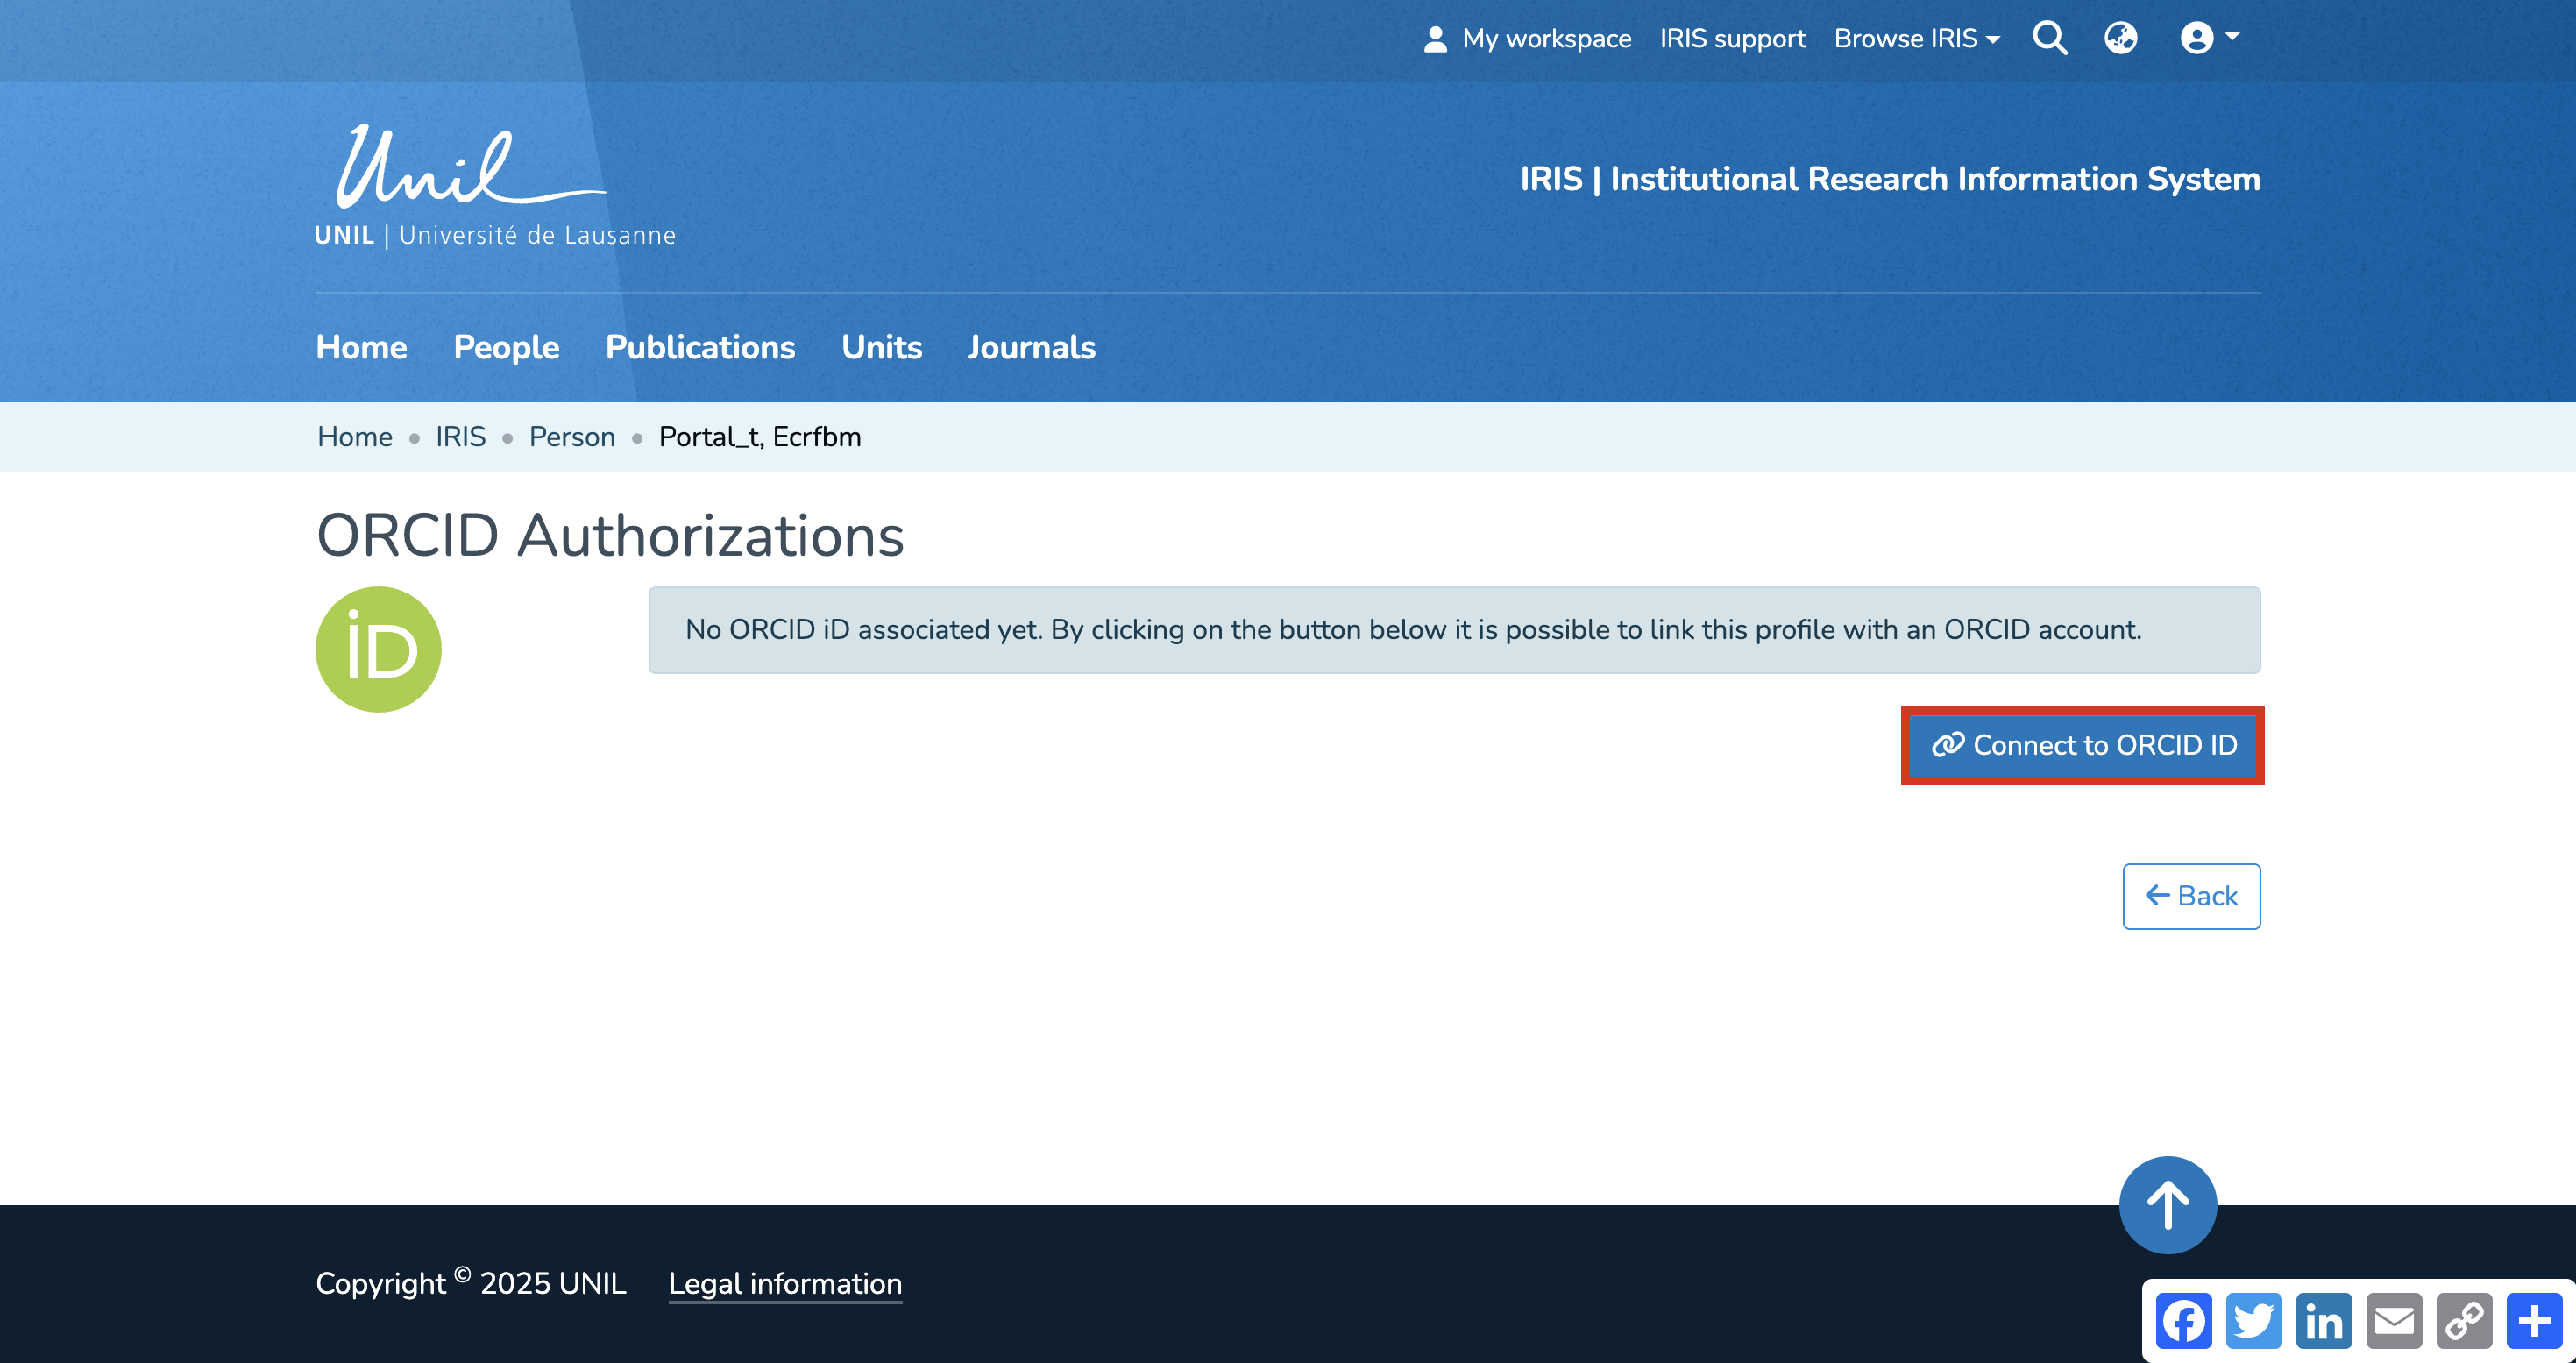
Connect Your ORCID ID
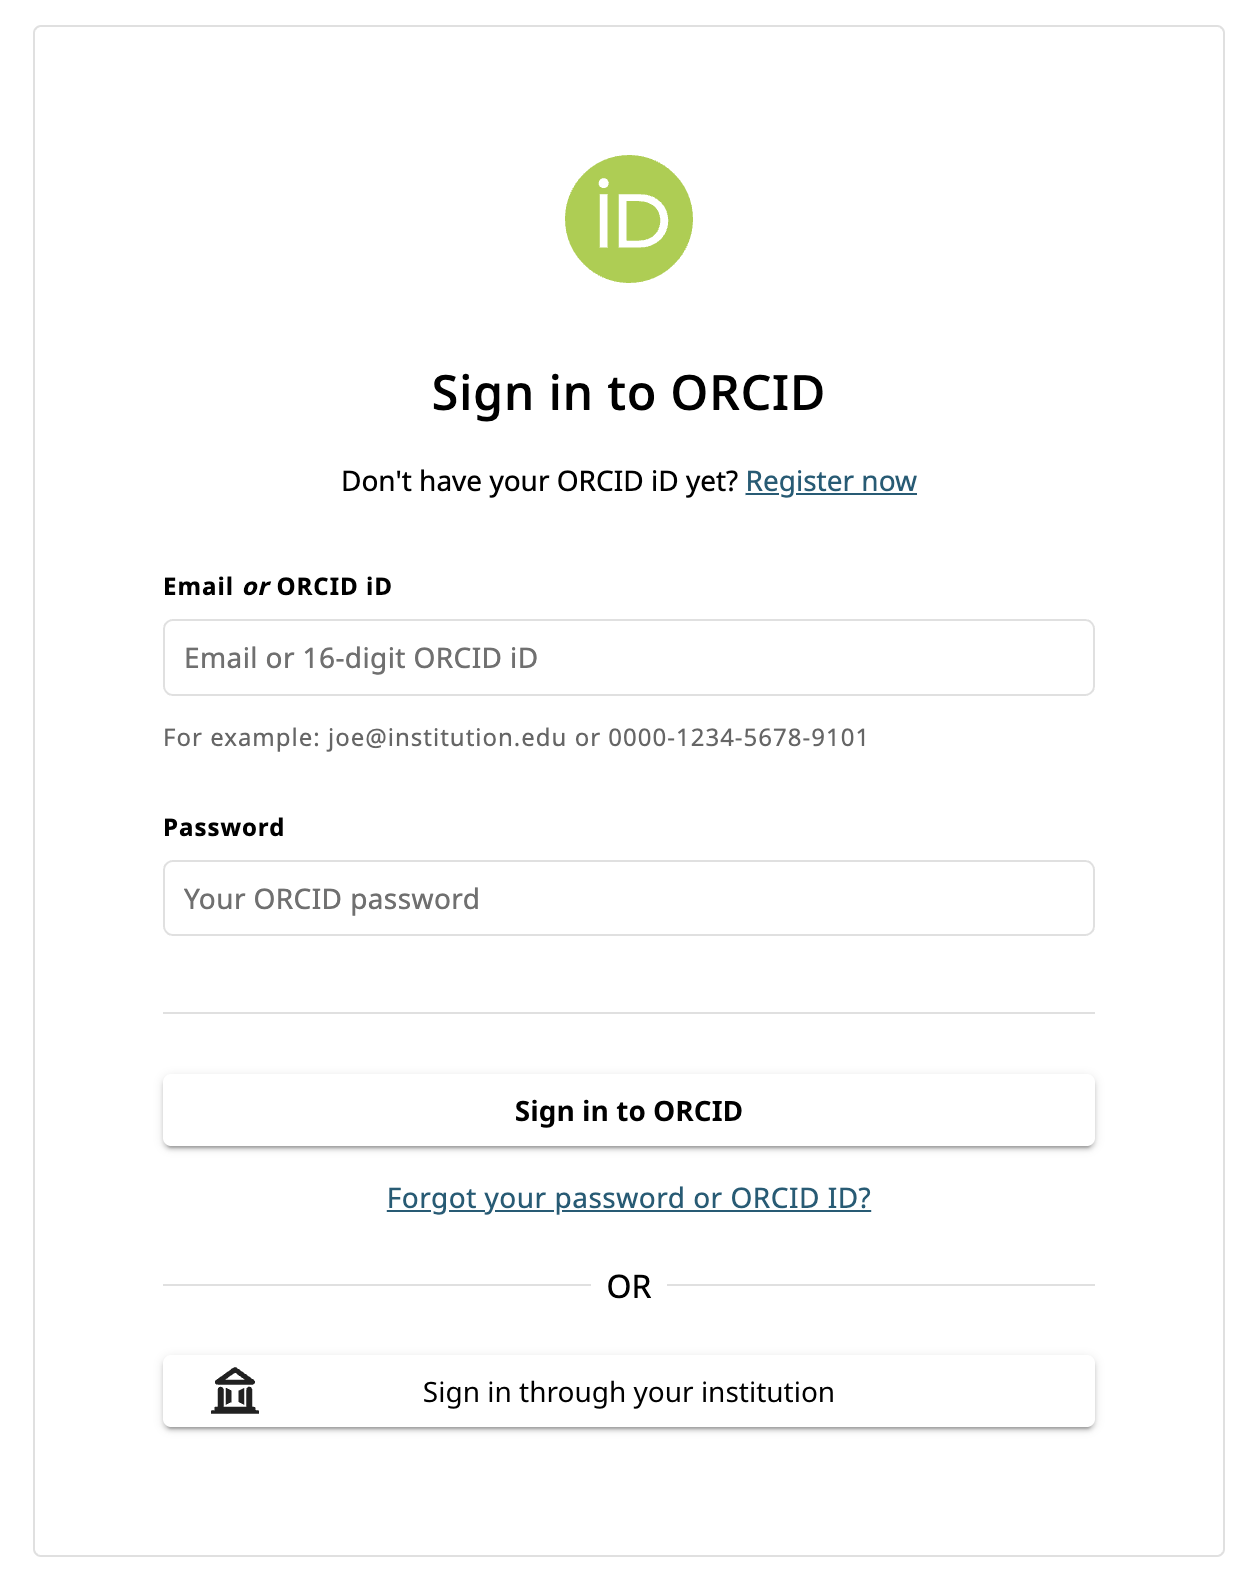
- On the “ORCID Authorizations” page, click on “Connect to ORCID ID.”

- A new ORCID page will open, asking you to enter your ORCID login information to authorize the link with IRIS.

- Once access is granted, your ORCID and IRIS profiles will be synchronized.
Importing individual items into IRIS (DOI/PMID/ORCID)
The voice in this video was generated by artificial intelligence.
Access Your Workspace
The import of individual items into IRIS is done from your workspace:
-
Click on “My Workspace.”
-
Click on “Import” to be redirected to the import page.
Importing Items
On the import page:
-
Click on (1) to select the type of entry (PubMed/DOI).
-
Enter the corresponding source for your choice.
-
Click on “Search.”

You will see the results related to your search and will need to click on (1) to import.
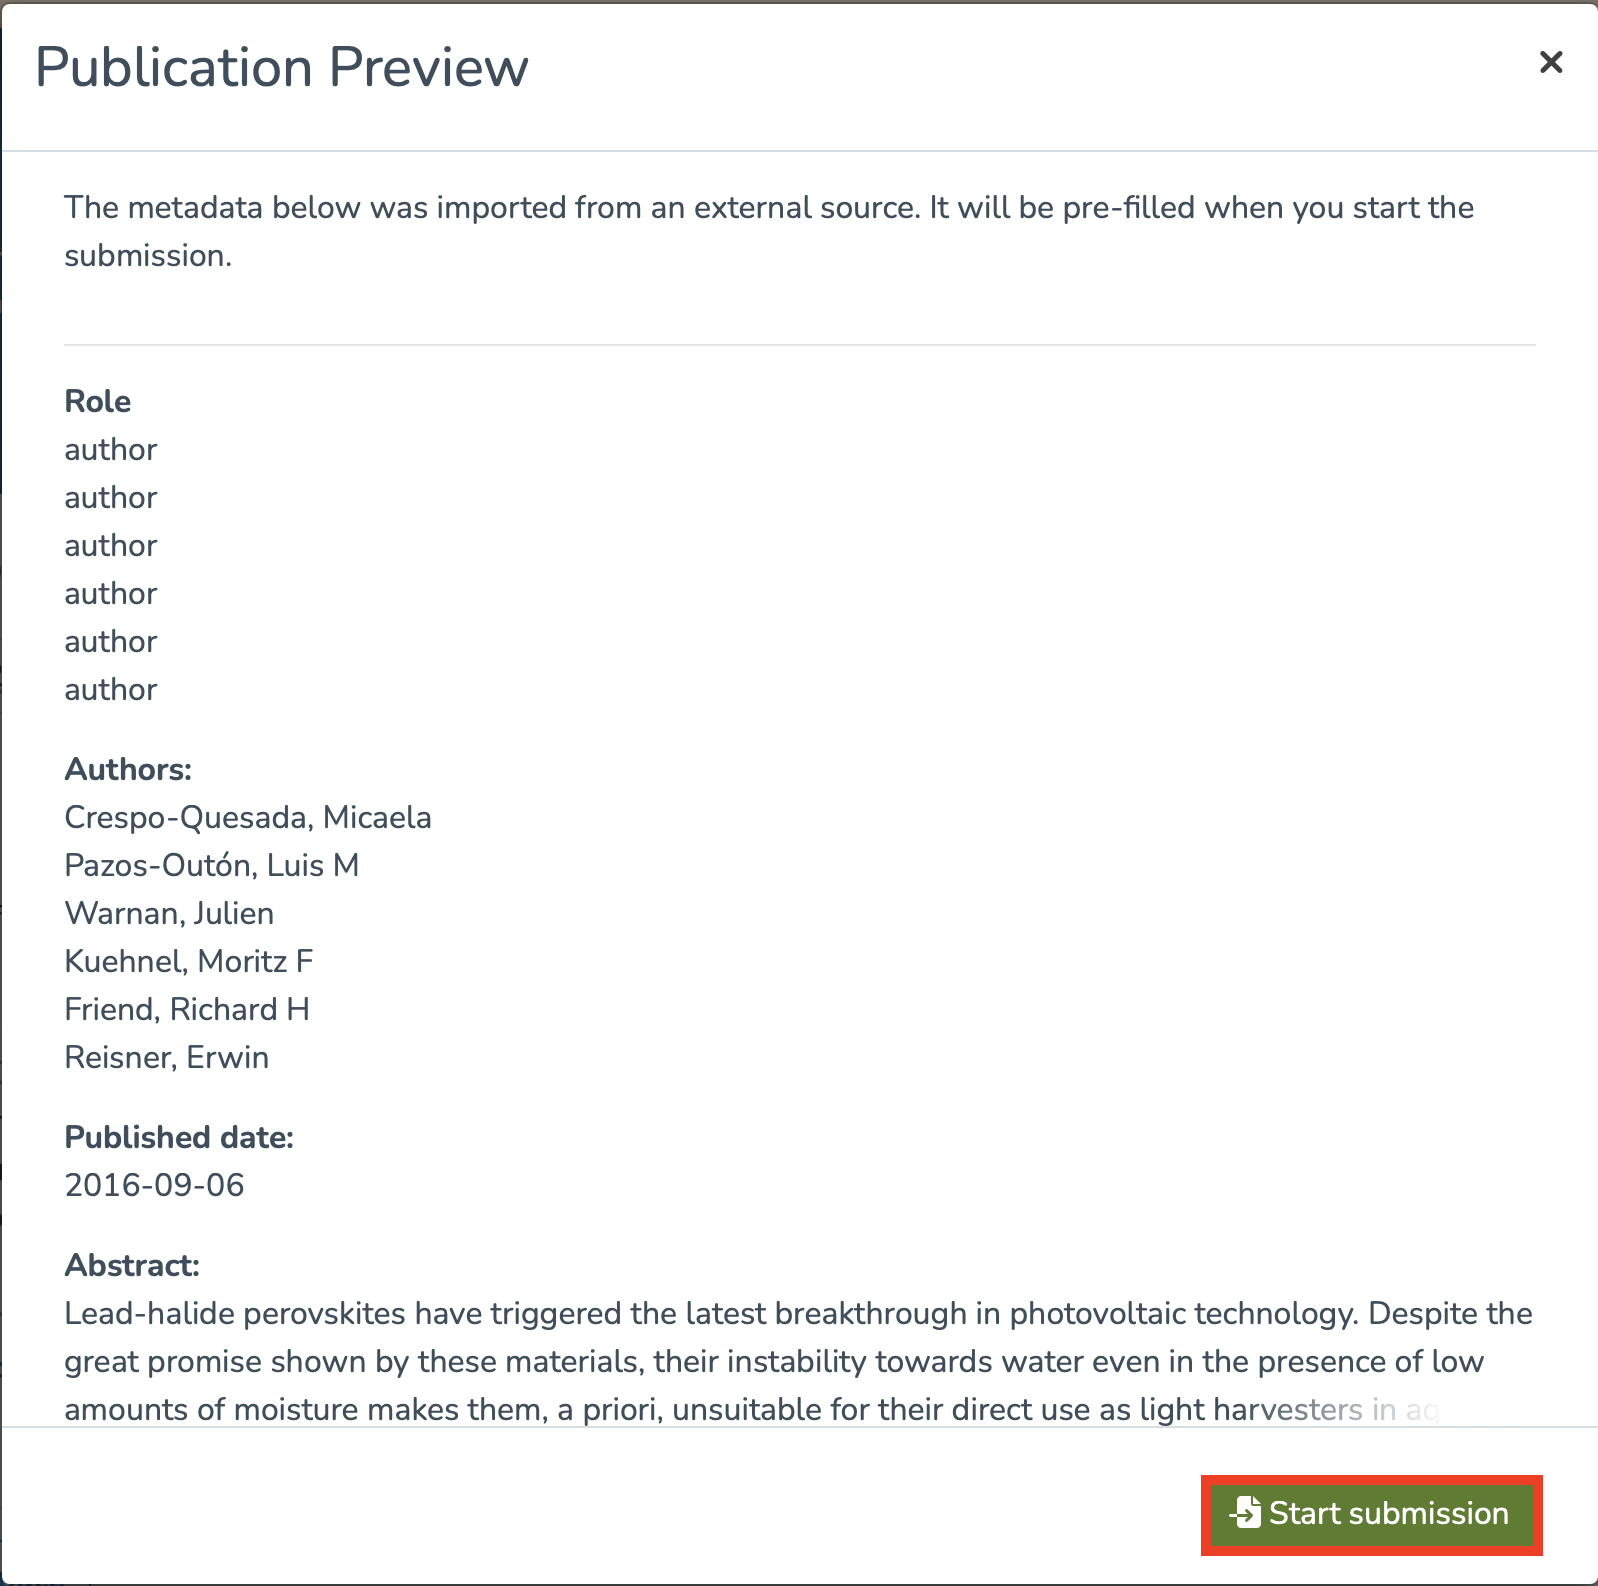
You will then be redirected to a page containing the metadata of the search result and will need to click on “Start Submission” to begin the import process.
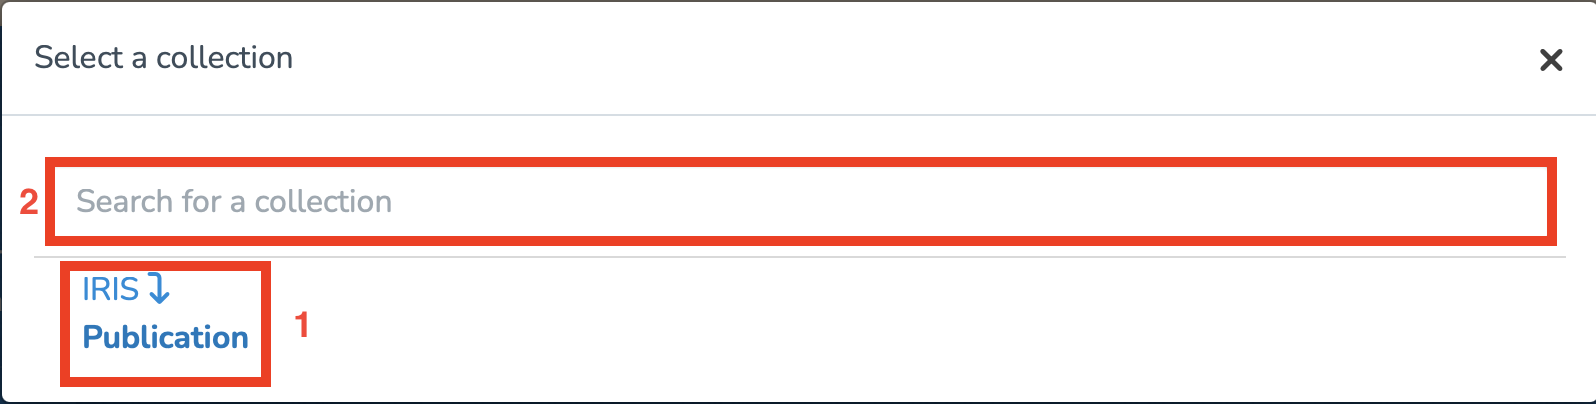
Once this is done, you will need to select a collection in which to import the item:
-
You can choose the proposed collection,
-
Or manually enter a collection.
You will then access the entry form.
Note: Fields marked with a “*” are mandatory and must be completed if they are not already filled in.
Make sure to fill in the two following fields by clicking on “Add”:
-
Links to people (Internal & external publication to UNIL/CHUV/Unisanté).
-
Links to units (Only internal publication to UNIL/CHUV/Unisanté).
The system will then suggest a list of potential duplicates. You must go through each suggested publication and specify whether it is a duplicate by clicking “It is a duplicate” or “It is not a duplicate,” as appropriate.
Note: Make sure to review every publication, as multiple pages may be available.
Once these steps are completed, you will need to:
-
Approve the license by checking the indicated box.
-
Choose whether to save or publish your import immediately.

After publishing your import, you can access its metadata as follows:
-
Access your workspace.
-
Click on “View.”
Exporting Publications from IRIS to ORCID
To export your publications from IRIS into ORCID, you must first ensure that your ORCID settings page is correctly configured. To do this, you need to access your researcher profile.
Access your researcher profile
Accessing Your Profile via the Login Menu
- From the IRIS homepage, click on the login menu.
- In the dropdown menu, select “My account and profile.”
- You’ll be redirected to a page titled “Update Profile”. Click on “View” to open the full version of your profile.
Accessing Your Profile via Search
- From the IRIS homepage, click on “People.”
- In the search bar that appears, enter your name (a), then click “Search” (b).
- Once the search is complete, your profile will appear in the results. Click on your name (c).
Open ORCID Settings
- You are now on your researcher profile page.
- Click on the three-dot icon to open the options menu.
- Select “Open ORCID setting page.”
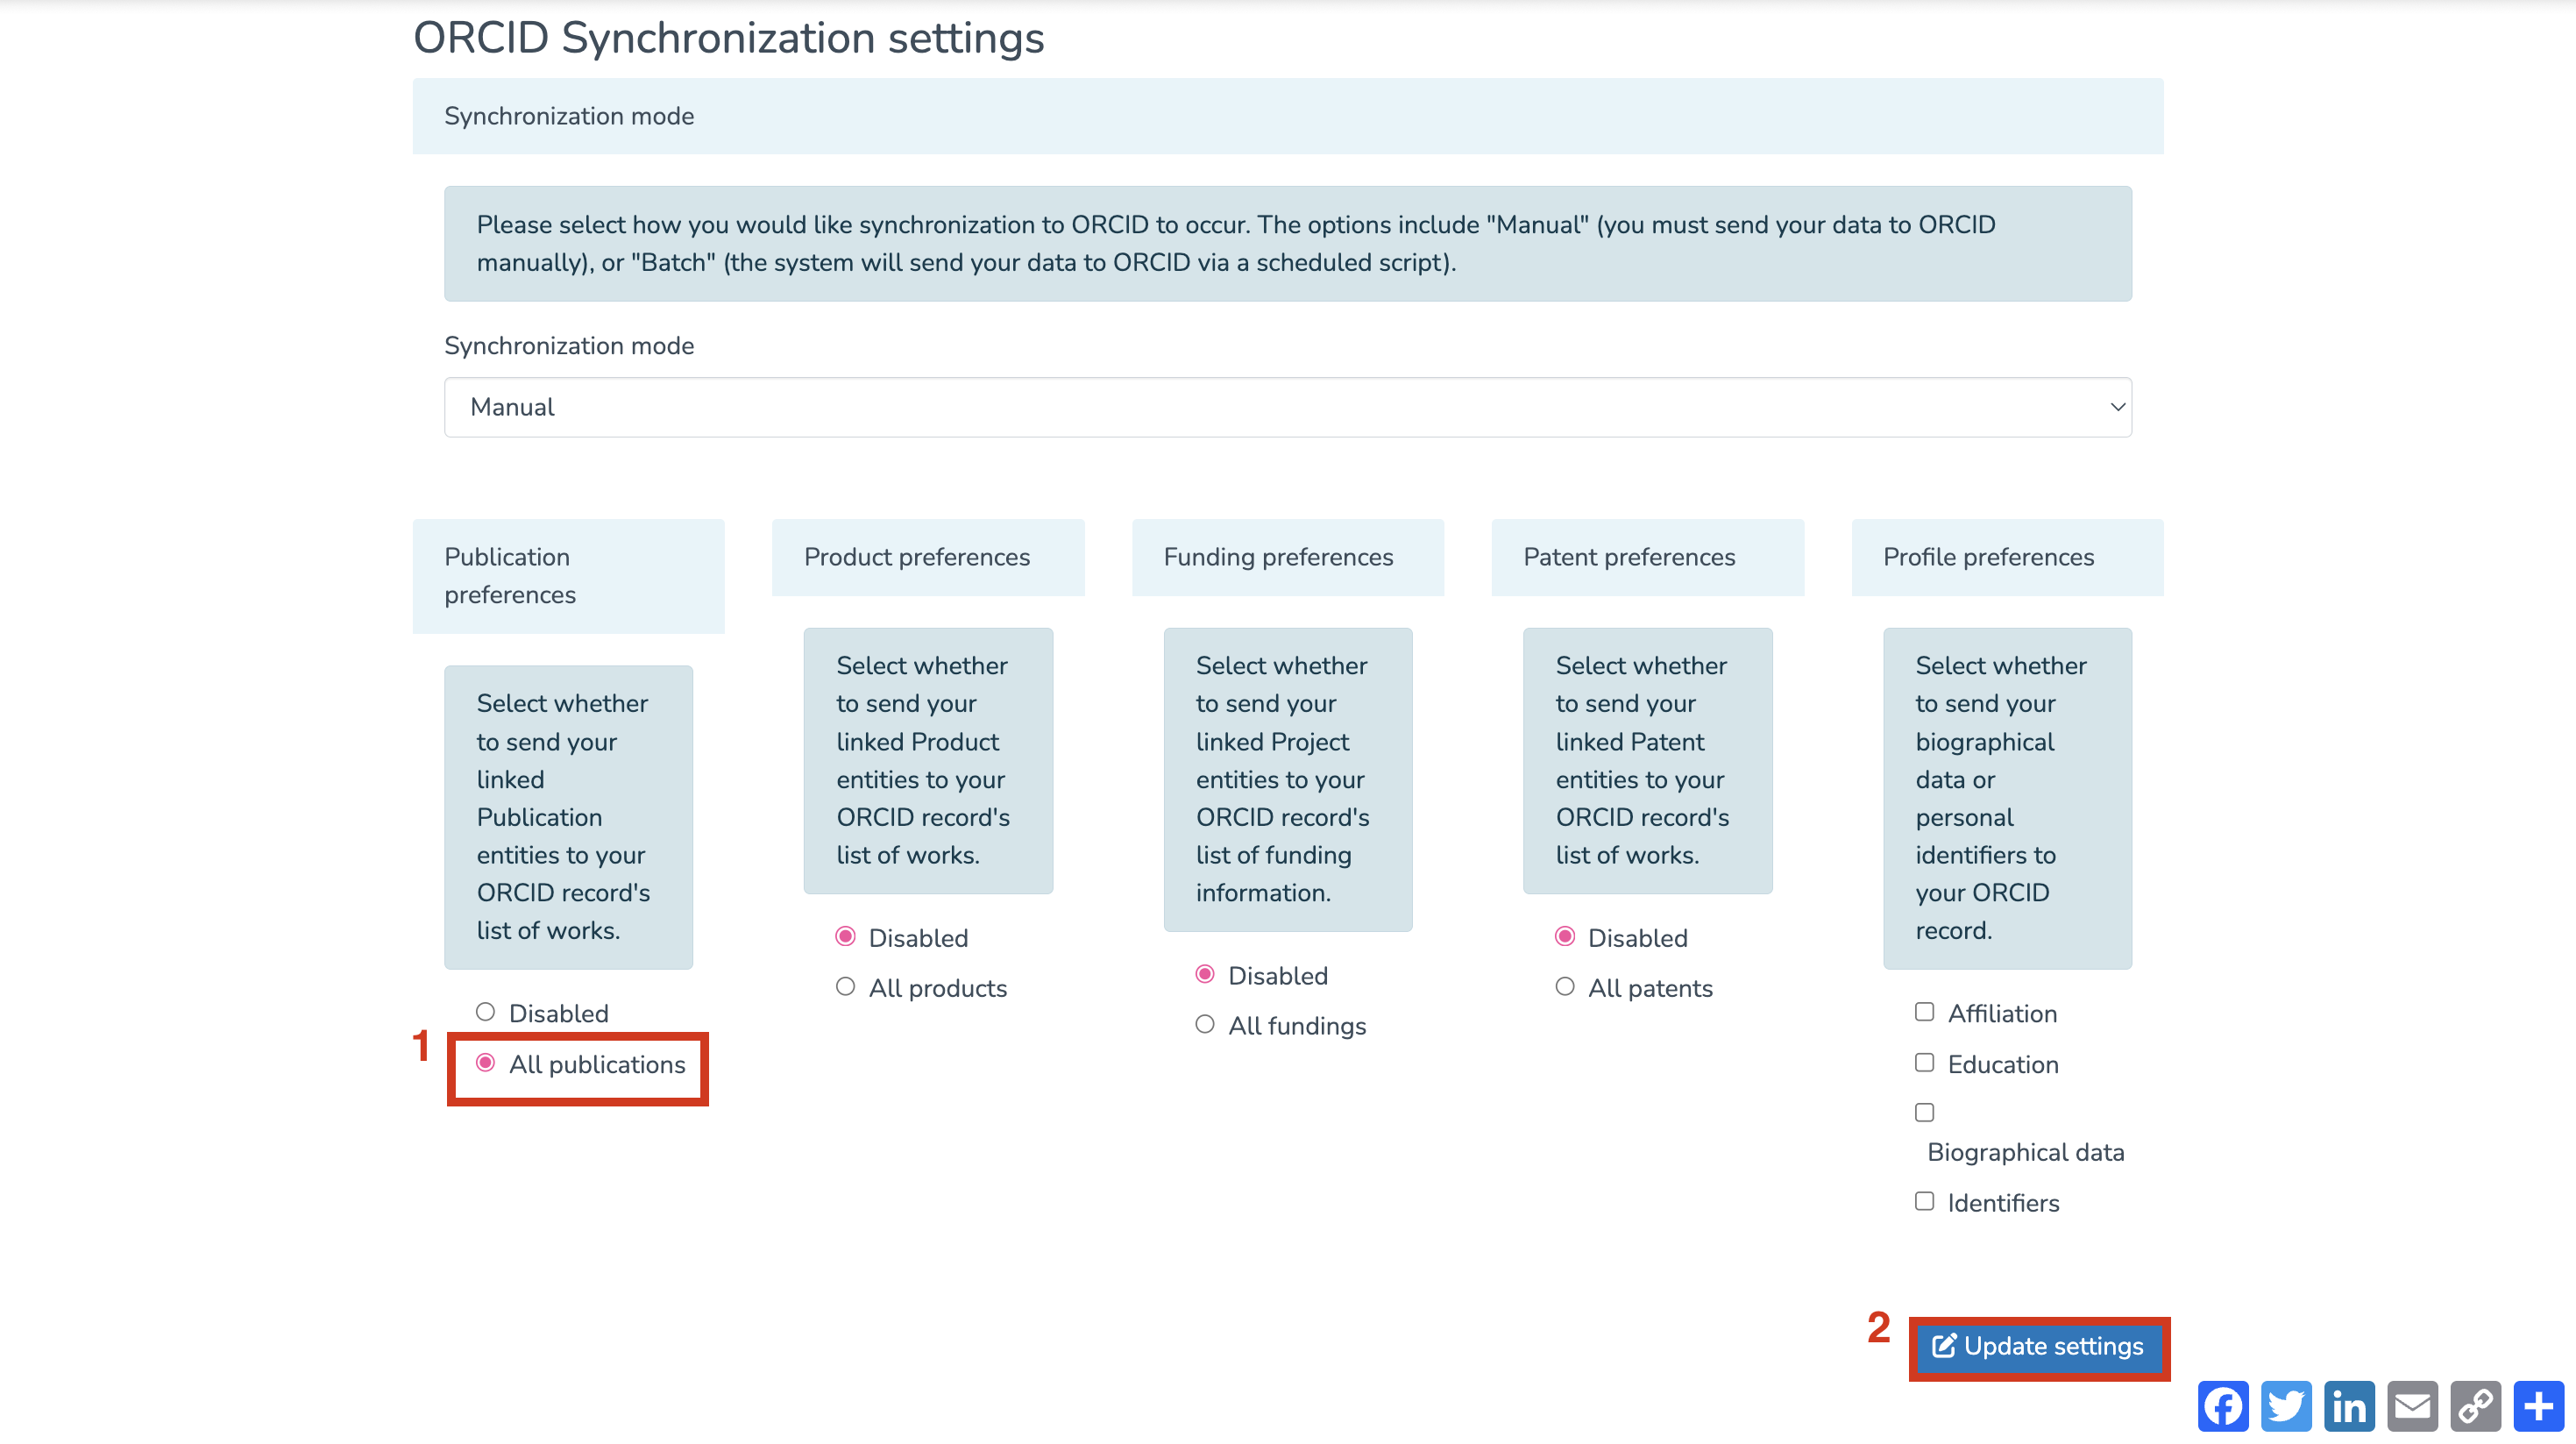
Verifying Synchronization Settings
- In the “ORCID Synchronization settings” section, make sure “All publications” is selected under “Publication preferences.” This will enable synchronization of your works with ORCID. If needed, you can also select the same option for products, funding, and patents.
- Once your preferences are set, click “Update settings.”

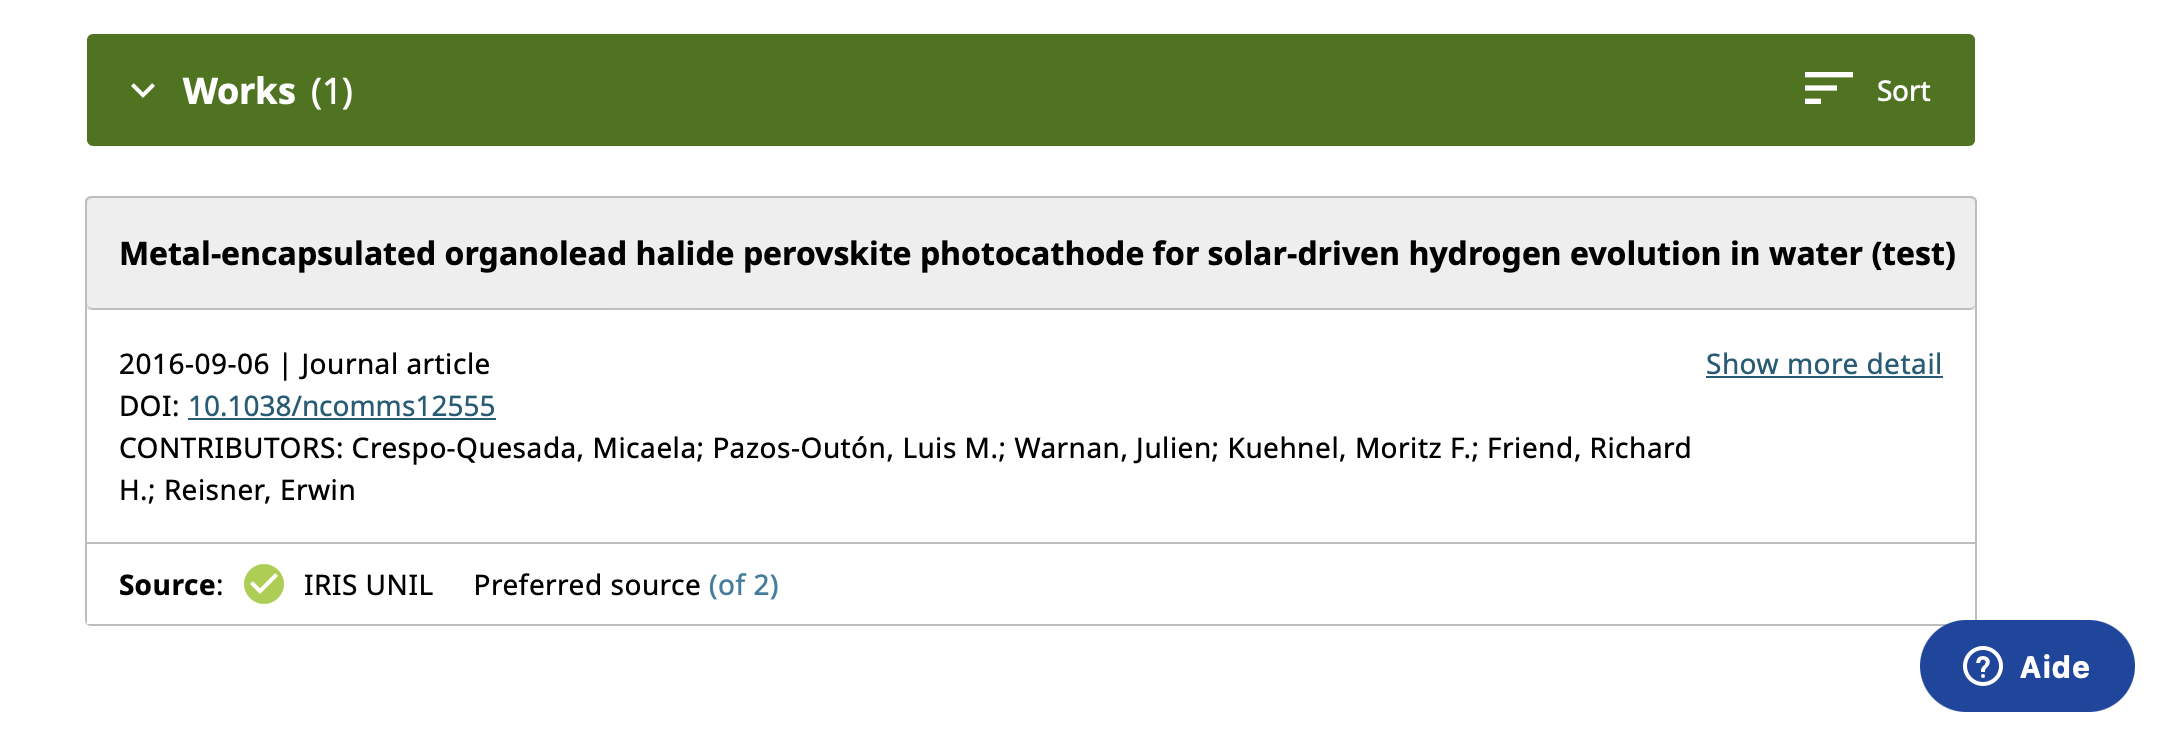
Exporting Publications
- The page will refresh automatically. Under the section “ORCID Registry Queue”, you should see the list of publications ready to be exported. For each publication, click the “+” button to add a new entry to your ORCID record.
- Once the export is complete, you can check your ORCID profile to ensure the publication has been successfully added. It should appear under the “Works” section of your ORCID profile.

Manual import of ORCID publications into IRIS
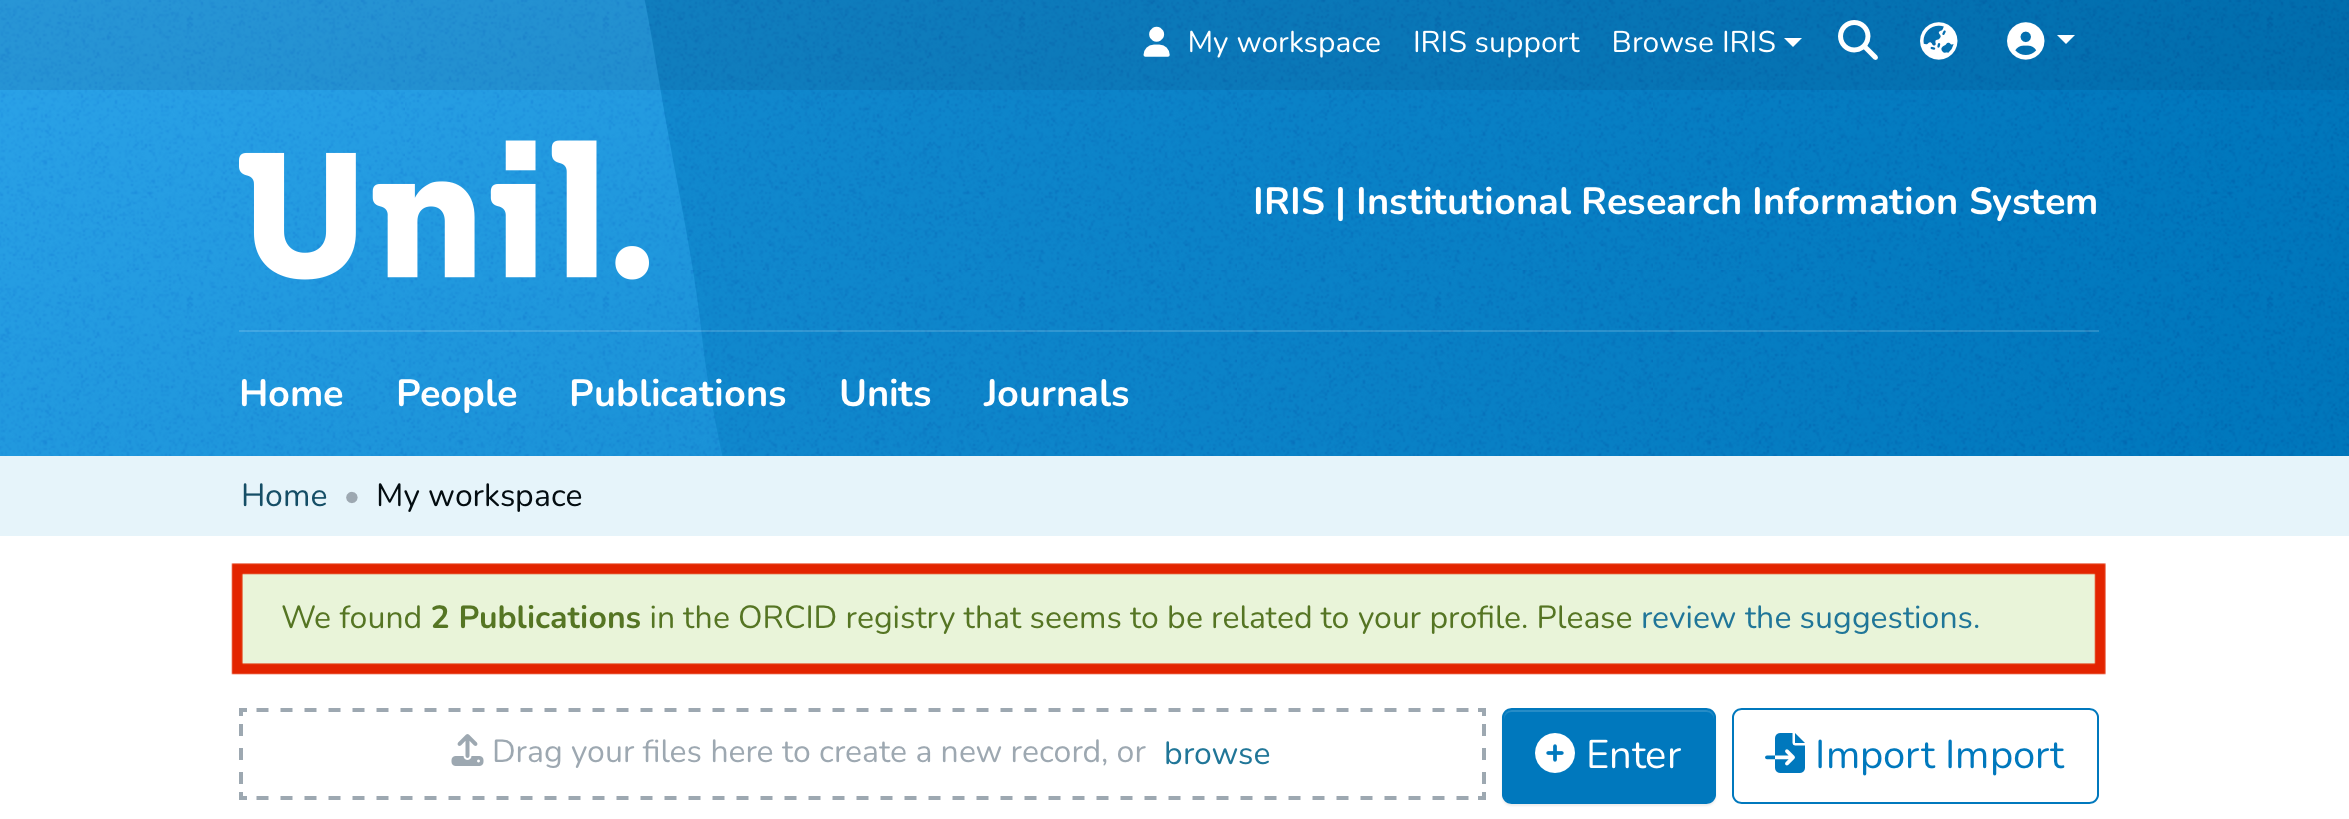
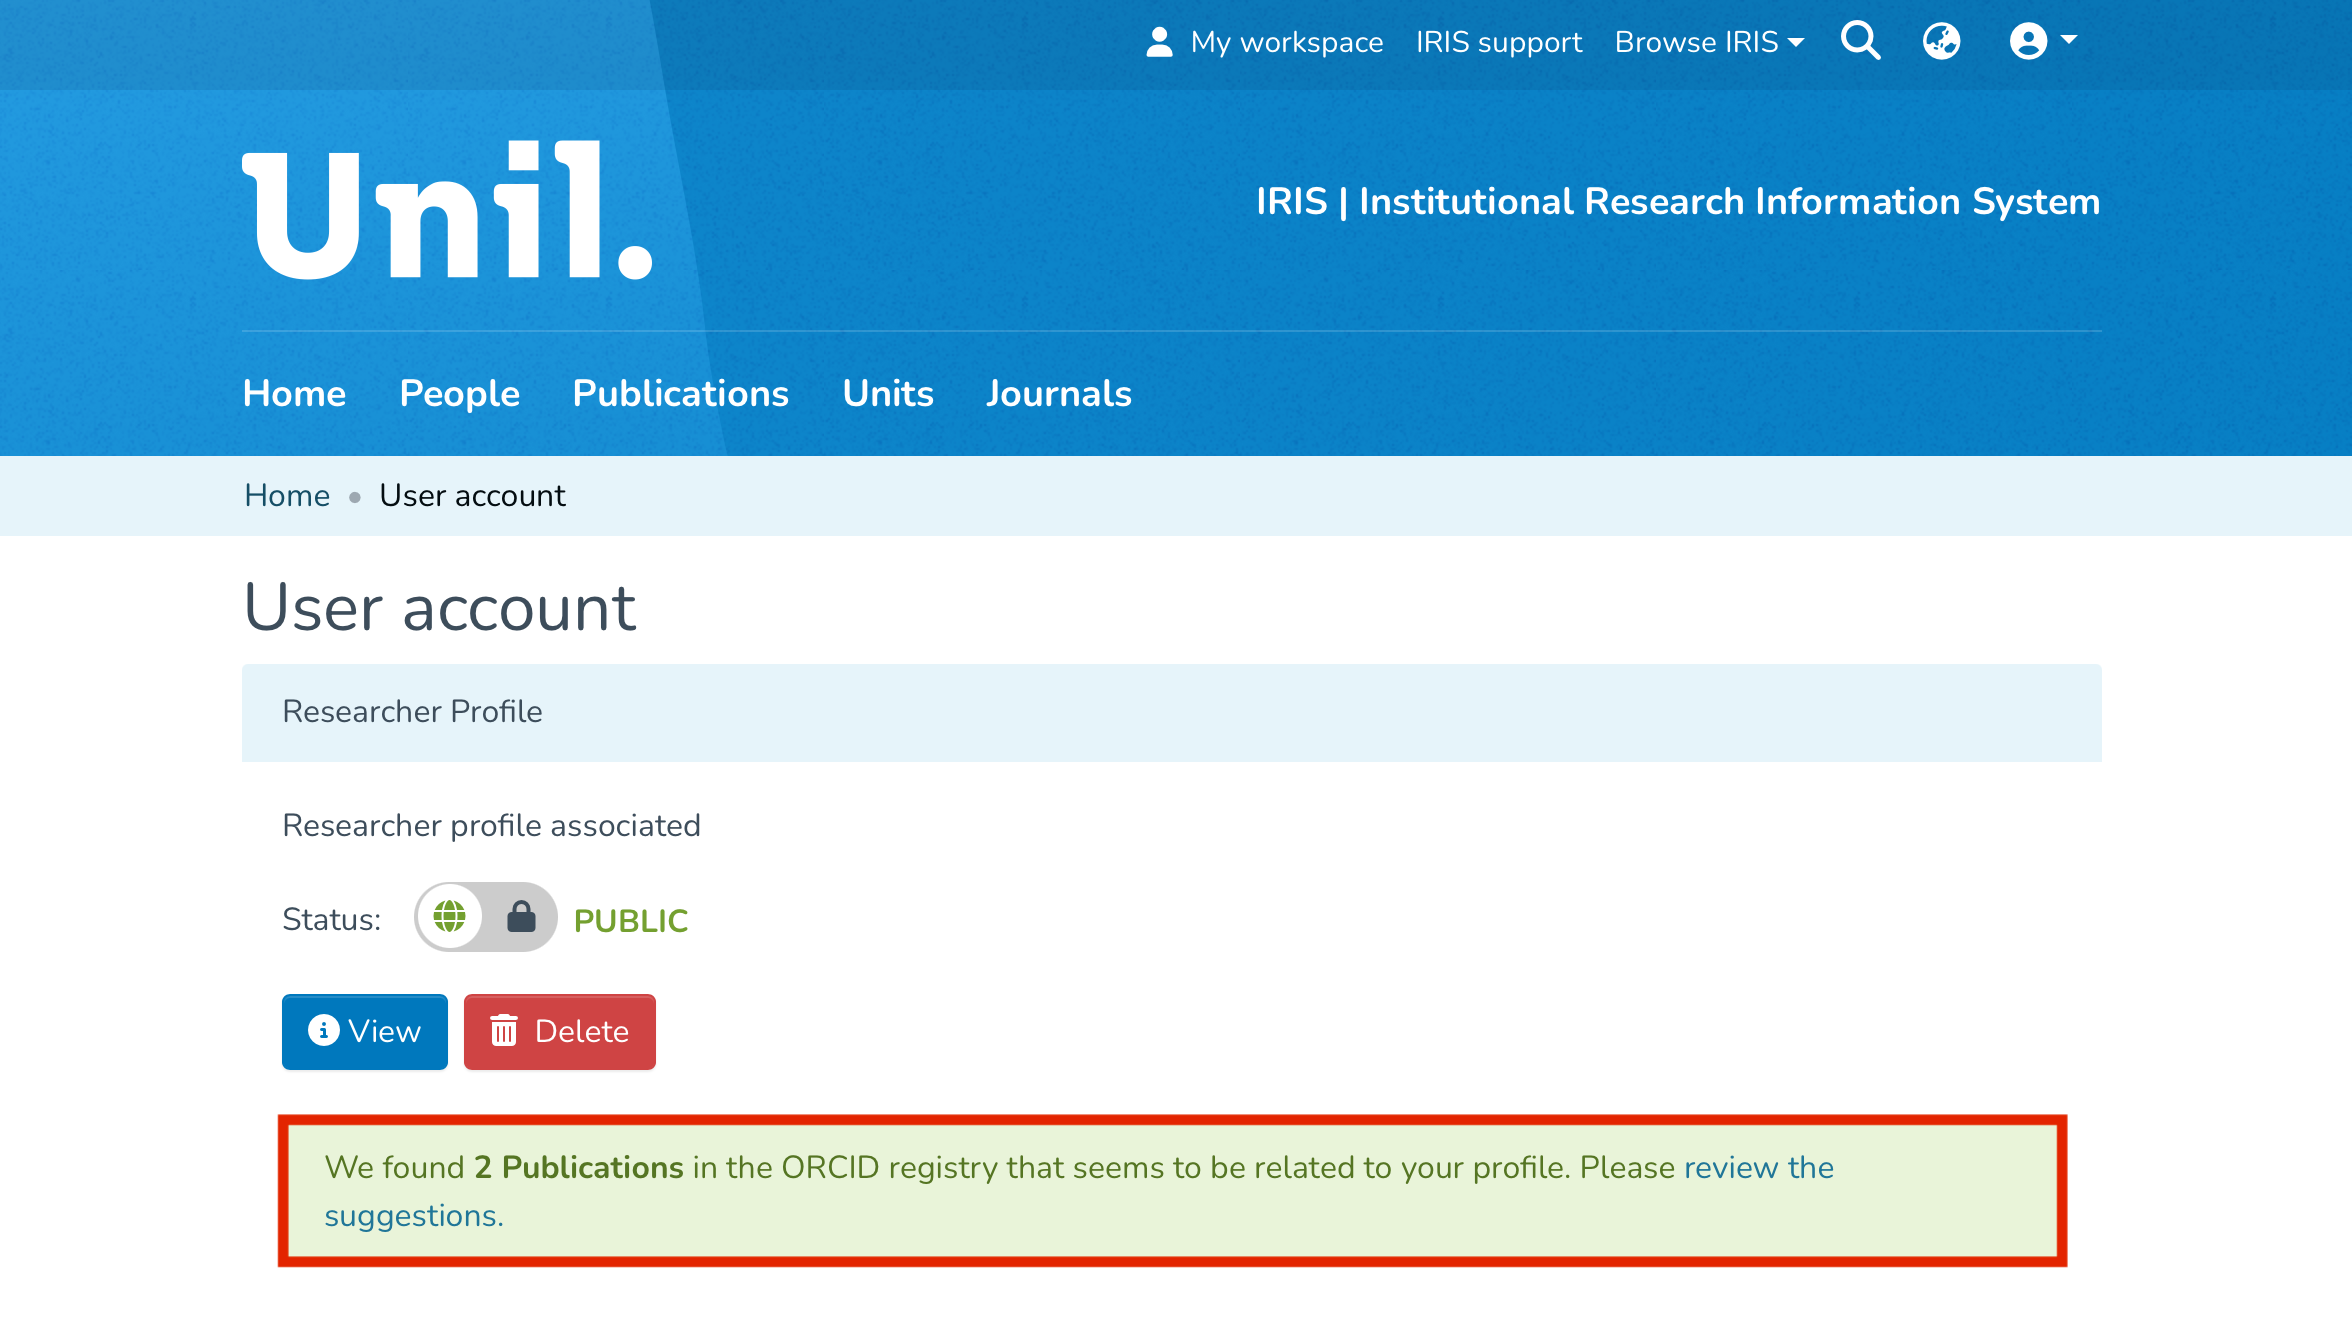
If a publication is detected on your ORCID profile, you should receive a notification in IRIS suggesting that publications are available for import. Click on "review the suggestions" to begin the import process.
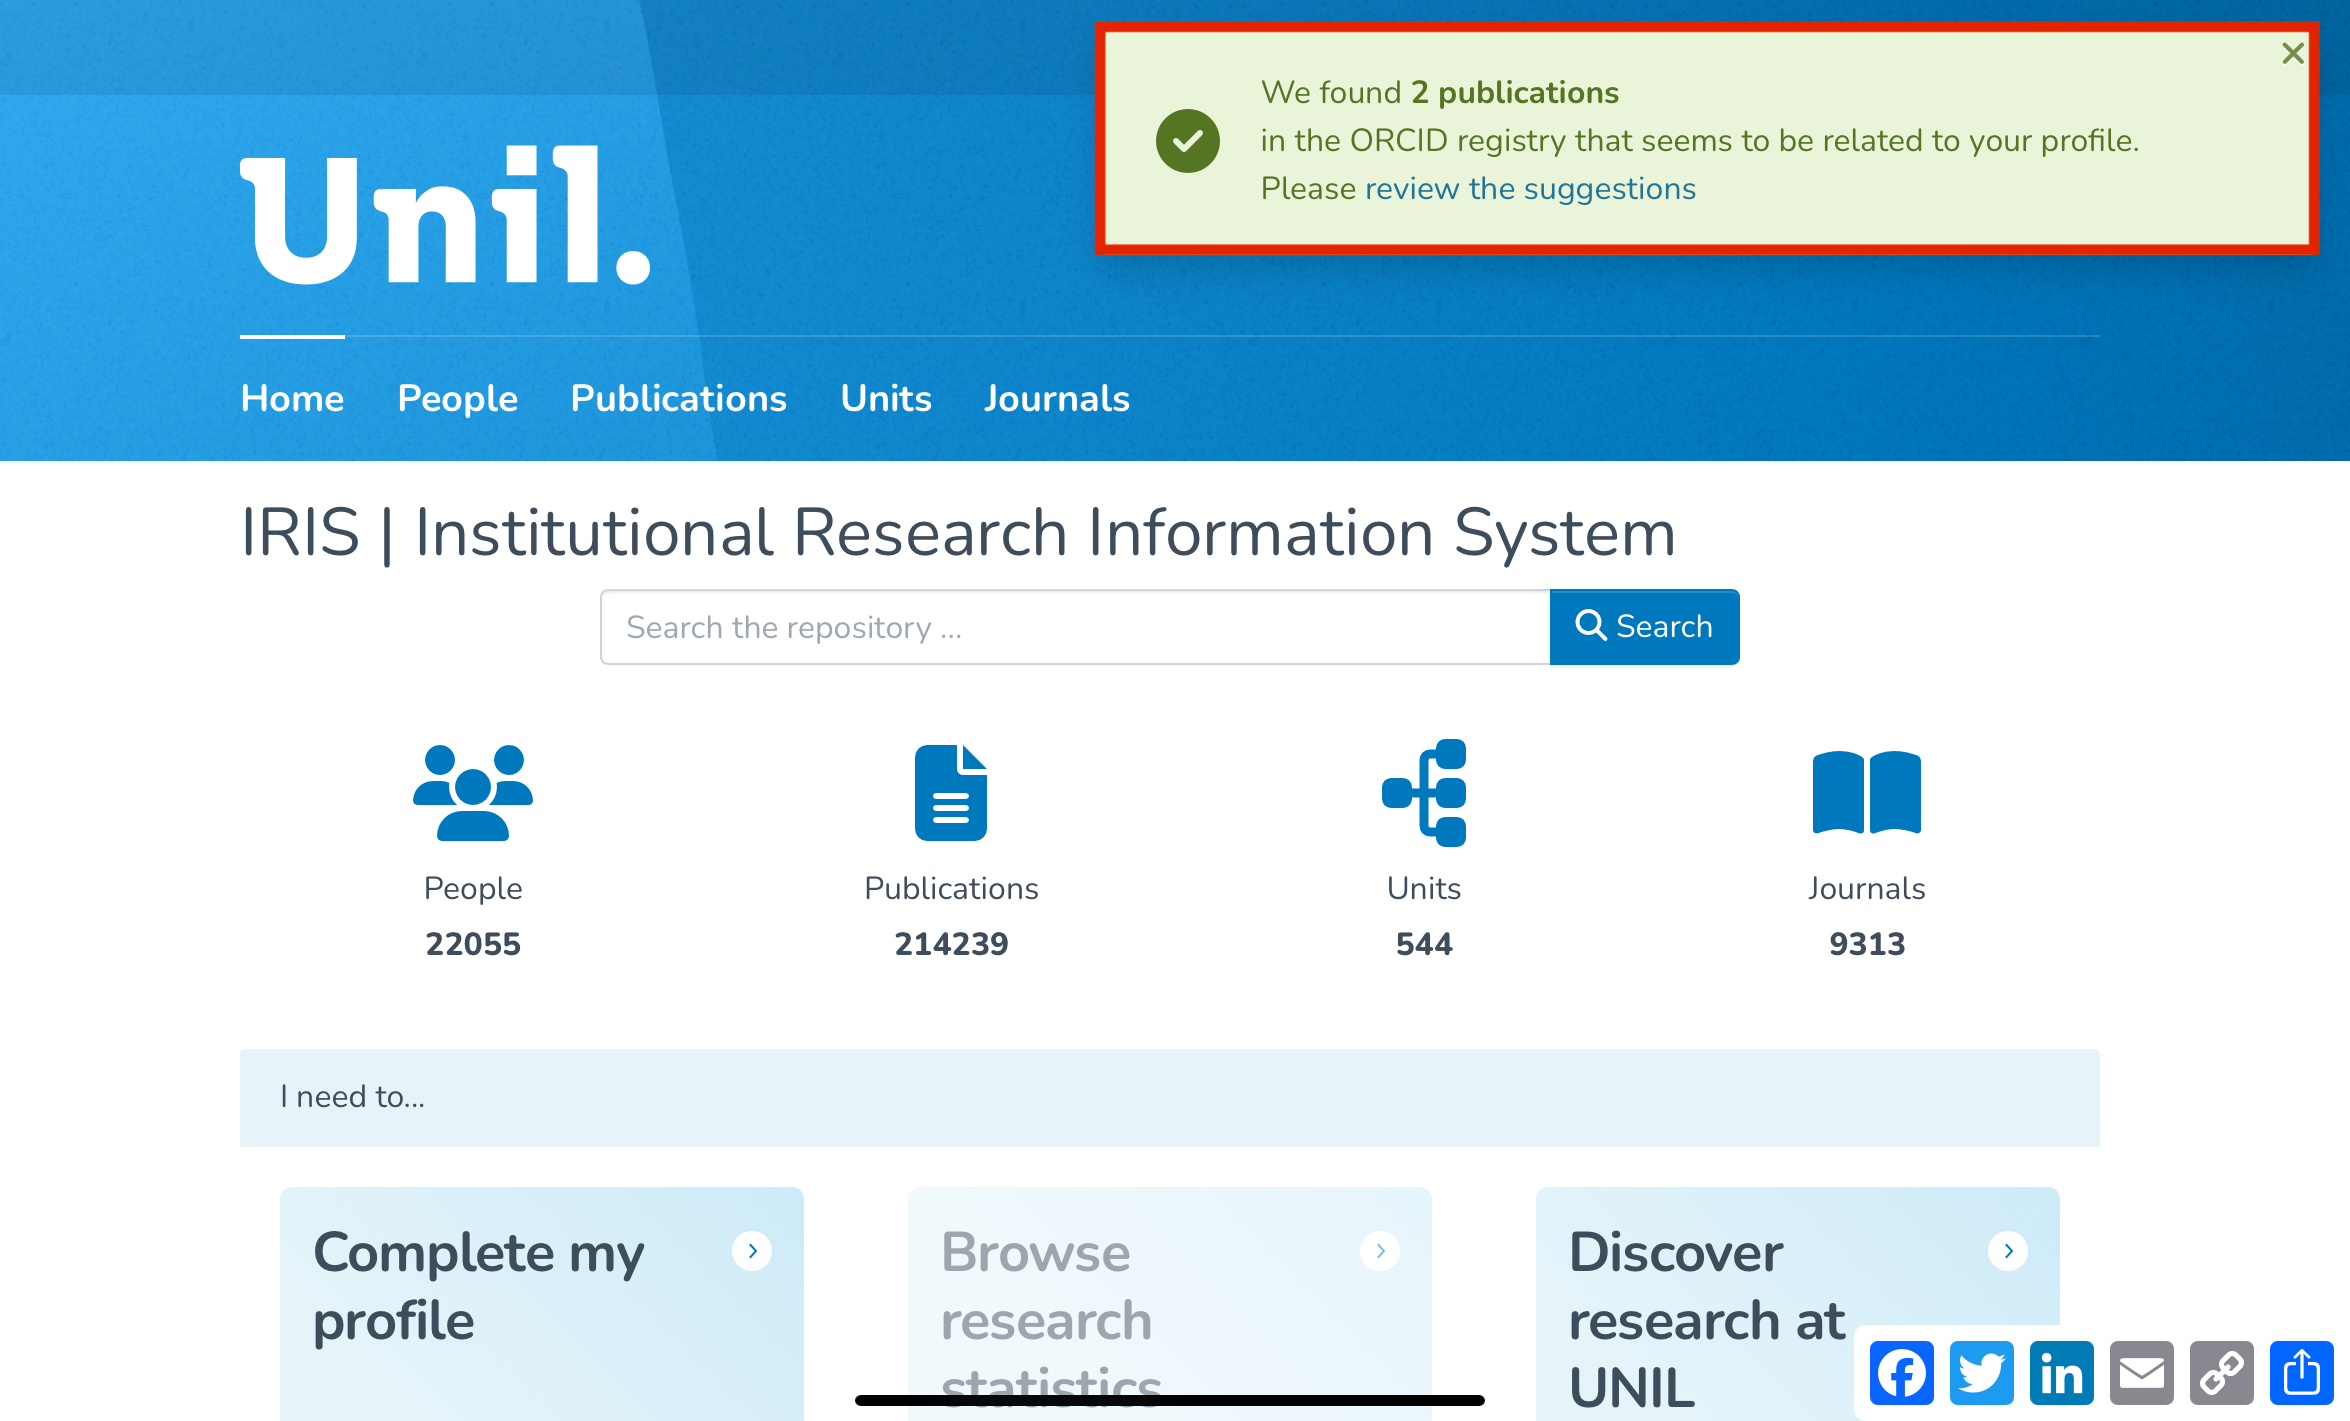
You will also be notified via your Workspace and User Account.
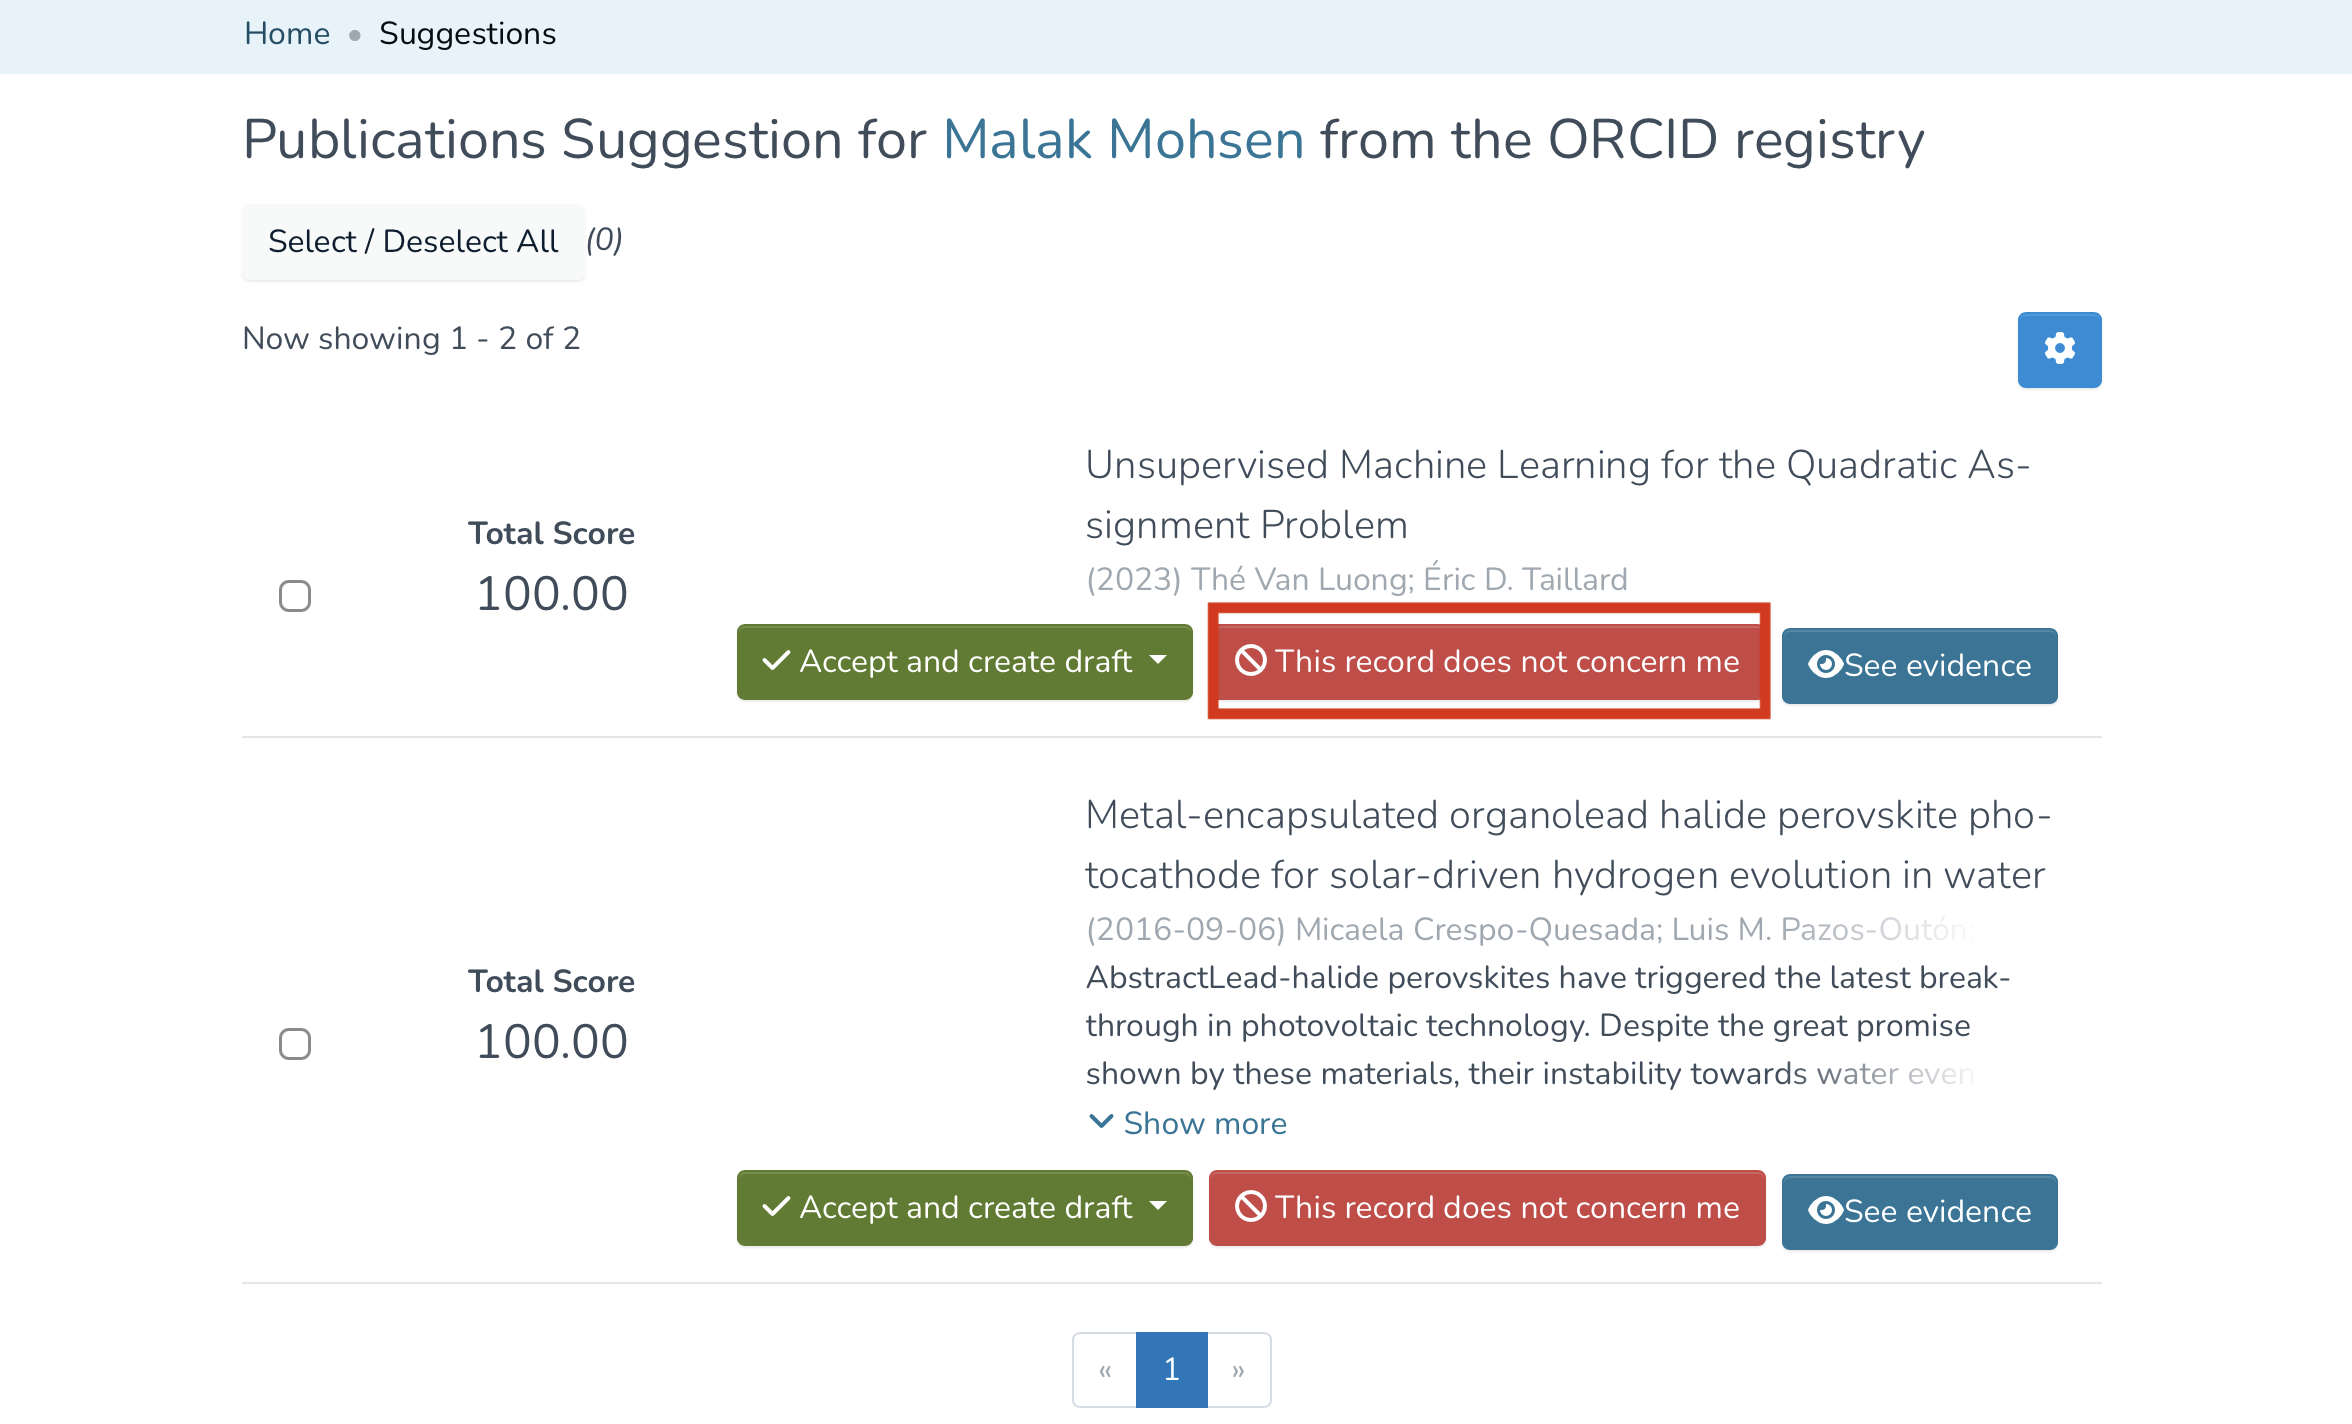
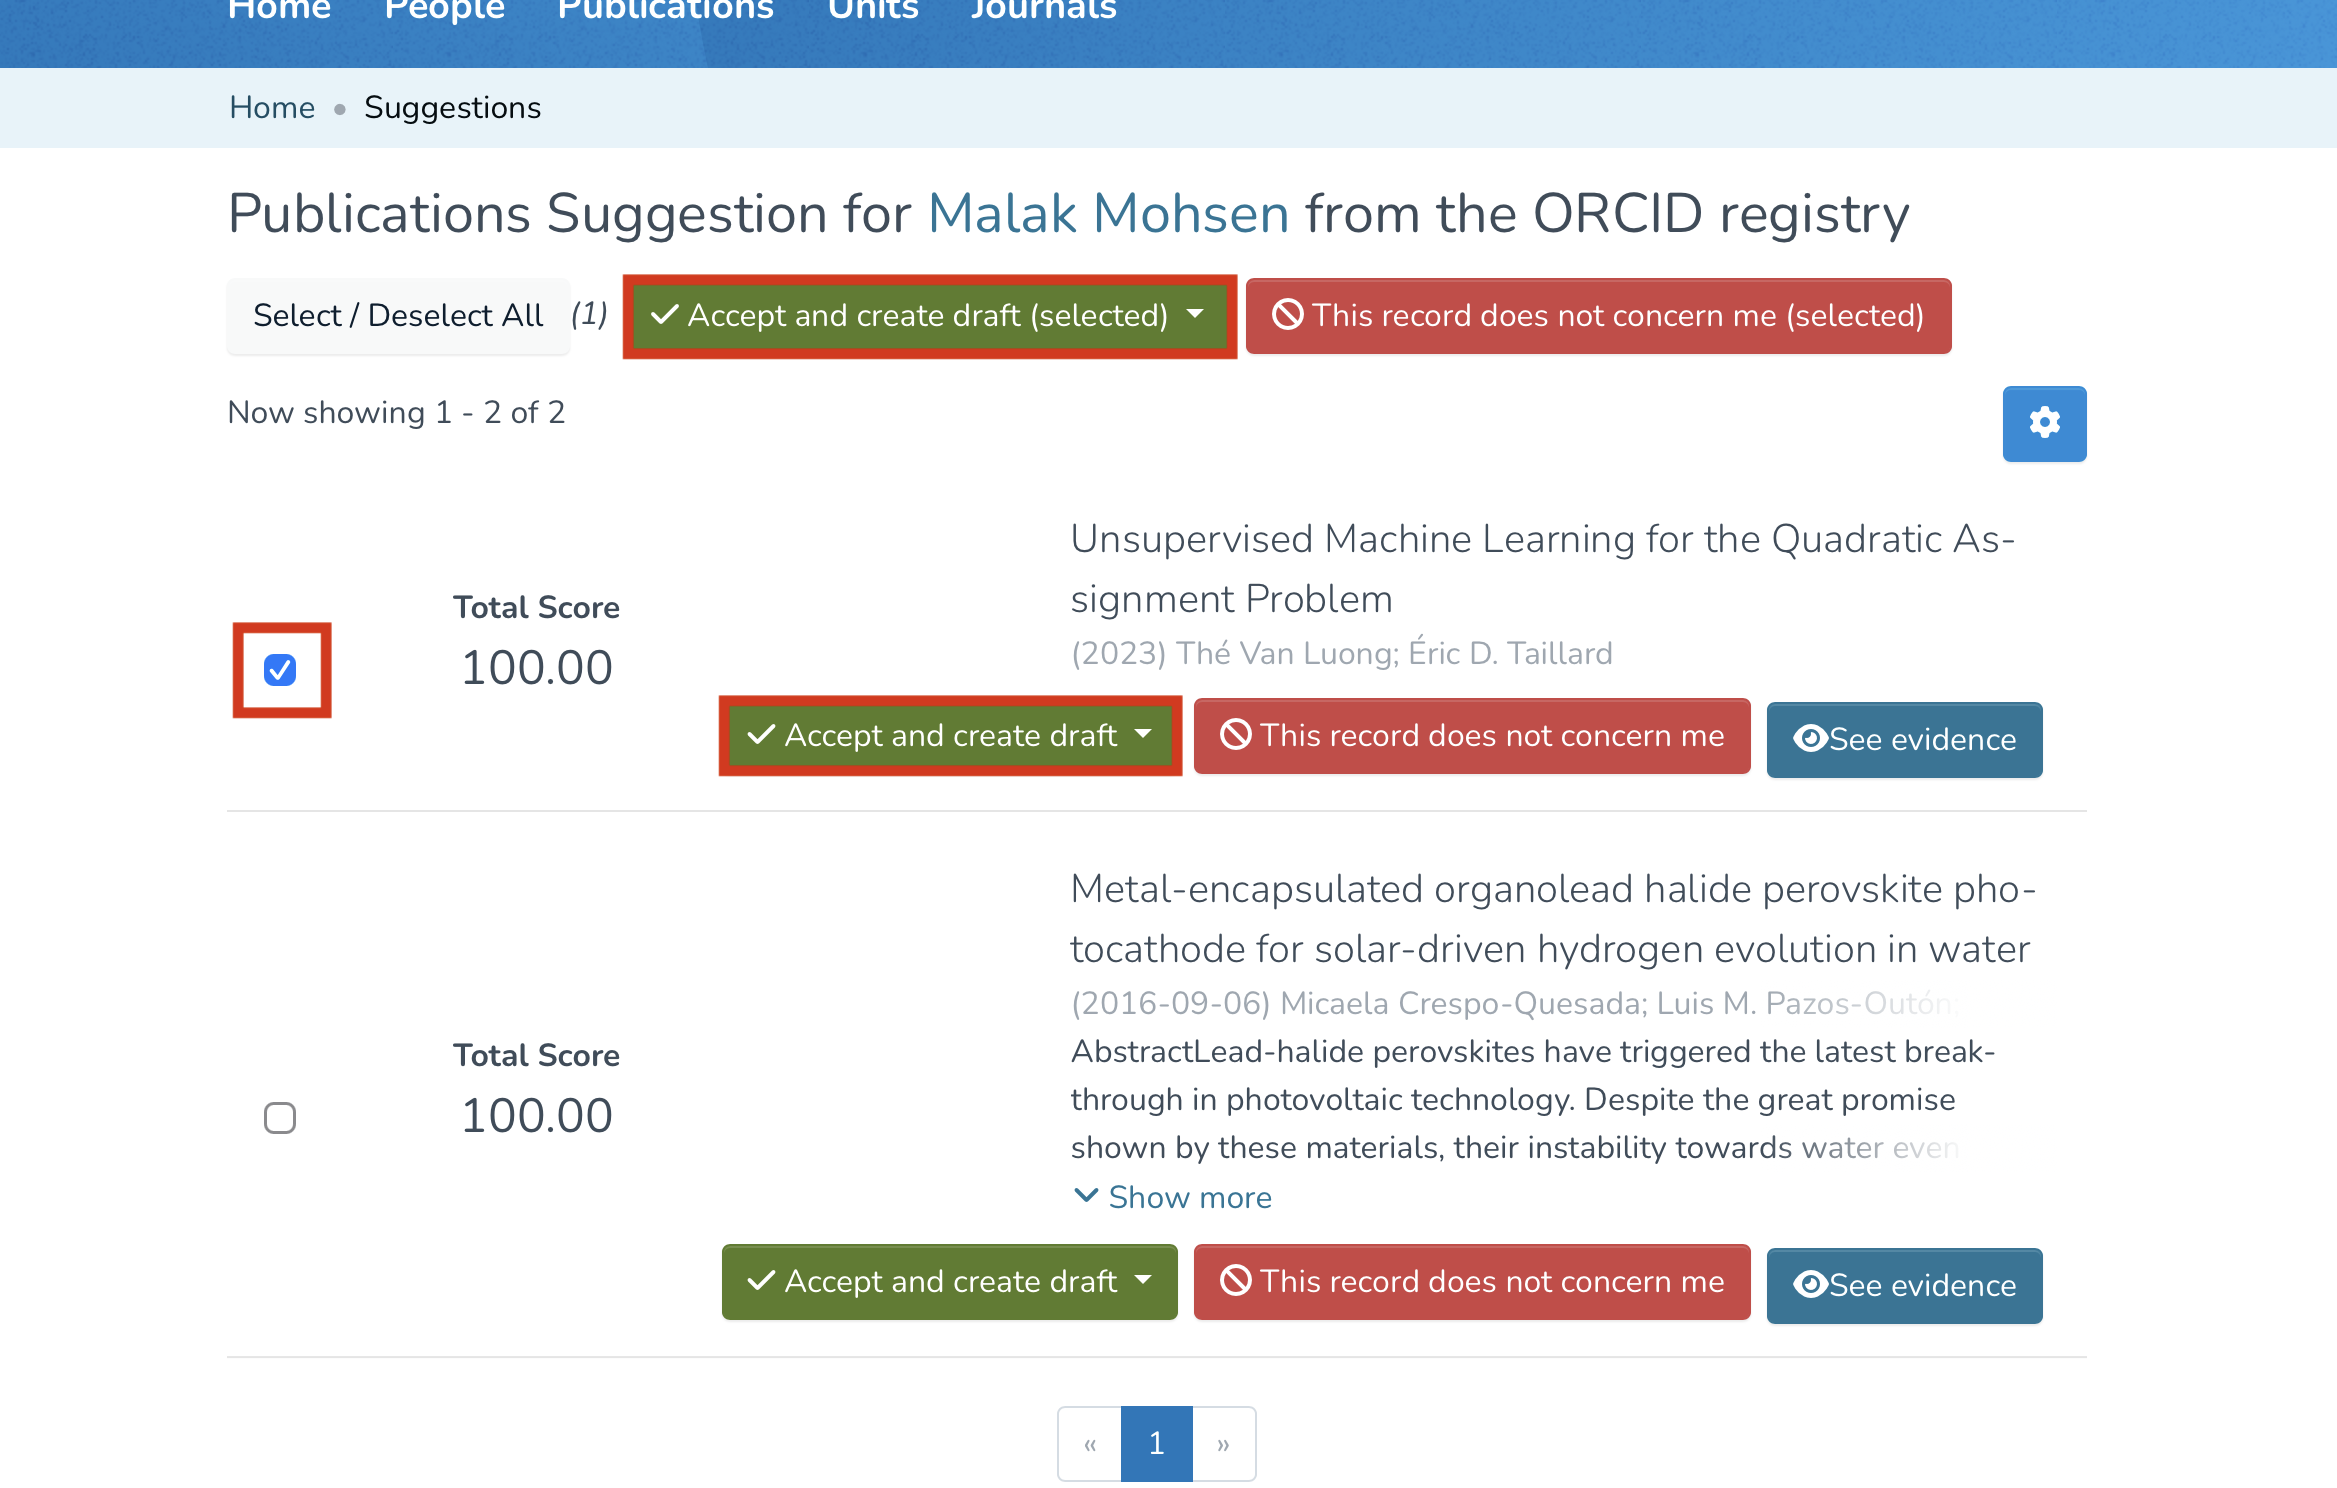
Selecting Publications to Import
- IRIS will then display a list of publications retrieved from ORCID. If any of the publications do not concern you, simply click “This record does not concern me.”

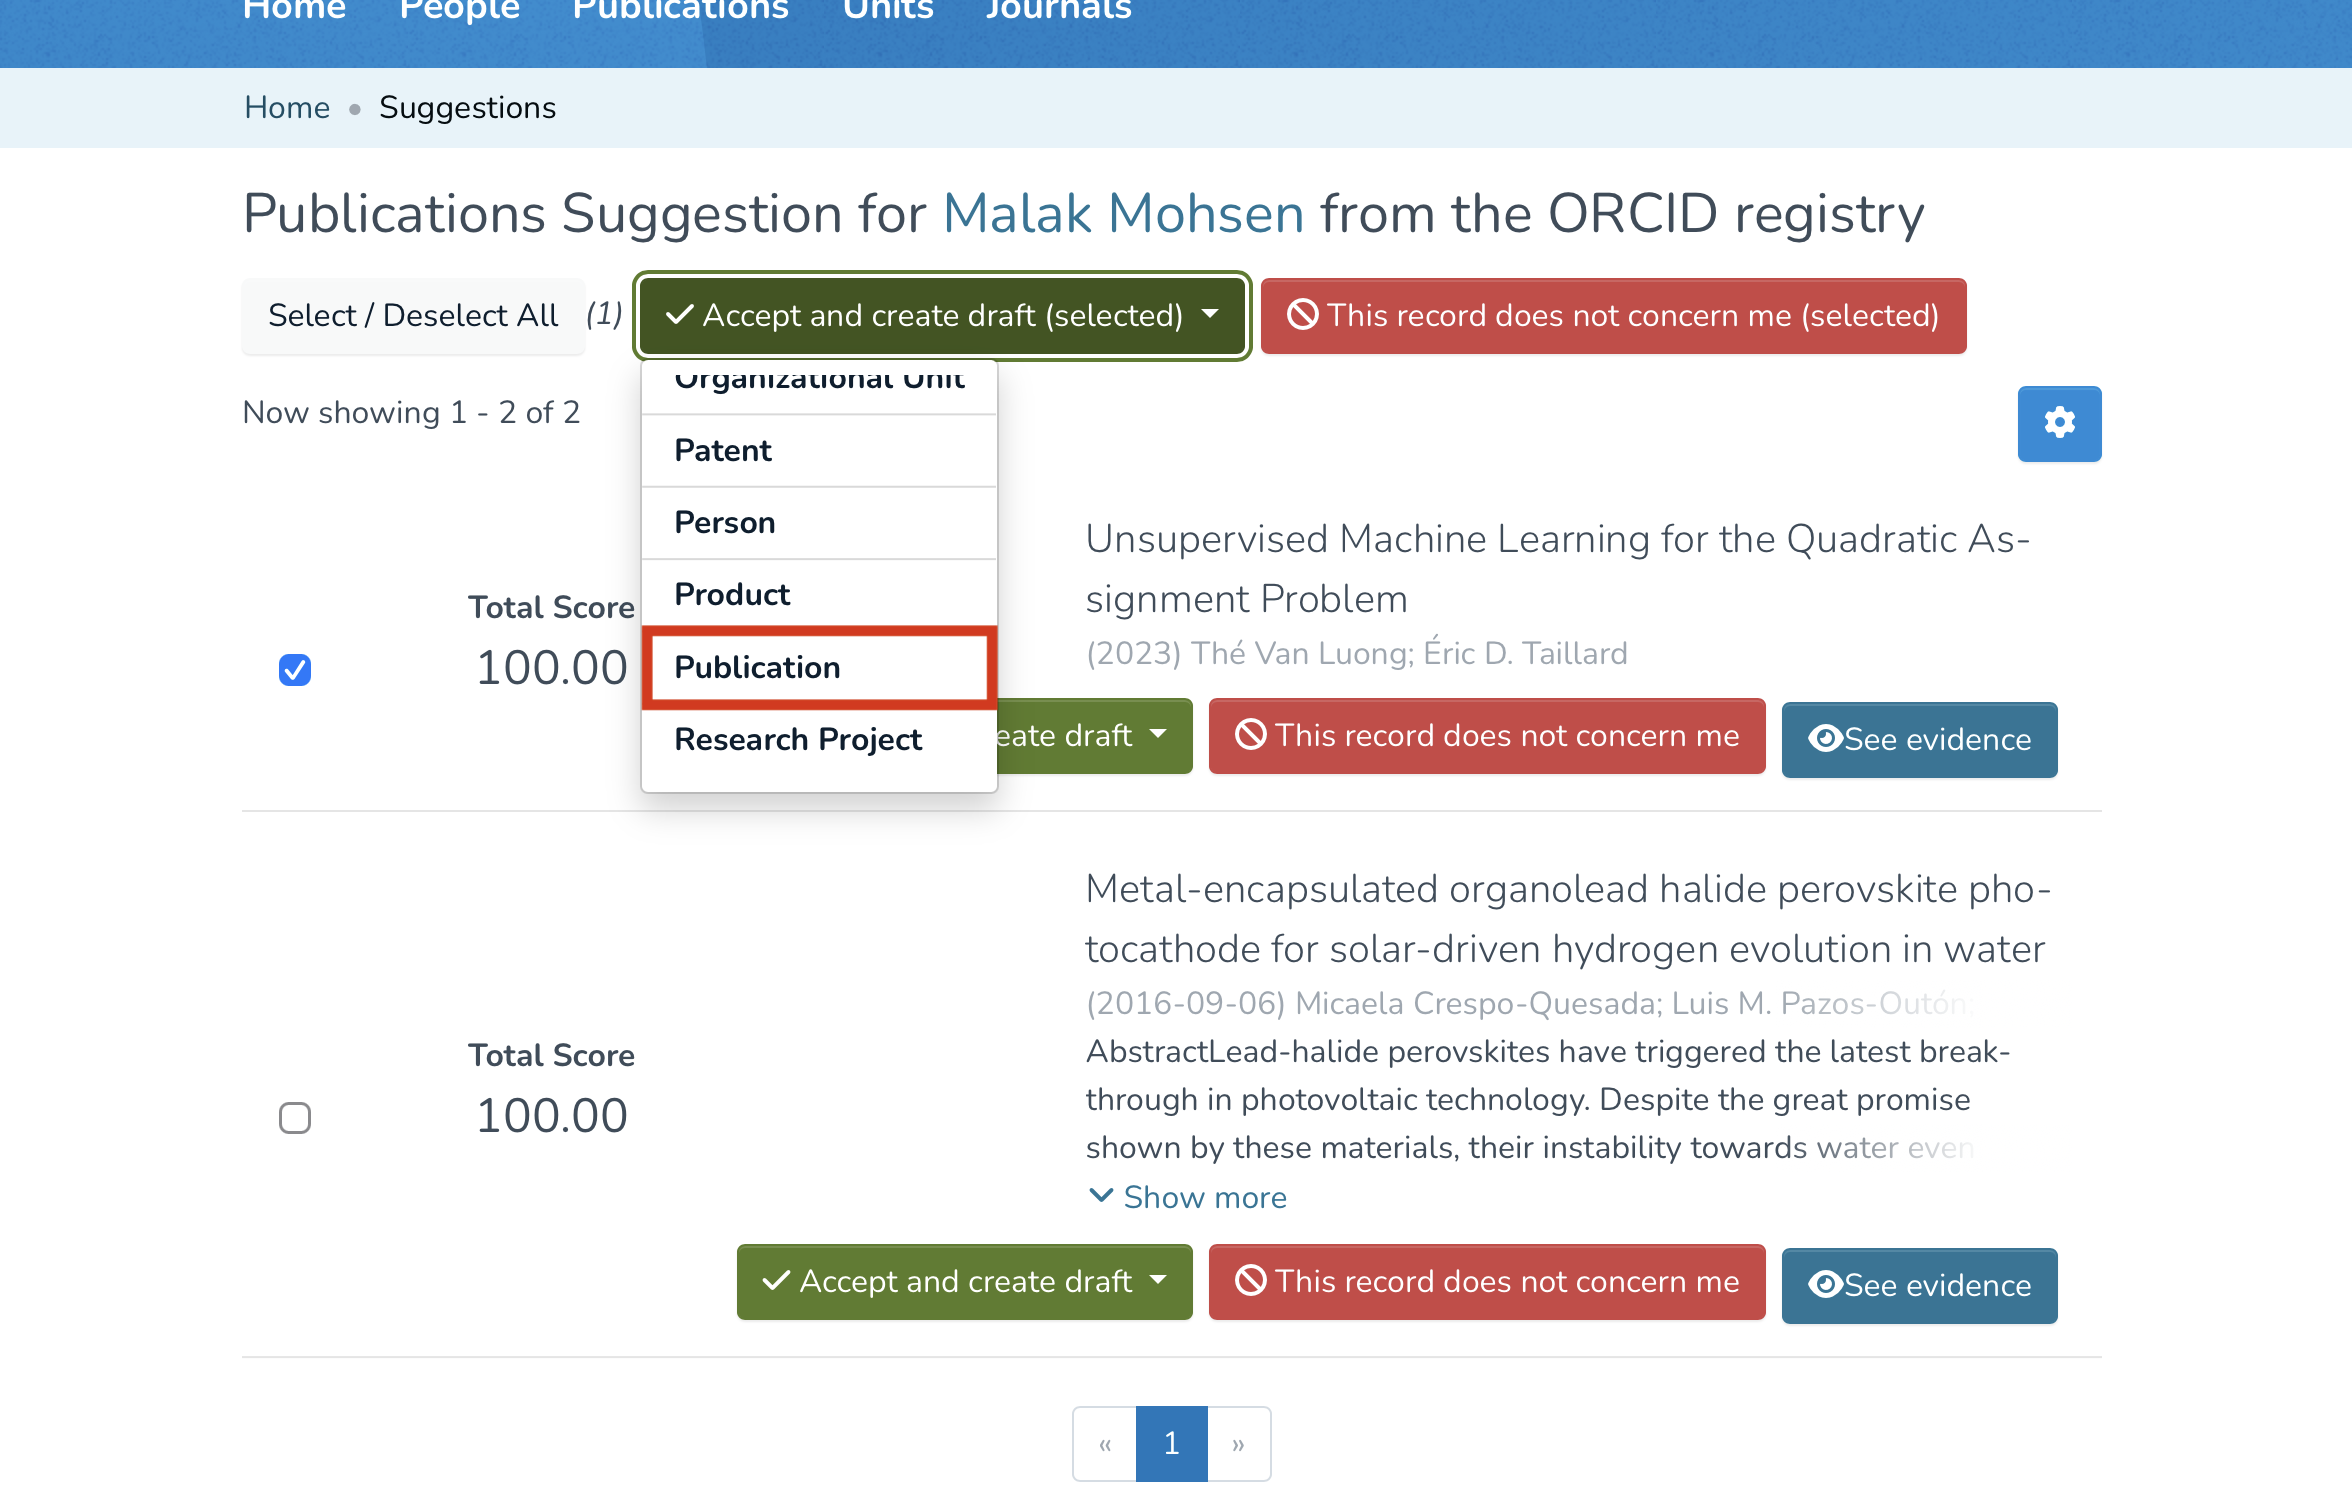
- If, on the contrary, you wish to import one or several of them, check the corresponding box(es), then click “Accept and create draft.”

- In the drop-down menu that appears, select “Publication.”

Creation in IRIS
Once this is done, you will be redirected to your workspace, where the imported publications will appear under “Submission in progress”, in the “Records I Created” section. At this stage, you can still edit the publication before publishing it.

Importing ORCID publications into IRIS from an external source
It is possible to import ORCID publications into IRIS from an external source, either from your own ORCID profile or from another researcher’s profile. The advantage of this method is that it allows duplicate records to be detected before the import. Here’s how to proceed:
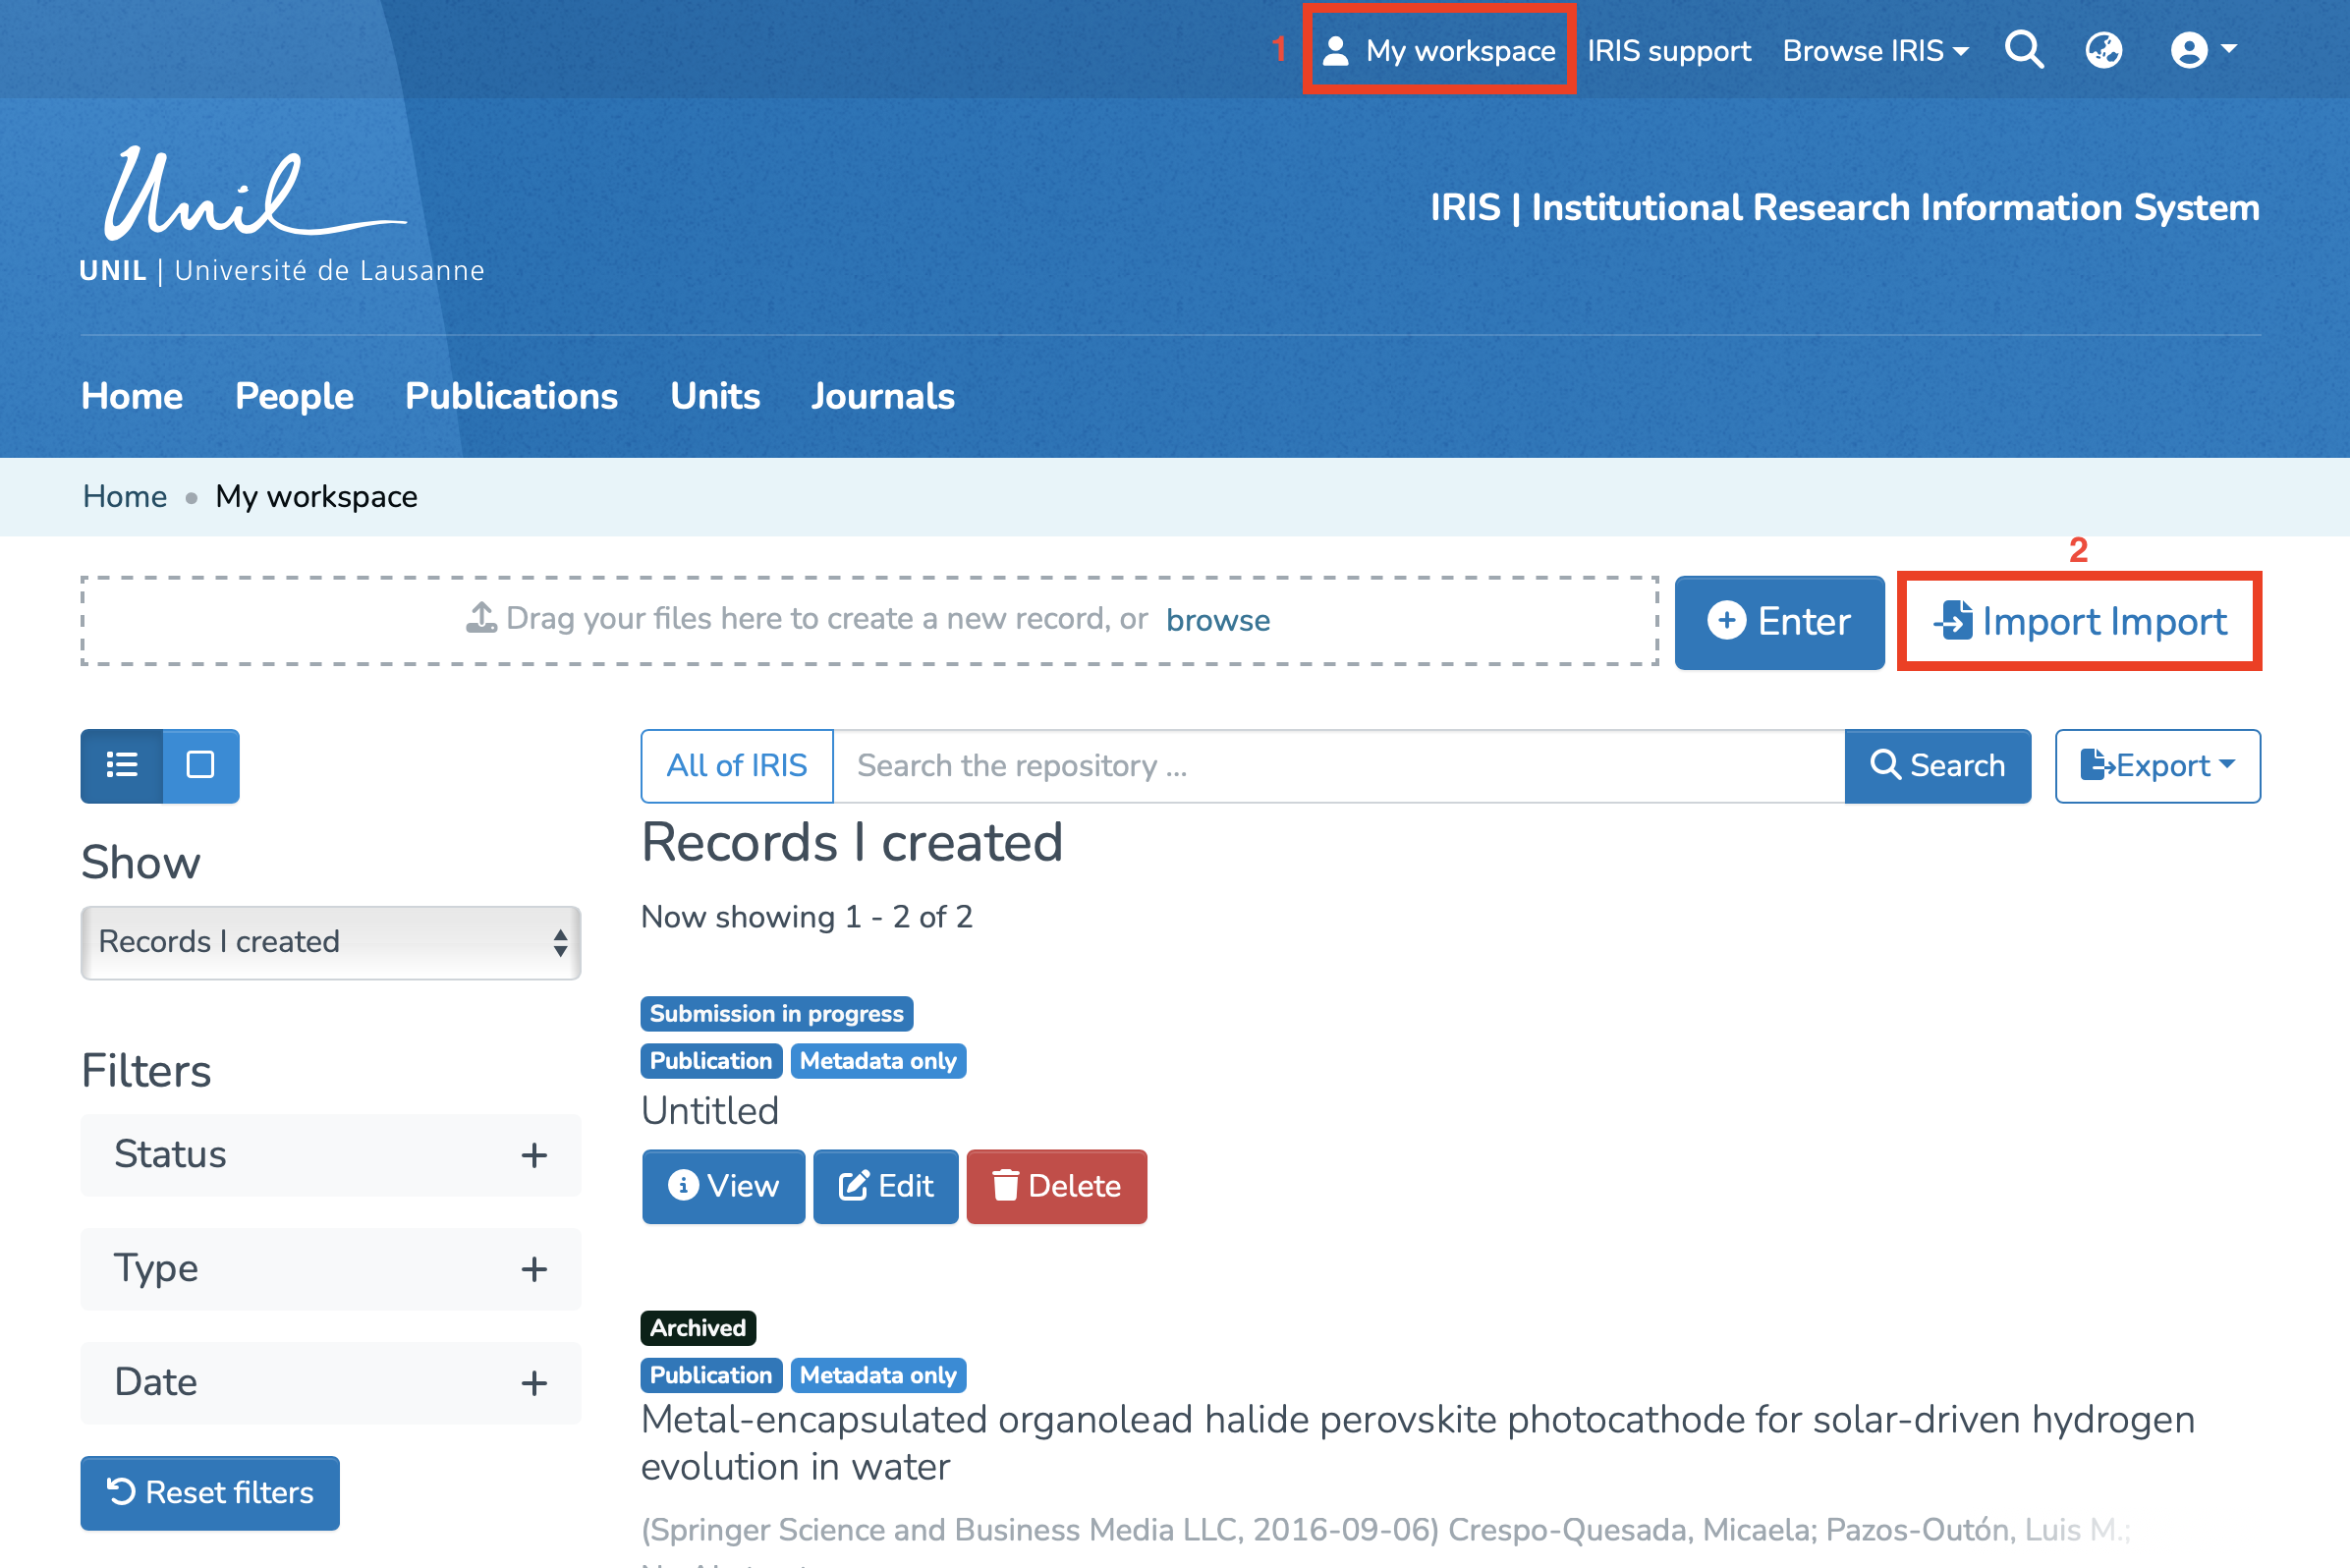
Accessing the Import Function
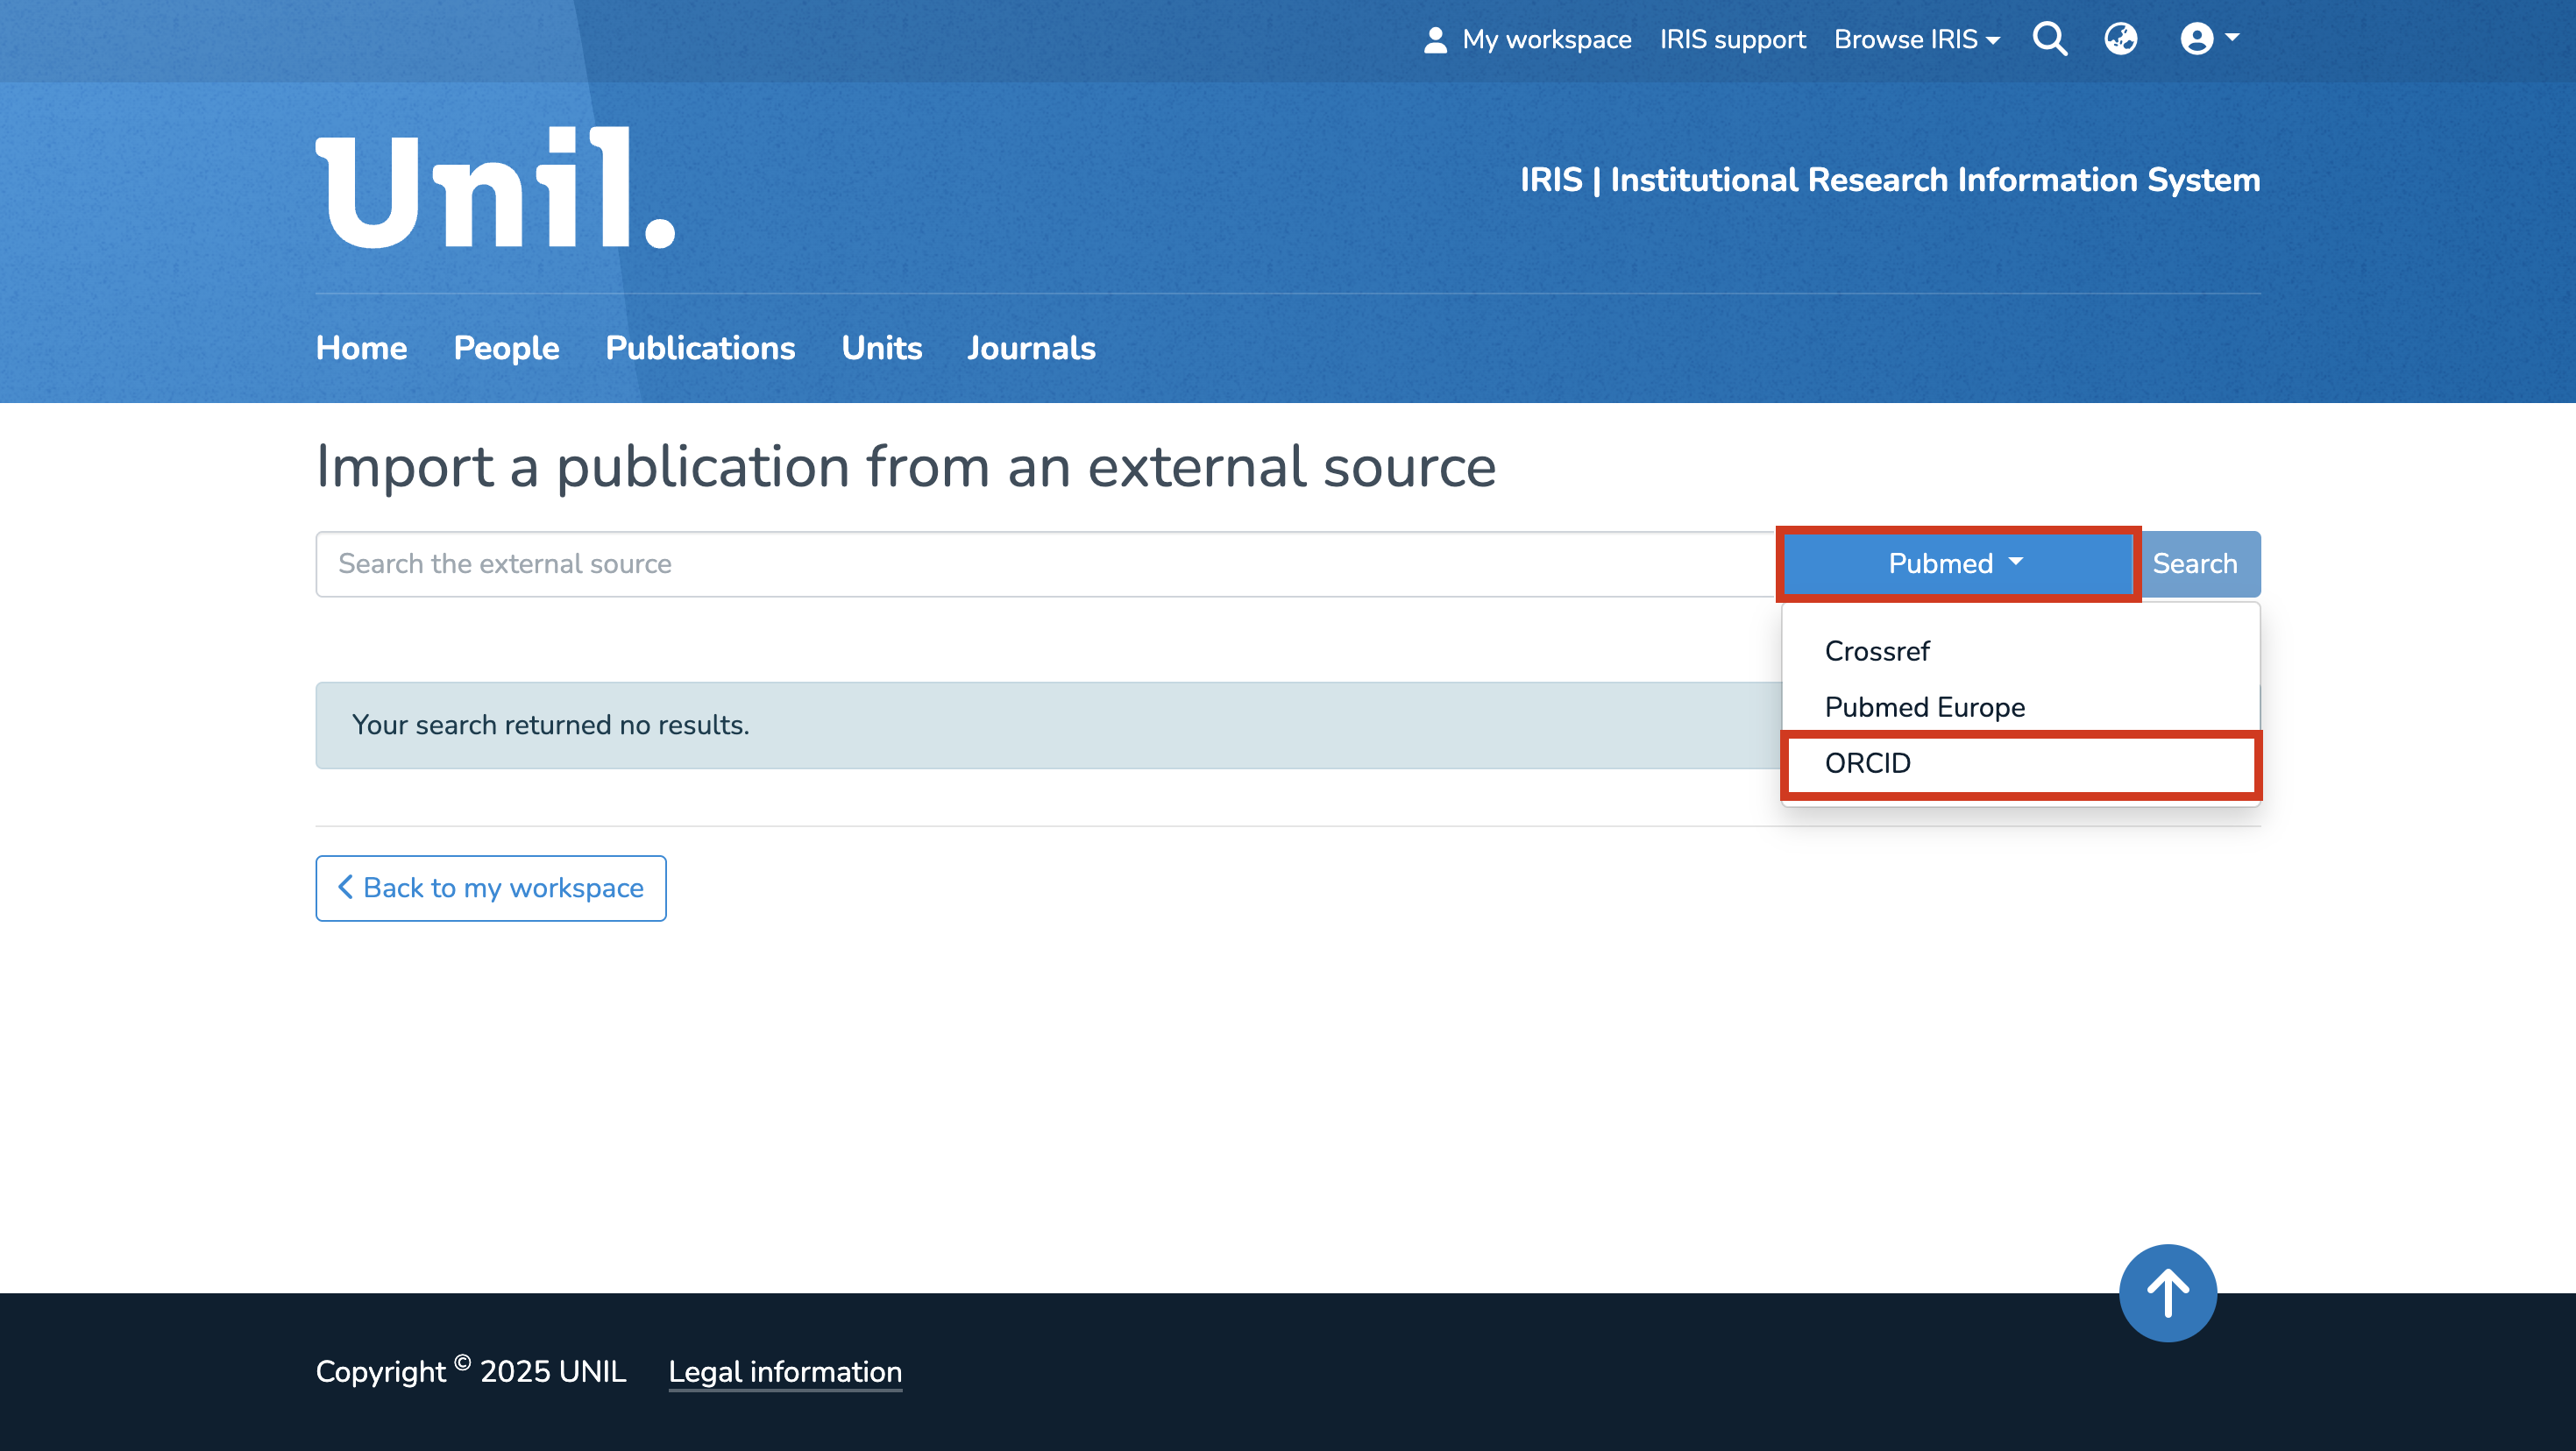
- Go to your Workspace in IRIS.
- Click on “Import” to start the import process.

- Since the publications you want to import come from an ORCID profile, click on the drop-down menu, scroll through the list, and select ORCID as the import source.

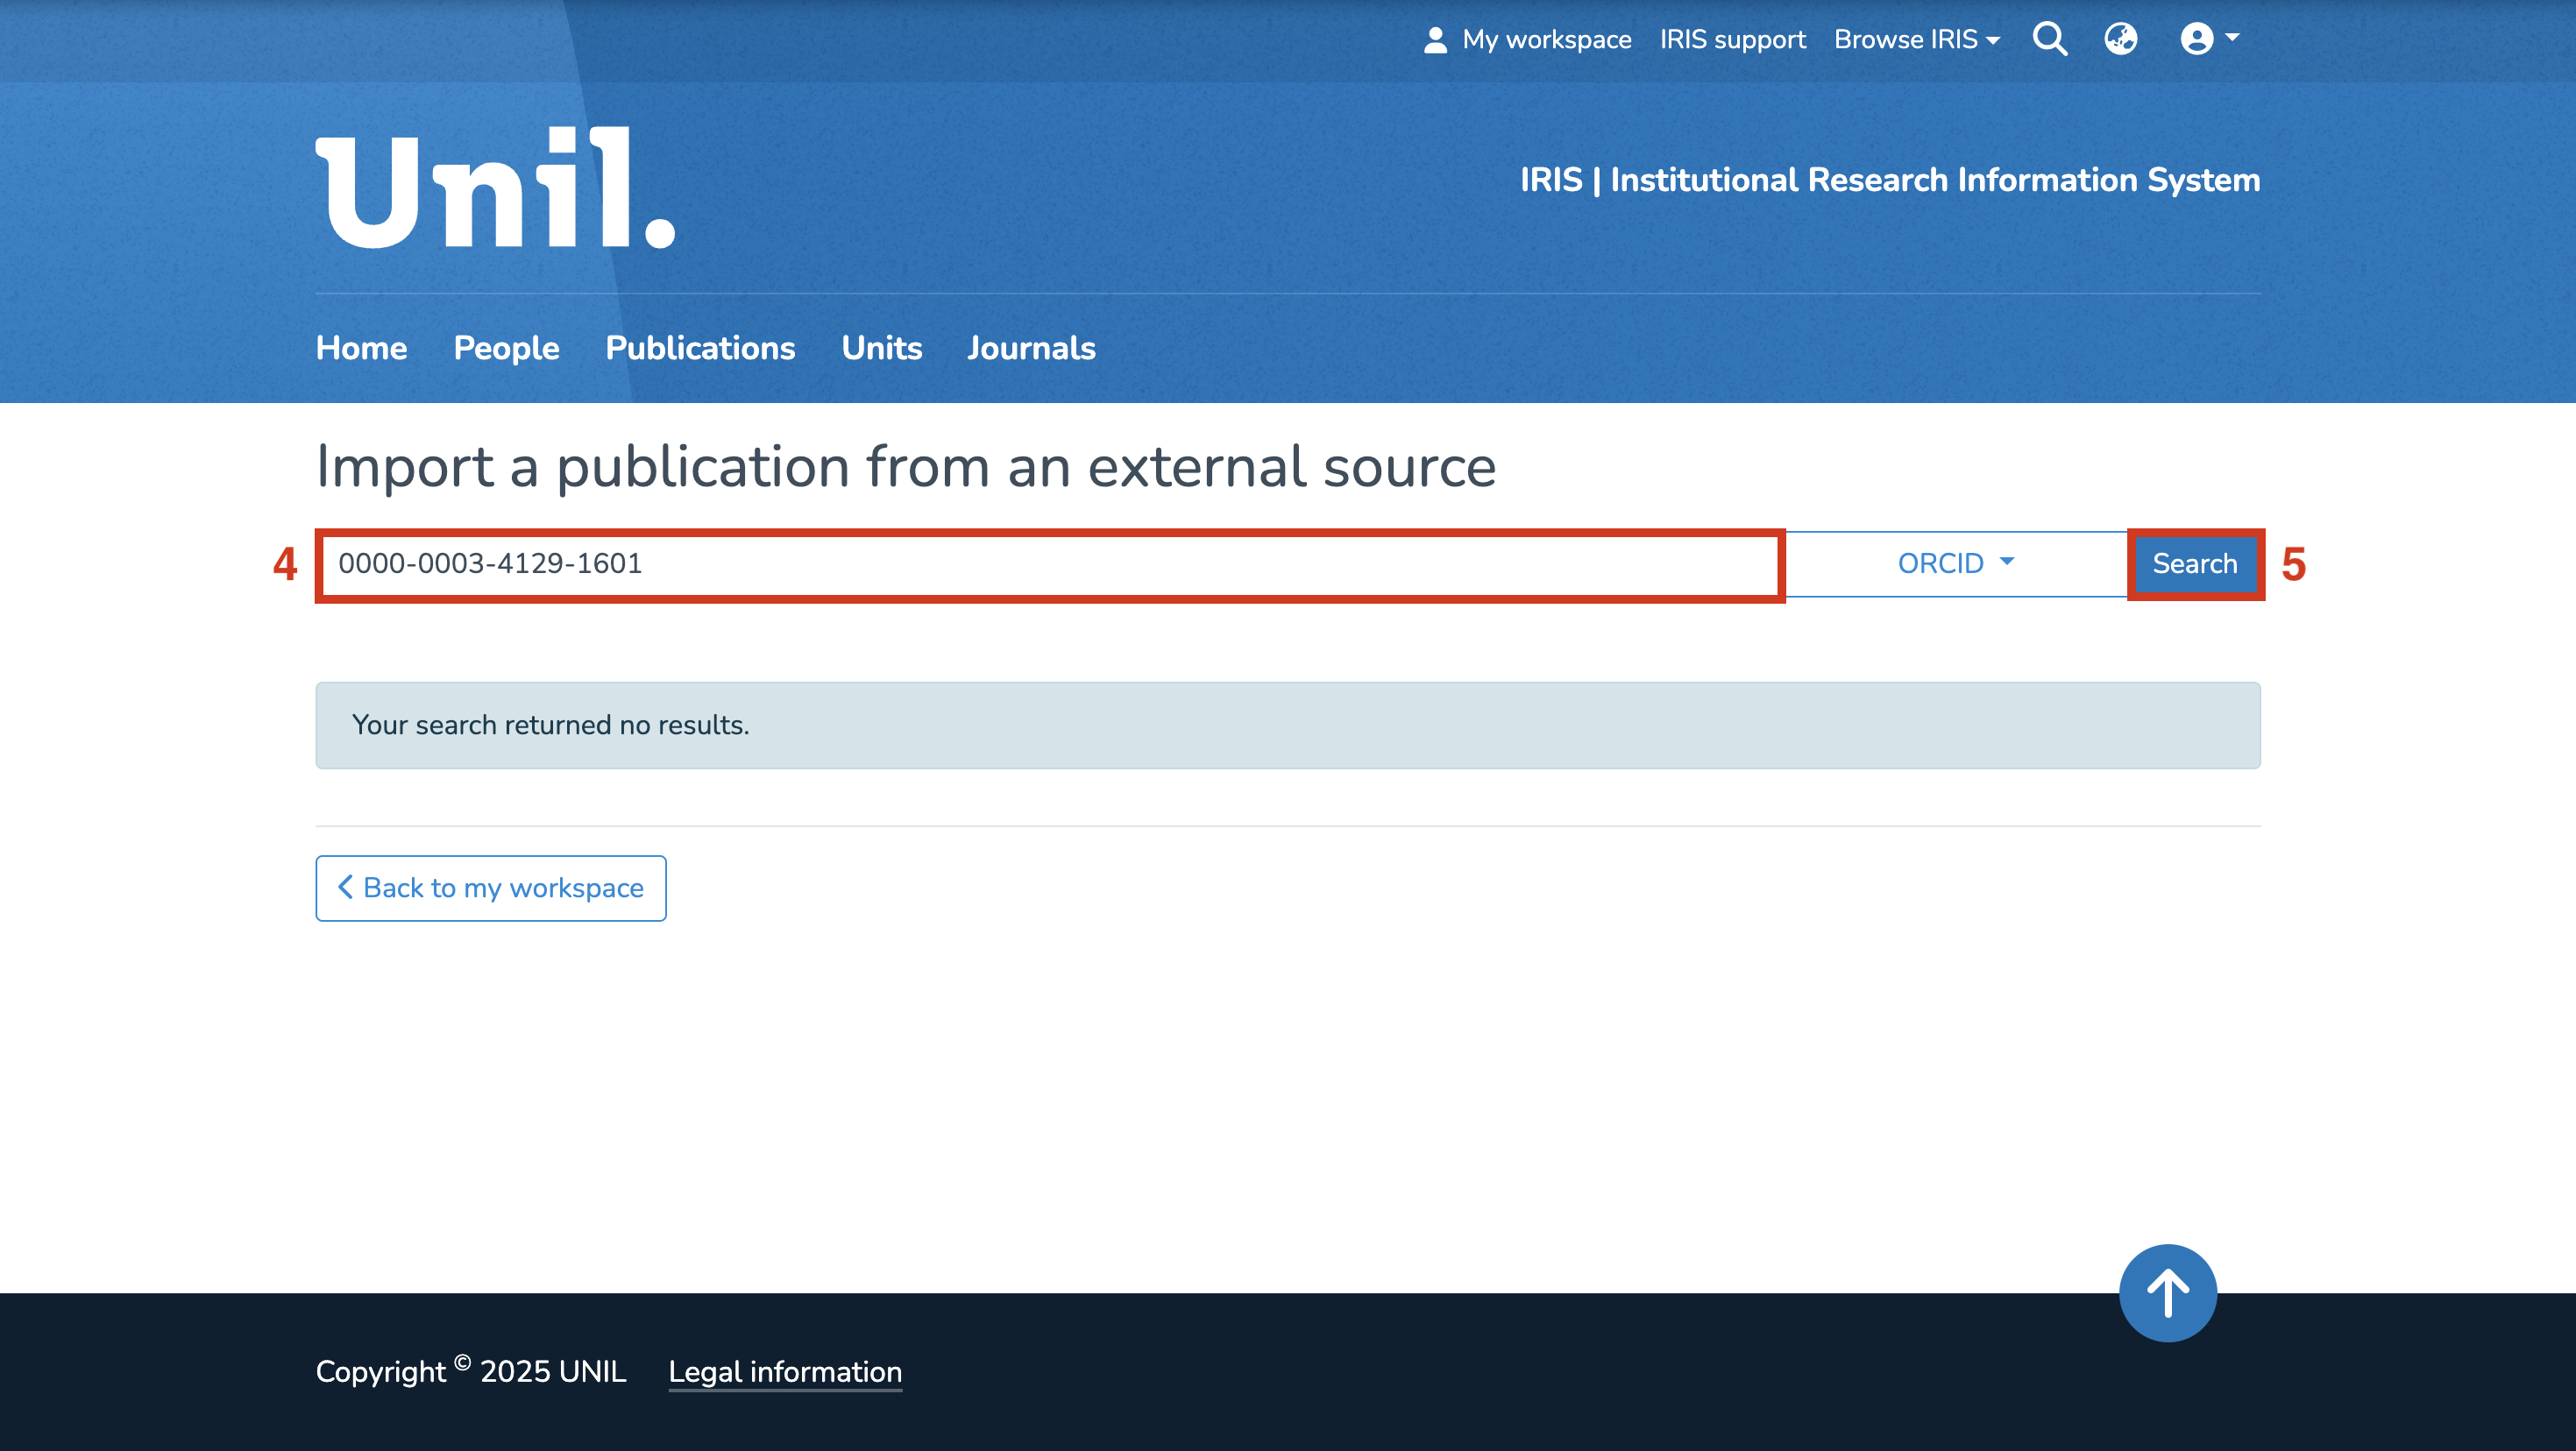
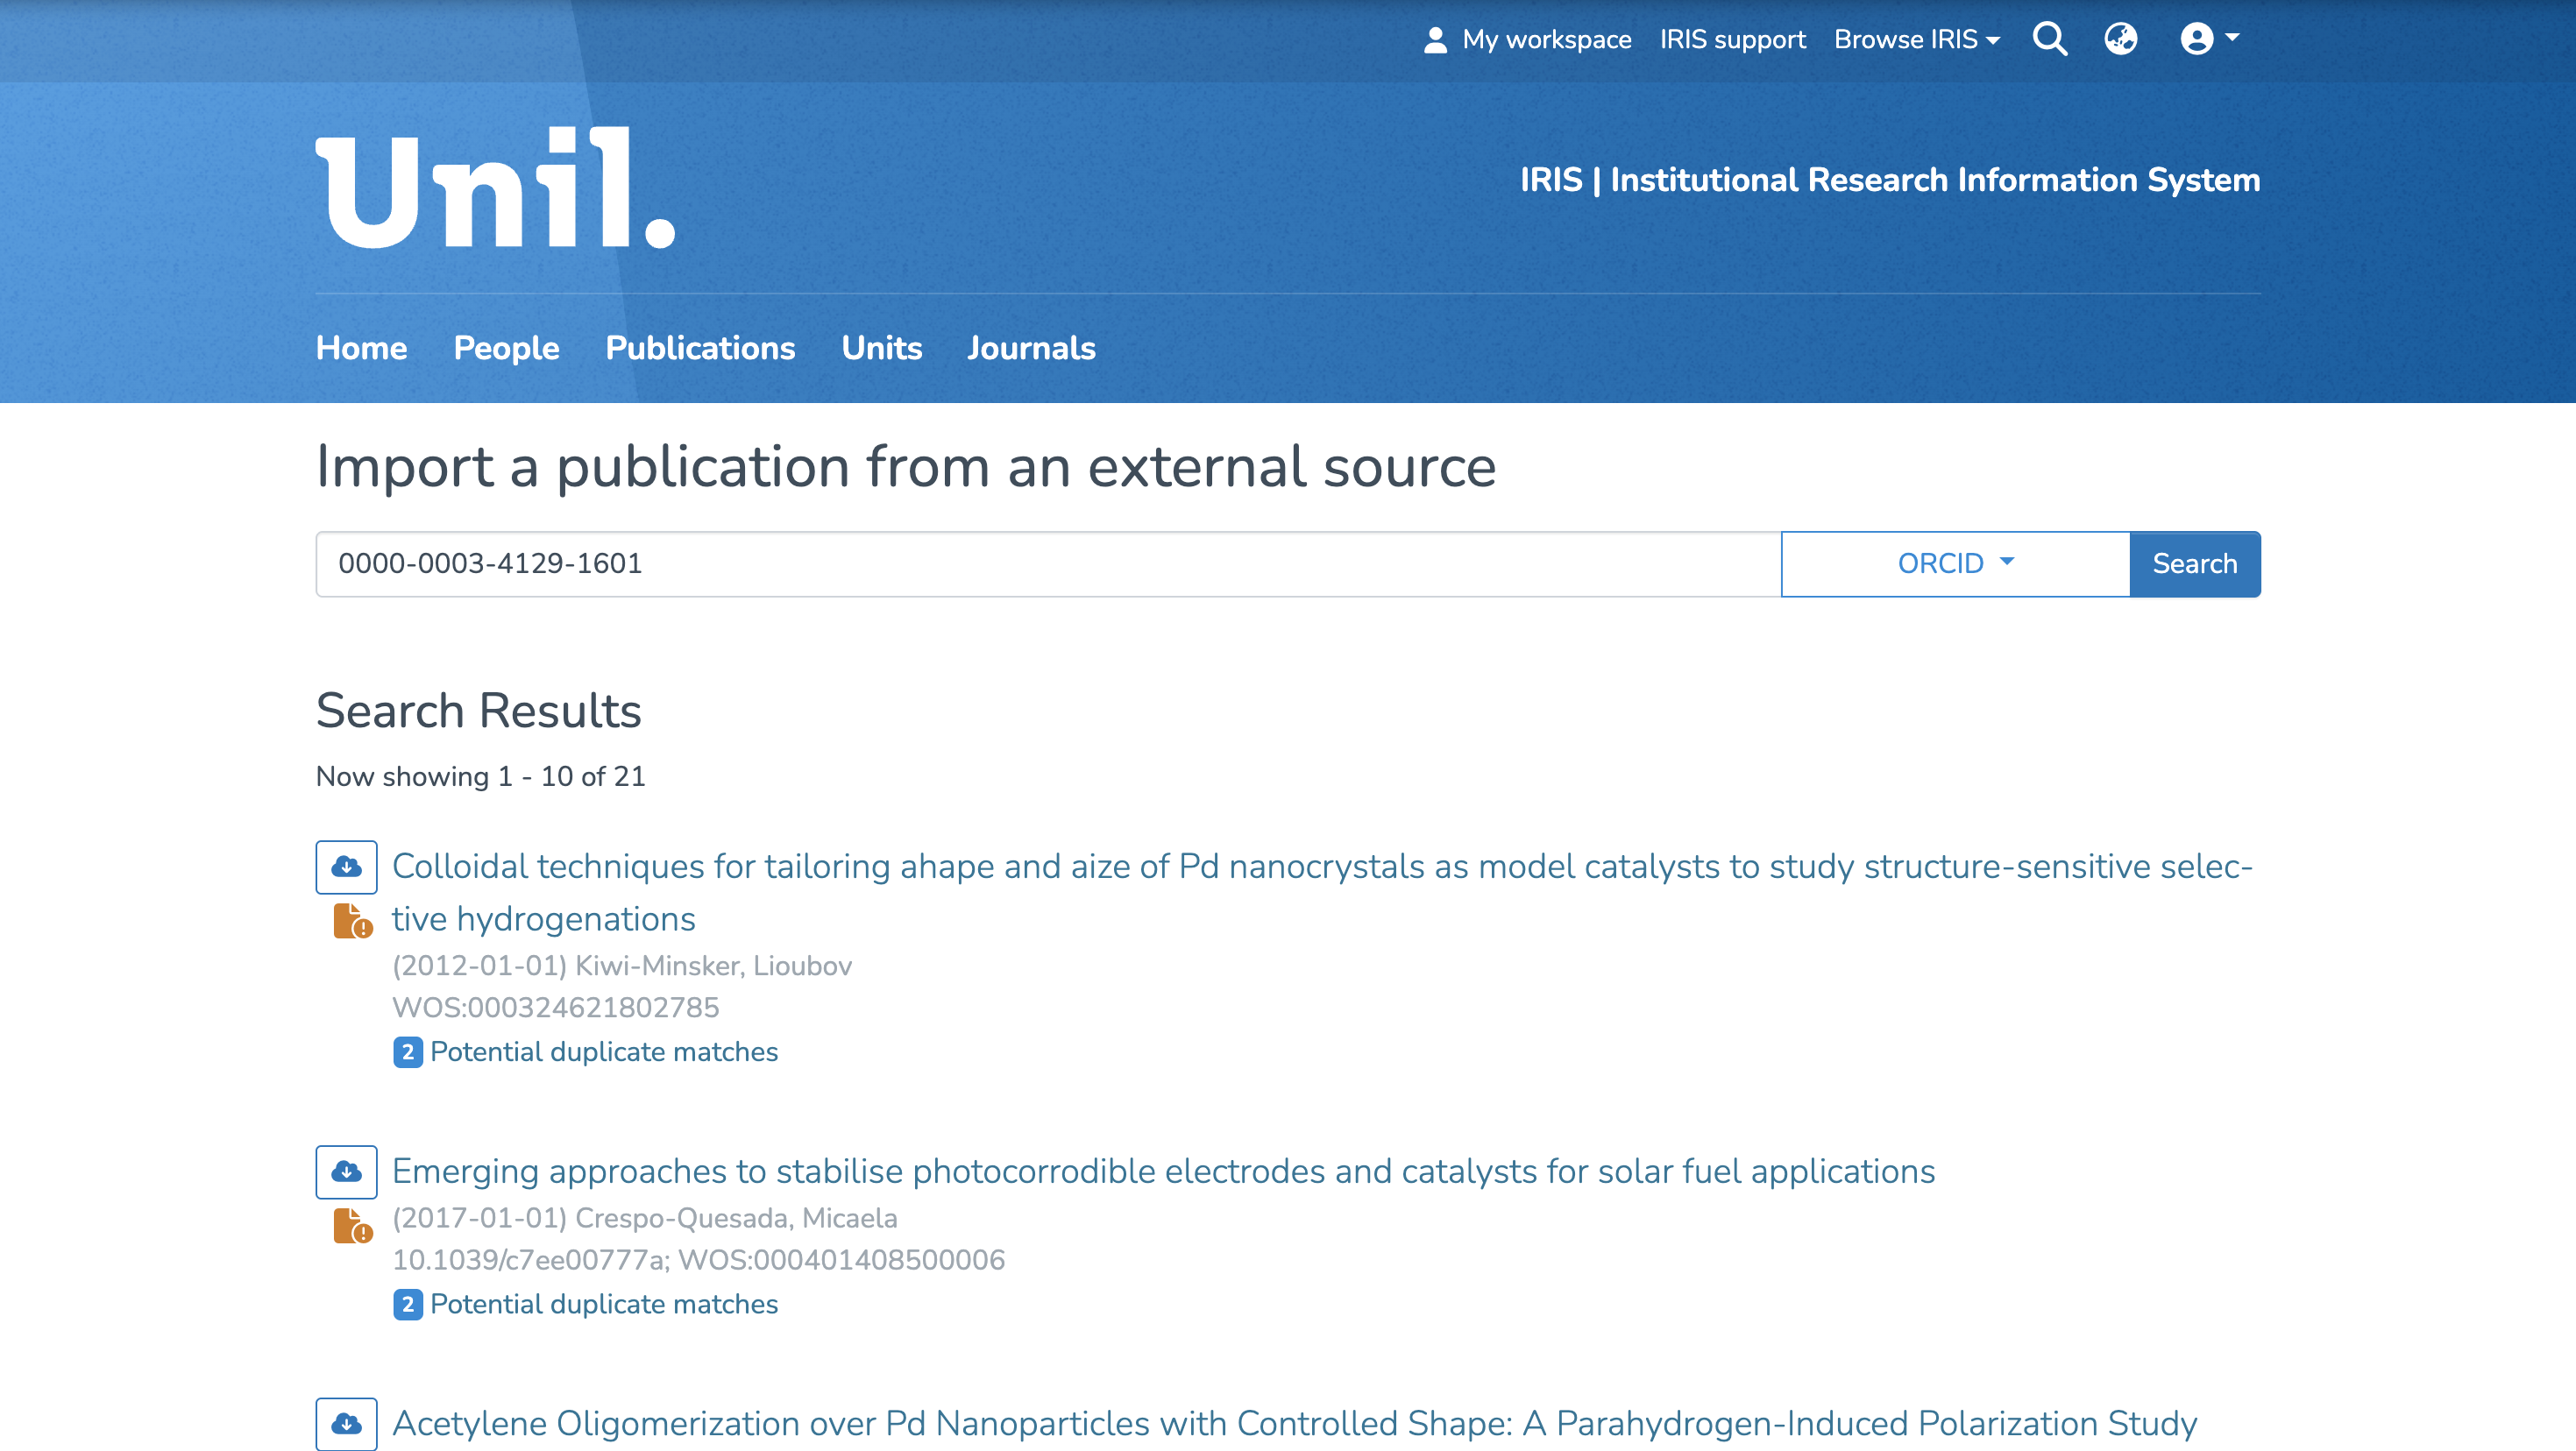
- In the search field, enter the ORCID ID of the profile from which you wish to import publications (your own or another person's).
- Then click on “Search.”

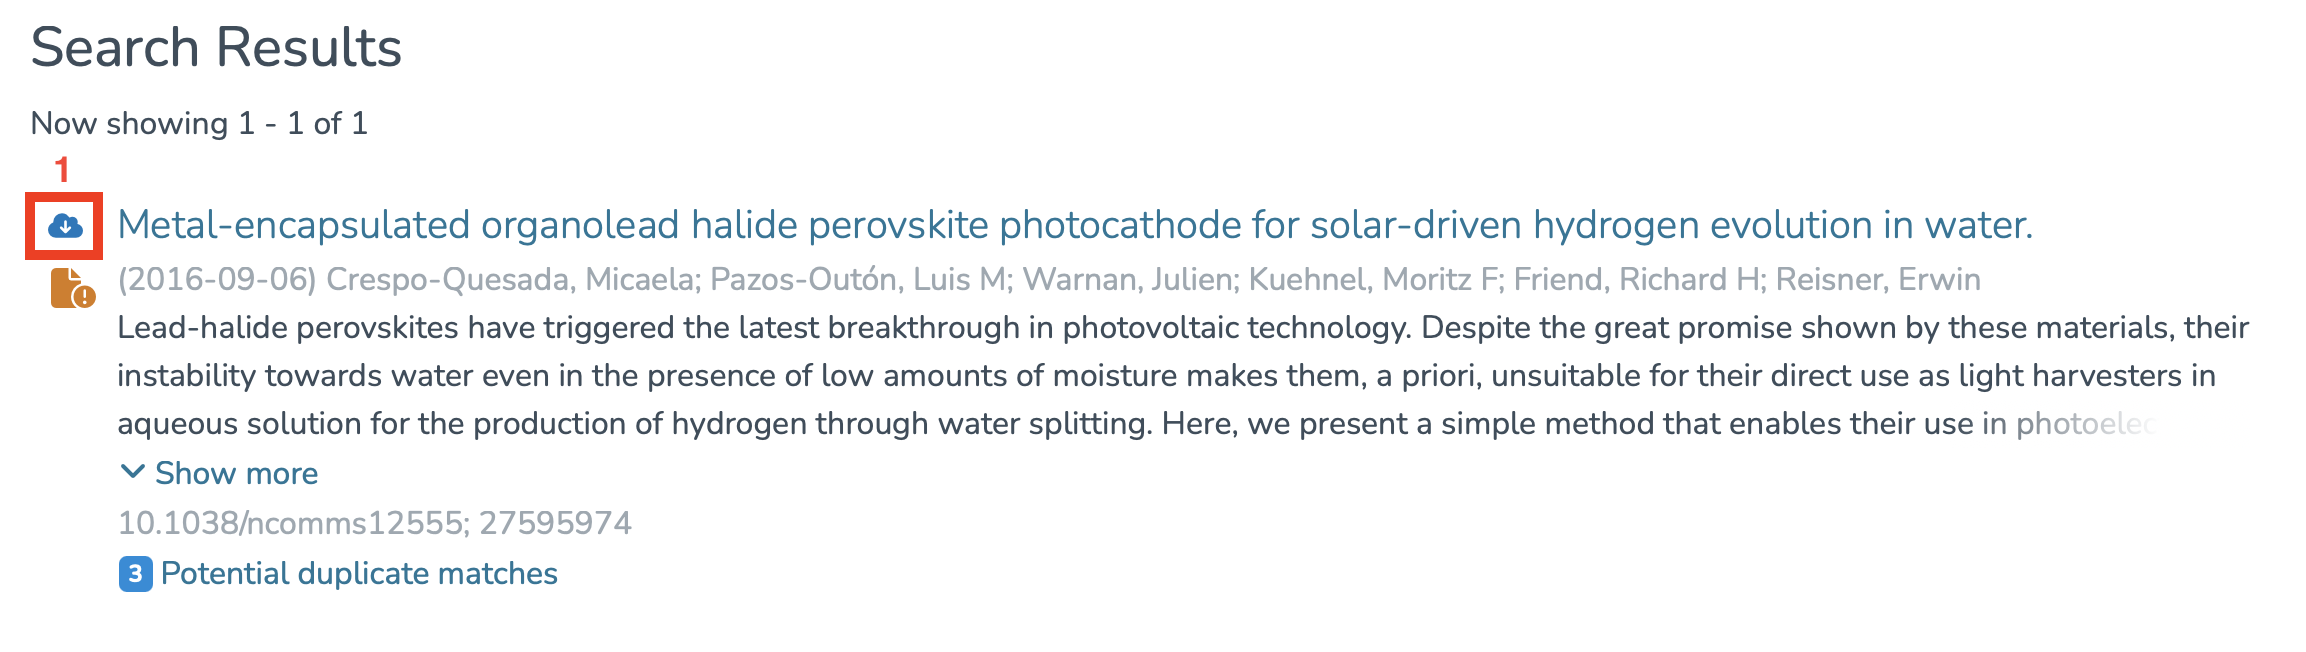
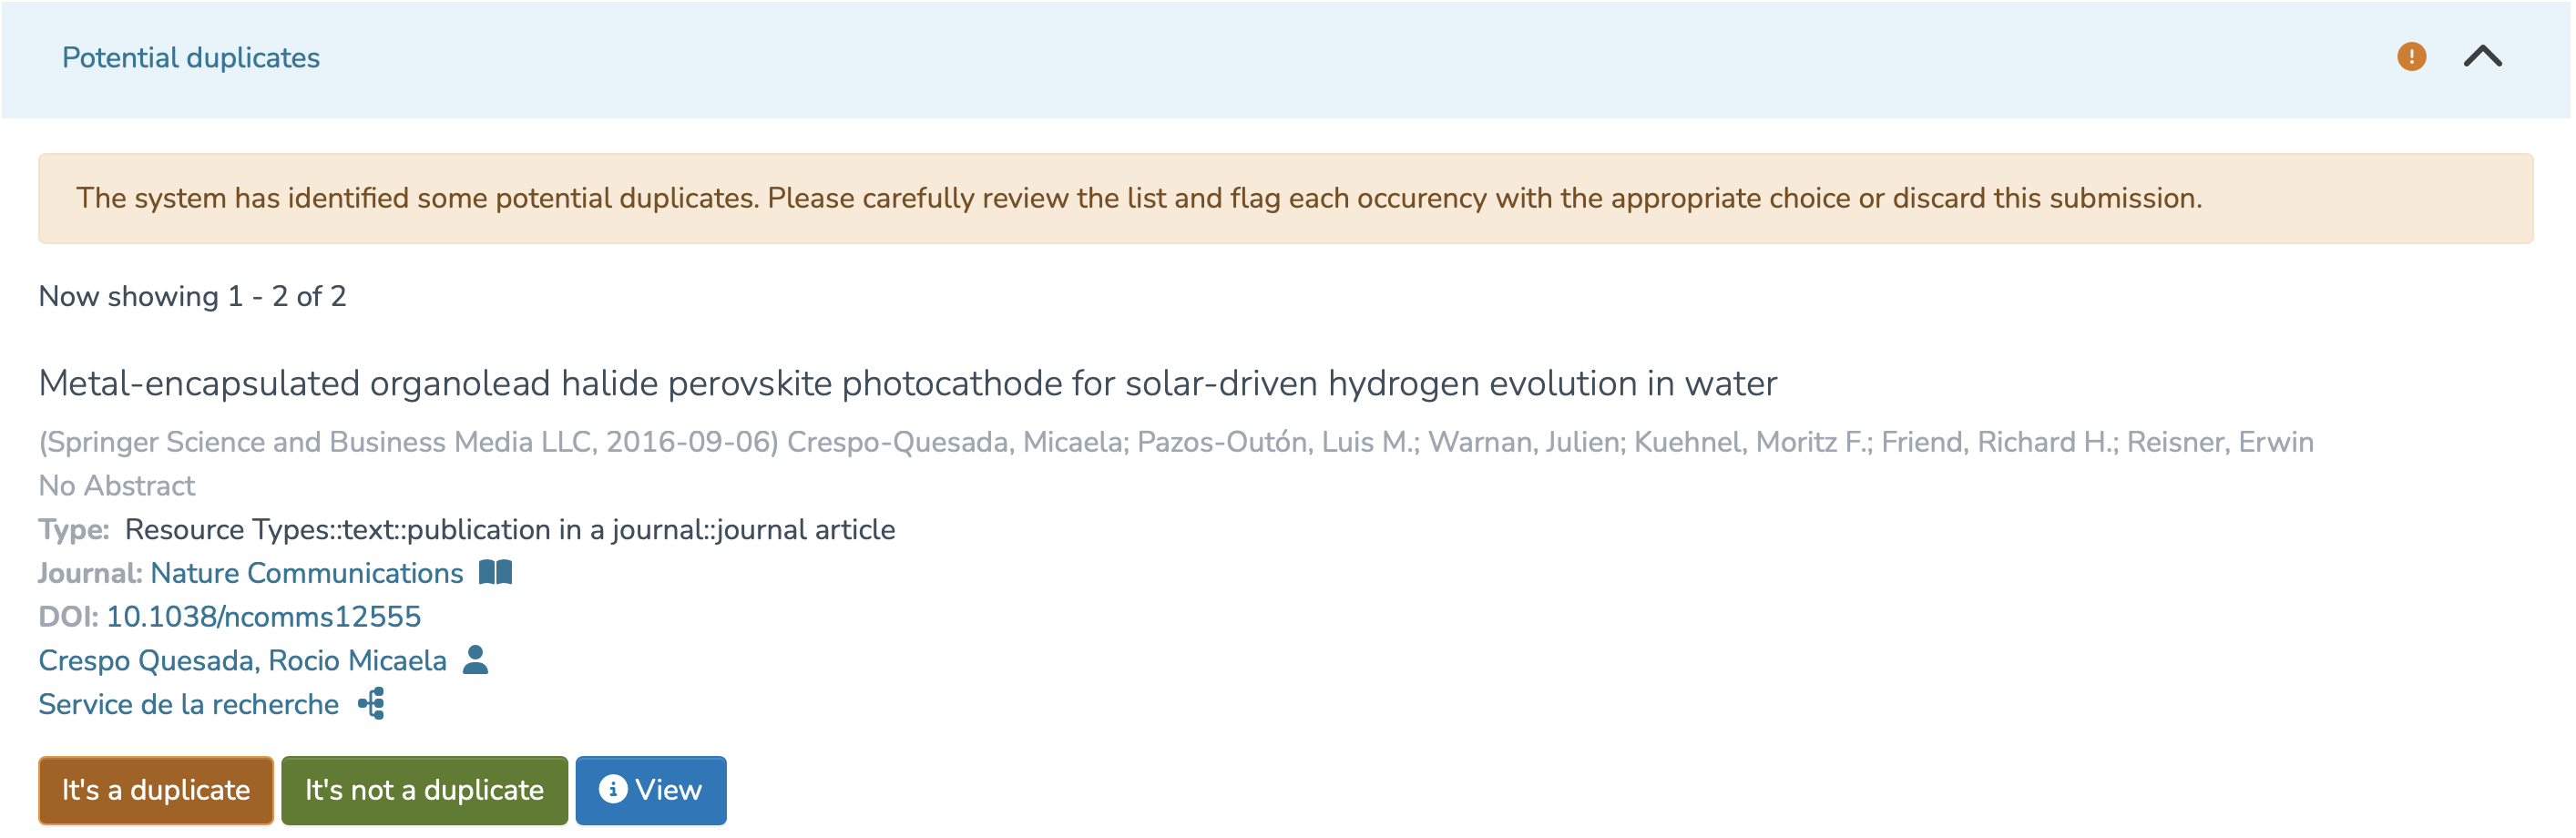
Viewing Available Publications & Checking for Duplicates
- Once the search is complete, all publications associated with the selected ORCID profile will be displayed.

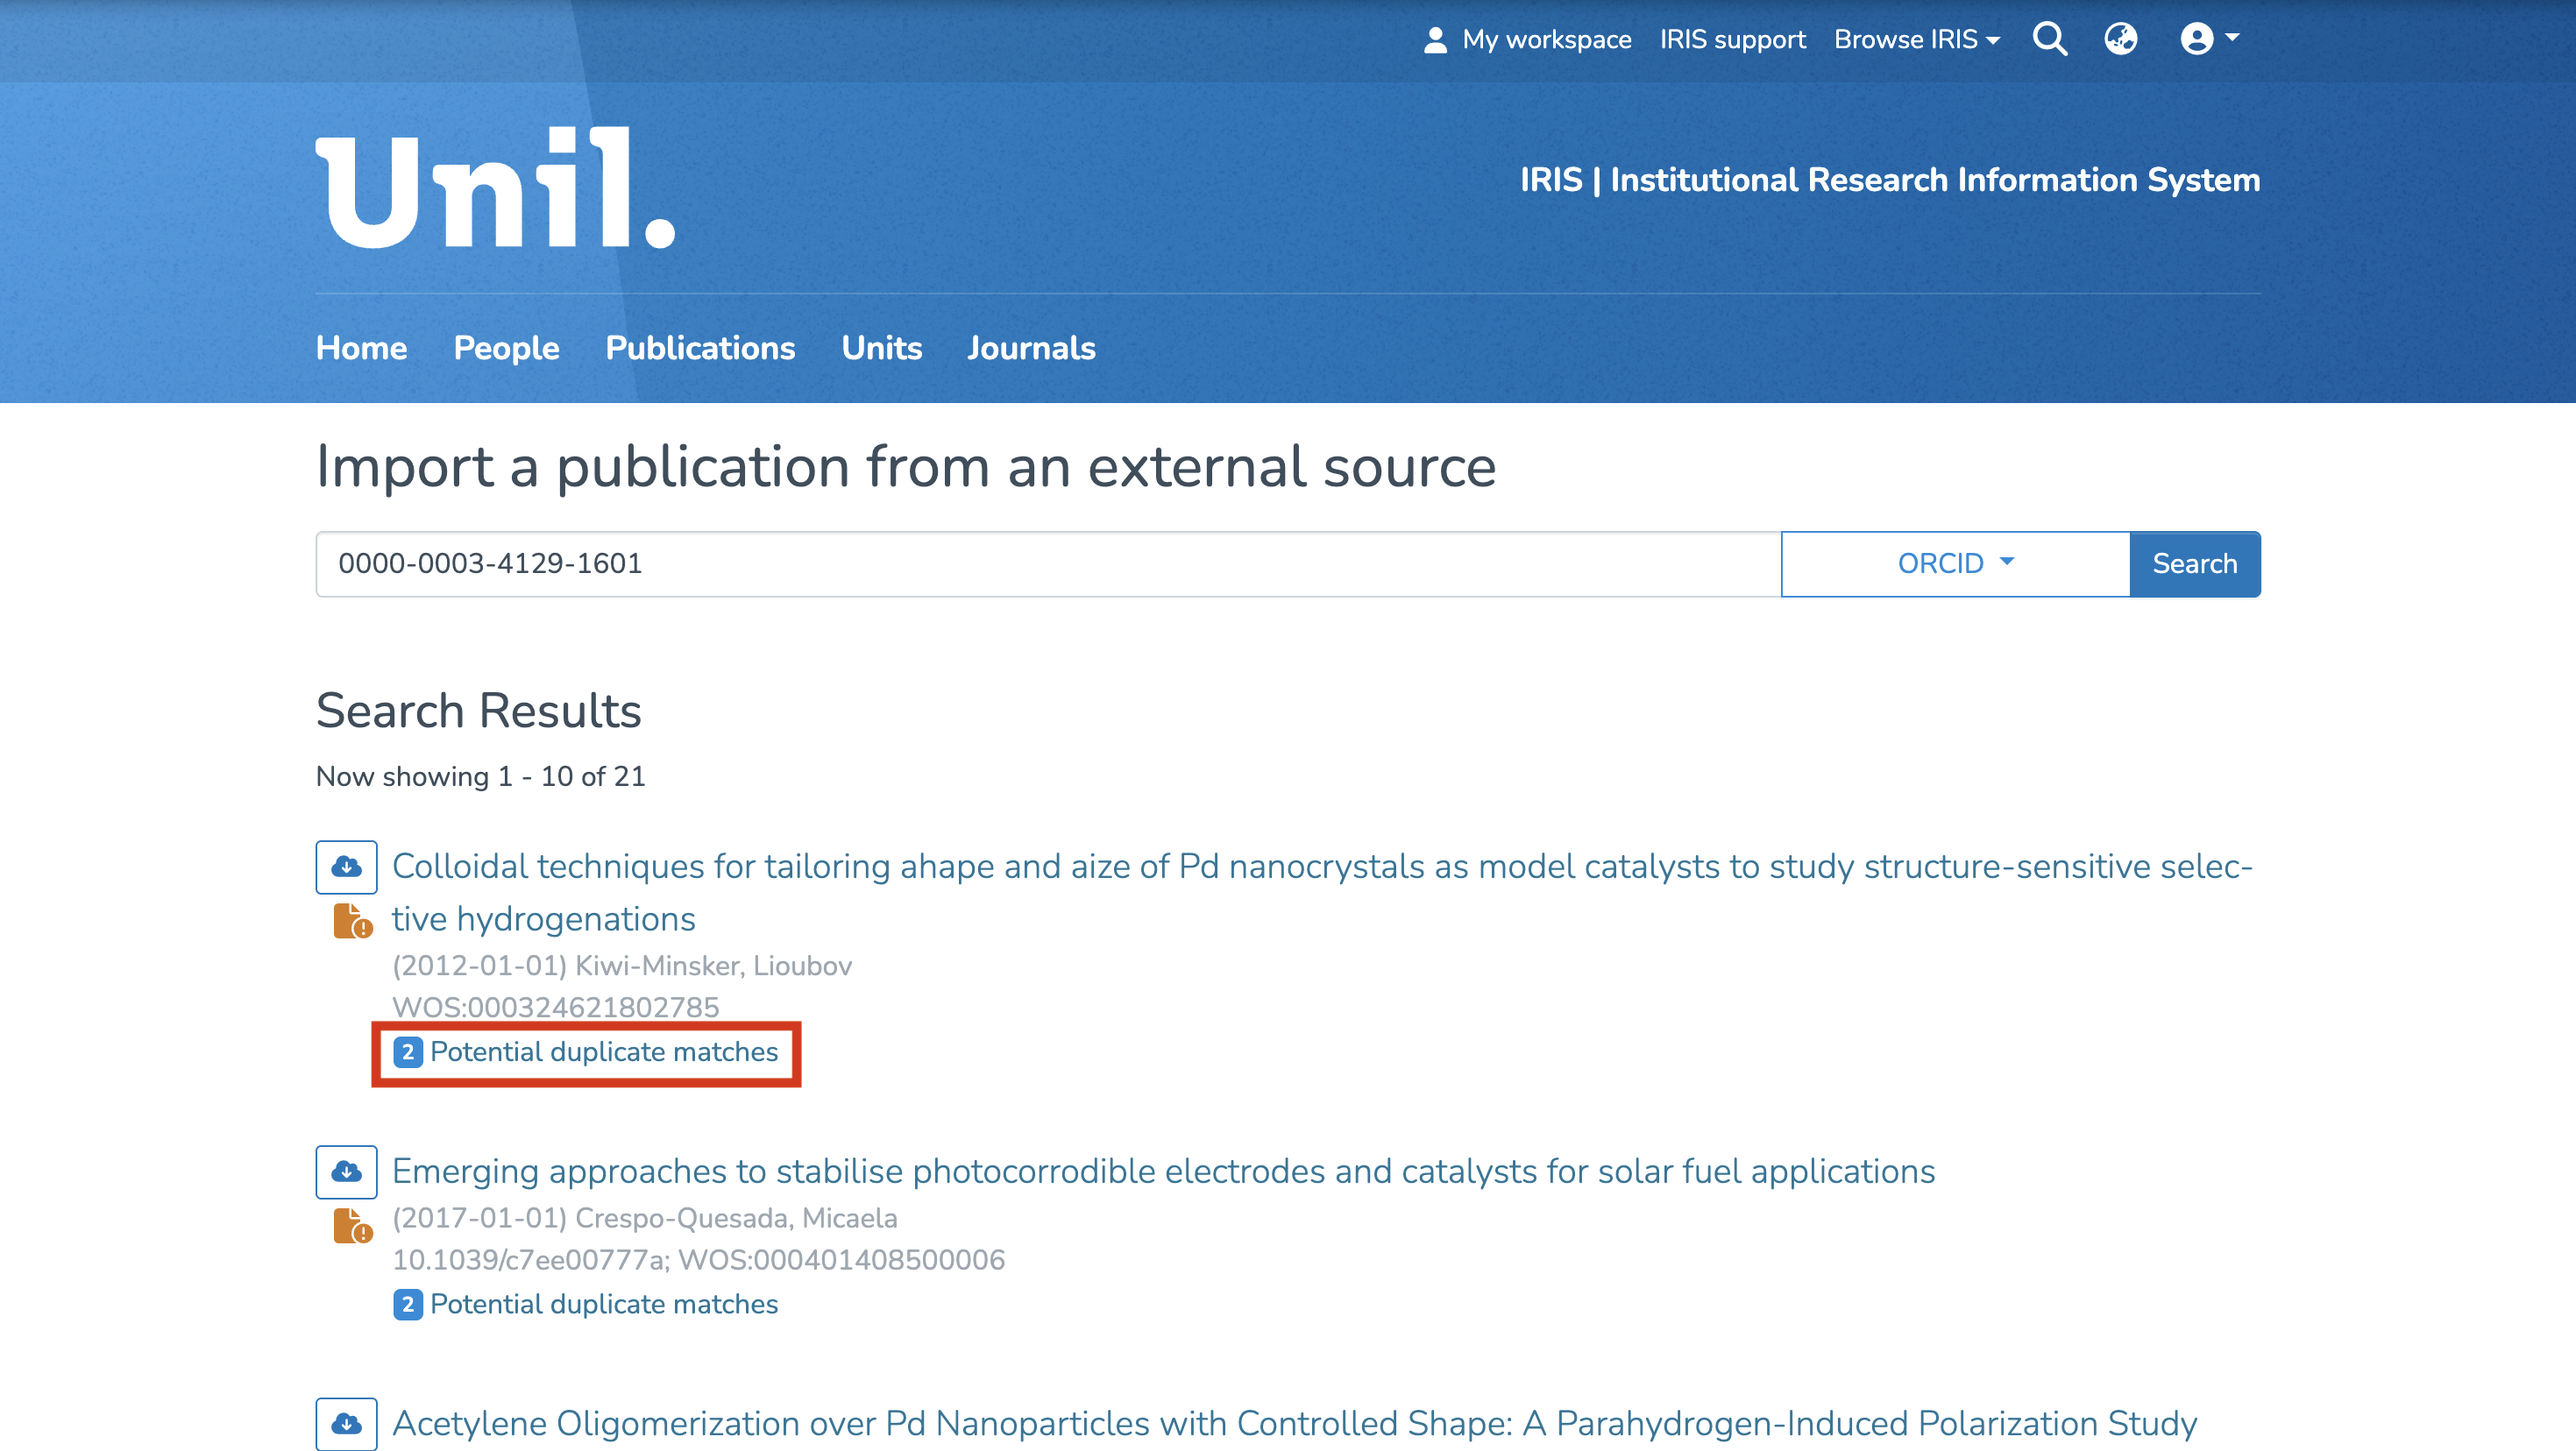
- One key advantage of this method is that IRIS automatically detects duplicates before the import.
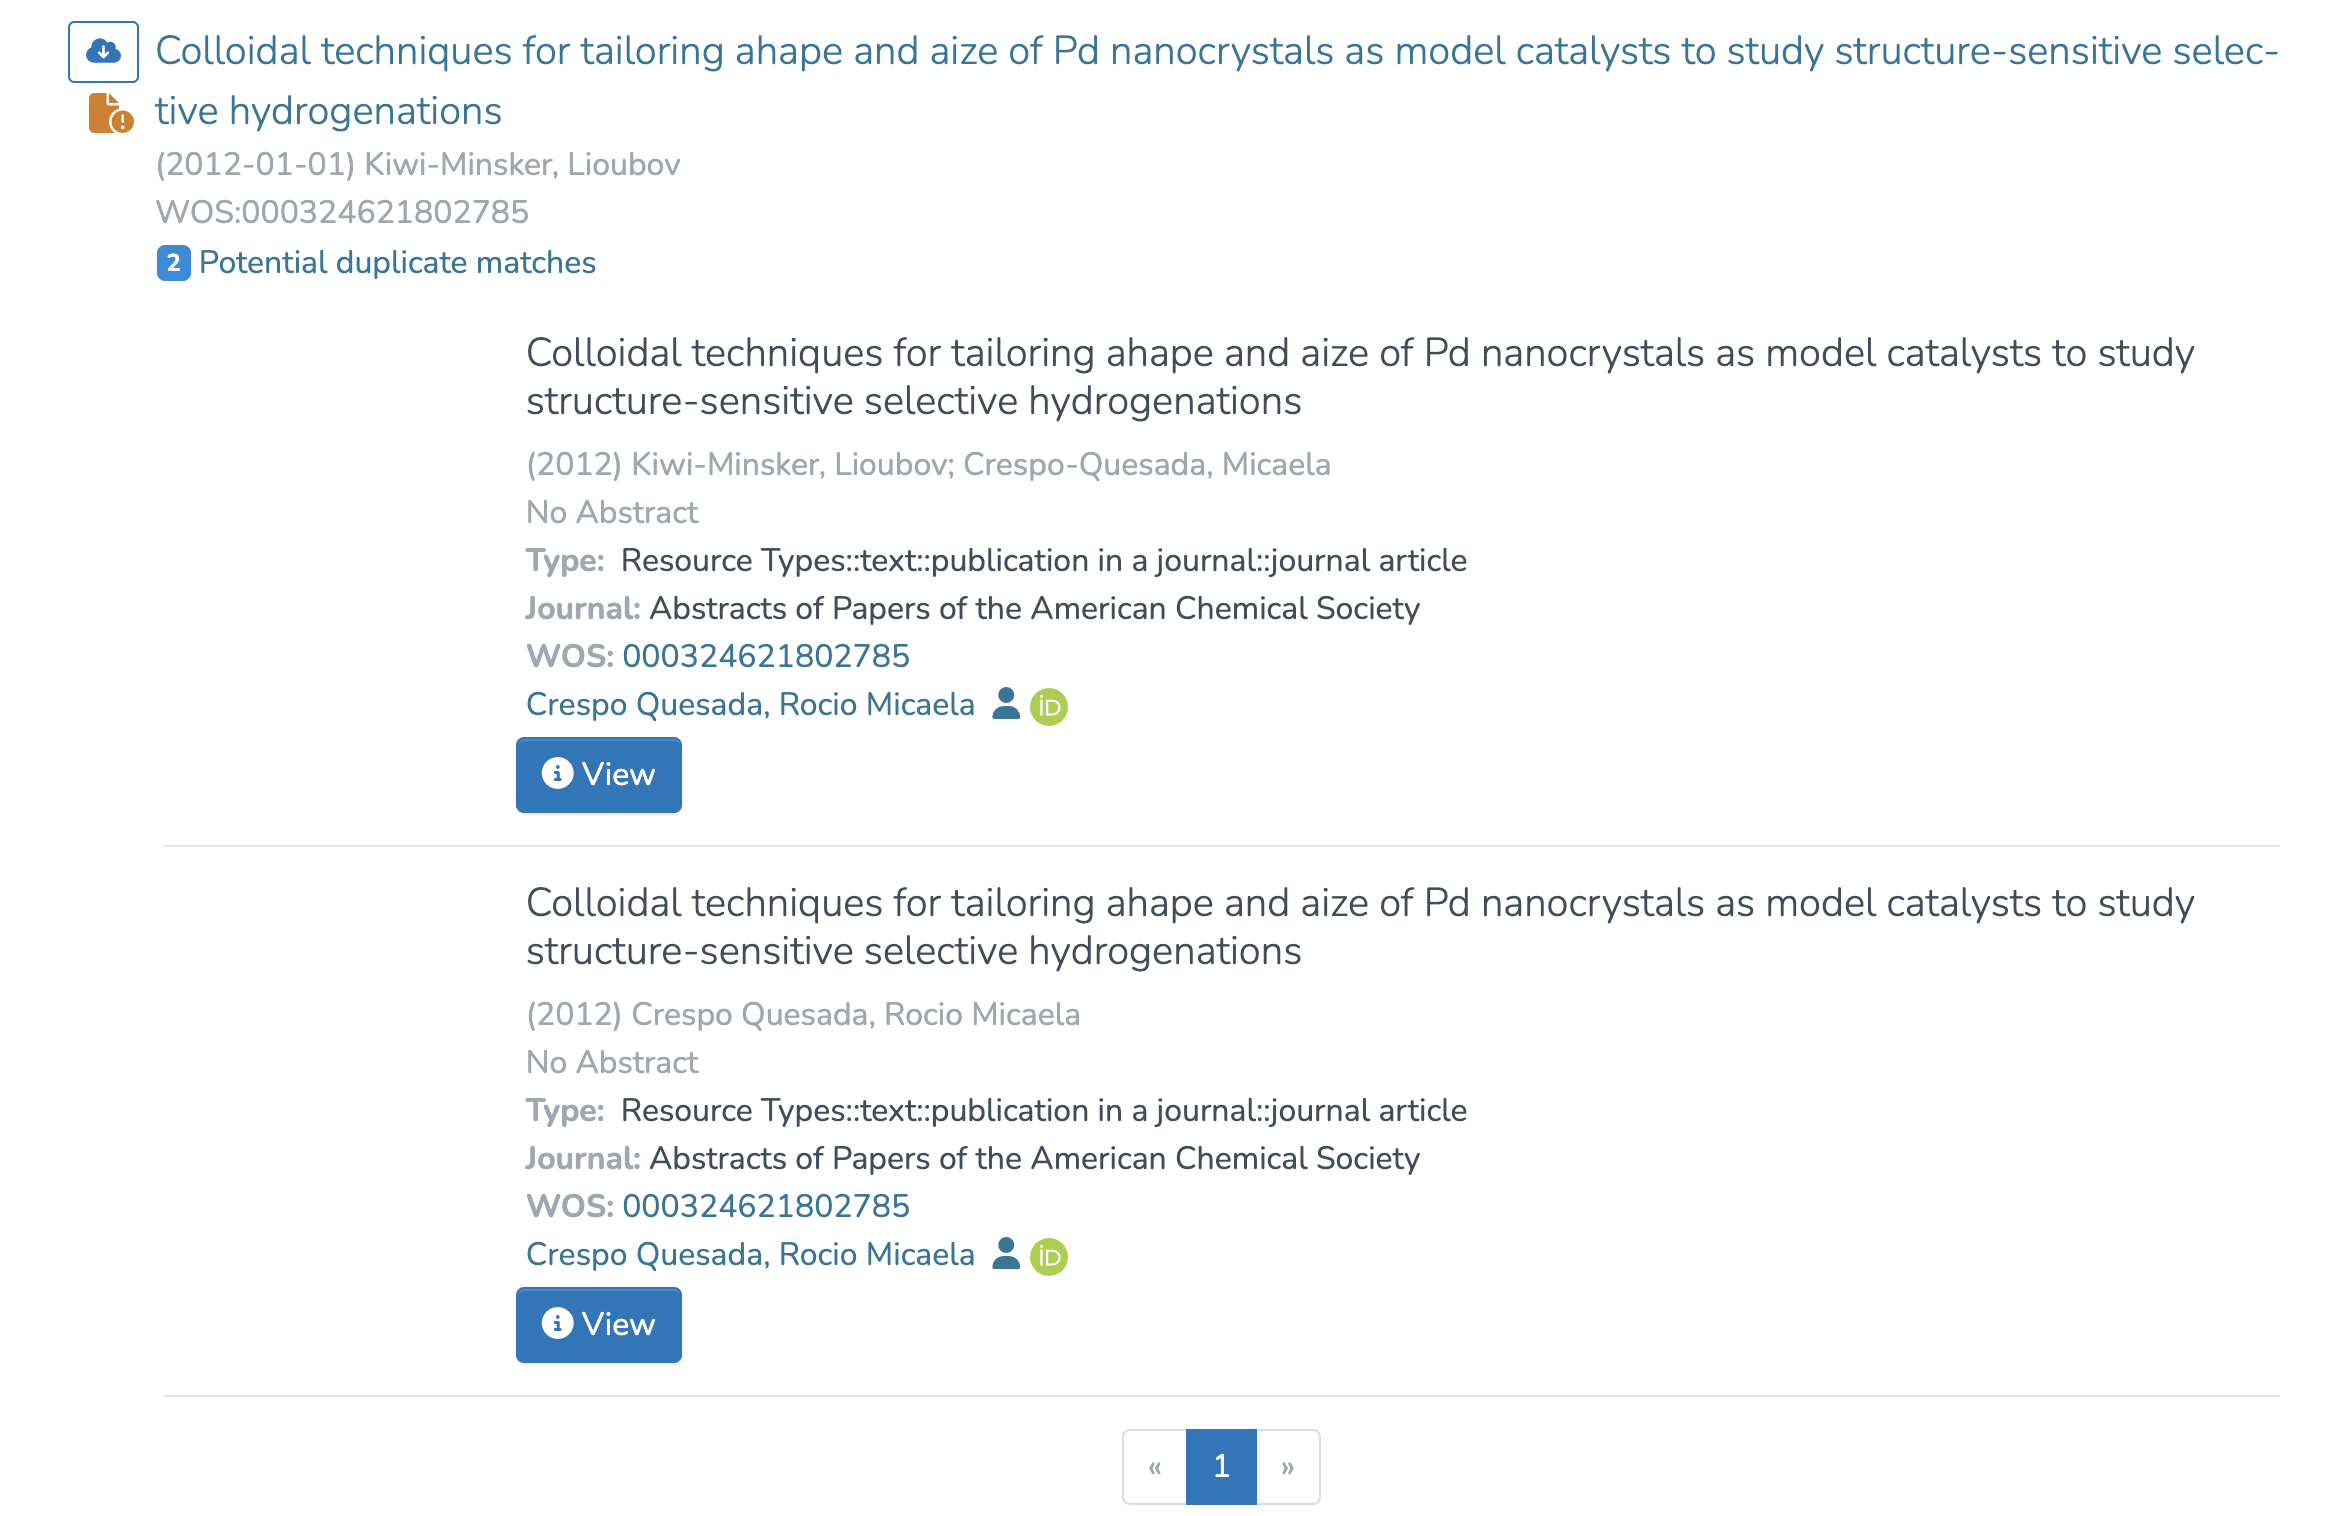
- Under each publication, you’ll find a section titled “Potential duplicate matches.”

- By clicking on it, you can view a list of publications already in IRIS that the system recognizes as possible duplicates.


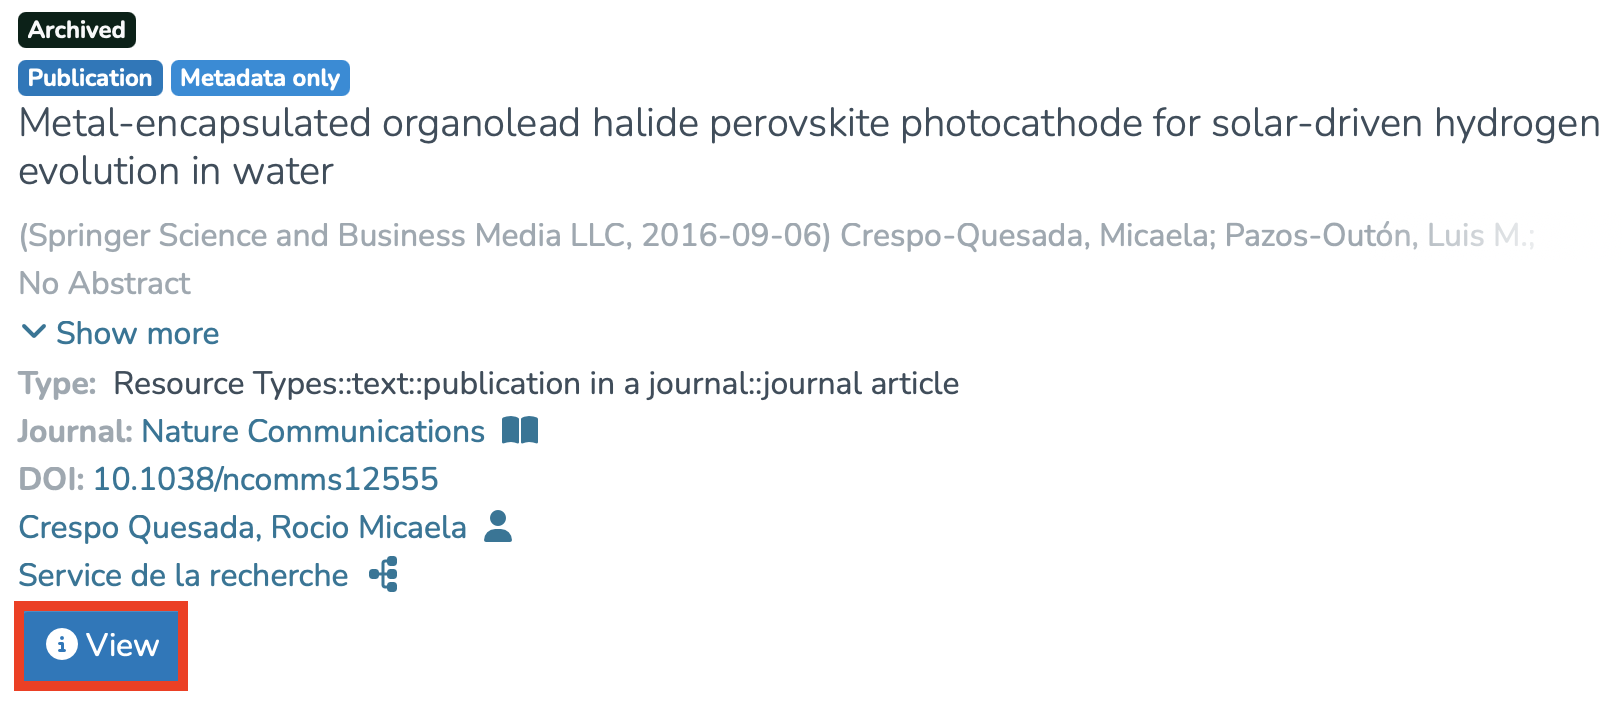
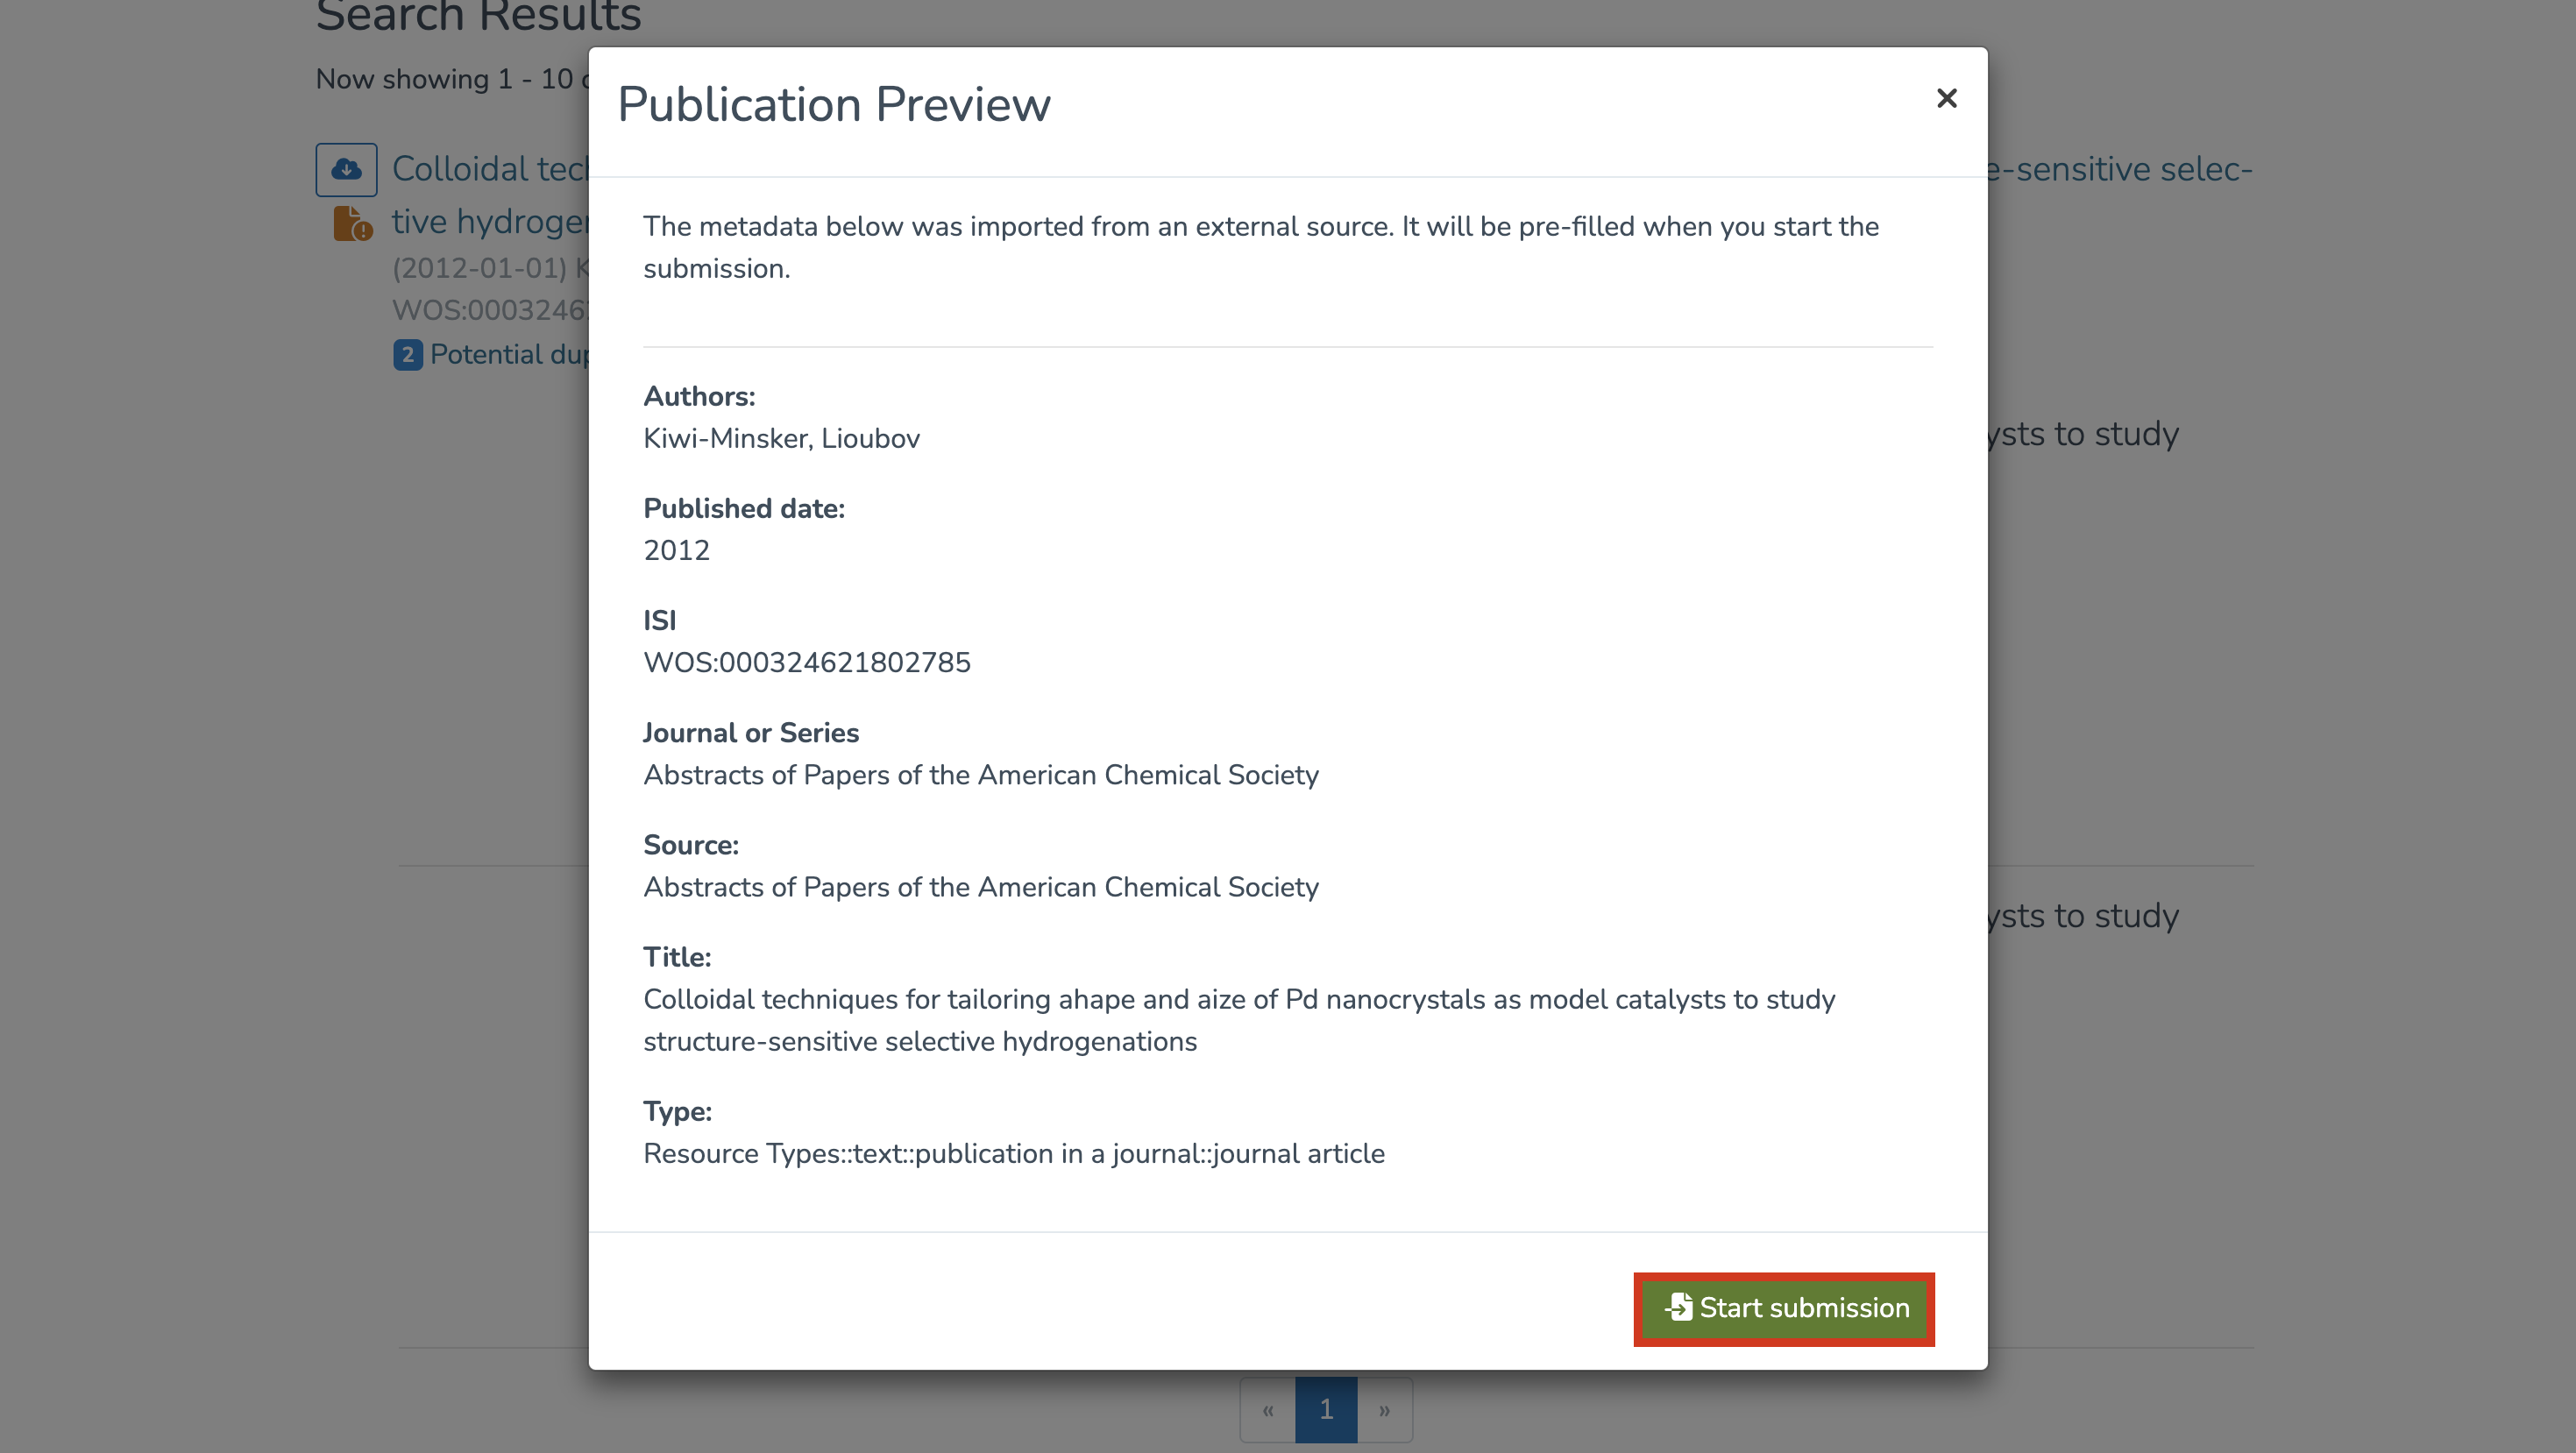
Importing a Publication
- If the publication is correct and relevant, click on the cloud icon to the left of the title.

- A window will open showing the metadata of the publication. Click on “Start submission” to continue.


- After this step, you will be redirected to your workspace, where the imported publications will appear under “Submission in progress”, in the “Records I Created” section. At this stage, you can still edit the publication before publishing it.


Advanced functionalities
Aimed at more experienced users, this section explores the powerful tools offered by IRIS to get the most out of the platform.