If you haven't logged into your email for some time and are facing issues, the documentation about our recent migration to Exchange Online is available here. The owa.unil.ch website has been phased out, and cannot be used to access your email.
This article is currently under review and going through changes. The information might be out of date or inaccurate. Do not hesitate to contact us at helpdesk@unil.ch or by phone for more information.
The macOS section has been fully updated. Its contents are now up to date, and you may follow the instructions within to access your Unil email account on macOS.
Access via web browser (Firefox, Safari, Edge, Chrome, ...)
Outlook Online
![]()
- Go to outlook.office.com
- Log in using your UNIL email address and password
- You now have access to all the functionalities provided by your Exchange account; e-mails, calendars, contacts, tasks, notes, etc.
Access by application (computers, tablets, smartphones)
 macOS
macOS
The CI recommends using Outlook instead of Apple Mail, especially for UNIL employees. Using Apple Mail on mailboxes containing more than a few thousands of emails may lead to data corruption and loss.
Outlook Exchange account setup (email, calendards, etc.)
Before starting, ensure that an up to date version of Outlook is installed. To do so, open the Outlook menu and click on About Outlook. If you are using the 2019 or 2016 version of Outlook, you will have to uninstall it and install the latest version (french).
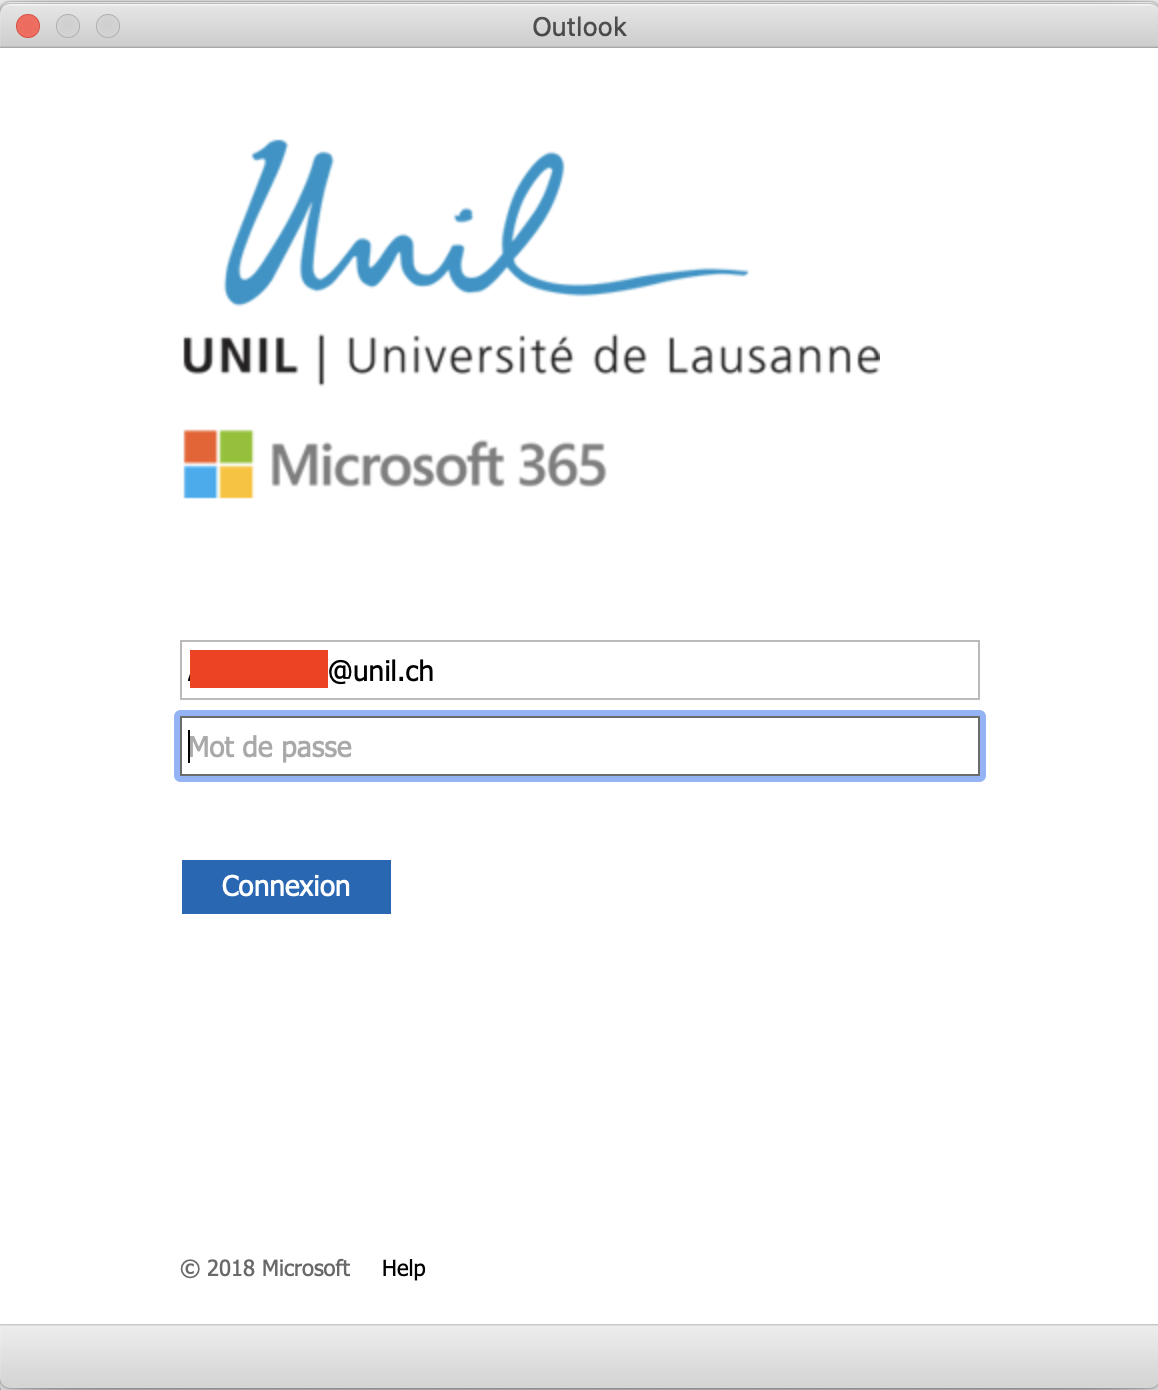
- Open Microsoft Outlook and enter your @unil.ch email address
- A window opens ans prompts you for your UNIL password
- If you have already logged into another Microsoft product, your email account should be automatically added

- If you have already logged into another Microsoft product, your email account should be automatically added
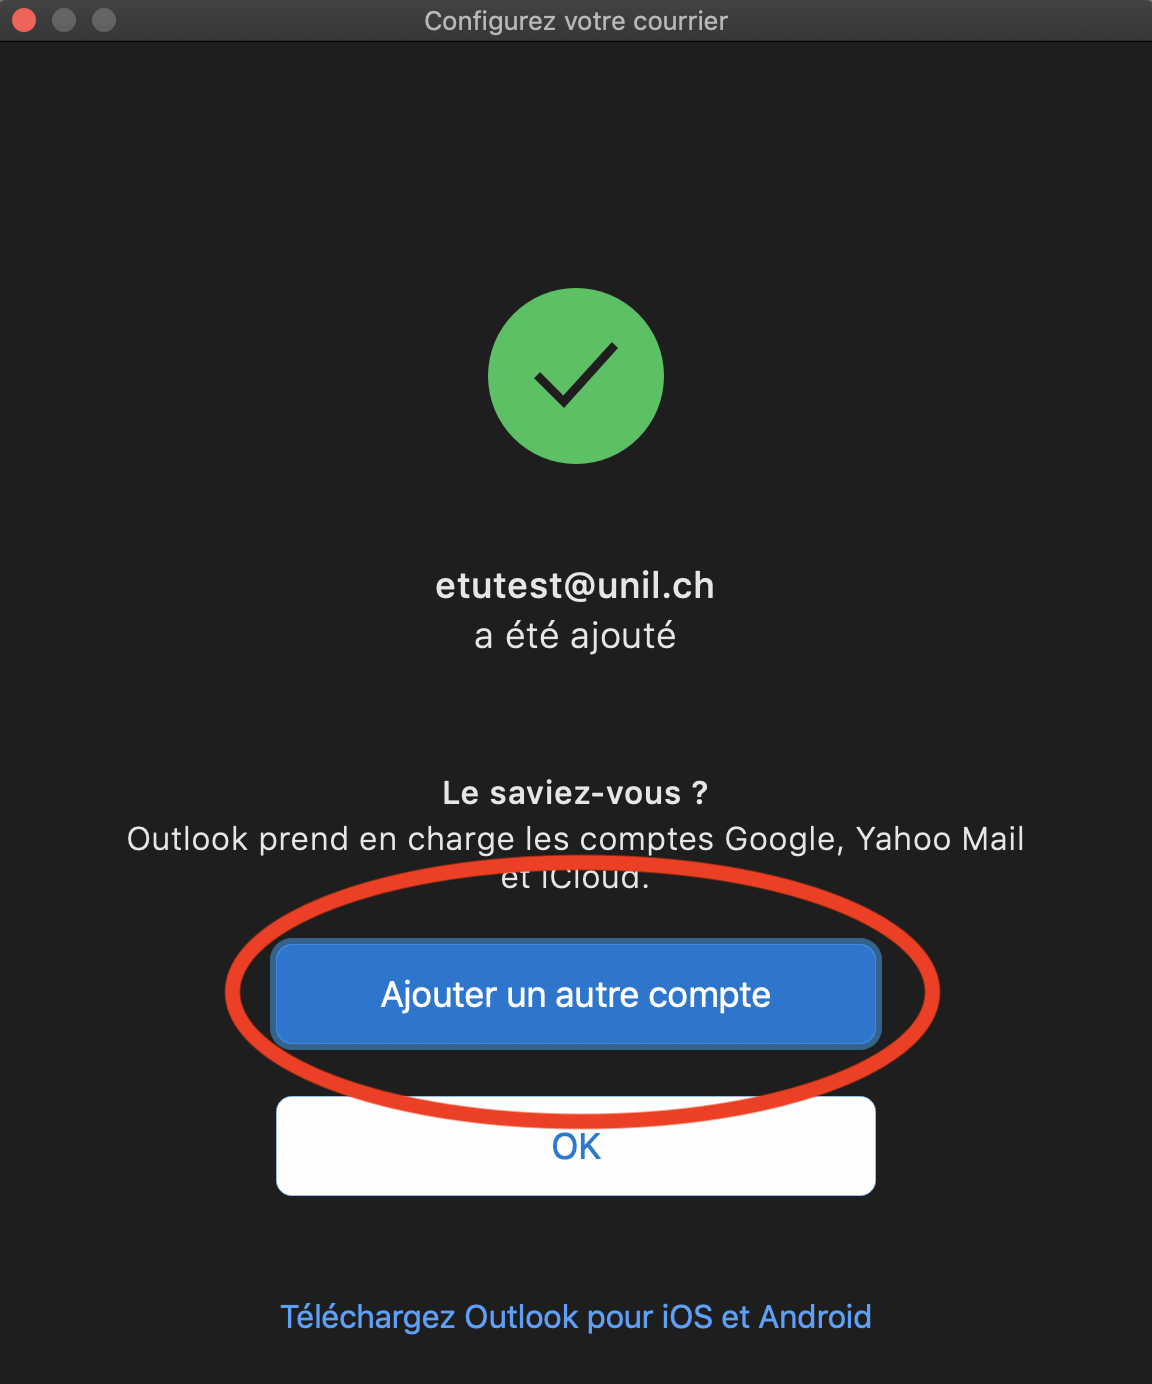
- After logging in, the email account should be automatically added and set up. You should see a confirmation window.
- If desired, you may add another email account by clicking the following button:
[Outlook] Connecting additional Exchange accounts
Before starting, ensure that an up to date version of Outlook is installed. To do so, open the Outlook menu and click on About Outlook. If you are using the 2019 or 2016 version of Outlook, you will have to uninstall it and install the latest version (french).
- Open the Outlook app
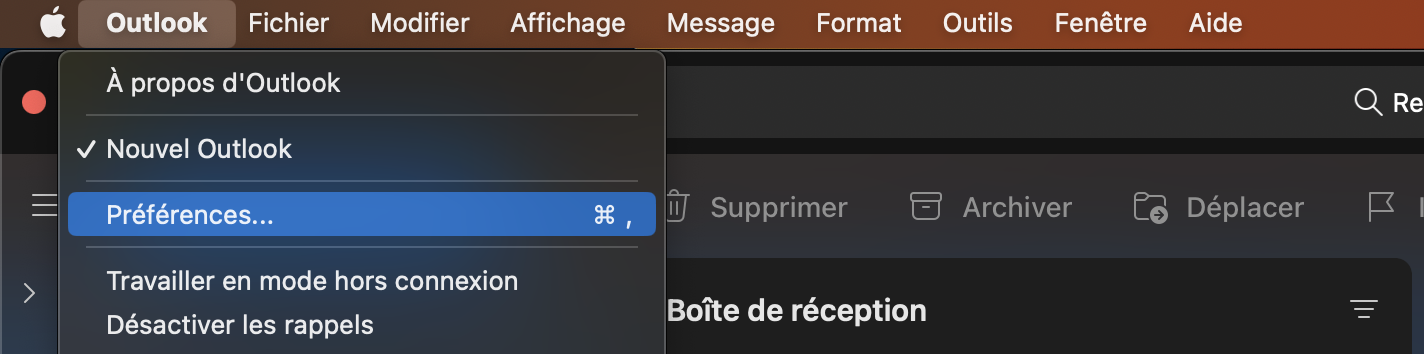
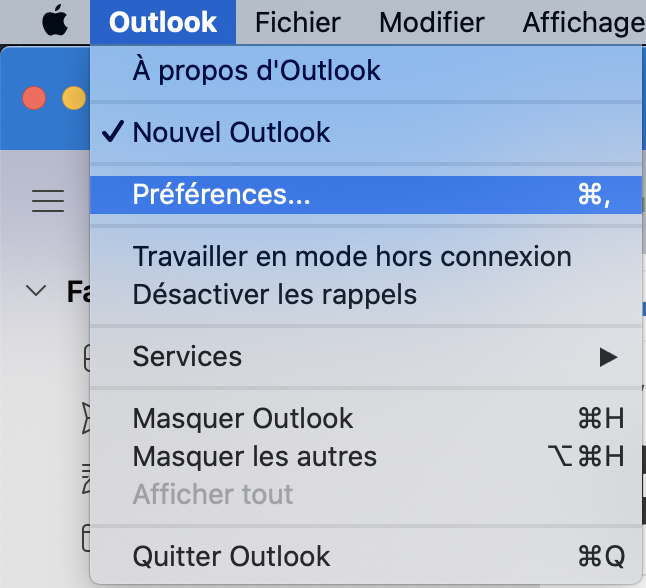
- On the top left of the display, click on the Outlook menu then Settings...
- Click on the Accounts icon
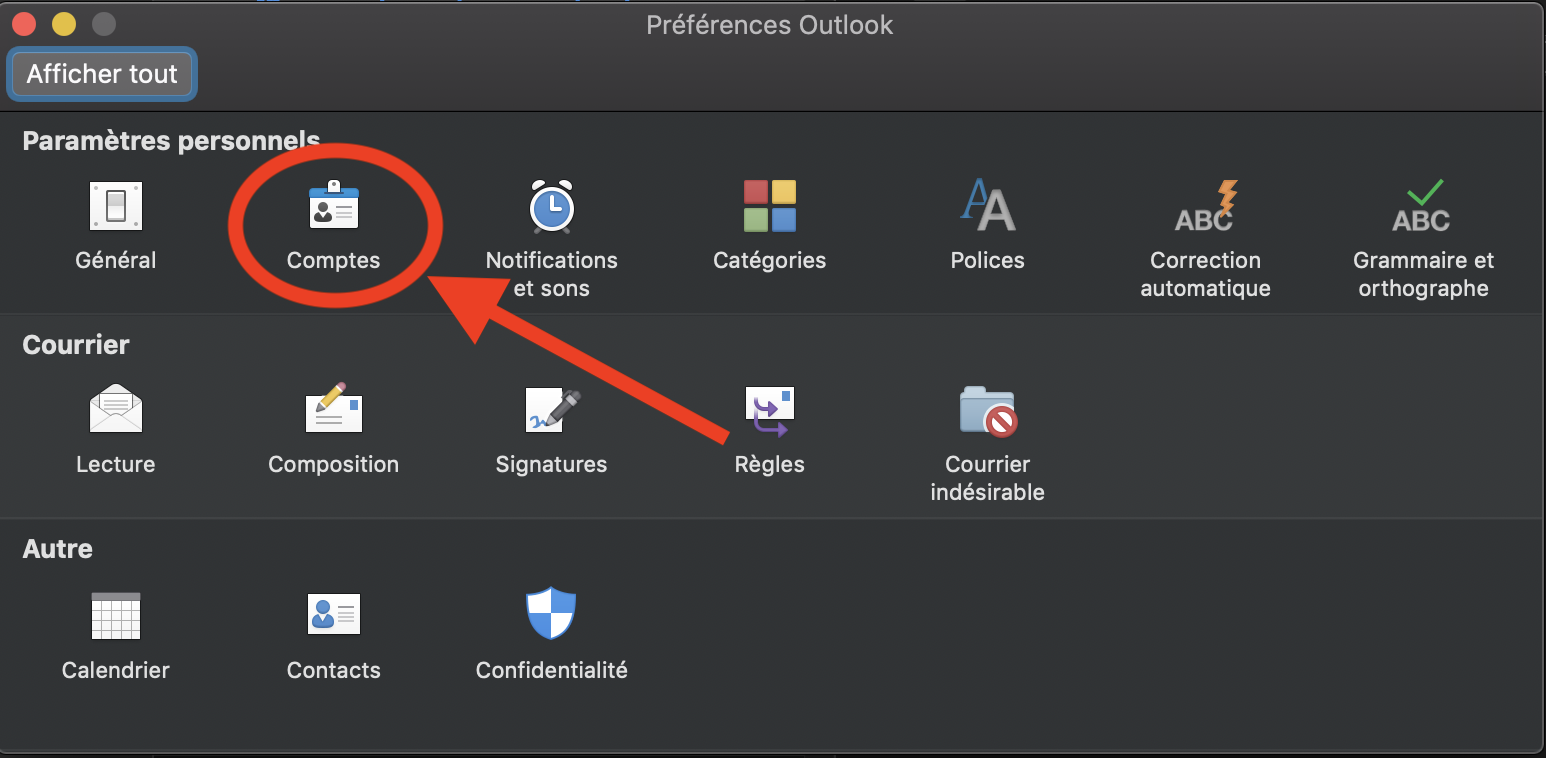
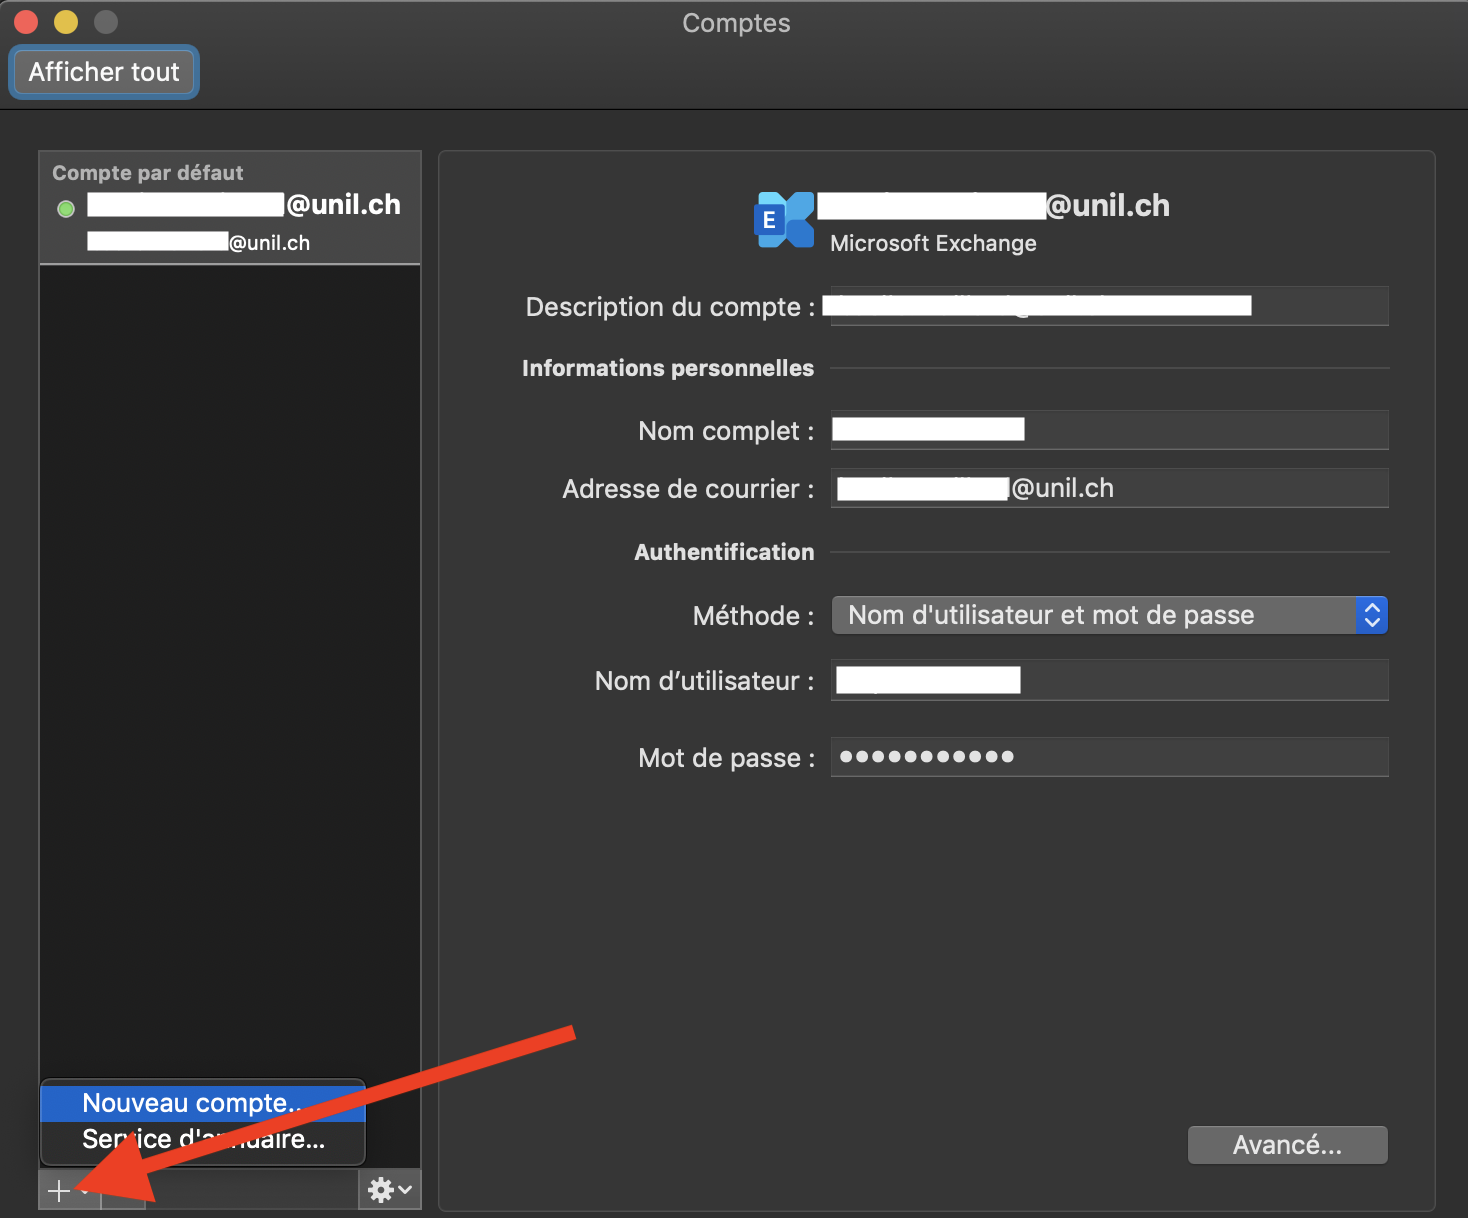
- Click on the
+symbol, then New account...
- Follow the standard Exchange account setup process referenced above
[Outlook] Add a mailbox that is shared through your Unil account
These instructions are for the newly introduced shared mailboxes that do not possess their own credentials but are instead accessed by a person's own Unil account. If you would like to add a shared mailbox with its own credentials, you can follow the procedure for standard Exchange accounts above.
Shared mailboxes cannot be added to Apple Mail. They are only available on Microsoft Outlook.
Before starting, ensure that an up to date version of Outlook is installed. To do so, open the Outlook menu and click on About Outlook. If you are using the 2019 or 2016 version of Outlook, you will have to uninstall it and install the latest version (french).
- Open the Outlook app
- On the top left, click on Outlook right next to the Apple icon, then Settings...
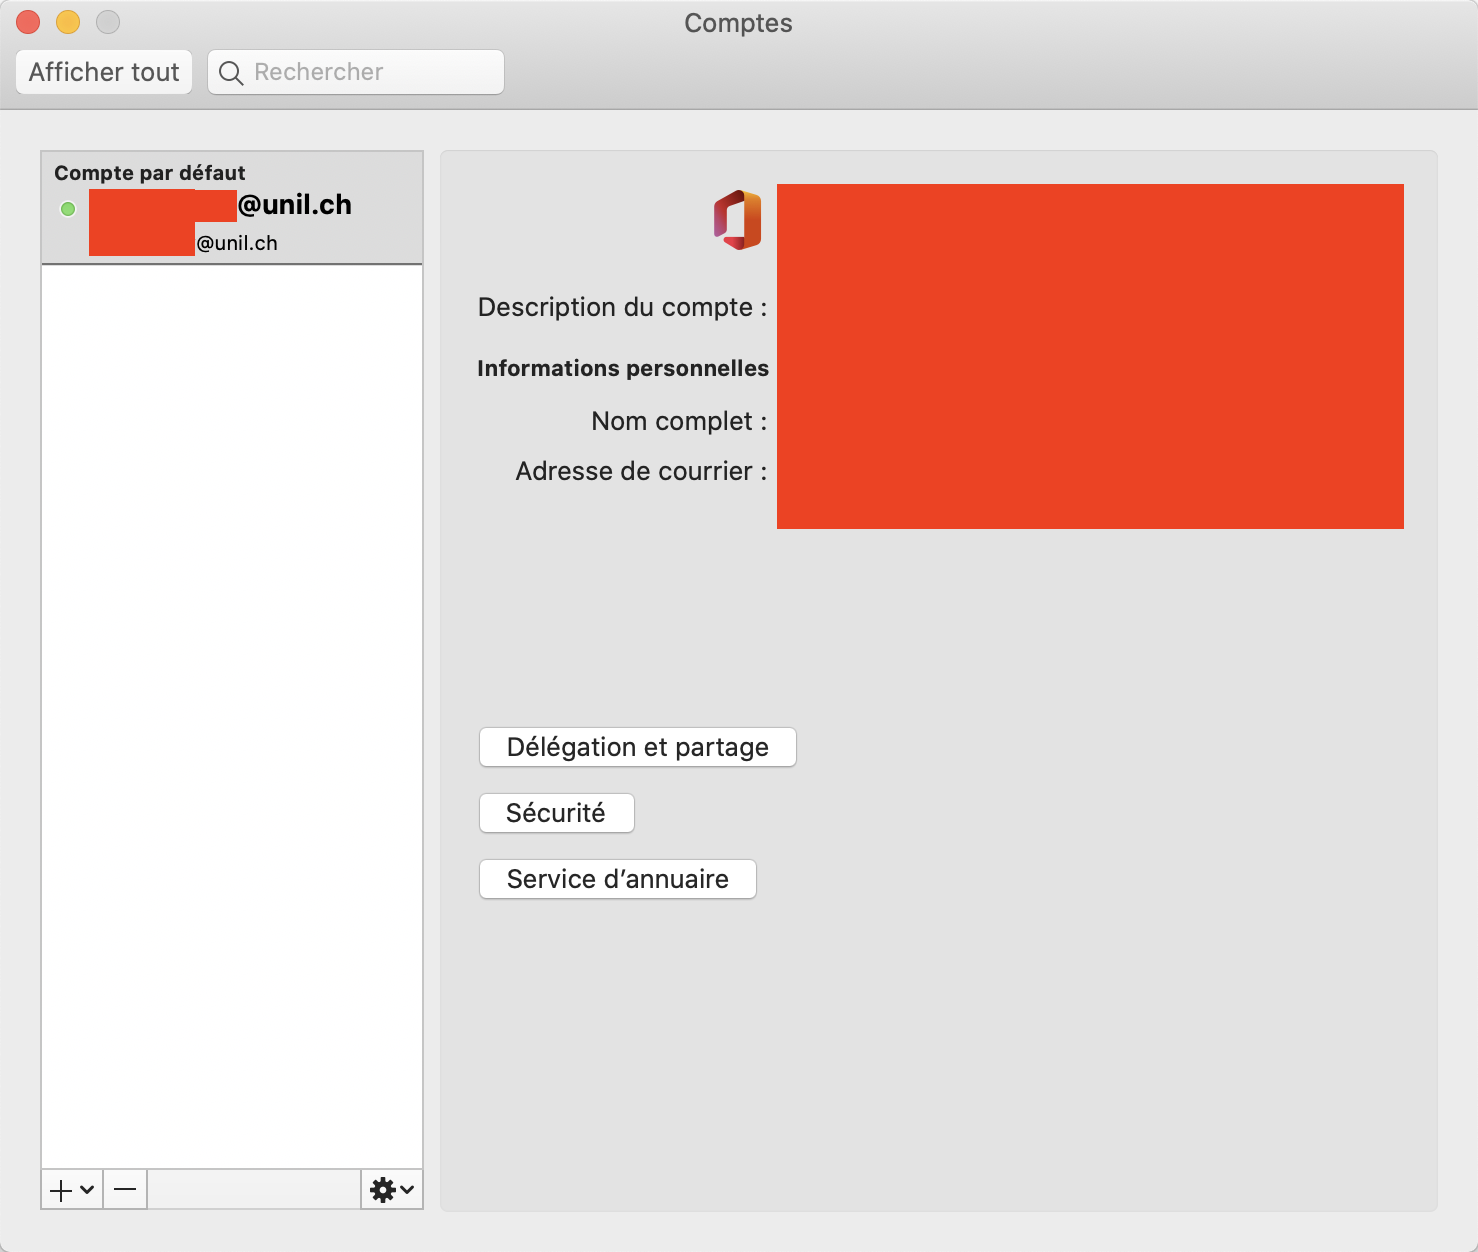
- Select your personal account in the list on the left, then click on Delegating and sharing

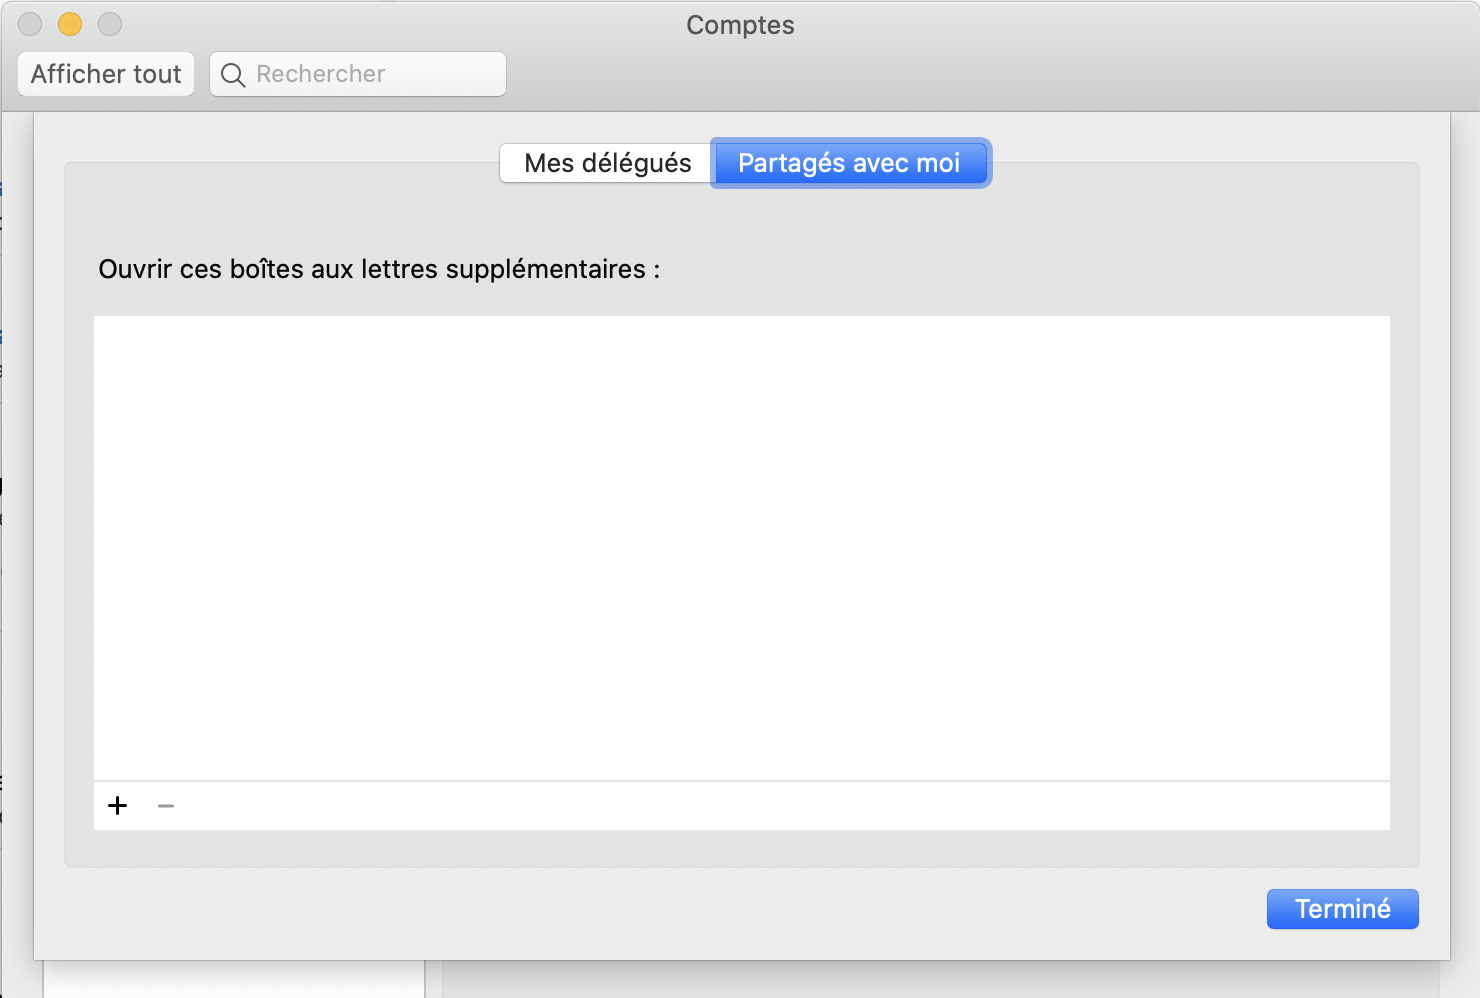
- Open the Shared with me tab and click on the
+on the bottom left
- Write the name of your shared mailbox in the search field. For example, if you would like to add
boite-mail-partagee@unil.ch, look forboite-mail-partagee) and double-click it - The shared mailbox should now appear in Outlook's main window.

If an error message pops up, please check with the person reponsible for the mailbox that your permissions have been granted properly then wait a moment before trying again. If the problem persists, please reach out to the helpdesk.
Apple Mail
[Apple Mail] Connecting an Exchange account
- Open the Mail app
- On the top left, click on Mail then Accounts...
- Select Exchange
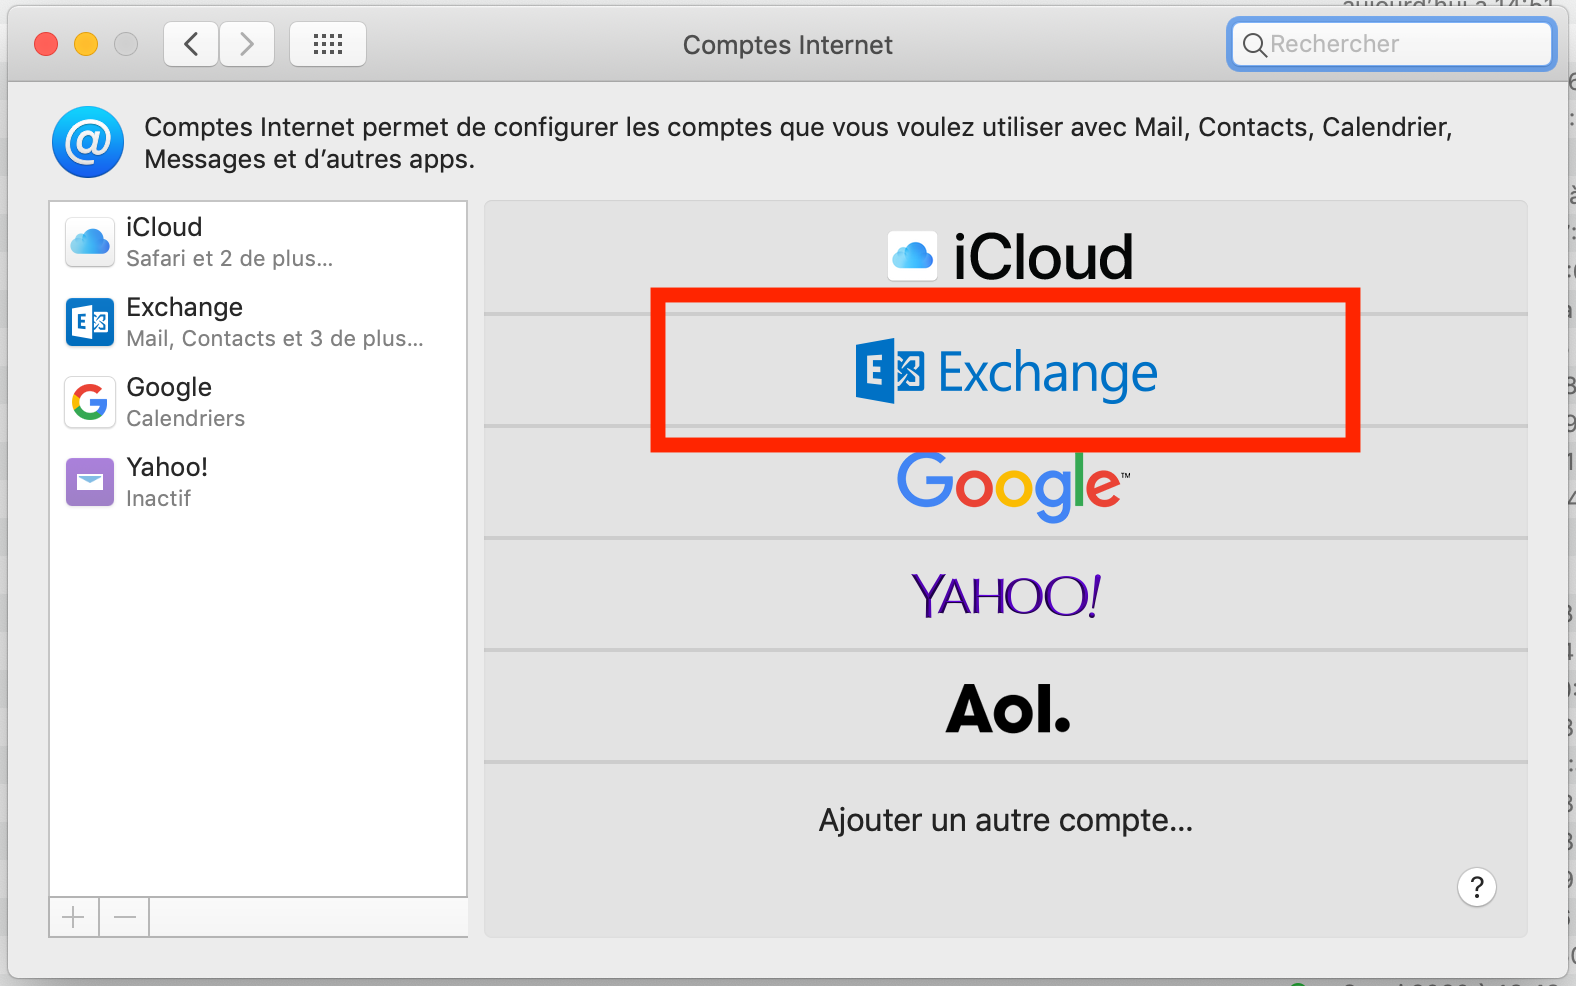
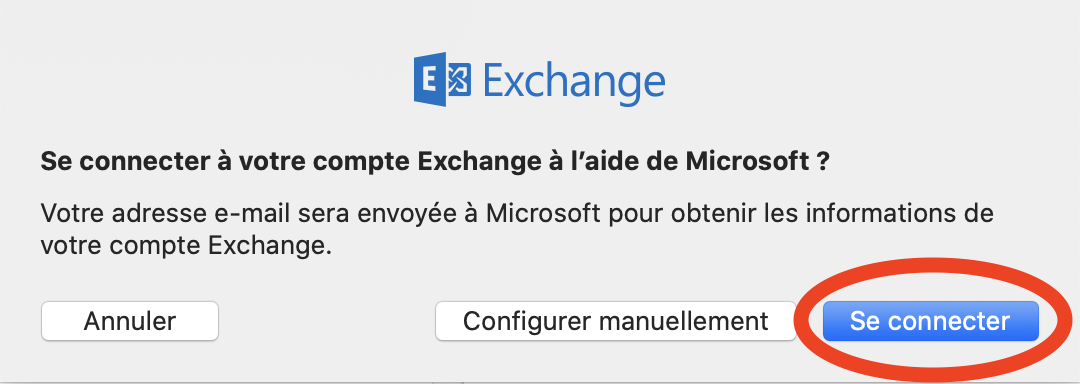
- Fill in the Name and e-mail address fields, then click on the blue button
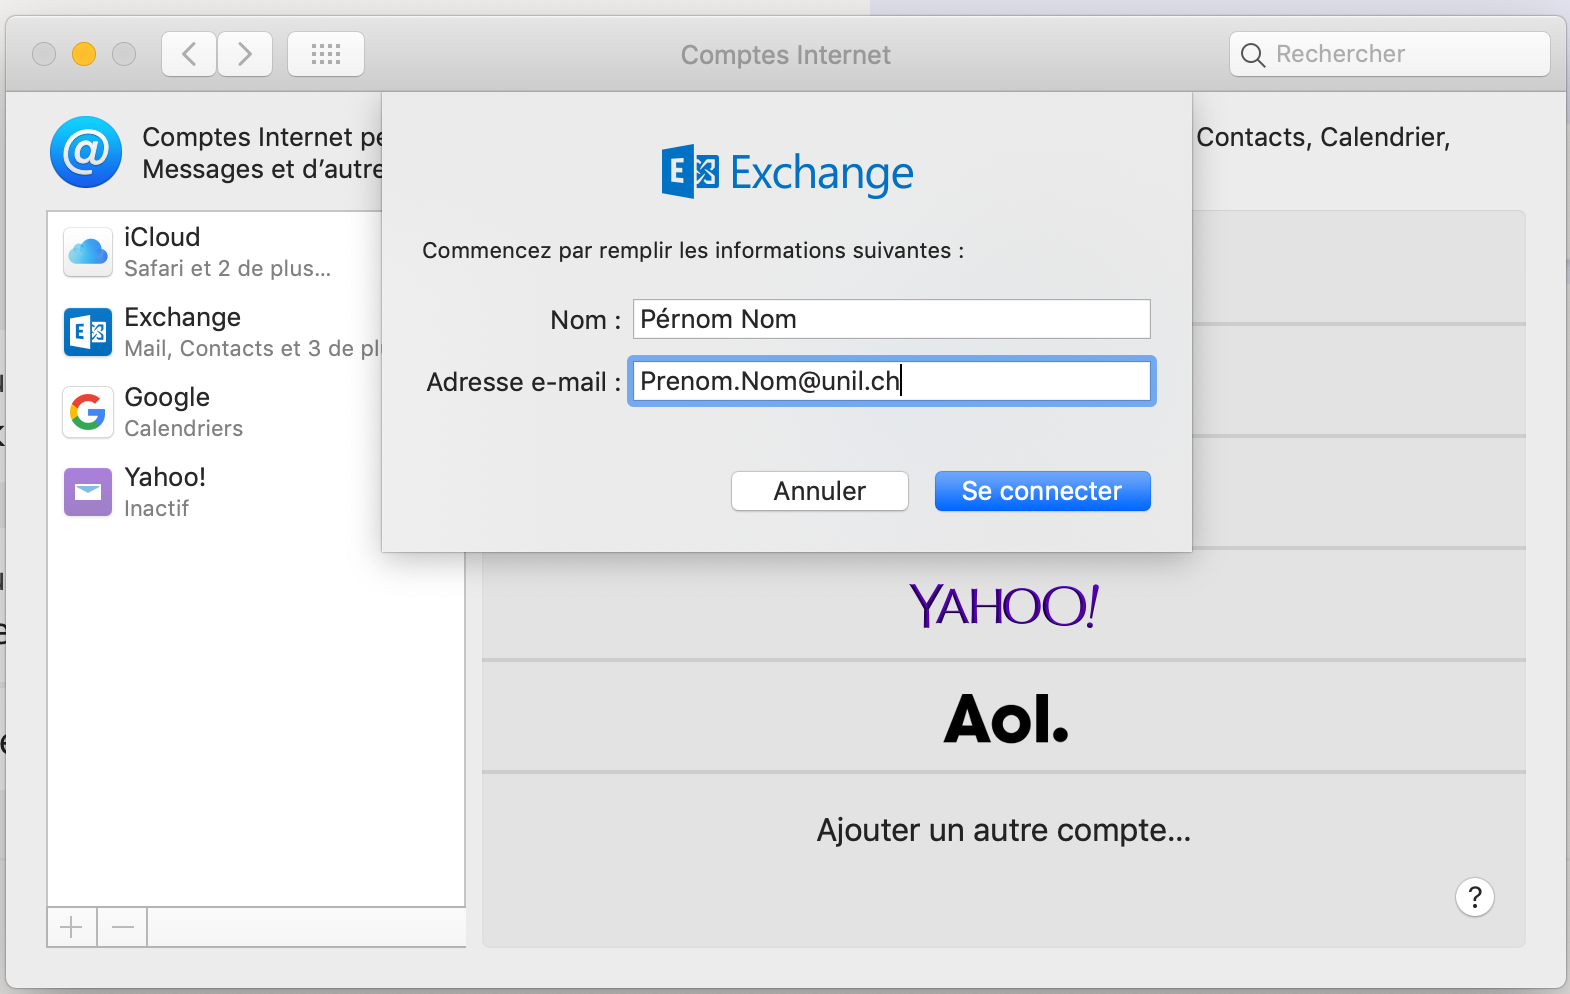
- Select the blue button again. Manual configuration does not work since the migration to Exchange Online.

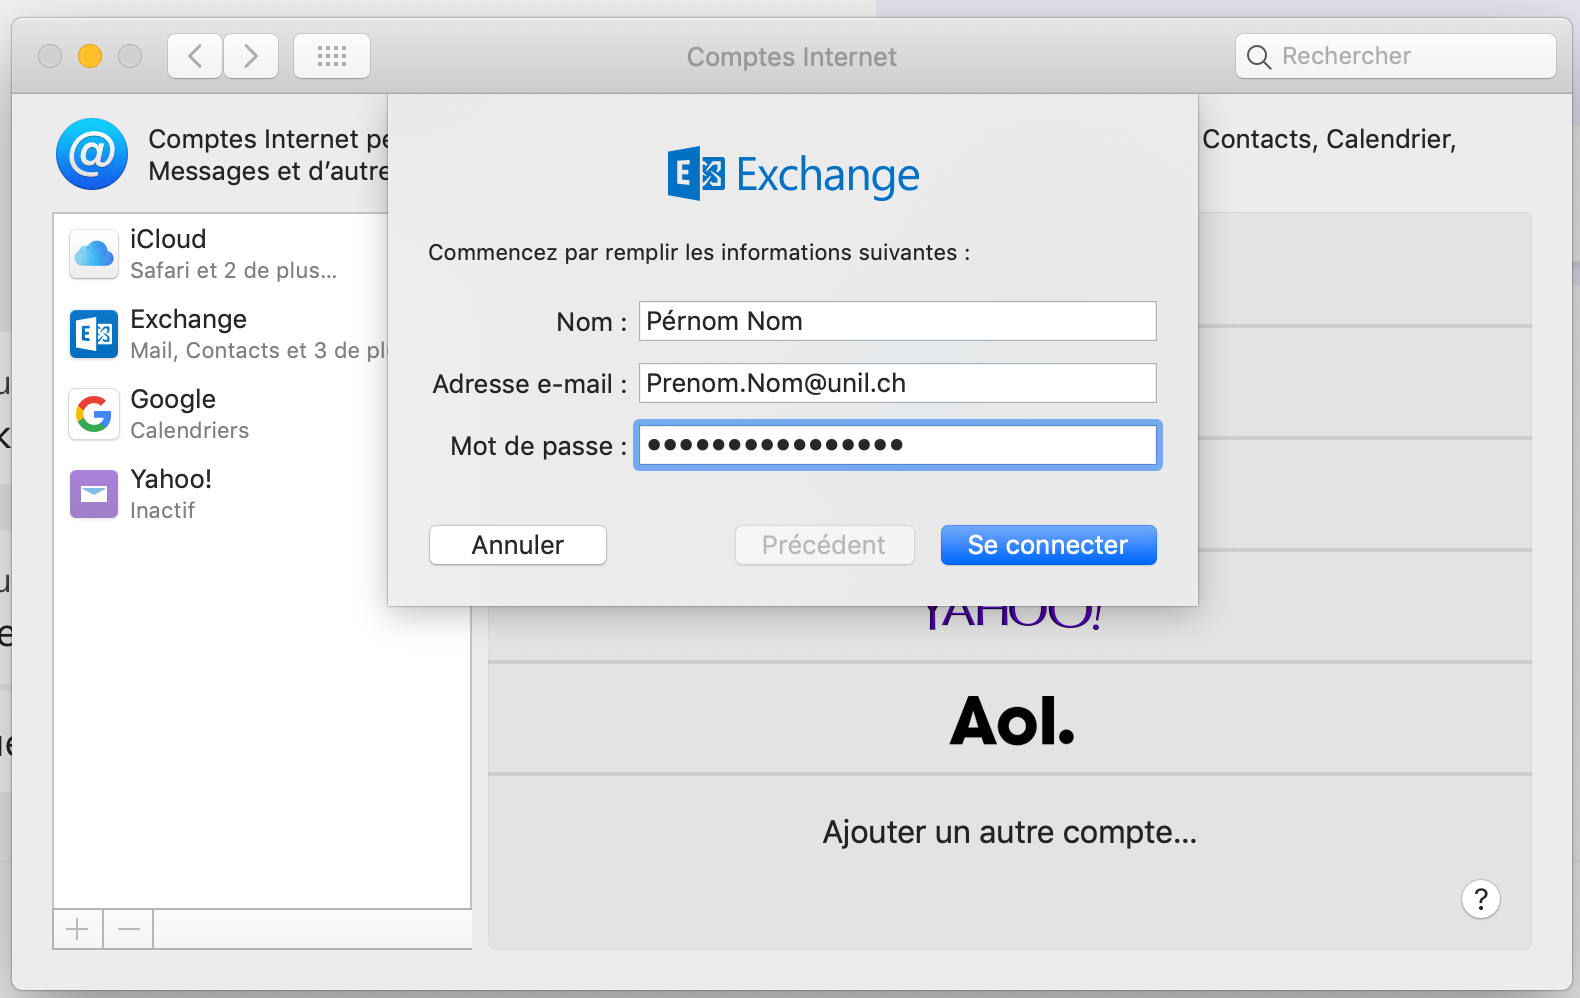
- Enter your Unil account password, then continue
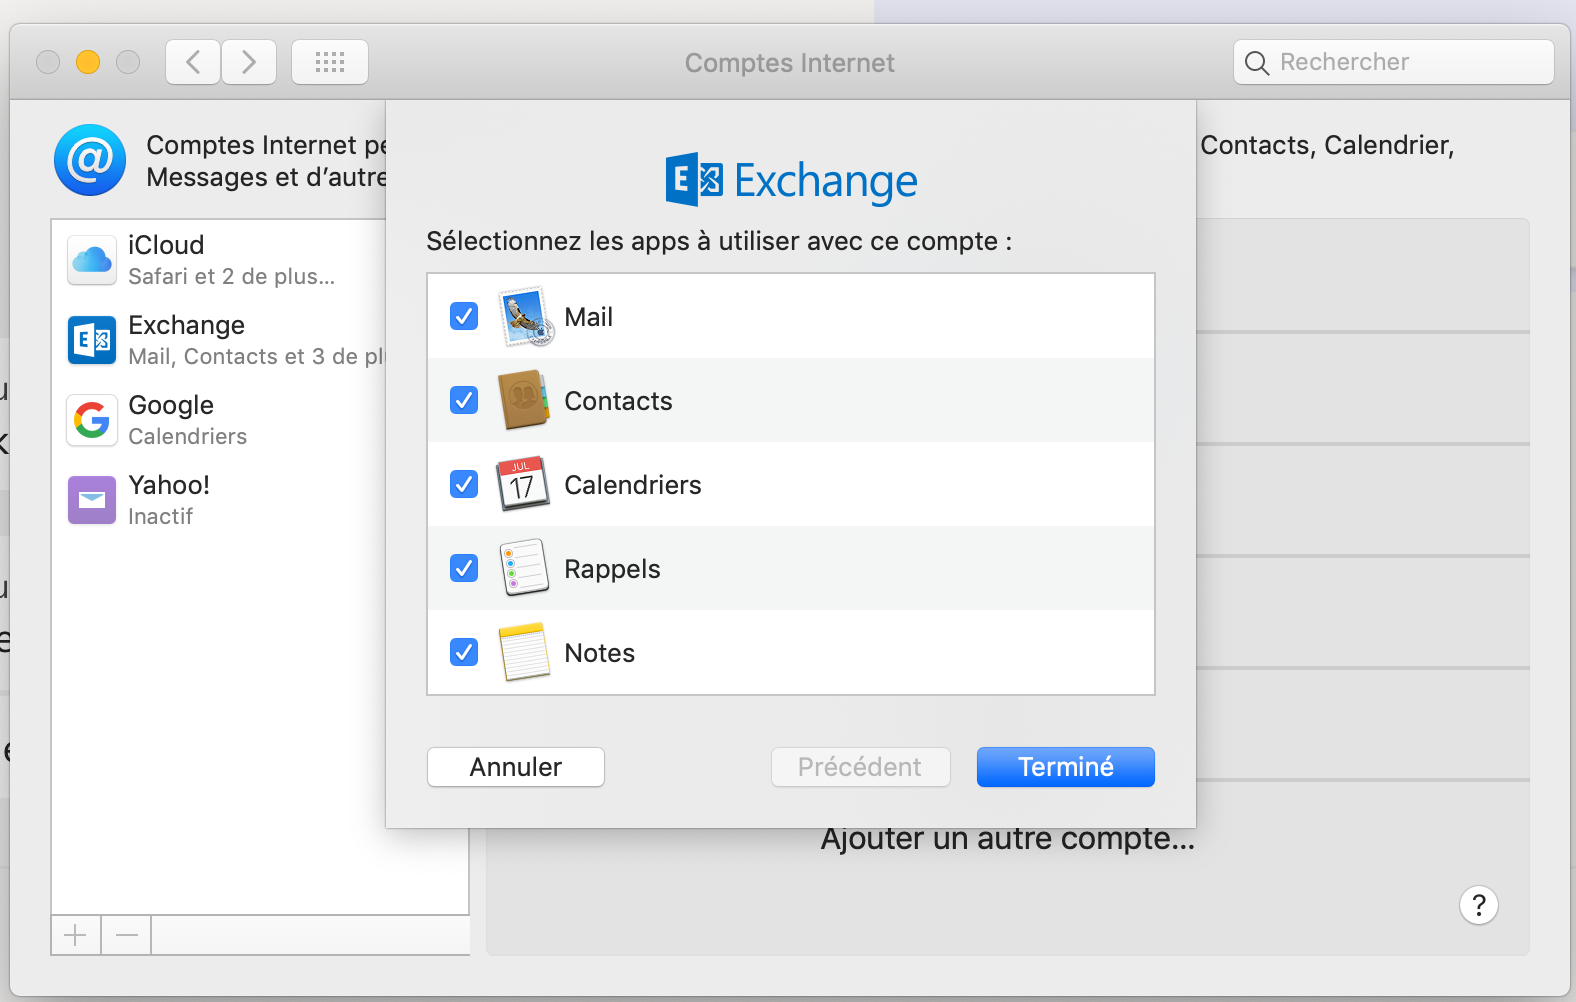
- Select the Exchange services you would like to enable, then click on Finish


[Apple Mail] Archiving emails on macOS
- Open the Mail app
- Click on the
+button on the bottom left of the main window, then select New mailbox...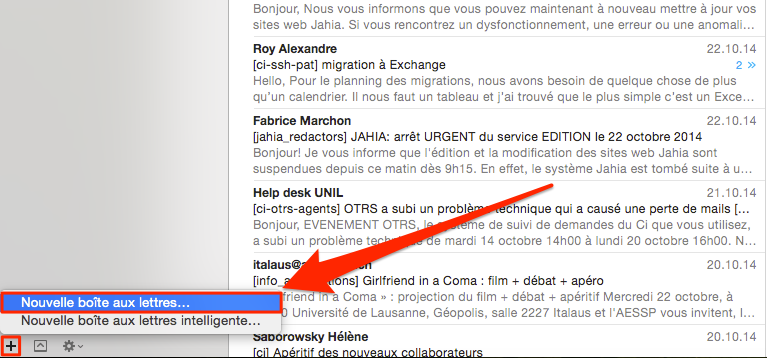
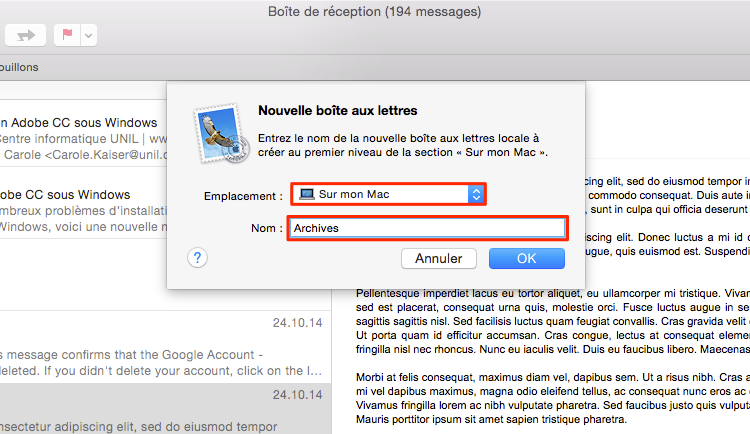
- Under Location, select On my mac. Under Name, type in something like "Archives" and click on OK
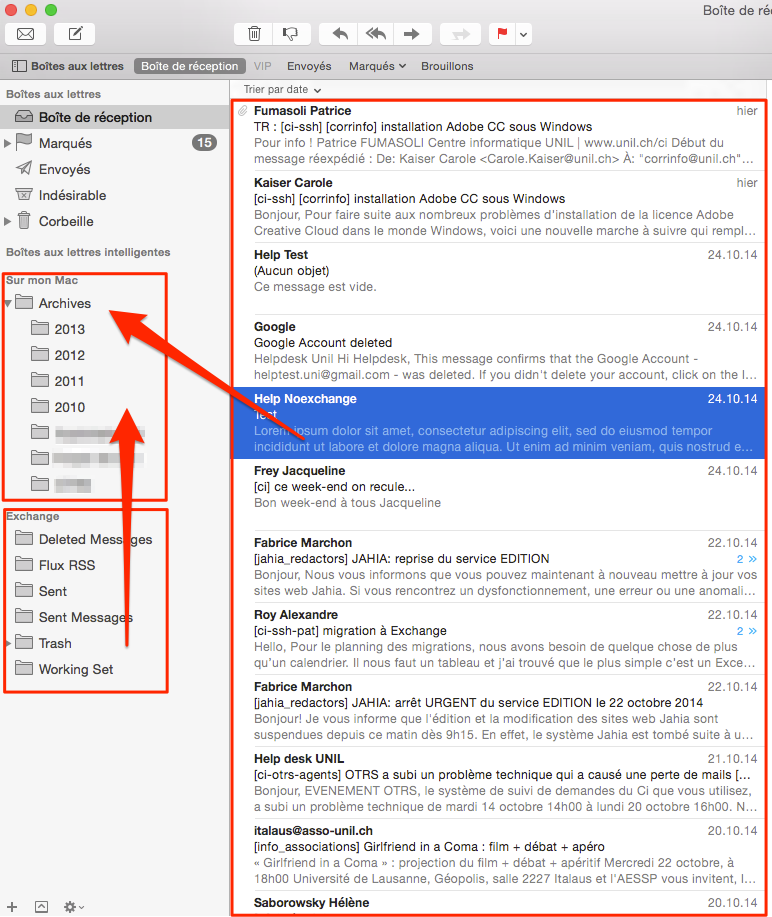
- Move emails or mailboxes from your Exchange account into the new Archives mailbox
Do not move more than a thousand emails at a time. Doing so might cause loss of data and potential mailbox corruption. Do call the helpdesk if you are feeling unsure or have sudden doubts about what you are attempting to do.
Windows
This part of the article is severely outdated. We are working on updating it.
- Outlook configuration
- calendars
- address book
- reminders
- notes
- How to archive e-mails on Windows
Outlook configuration
The Ci strongly recommends the use of Outlook.
1. Open Outlook
2. Go to the “File” menu and click on “Add an account”
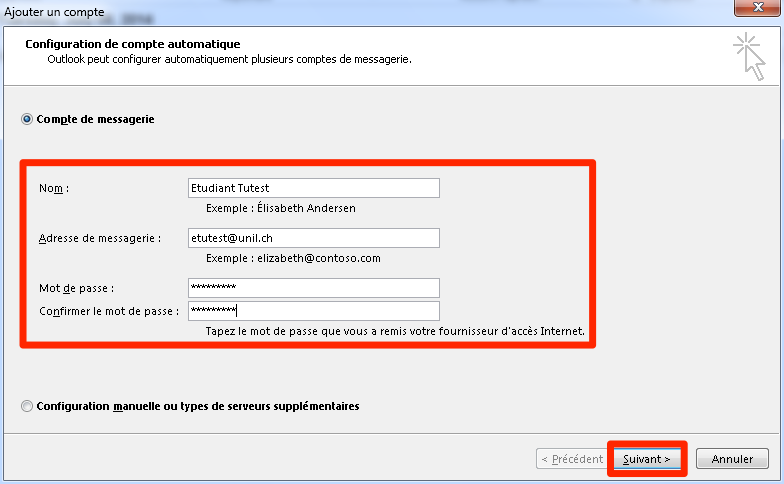
3. Fill in the fields with the required information (name, e-mail address, password and confirm password) and click “Next”
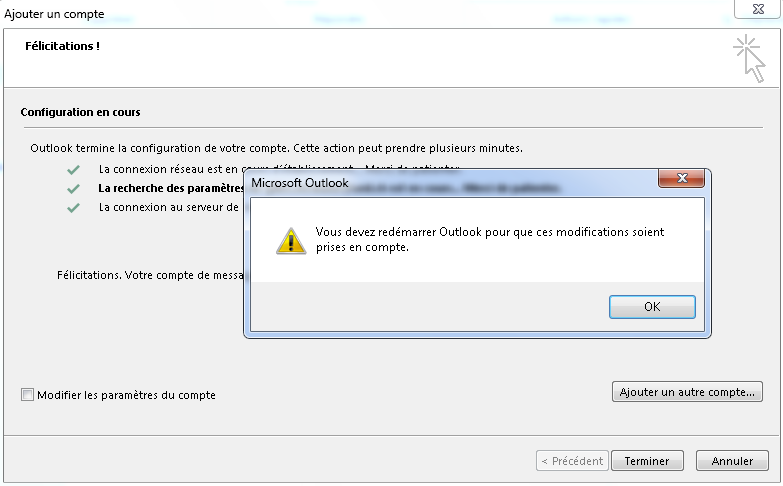
4. Click “End” once the automatic configuration is done
5. Restart Outlook
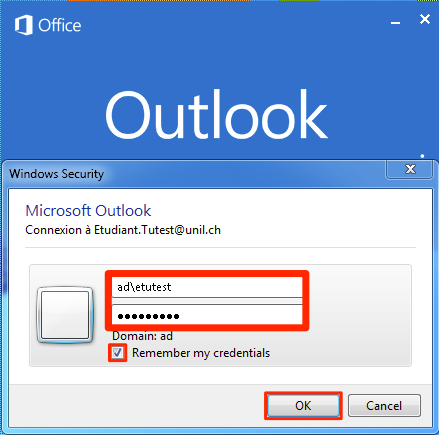
6. When Outlook launches itself an authentication window will appear; enter your username as “ad\username” and your password
7. Check the “Remember my credentials” box and click on “OK”
How to archive e-mails on your Windows computer
- Open Outlook
- Go to "File"
- Click on "Account Settings" and "Account Setings..."
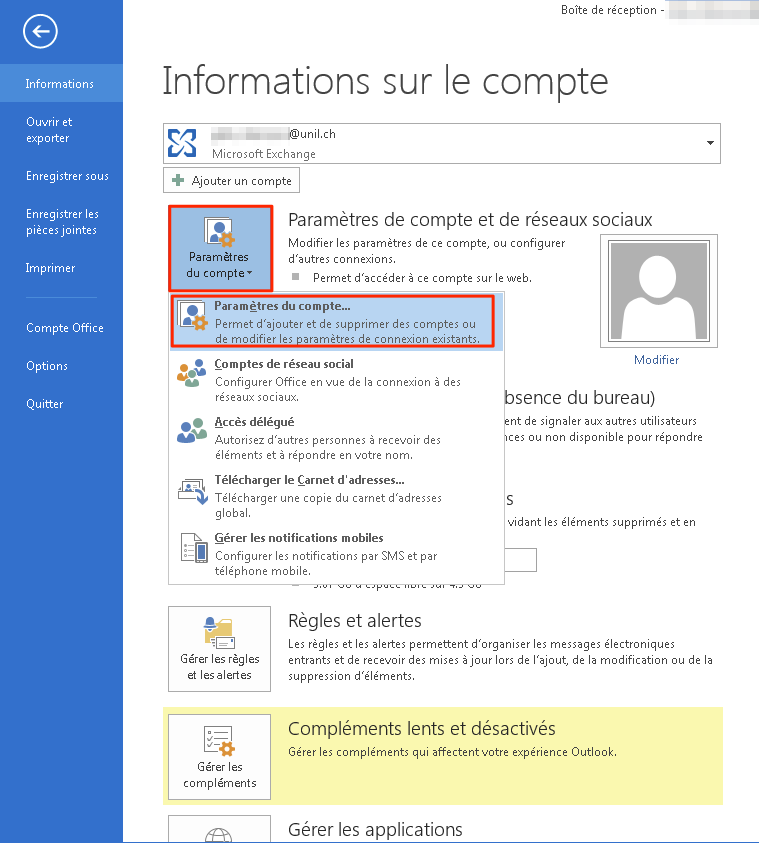
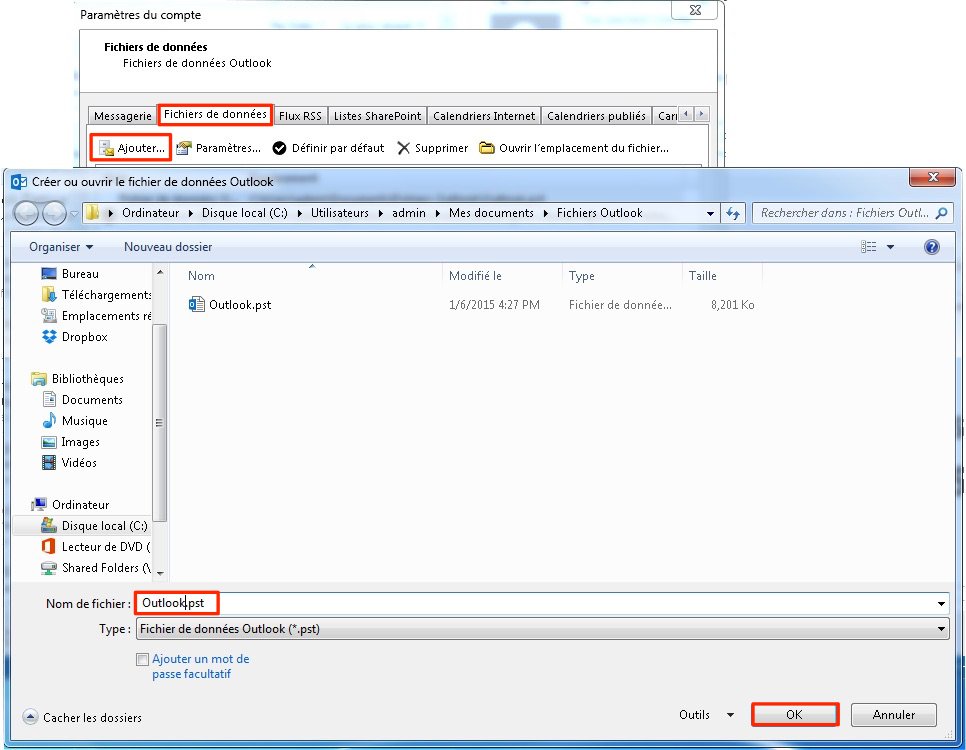
- Click on "Data Files" and "New..."
- Enter a file name and click on "OK"
- Go back to your e-mail
- Right click “Outlook Data File,” and select “New Folder…”
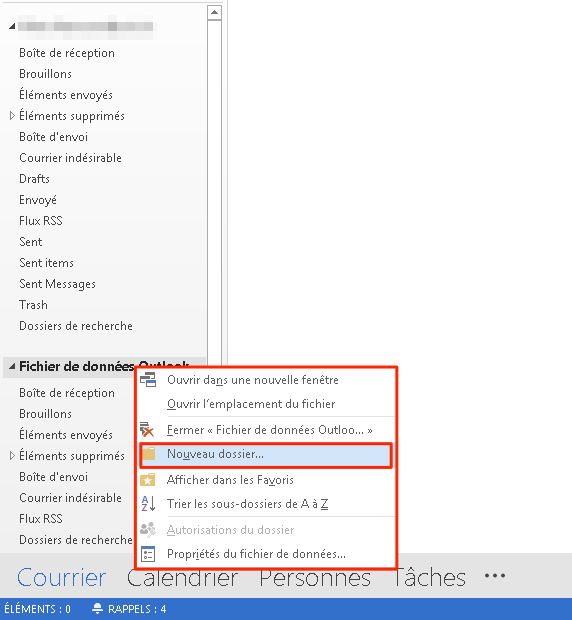
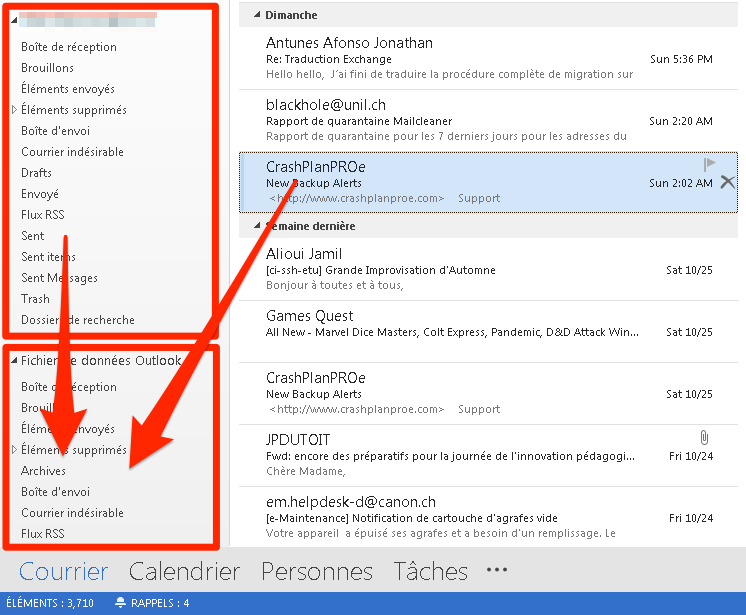
- Name the local folder “Archive,” for example
- Move messages or entire mailboxes from your UNIL Exchange account by dragging and dropping them to your new local archive mailbox.
iOS (iPhone/iPad/iPod Touch)
- iOS configuration
- calendars
- address book
- reminders
- notes
iOS configuration
The Ci strongly recommends the use of the native iOS apps.
For security reasons, the Outlook app for iOS is blocked on our servers. You can find more information here (in French).
1. Go to “Settings”
2. Choose “Mail, Contacts, Calendars”
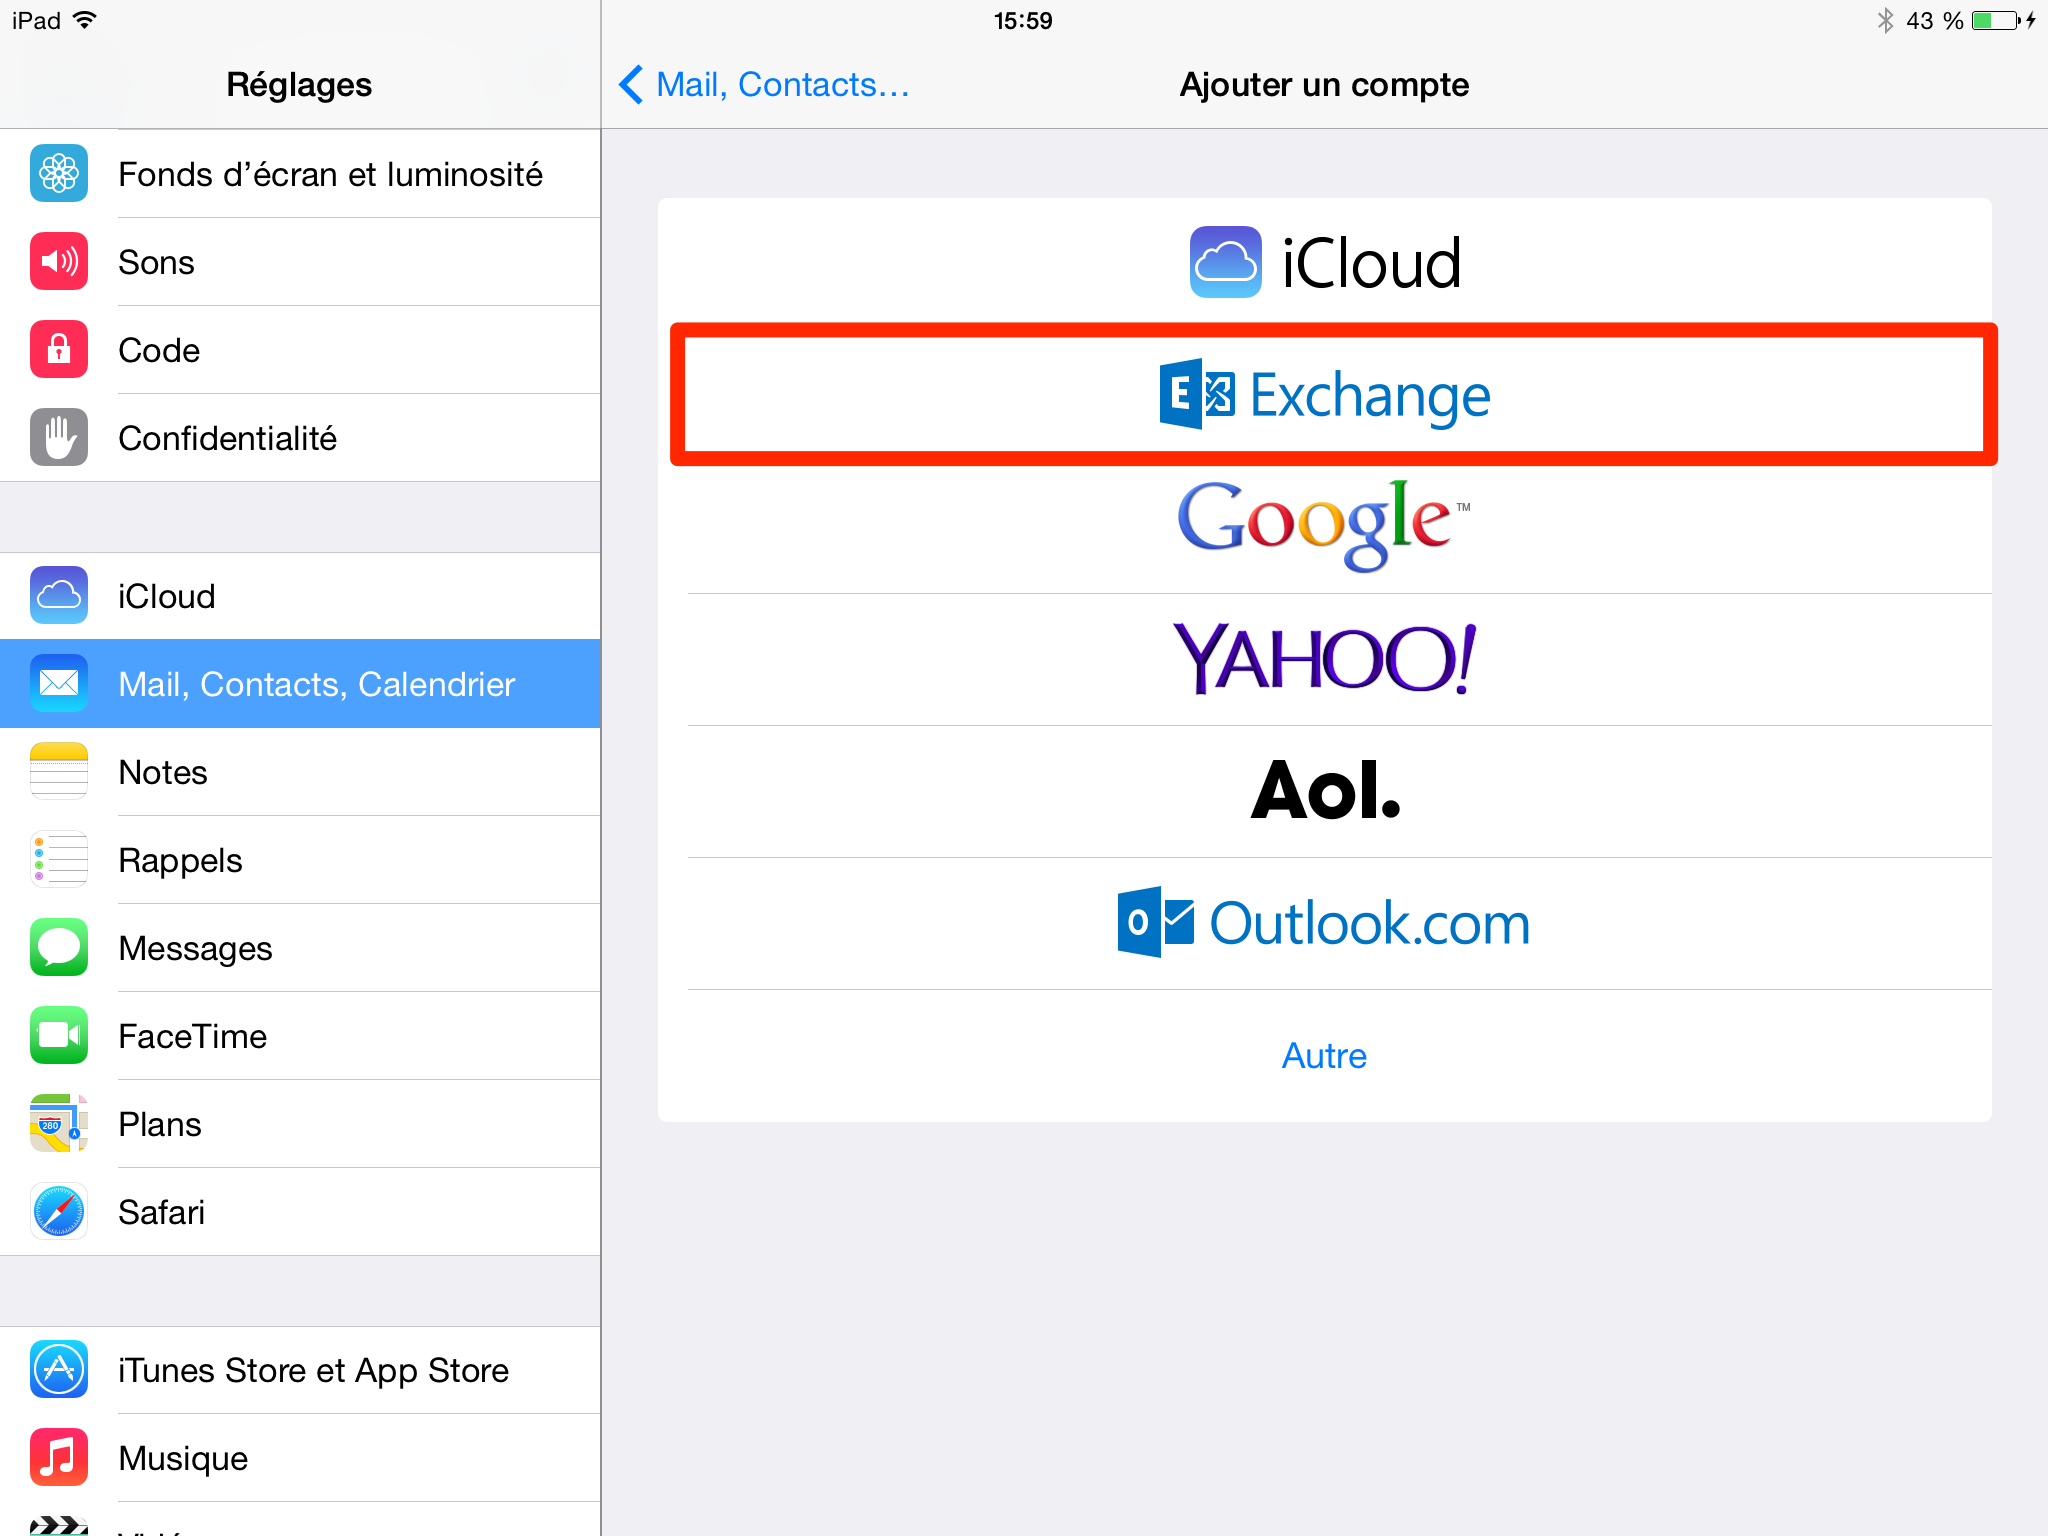
3. Click on “Add Account”

4. Click the “Exchange” icon
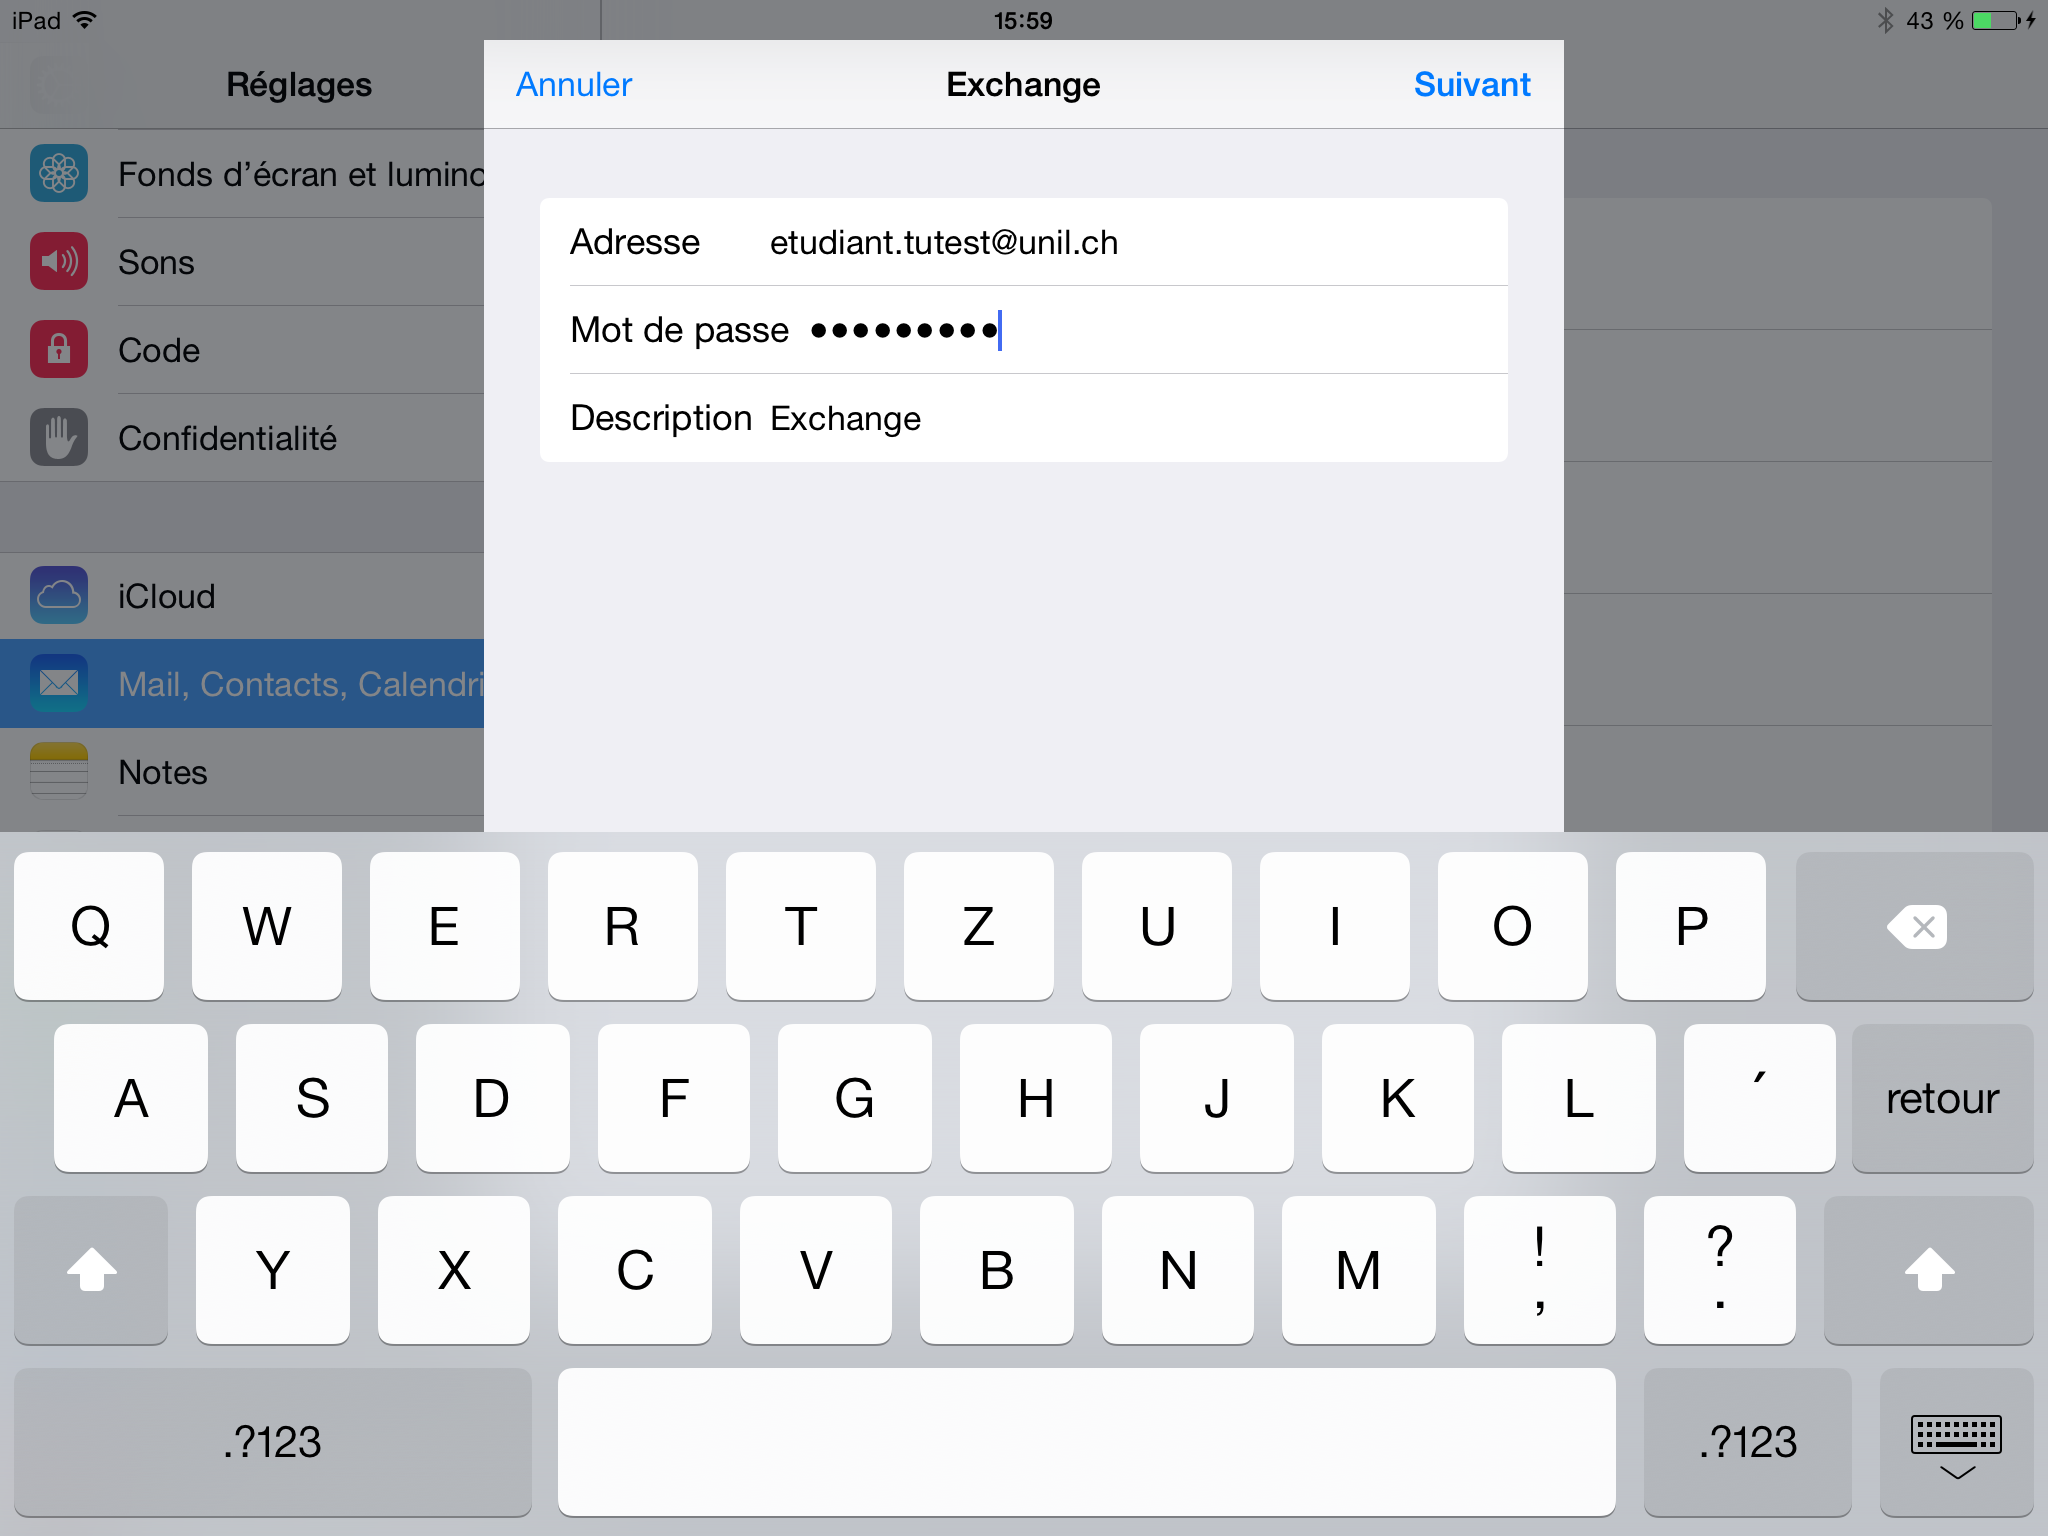
5. Fill in the fields with the required information (address, password and description) and click on “Next”
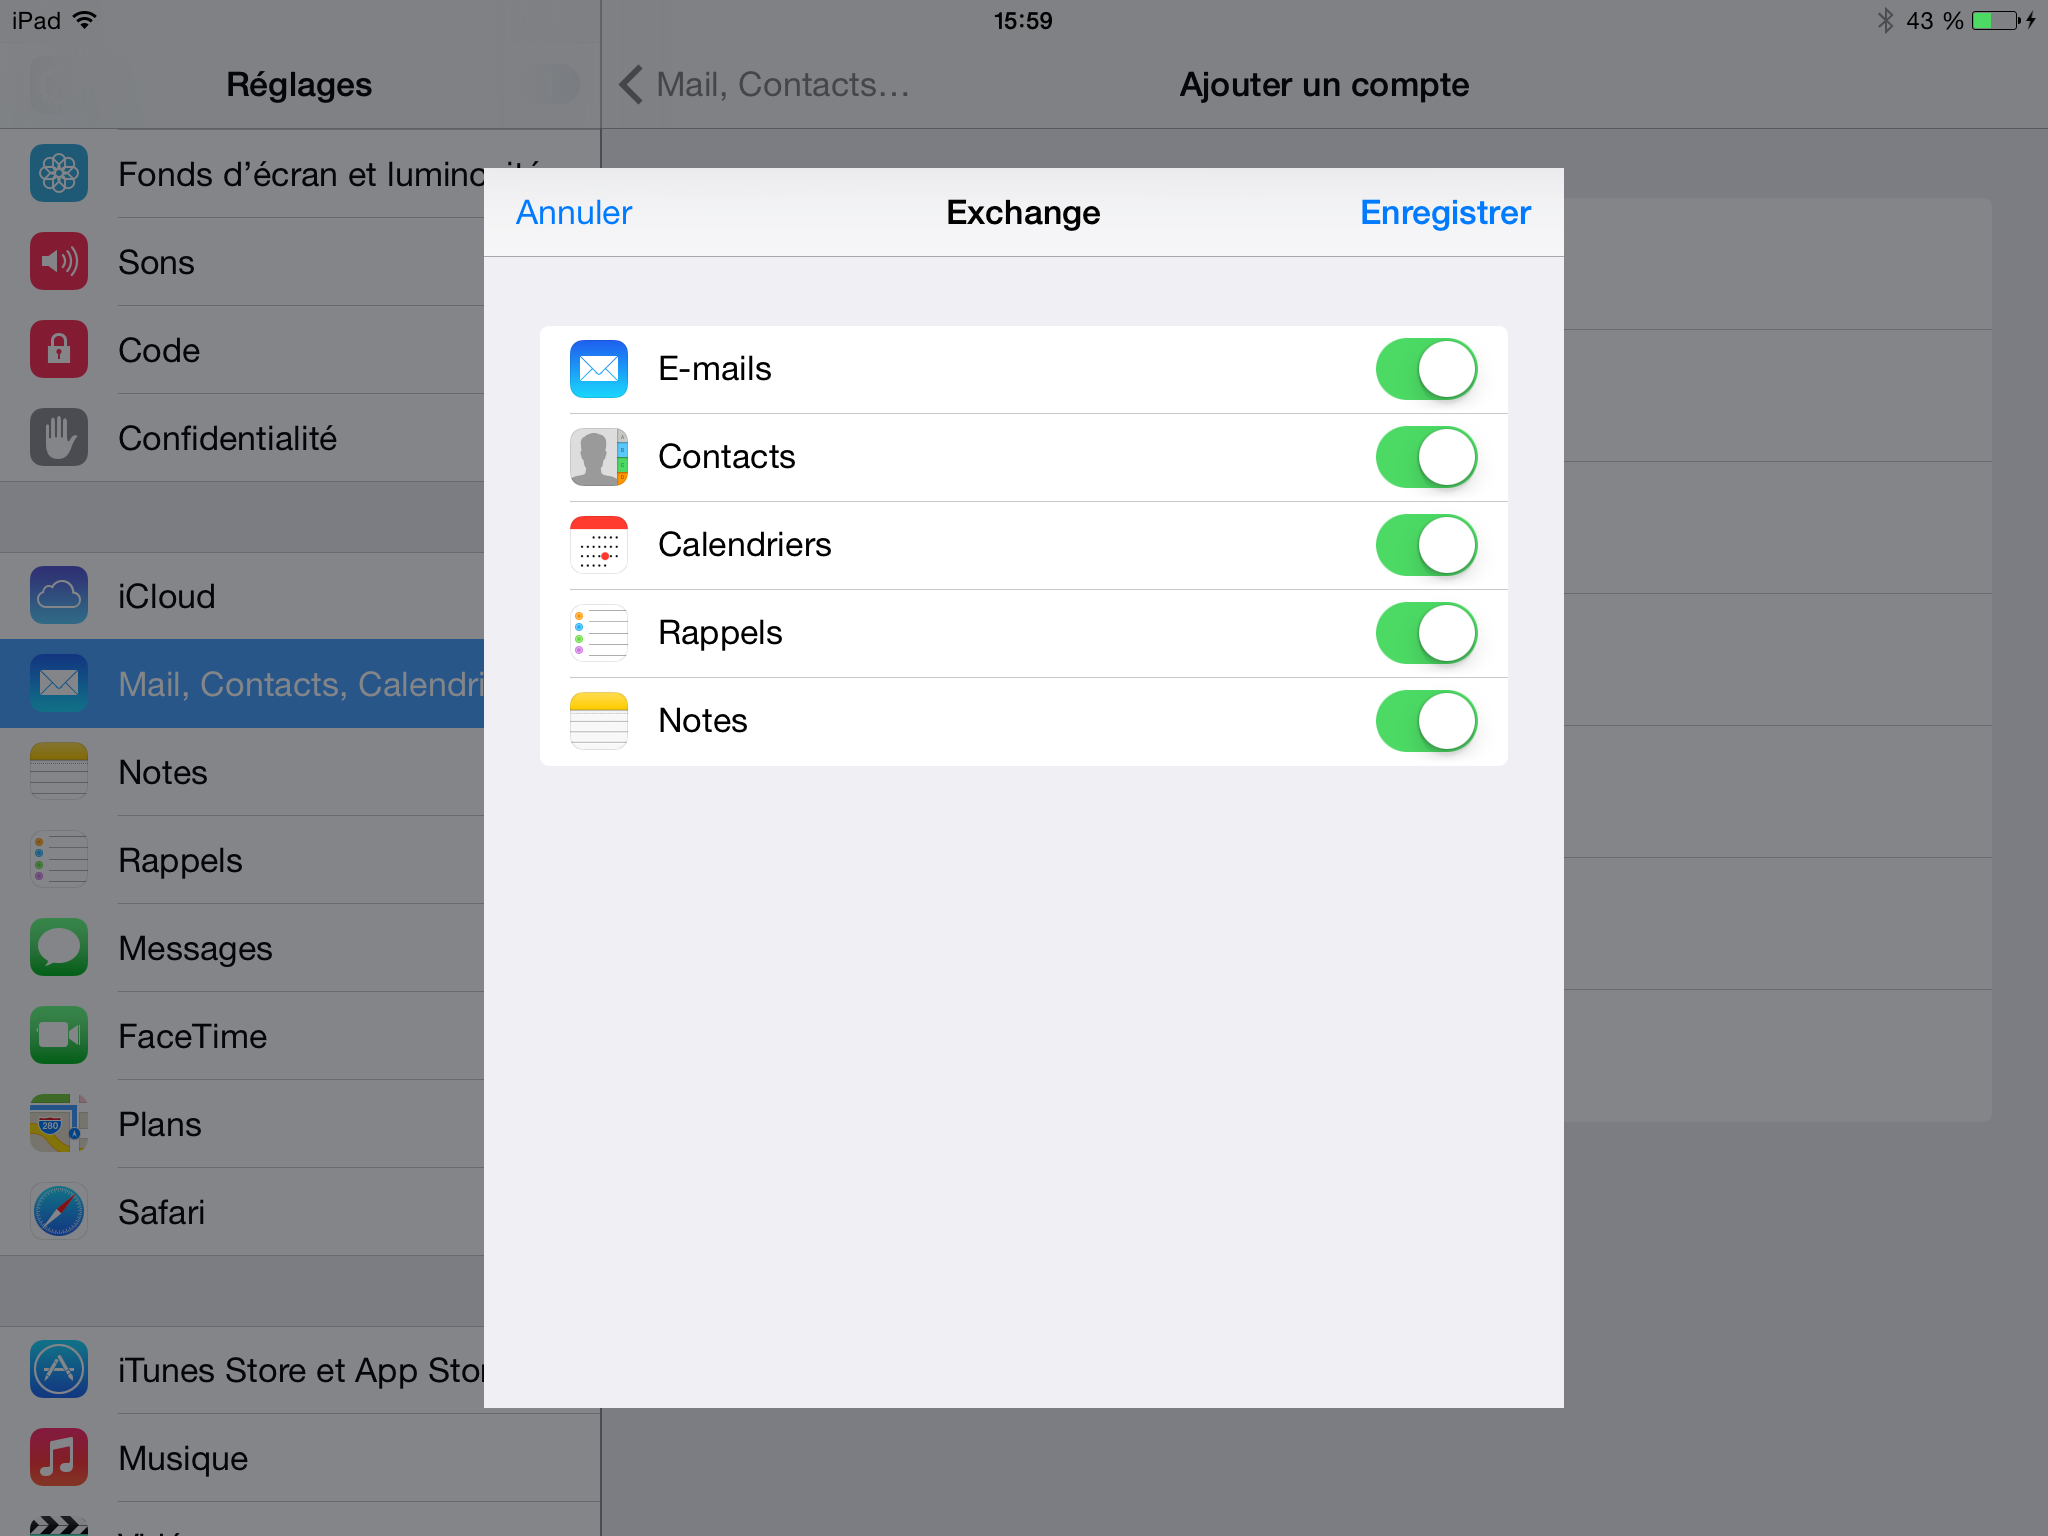
6. Select the Exchange services you wish to activate and click “Save” to finish the configuration
Android

- Android Configuration
- calendars
- address book
- (tasks: third party app required)
- (notes: third party app requiered)
How to set Exchange up on an Android device (version 4 and up)
The Ci strongly recommends the use of the native Android apps (all functions offered by Exchange are however not available).
For security reasons, the Outlook app for Android is blocked on our servers. You can find more information here (in French).
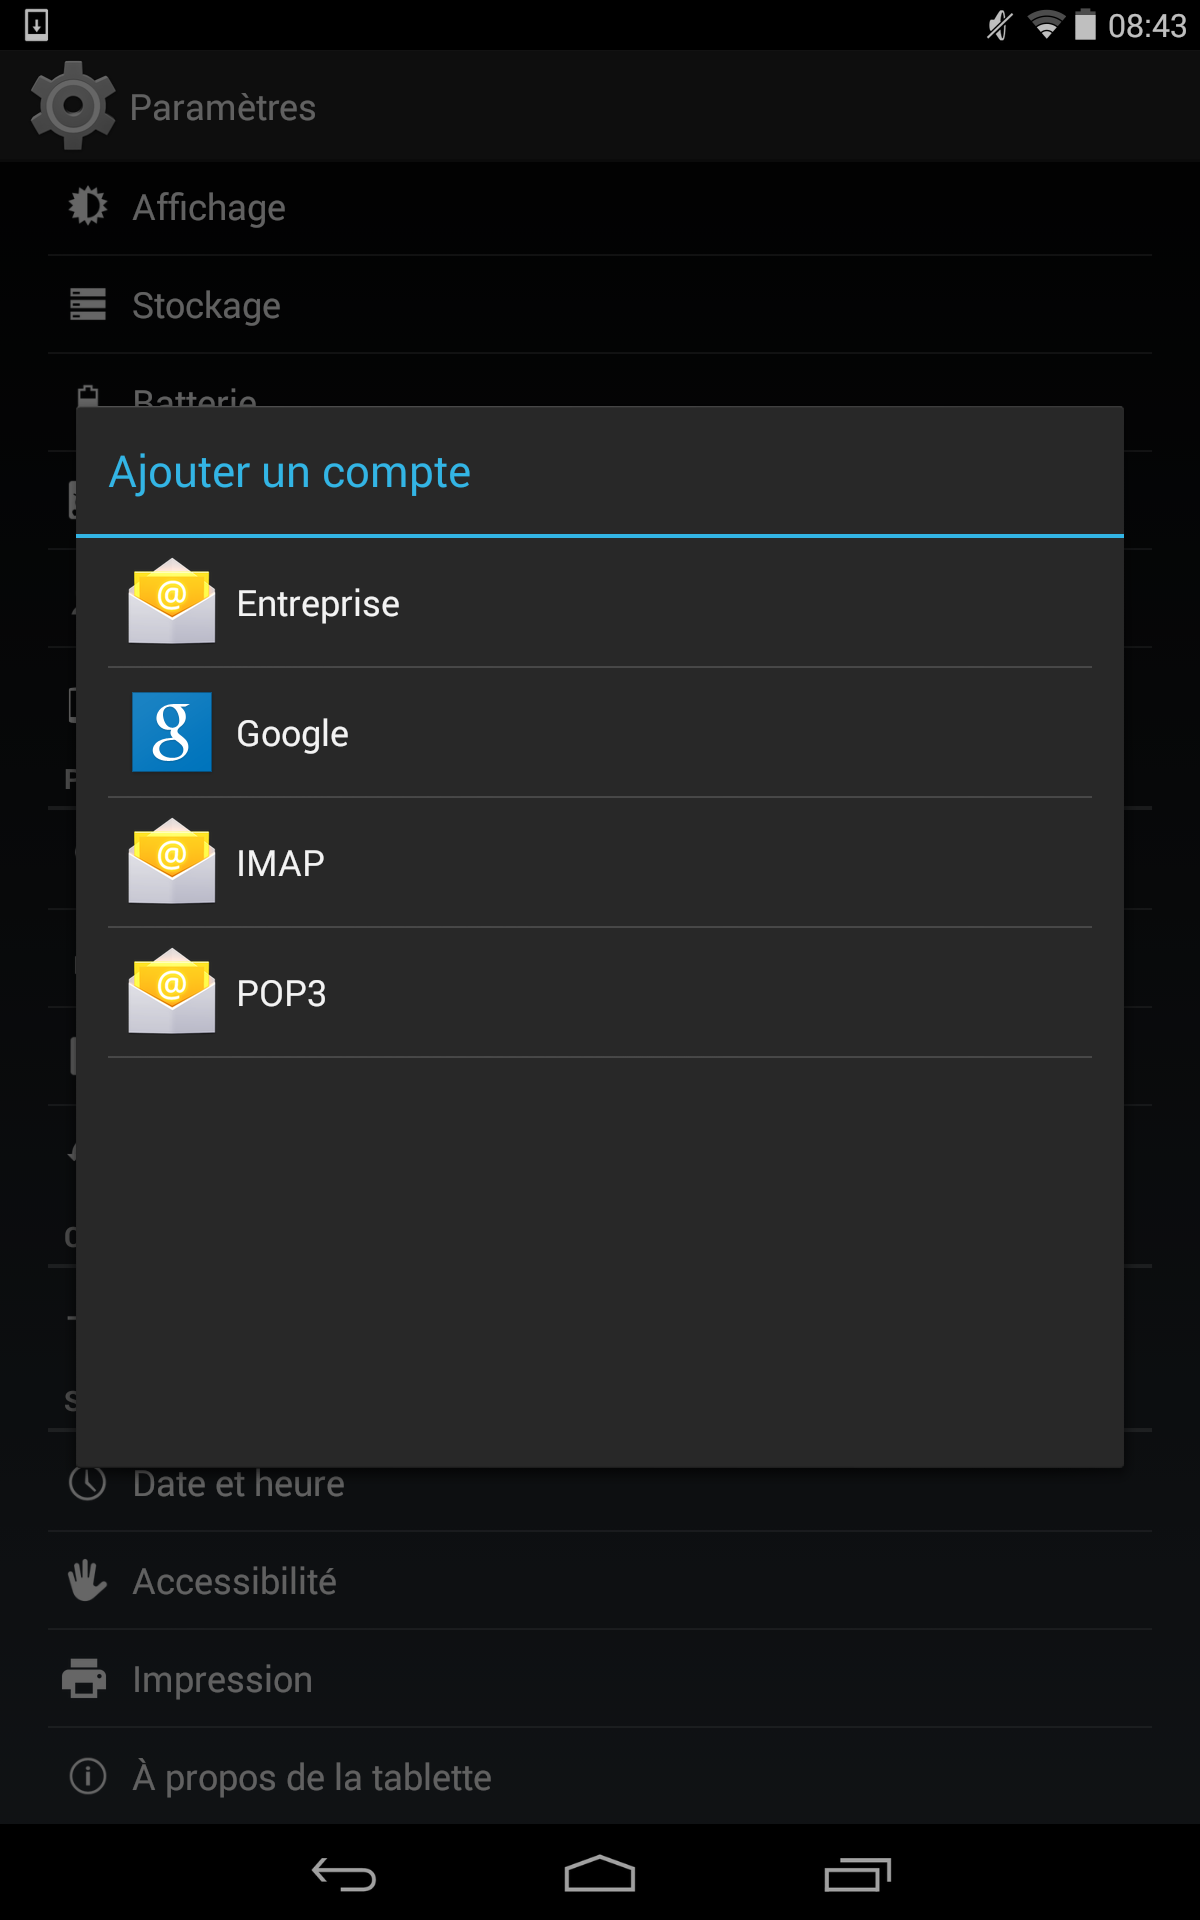
1. Go to “Settings,” and then click on “Add account”
2. Choose “Entreprise”
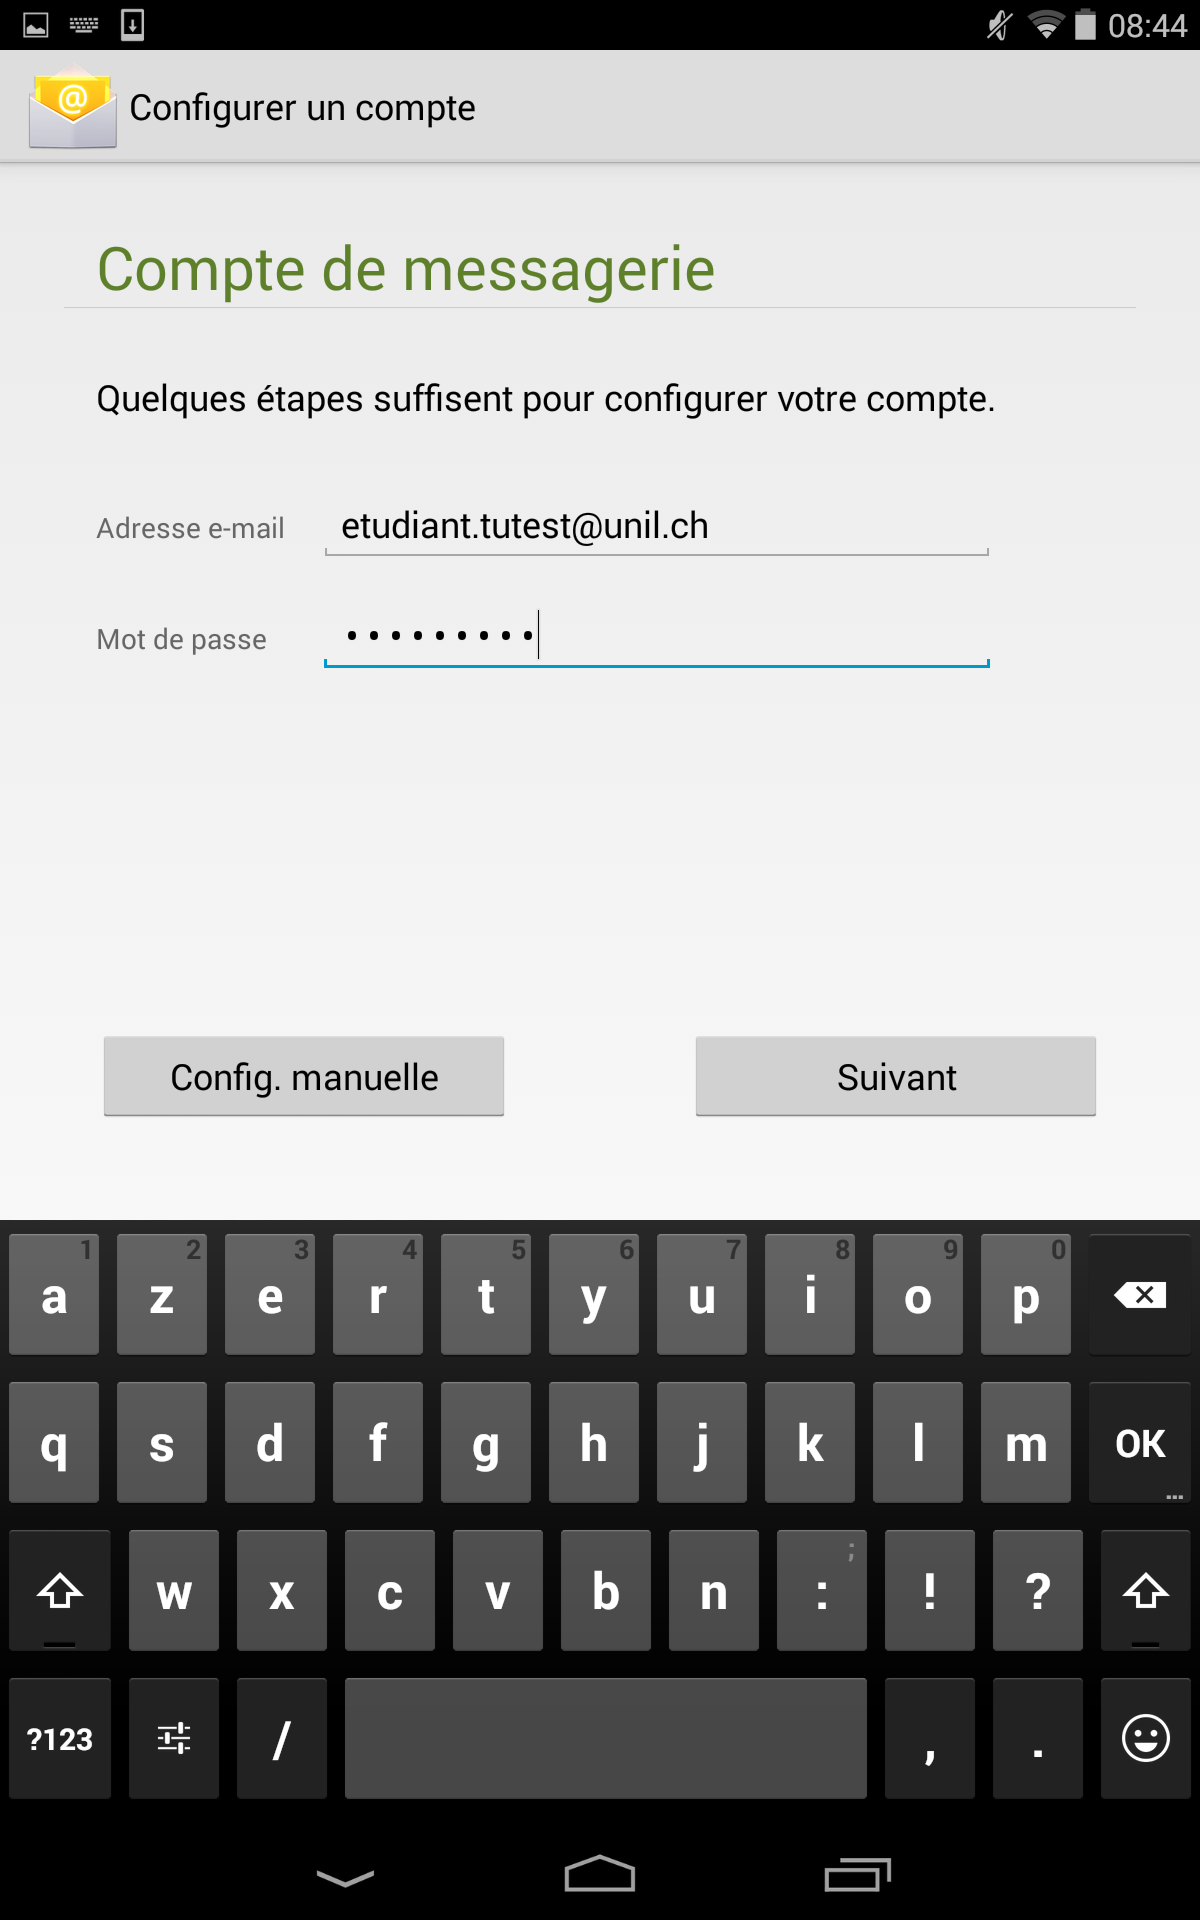
3. Fill in the “E-mail address” and “password” fields
4. Click the “Next” button
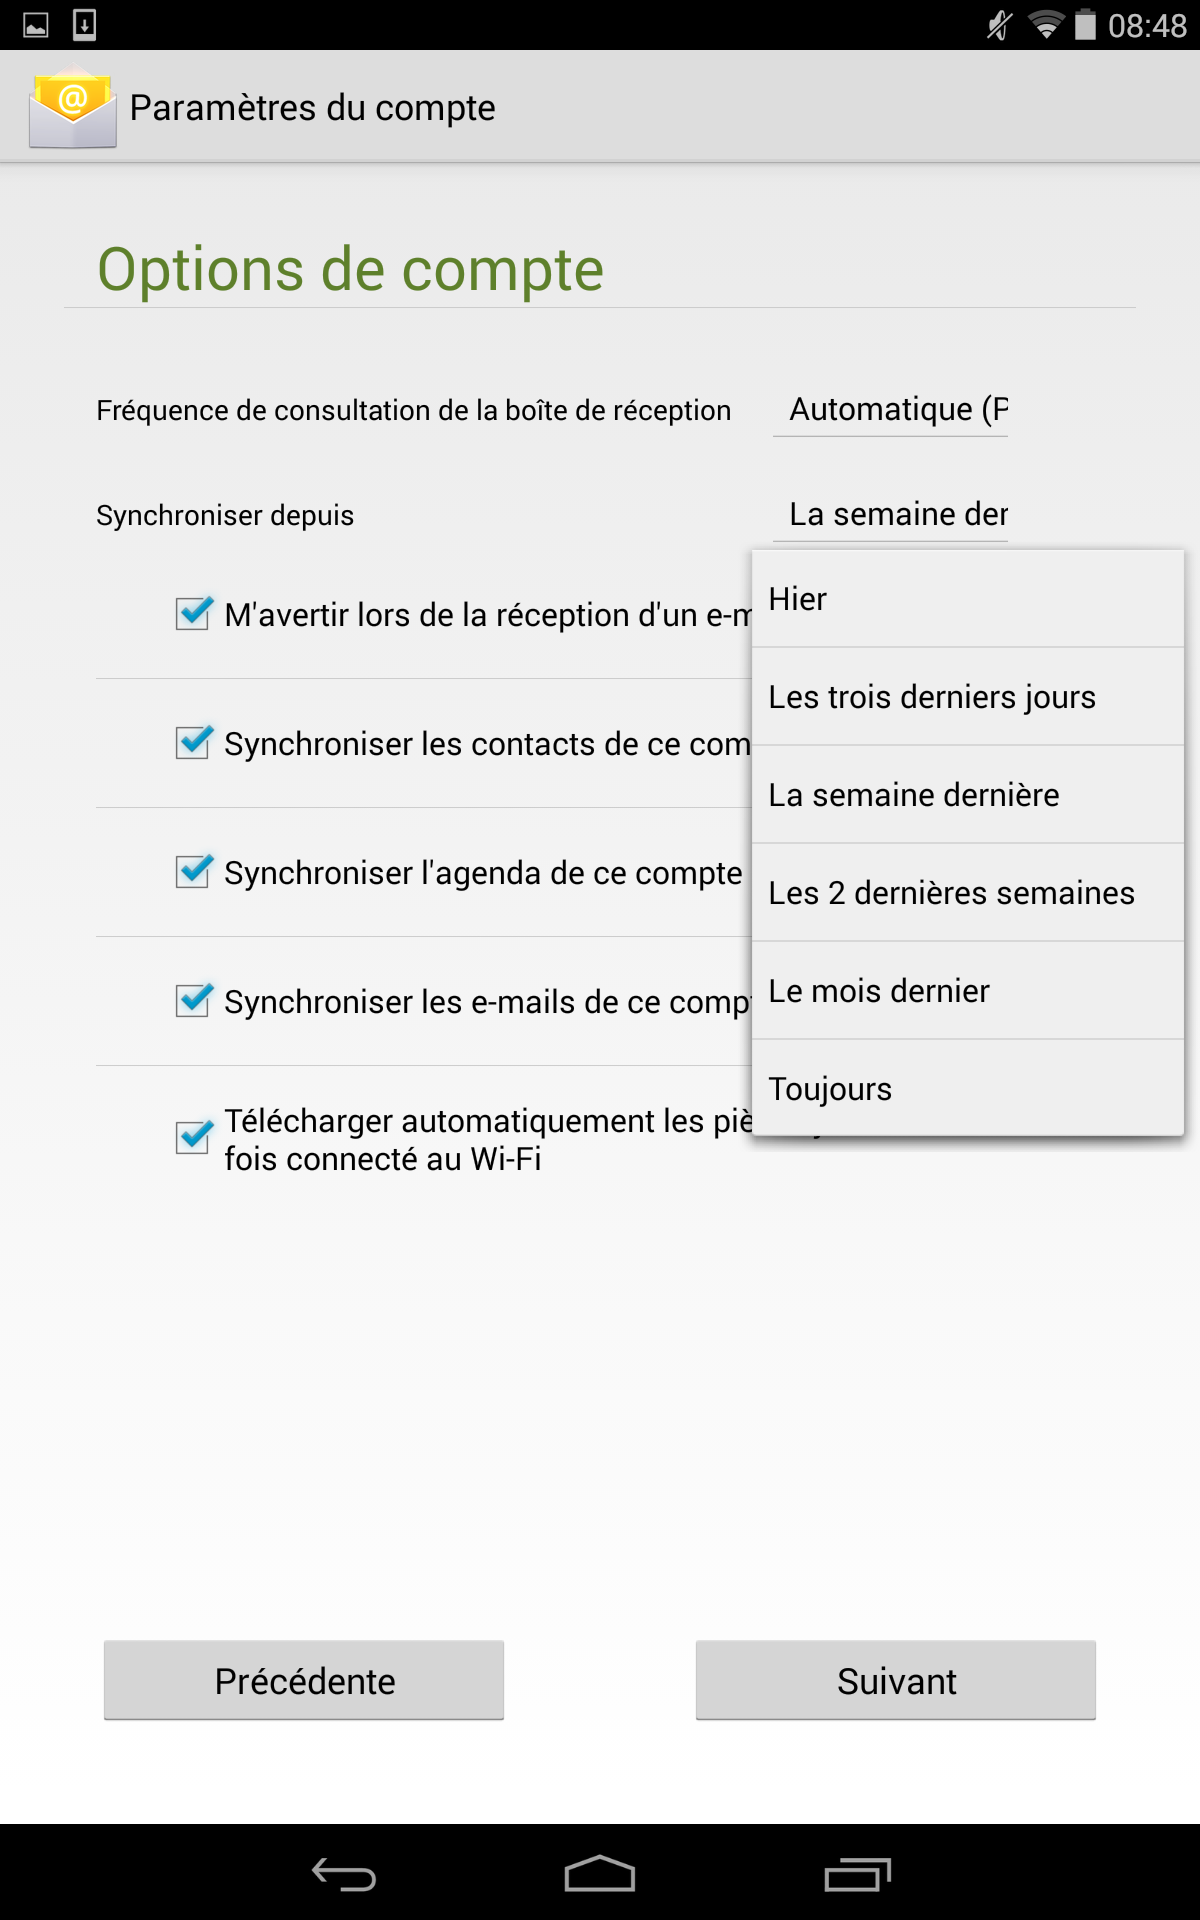
5. Select the options and synchronisation period you want
6. Click “Next”
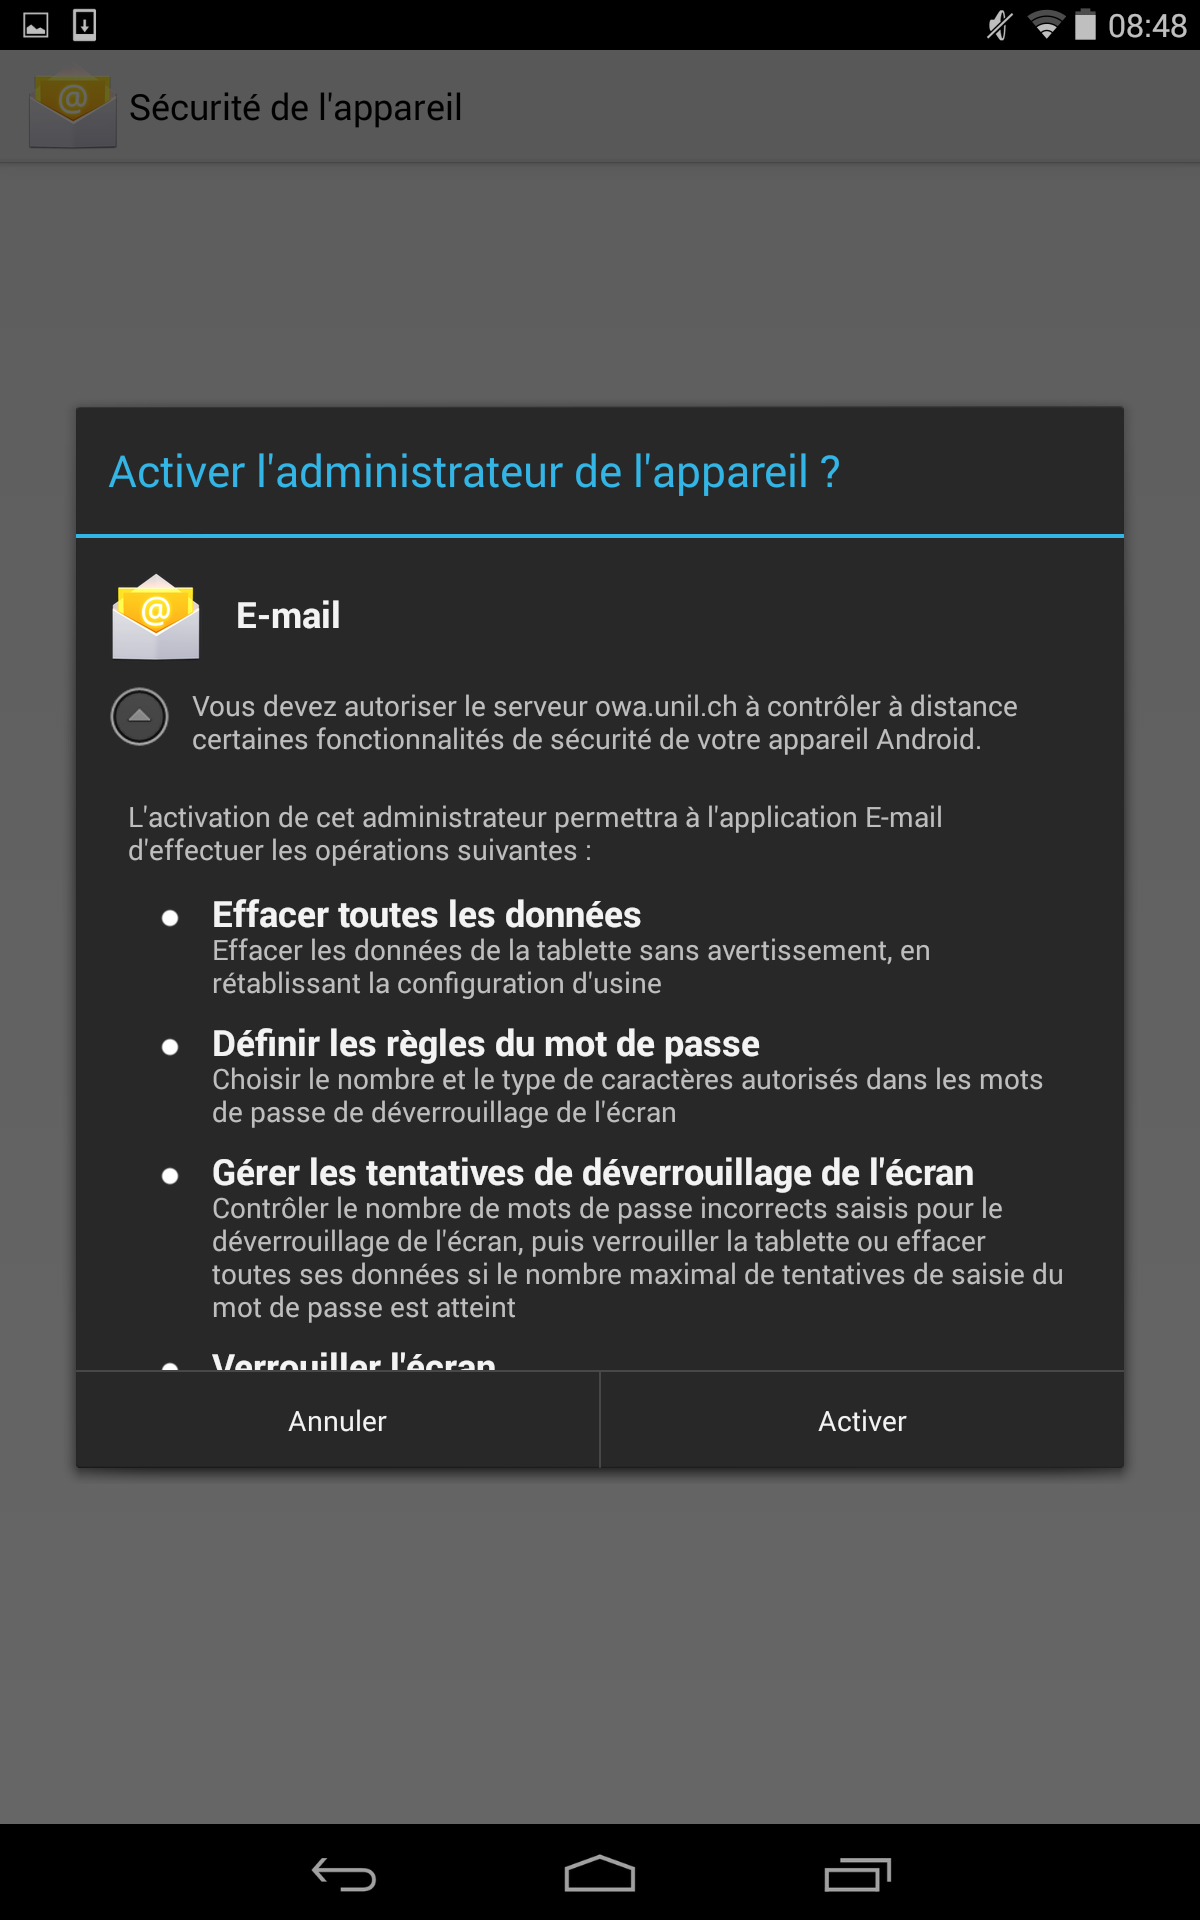
7. Allow the Exchange server as administrator by clicking the “Activate” button (this lets you remotely erase your device in case you lose it or it gets stolen)
Limitations due to Android & workarounds
Android is for the time being limited in its support of the Exchange services:
- there is only one colour for calendars
- there is no support of tasks and notes systems
These applications allow you to work around these issues (the Ci does however not guarantee that they work and offers no support whatsoever for them):
Other
- Setup for generic e-mail clients
Generic e-mail clients
This information is meant for software that does not support Exchange and its more advanced functions (calendars, address book, tasks and notes)
-
Incoming mail server
-
imapx.unil.ch
-
port 993
-
SSL/TLS
-
authentication with password
-
-
Outgoing mail server
-
smtpauth.unil.ch
-
port 587
-
STARTTLS or simply TLS depending on your client
-
authentication with password
-
UNIL e-mail with your private e-mail address
Use your UNIL e-mail with your private email address
Only for students!
If you choose to do so, you are entrusting your own data to companies that are external to the UNIL; this is why the Centre informatique does not offer any support regarding the utilisation of these websites and can in no means be held responsible for any kind of damage that were to happen due to your use of these websites or emails that do are not redirected to the destination mailbox. What arrives in your UNIL mailbox is what counts.
Concerning the university staff, using an external service may go against the internal UNIL directives.
Transfer your e-mails to another e-mail address
1. Log into https://outlook.office.com with your UNIL credentials.
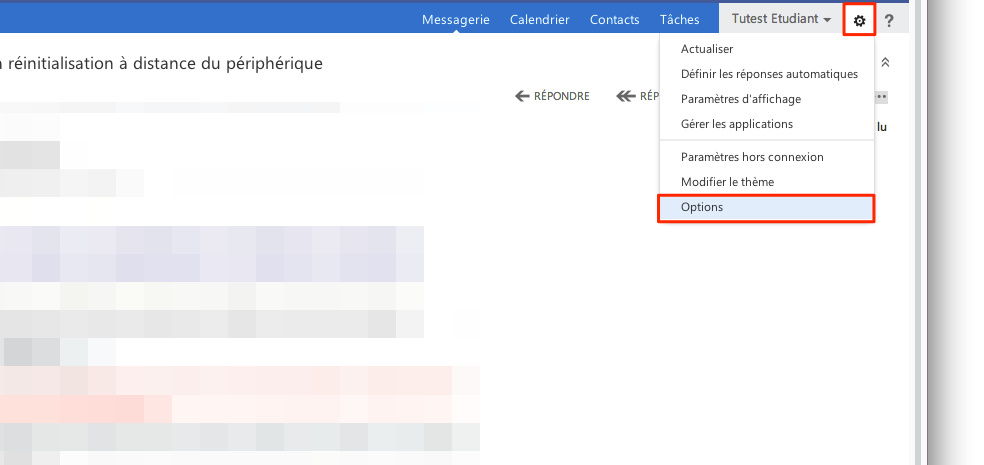
2. Go to the “Options” menu
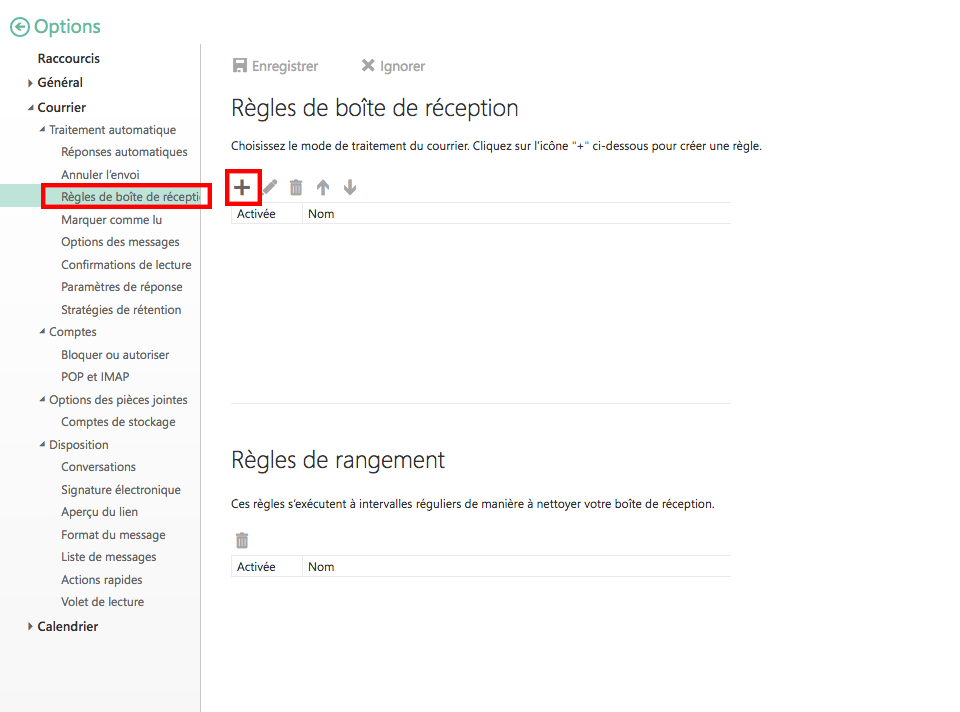
3. Under the “Organize email” section click on “+”
4. Select “Create a new rule for arriving messages”
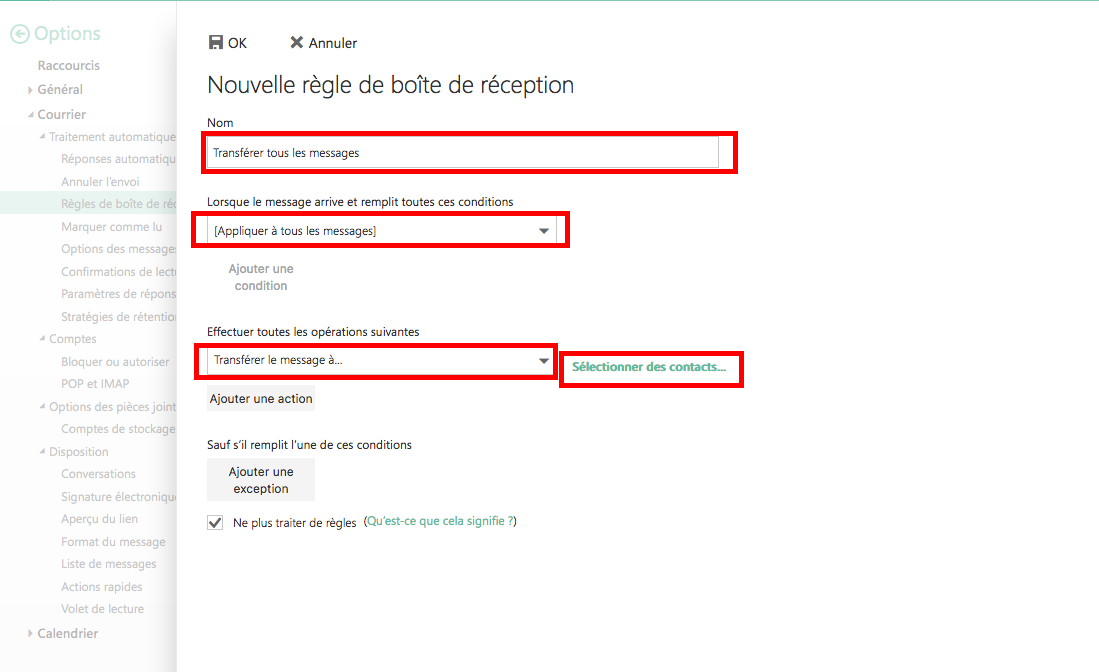
5. Name the rule, choose “Apply to all messages” and “Redirect the message to…”
6. Type in the private e-mail address you want to use for the transfer
7. Click on the “Save” button
8. Finish the procedure by accepting the warning message
Désactiver la correctionSuggestions Premium
Désactiver la correctionSuggestions Premium
Désactiver la correctionSuggestions Premium
Désactiver la correctionSuggestions Premium
Désactiver la correctionSuggestions Premium