Data management
Topic
Data transfer between a laptop, a virtual machine, or a lab server and the DCSR NAS
The DCSR NAS, or the "Network Attached Storage of the Scientific Computing and Research Support Unit", is one of the several NAS solutions available at UNIL. The DCSR NAS is dedicated to the secure mid-term storage of research regular or personal data. The DCSR NAS does not comply to the current regulations for the storage of sensitive data, as defined by the LPrD law Art. 4 al. 2. For handling sensitive data, please refer to the corresponding documentation.
Organization
The first section explains how to access the DCSR NAS from the UNIL network with each of the most common operating systems (Windows, MacOS and Ubuntu)
The second section explains how to access the DCSR NAS from the CHUV network
Note: If you work from home, you first need to connect to UNIL's Virtual Private Network (VPN), using the Pulse Secure software (see VPN instructions).
Access from the UNIL network
From Windows
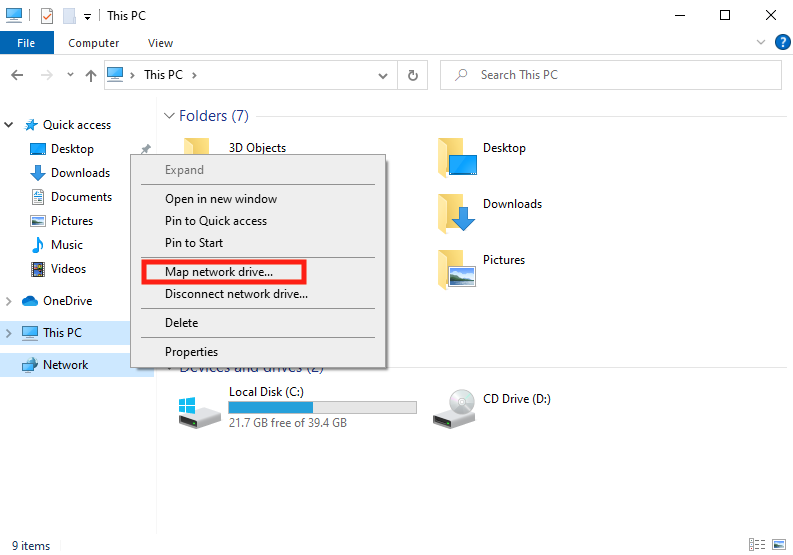
Step 1: right click on Network in File explorer and choose "Map network drive…"
Step 2: enter the address of the Samba server and click to finish
Replace RECHERCHE with RECHERCHE-P in the screen capture below to access the corresponding folder for a project that was created with the personal data flag
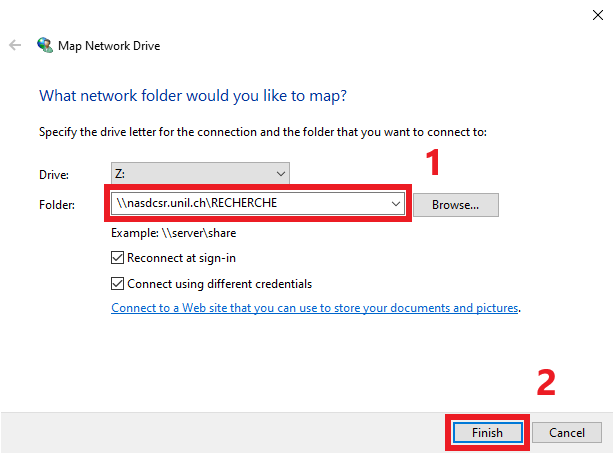
\\nasdcsr.unil.ch\RECHERCHE
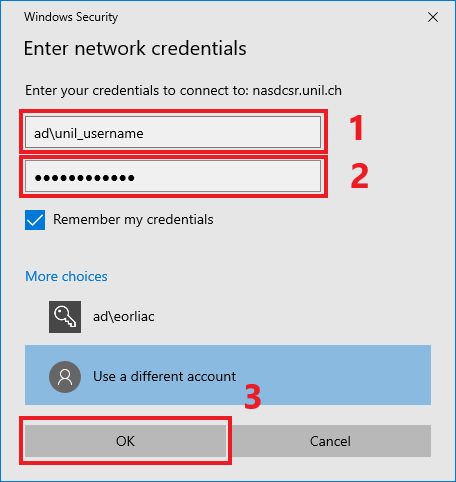
Step 3: enter your Unil credentials and clikc "OK"
- username:
ad\unil_username(for examplead\ulambda) - password
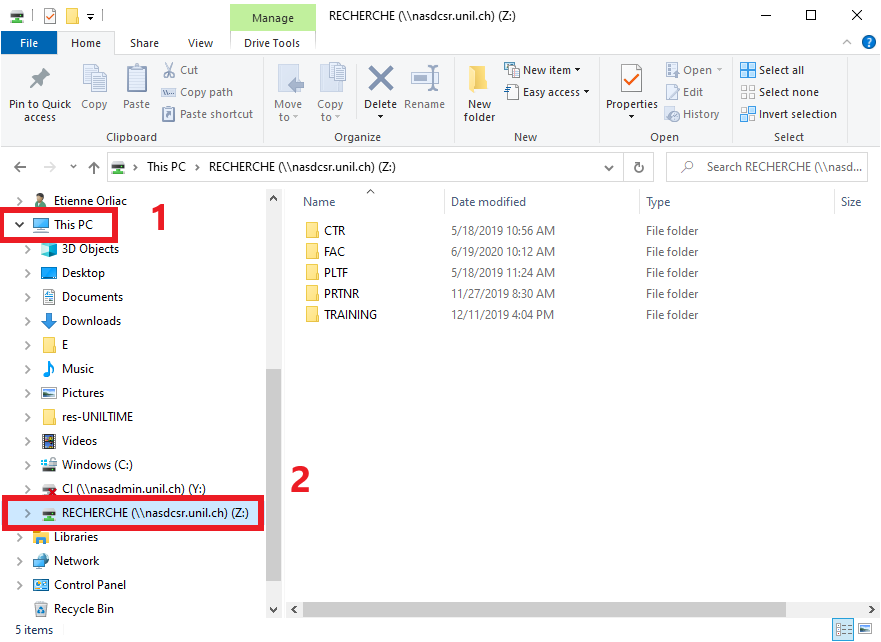
Step 4: click on "This PC" and then on the new network drive
From MacOS
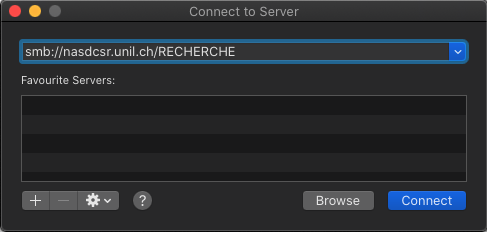
Step 1: open the Finder, in Go menu, select "Connect to Server"

Step 2: enter the NAS url (smb://nasdcsr.unil.ch/RECHERCHE), you also may add this server as a favourite by clicking on + symbol
Replace RECHERCHE with RECHERCHE-P in the screen capture below to access the corresponding folder for a project that was created with the personal data flag
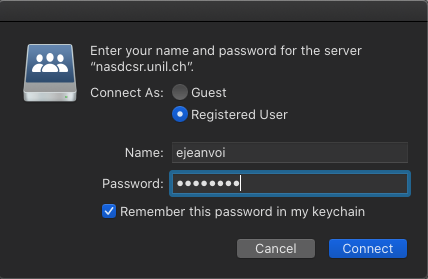
Step 3: enter your credentials
From Ubuntu
It is possible to use a GUI but there are as much solutions as desktop managers. So here is a way to mount the NAS using command line interface.
Don't forget to adapt the username= field in the sudo mount command by replacing unil_username with your username at UNIL (ex. mcurie for Marie Curie)!
Replace RECHERCHE with RECHERCHE-P in the commands below to access the corresponding folder for a project that was created with the personal data flag
# First install the packages
# Debian/Ubuntu version
$ sudo apt install samba cifs-utils
# Fedora/RedHat version
$ sudo dnf install cifs-utils

# In the following, ~/nas is chosen as a mountpoint, but it could be elsewhere
$ mkdir ~/nasdcsr
$ sudo mount -t cifs -o username=unil_username,mfsymlinks,domain=ad,rw,iocharset=utf8,dir_mode=0700,file_mode=0700,uid=$(id -u) //nasdcsr.unil.ch/RECHERCHE ~/nasdcsr

# Perform the reauired operations
$ cd ~/nasdcsr
…

# When finished, don't forget to umount it
$ sudo umount ~/nasdcsr
Accessing DCSR NAS from CHUV network
Windows and Mac users can install the graphical desktop client from DataExpedition as well if they wish so:
Download Expedat from here, installation instruction from here, and product documentation from there.
Here is an example of ExpeDat session:
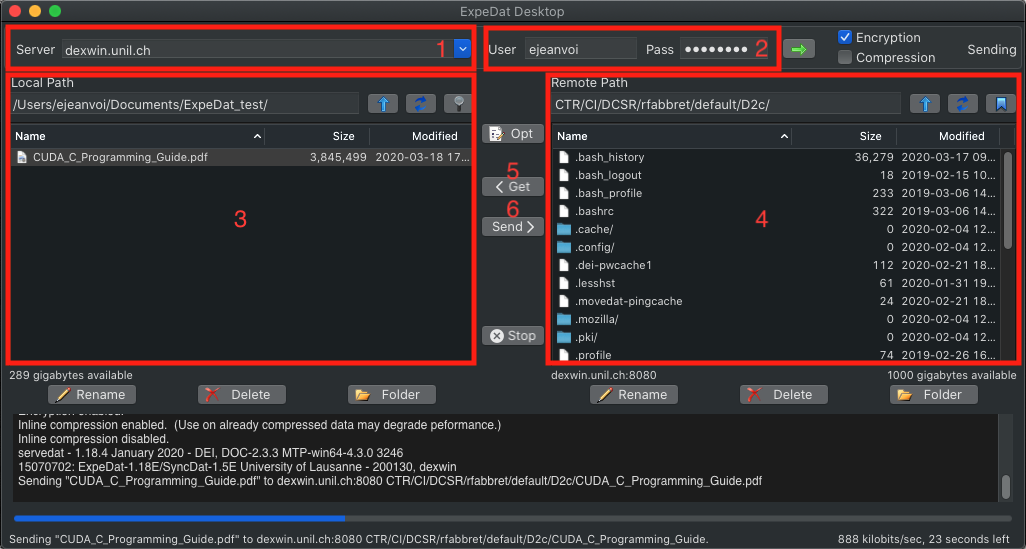
On that screenshot you can see:
- The server of the NAS
- The user information (login and password)
- The explorer for the files located on your laptop
- The explorer for the files located on the NAS (note that the remote path must be set according to your personal working space)
- The get button to fetch files from the NAS to your laptop
- The push button to push files from your laptop to the NAS