Filetransfer from the cluster
filetransfer.dcsr.unil.ch
https://filetransfer.dcsr.unil.ch is a service provided by the DCSR to allow you to transfer files to and from external collaborators.
This is an alternative to SWITCHFileSender and the space available is 6TB with a maximum per user limit of 4TB - this space is shared between all users so it is unlikely that you will be able to transfer 4TB of data at once.
The filetransfer service is based on LiquidFiles and the user guide is available at https://man.liquidfiles.com/userguide.html
In order to transfer files to and from the DCSR clusters without using the web browser it is also possible to the API REST as explained below
Configuring the service
First you need to connect to the web interface at https://filetransfer.dcsr.unil.ch and connect using your UNIL username (e.g. ulambda for Ursula Lambda) and password. This is not your EduID password but rather the one you use to connect to the clusters.
Once connected go to settings (the cog symbol in the top right corner) then the API tab
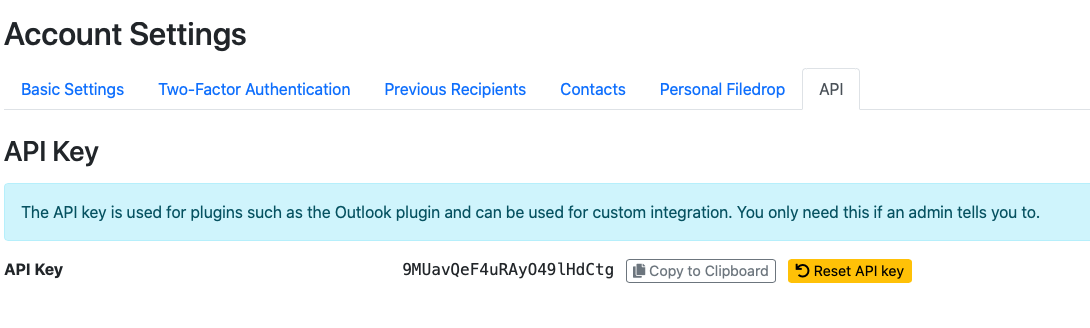
The API key is how you authenticate from the clusters and this secret should never be shared. It can be reset via the yellow button.
Transferring files from the cluster
To upload a file and create a file link:
module load liquidfiles
liquidfiles -k $APIKEY file_example_TIFF_.tiff
You can then connect to the web interface from you workstation to manage the files and send messages as required.
As preparing and uploading files can take a while we recommend that this is performed in a tmux session which means that even if your connection to the cluster is lost the process continues and you can reconnect.
Transferring large files
You follow the same procedure:
module load liquidfiles
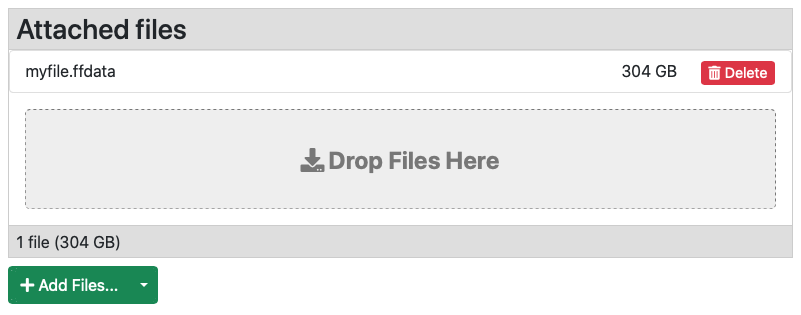
liquidfiles -k $APIKEY myfile.ffdata
The liquidfiles tool will chuck the file and it will send it to the server. Once all the chunks are uploaded the file will be assembled/processed and after a short while it will be visible in the web interface.
Here we see a previously uploaded file of 304 GB called myfile.ffdata