Sharing Files and Folders
With OneDrive, you can share files or folders with other people, groups, or via a link. Sharing folders with specific individuals is useful for collaboration with internal or external individuals or groups at the University of Lausanne. The option to share via a link is preferable for sharing with a large number of people whom you may not personally know.
Sharing Folders or Files with Specific Individuals or Groups
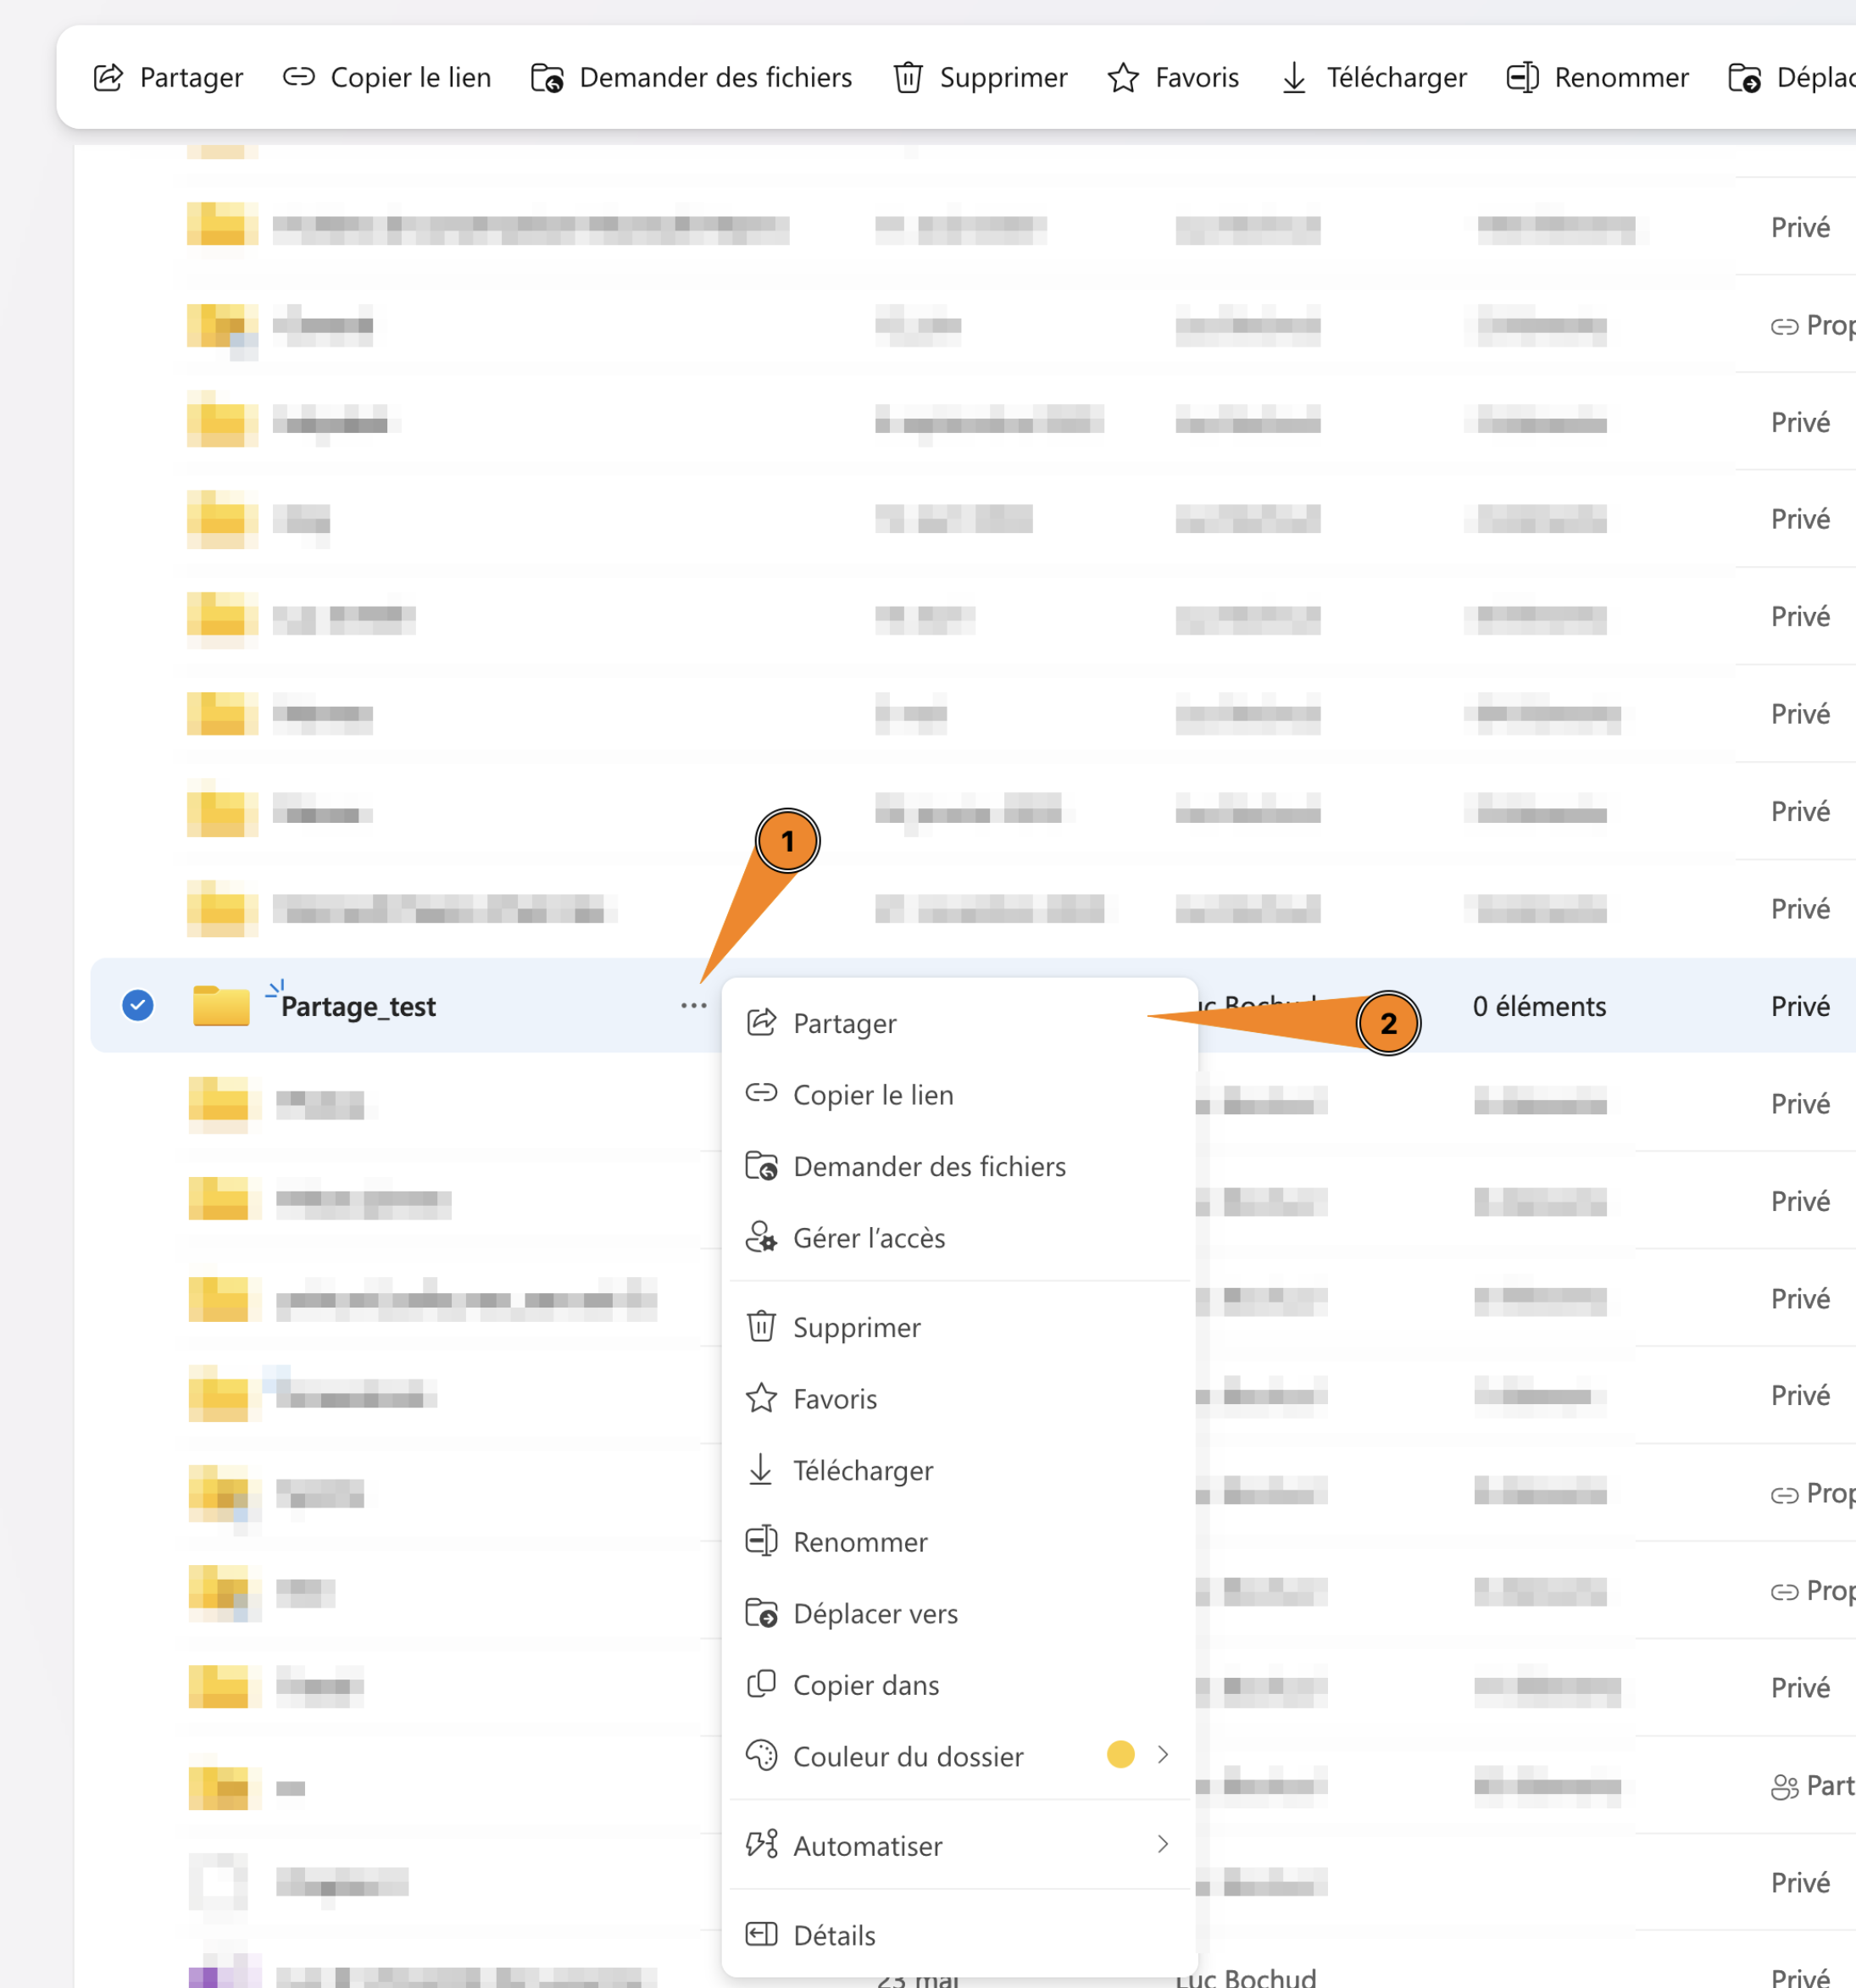
To grant access to your OneDrive data to another person or group, you can use the web interface by logging in to onedrive.com. Then click on the three dots (1) and "Share" (2).
You can also do this directly from your computer:
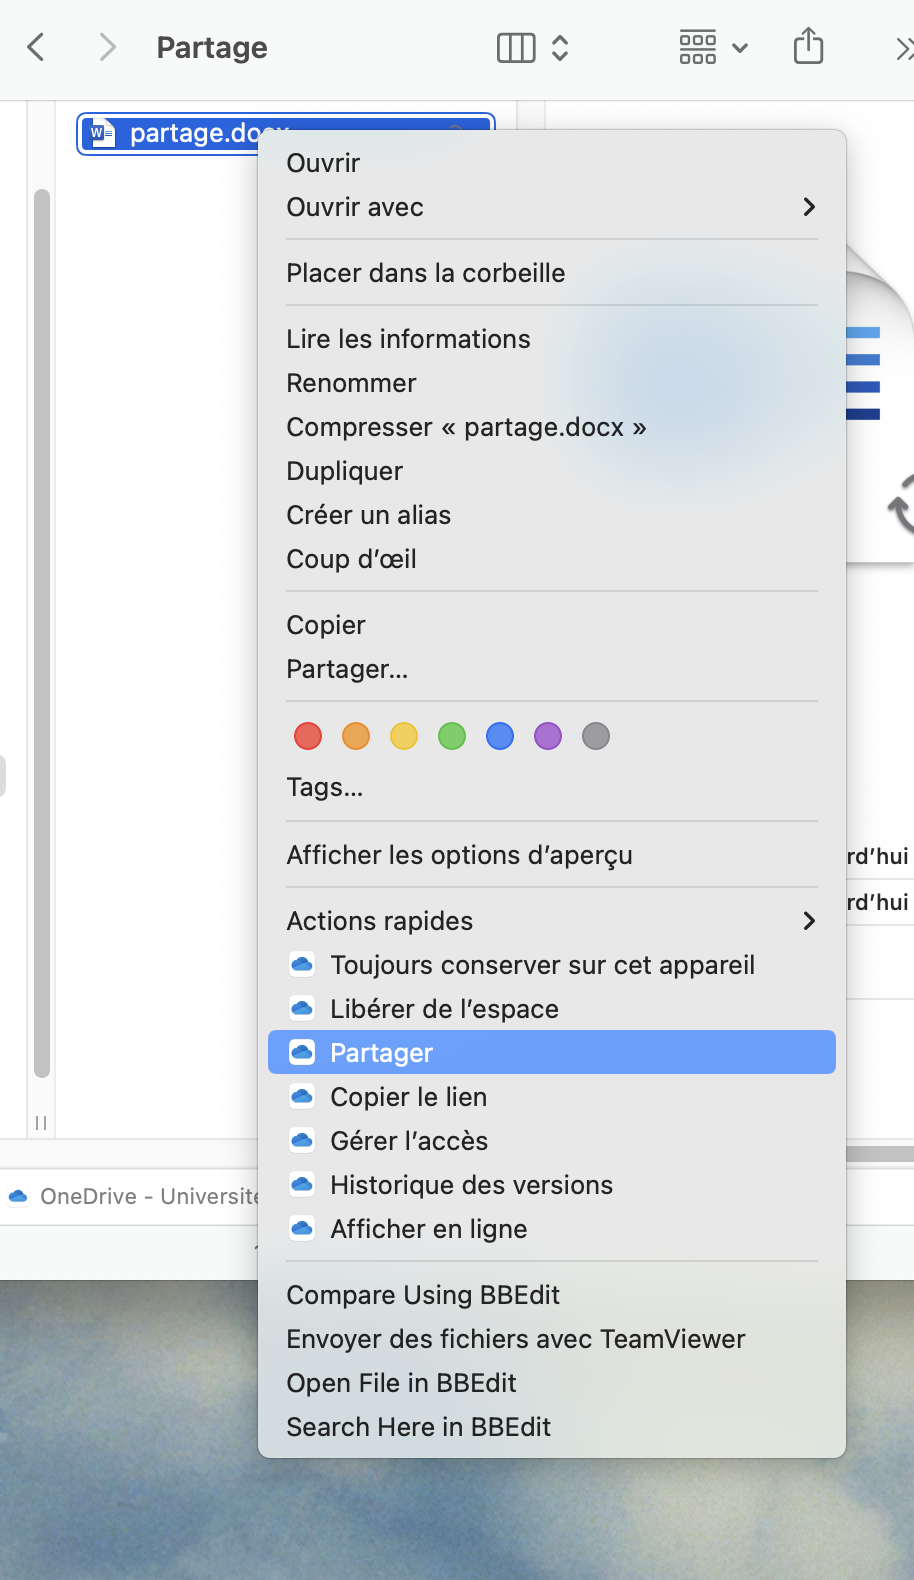
On macOS, right-click and choose "Share":
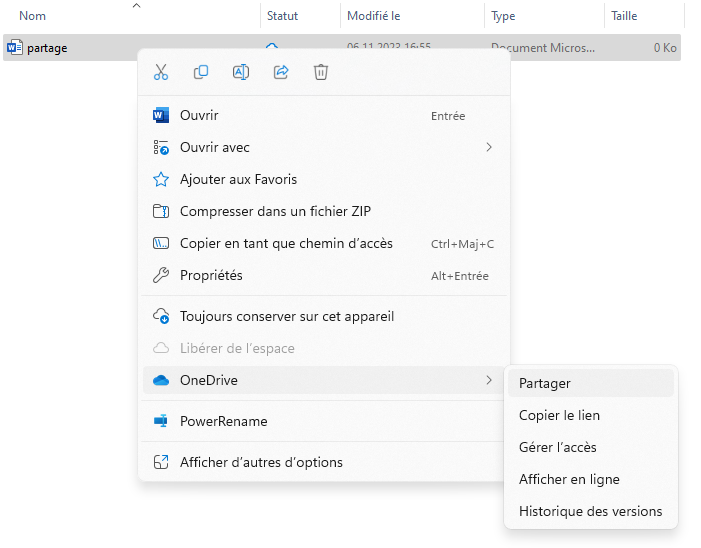
On Windows, right-click on the folder or file, then select "OneDrive" and "Share":
Sharing Procedure
Regardless of the method you use for sharing, you should encounter a window similar to the one below:
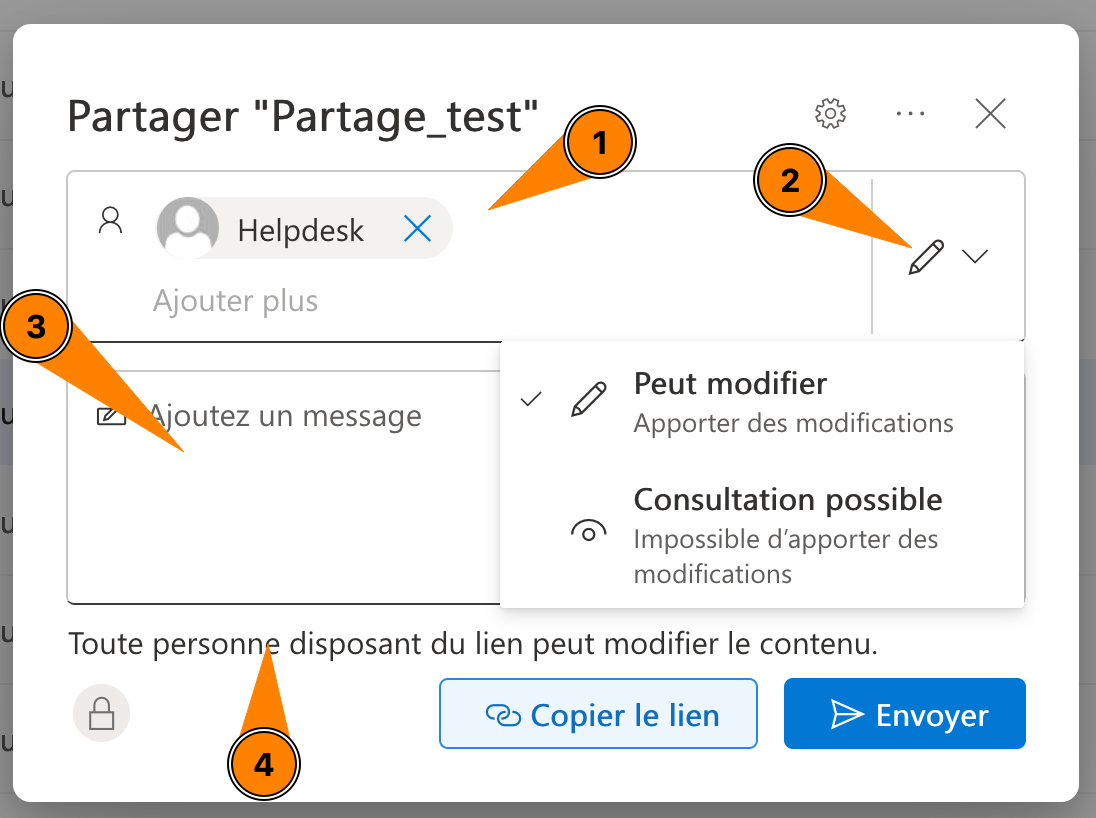
- You can add specific people or groups with whom to share the document.
- Modify the access type of individuals by clicking on the small pencil.
- Add a message that will be sent to the specified people or groups.
- Finally, you can click on "Anyone with the link can edit the content" to fine-tune the sharing. You will see the following window:
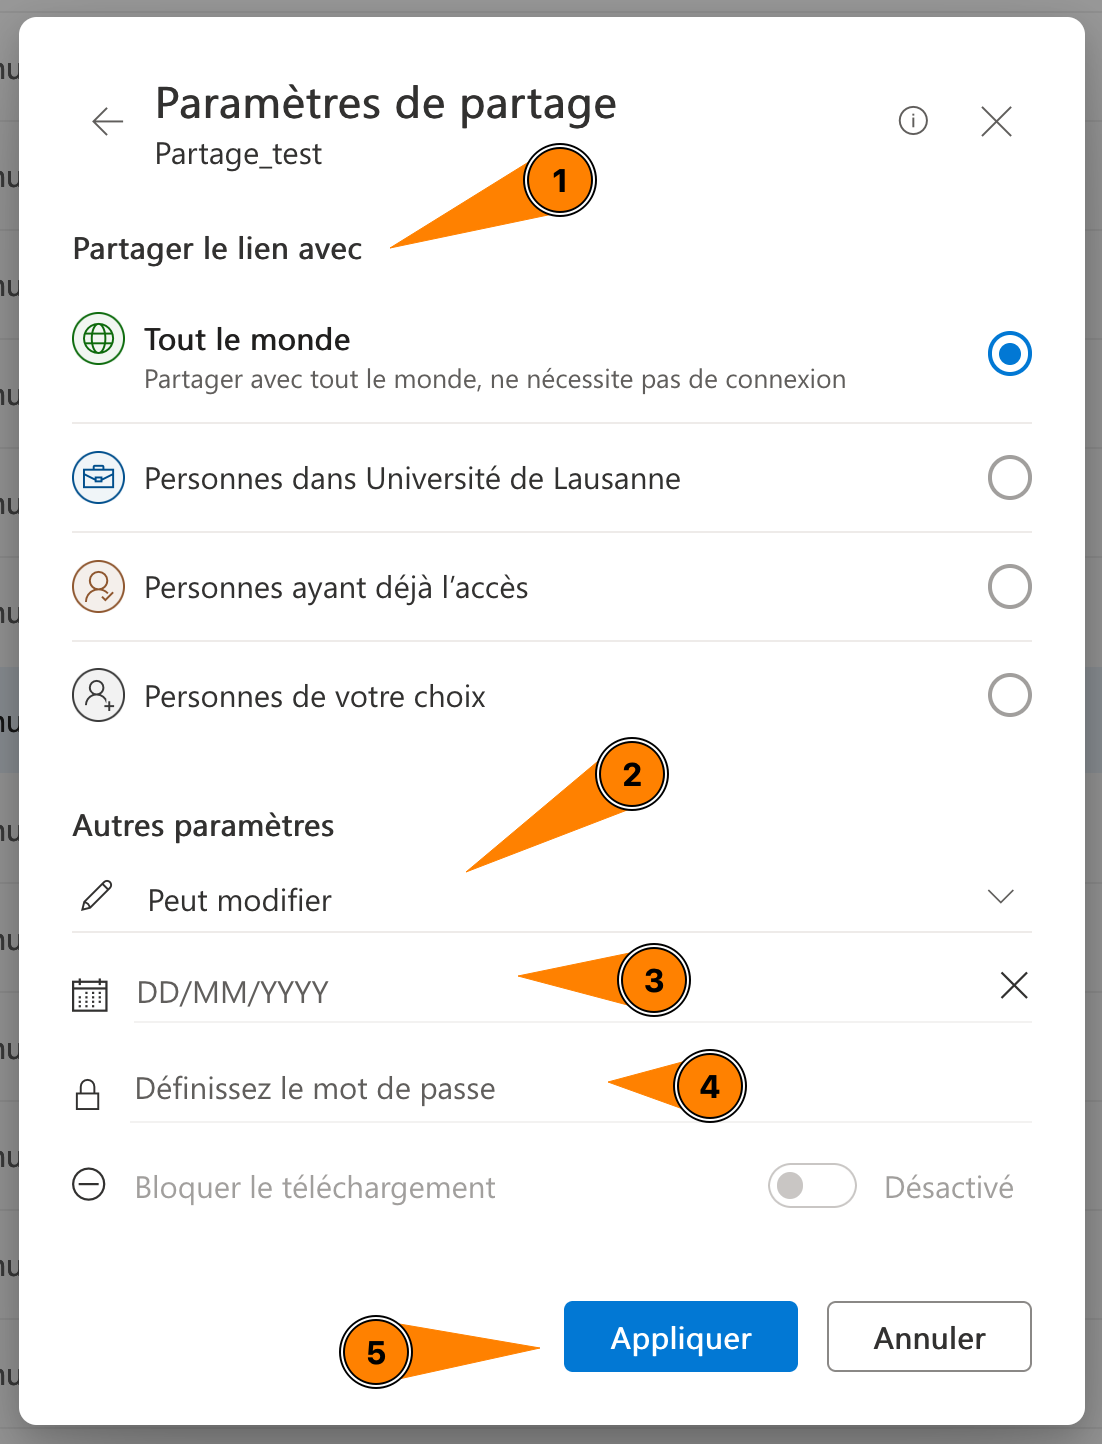
By default, the sharing scope is set to "People at the University of Lausanne" only; don't forget to change this setting if you want to share a document with external people.
- Choose who can access the document or folder.
- Specify again whether people can edit or only view what you are sharing.
- Set an end date for sharing.
- Set a password to access it.
- Finally, remember to save the changes by clicking the "Apply" button.
You will then return to the previous page and can click "Send" to send a message with the sharing link to the specified people or groups.
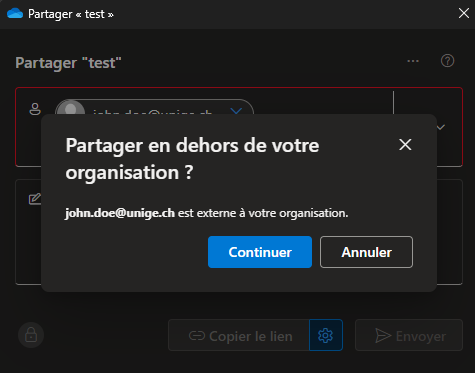
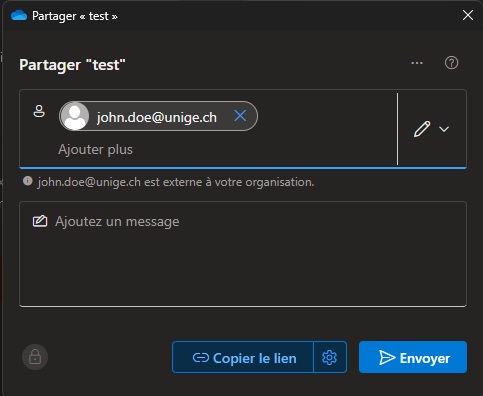
Sharing folders or files with people outside UNIL
The procedure to follow is the same as indicated above. You won't be able to search for the person in the directory because they are not part of UNIL. A warning message will indicate that you are sharing data outside UNIL.
Limitations
When you share data with external individuals, certain features are restricted because the data belongs to UNIL from OneDrive's perspective.
Key limitations:
- Externals will only be able to edit Office files from a browser. It will be impossible to open the file in the desktop application.
- Externals will not be able to add folders and/or files to their personal OneDrive using the "Sync" or "Add a shortcut to My Files" option.
- Shared folders and files will not appear in the "Shared with me" tab in an external's OneDrive account.
If the person you are working with want to use these features, you must use a team in Microsoft Teams:
If someone from another institution shares data with you from their OneDrive, the limitations will be the same.
Sharing via Link
However, they cannot add or delete files in a shared folder by default.
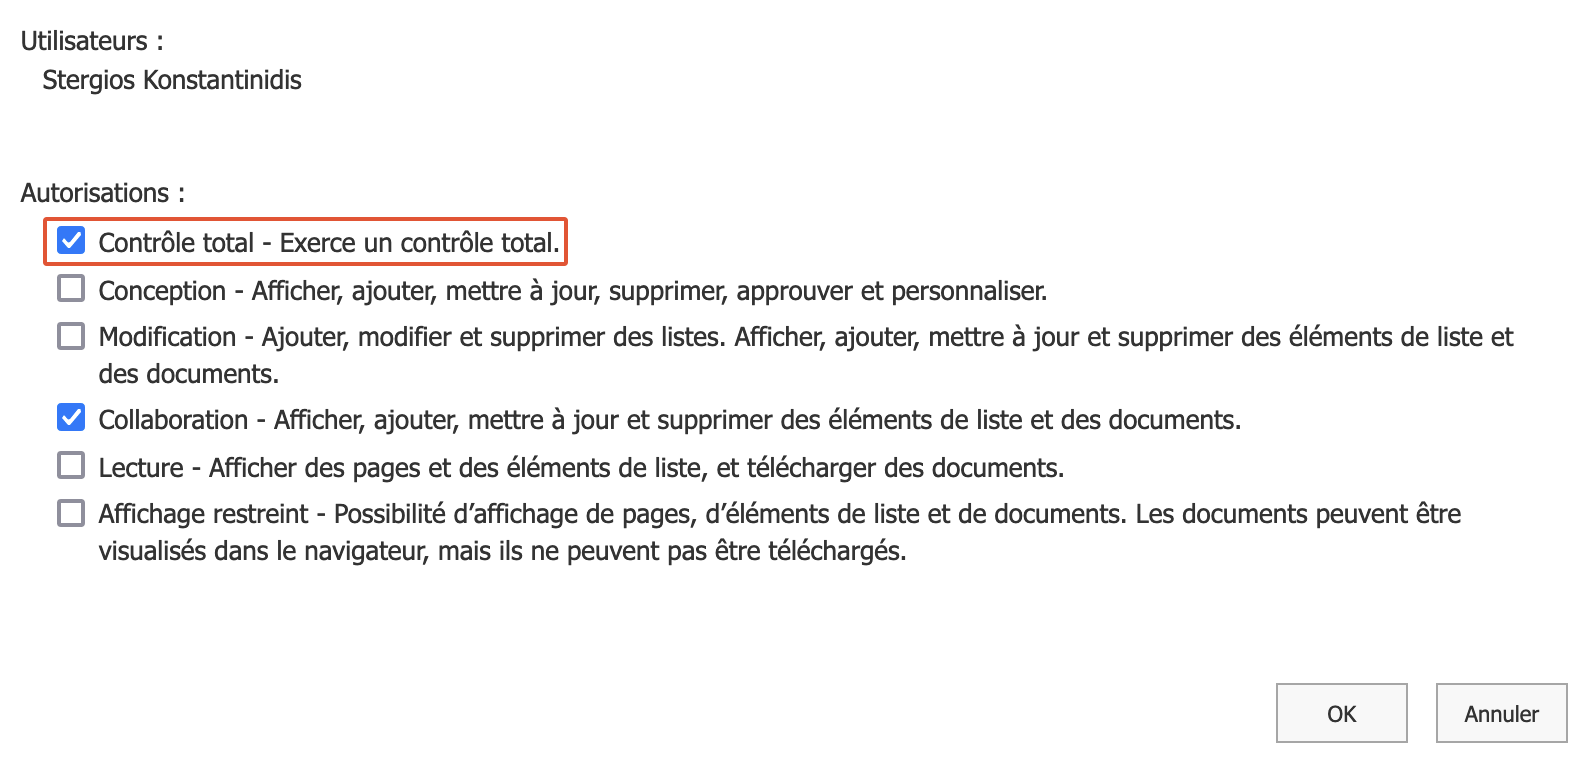
Adding/Removing Ownership of a Shared Folder
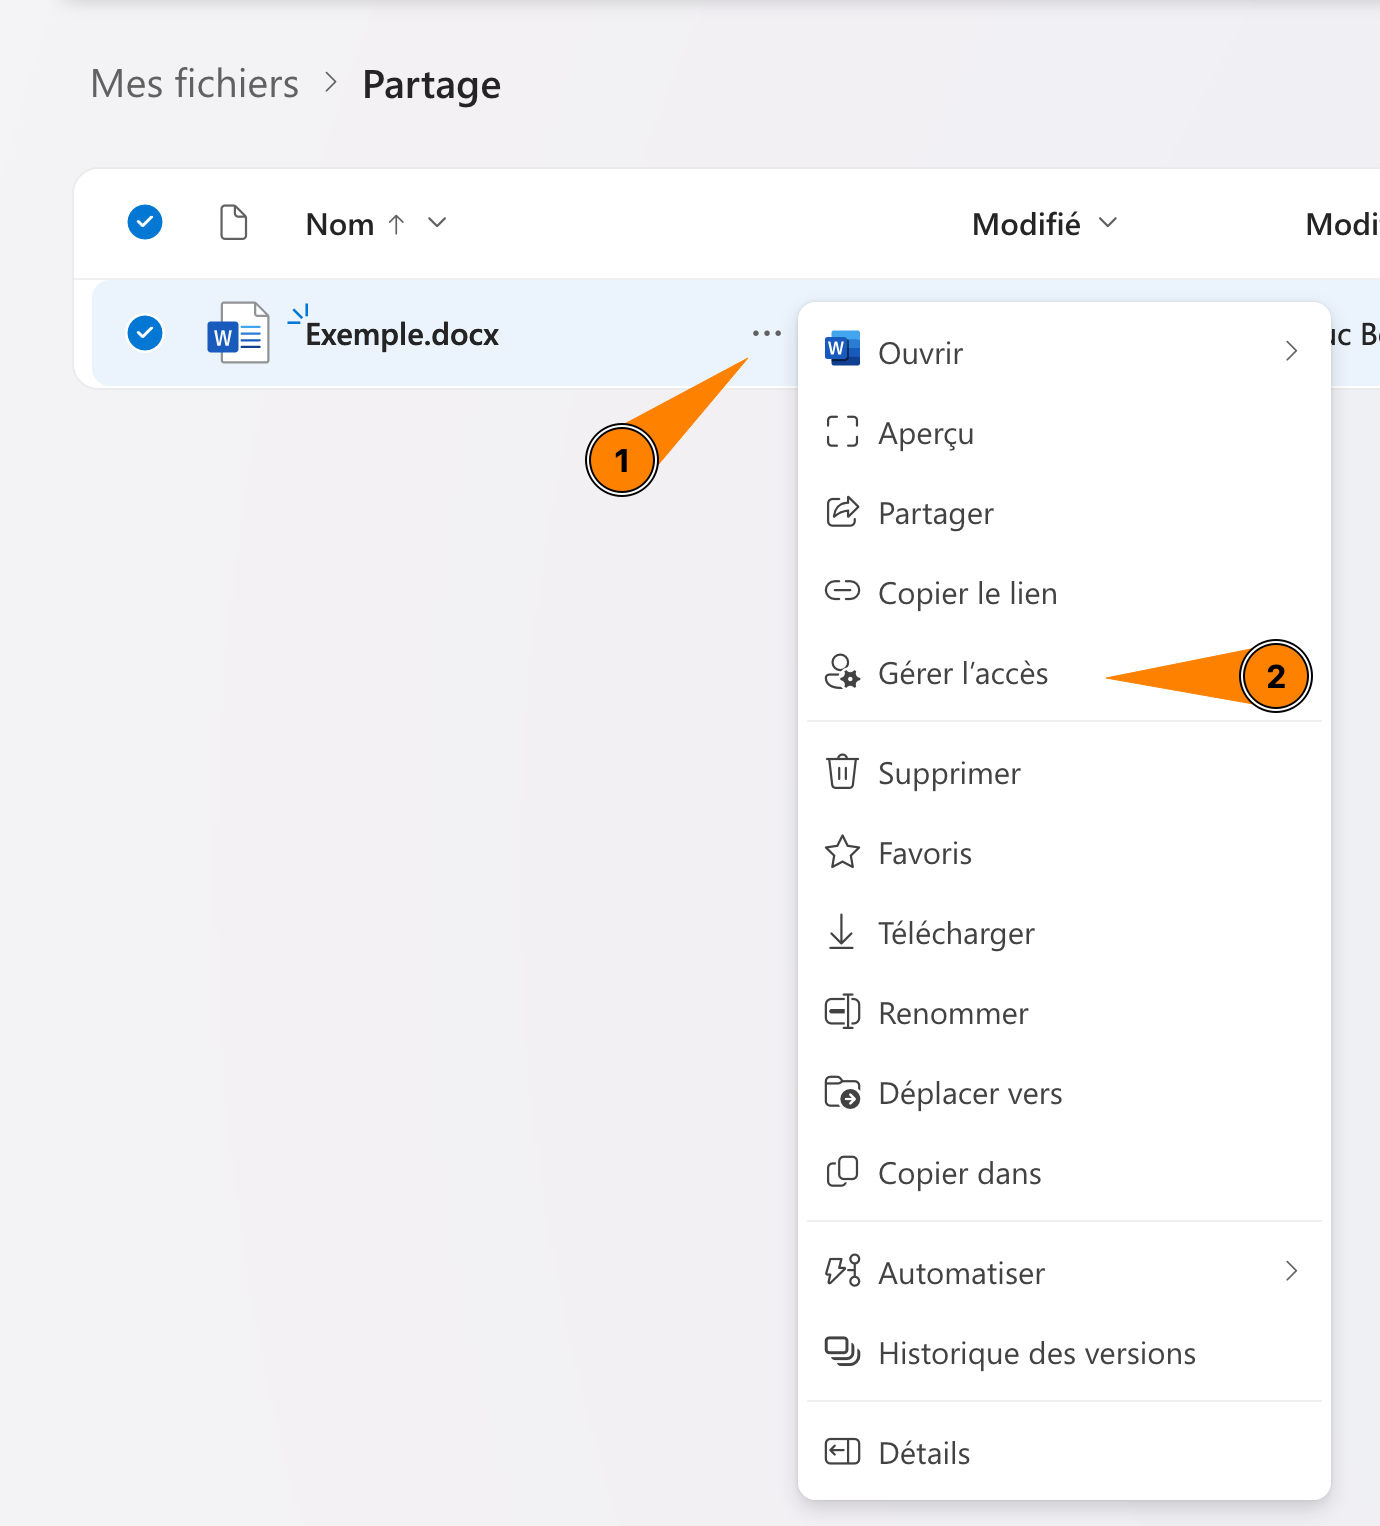
- Click on the three dots (1) of the file or folder you want to share and select "Manage access" in the menu (2).
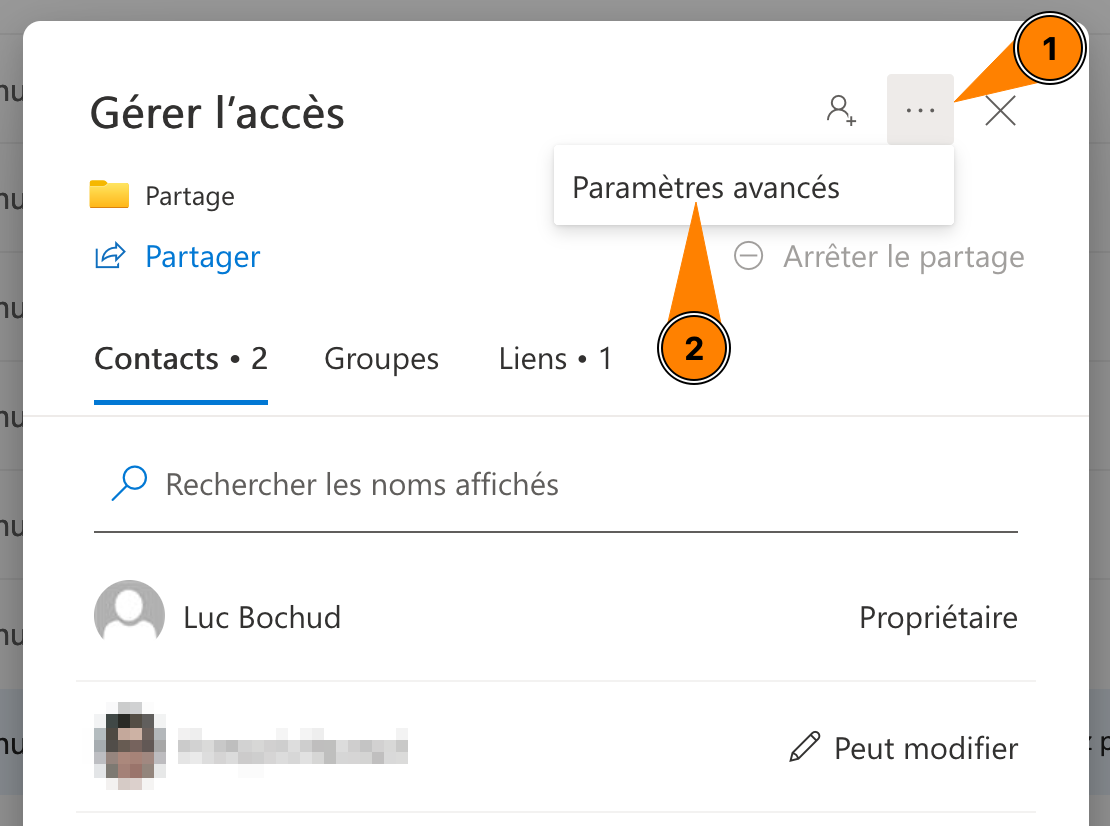
- Click on "..." (1) and then "Advanced settings" (2).
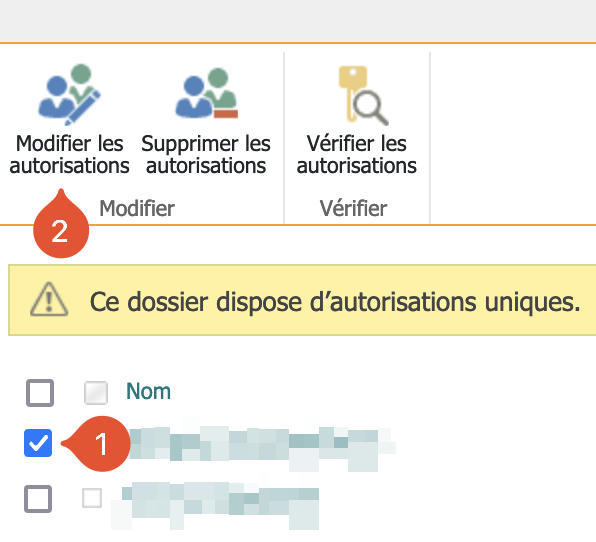
- Select the new/old owner (1) and click on "Edit permissions" (2).
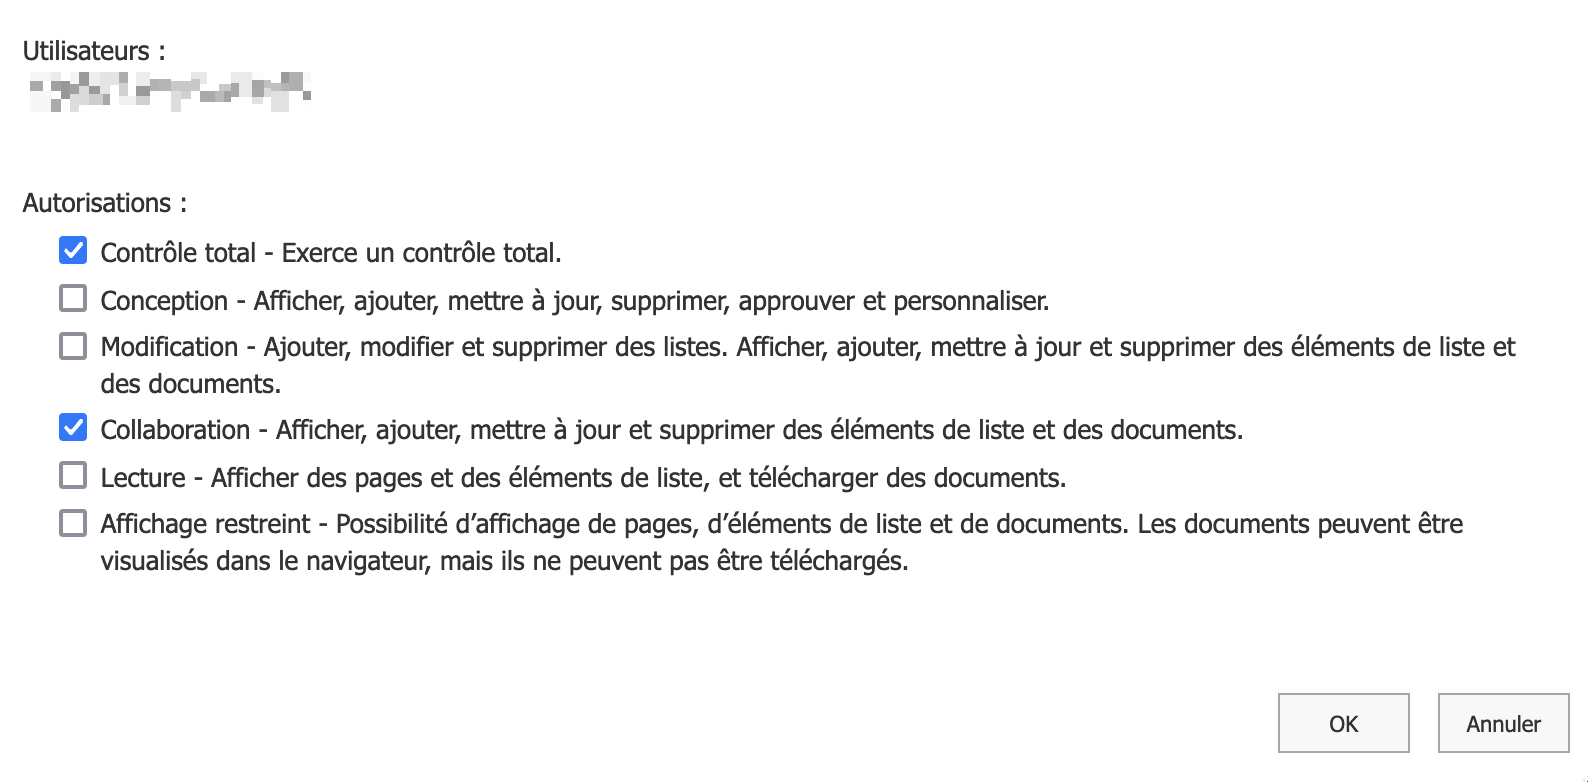
- Check/uncheck "Full control" at the top of the permissions list.

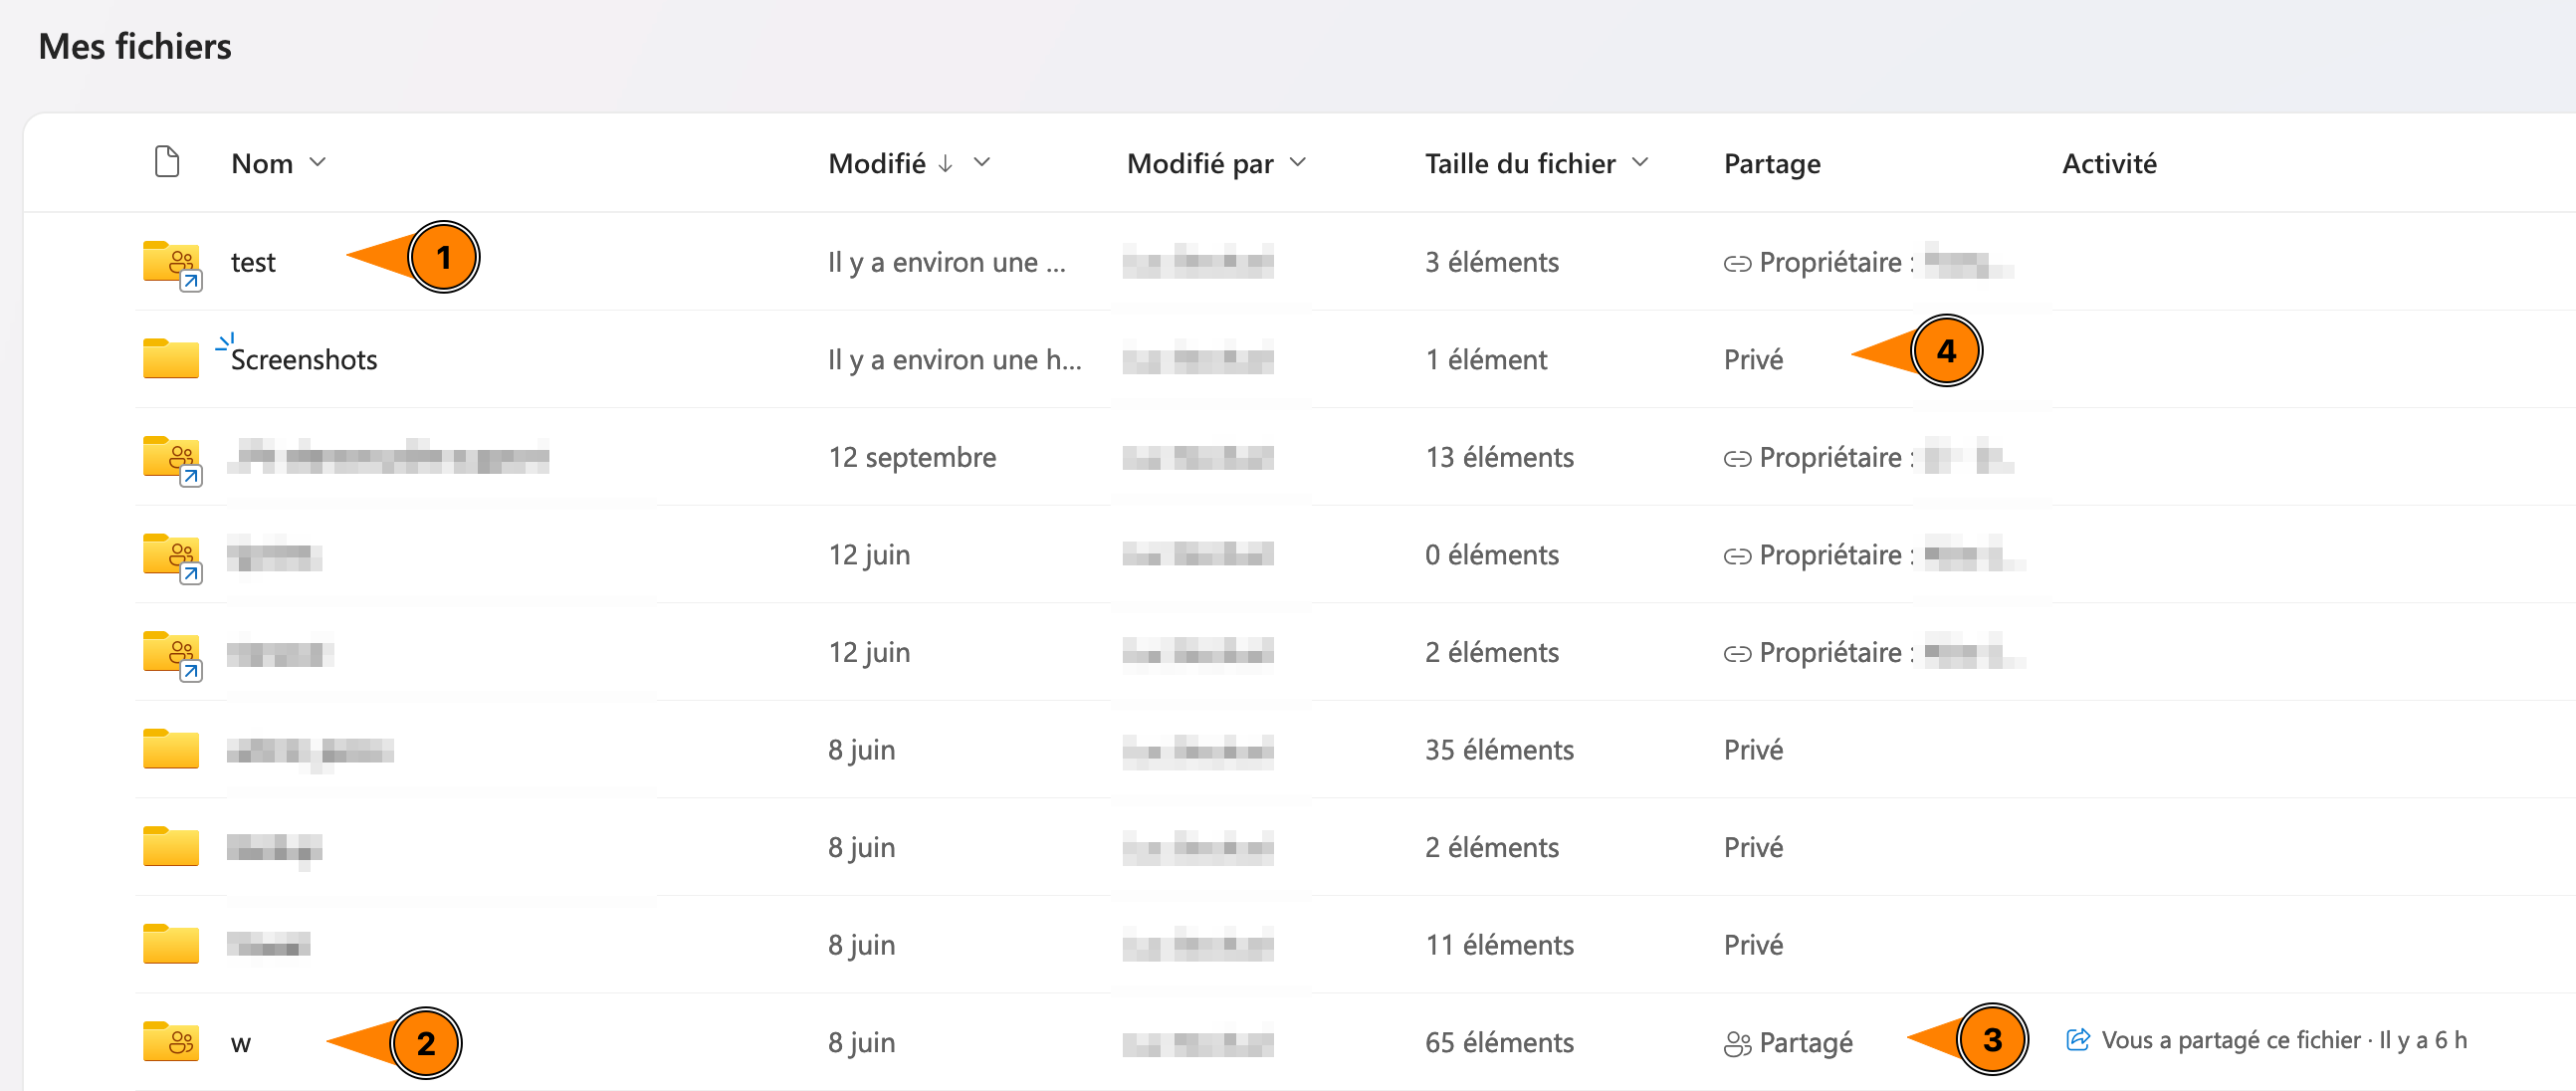
How to Find Shared Items
You can find files shared with you (2) and files shared by you (3) in the Shared tab of the web version of OneDrive.

Files and folders shared with you do not automatically appear in your OneDrive folder. To add them:
- Go to the Shared with you page.
- Once the file or folder you want to add to your OneDrive folder is selected, click on Add shortcut to My files in the top bar (1) or by clicking on the three dots (2).
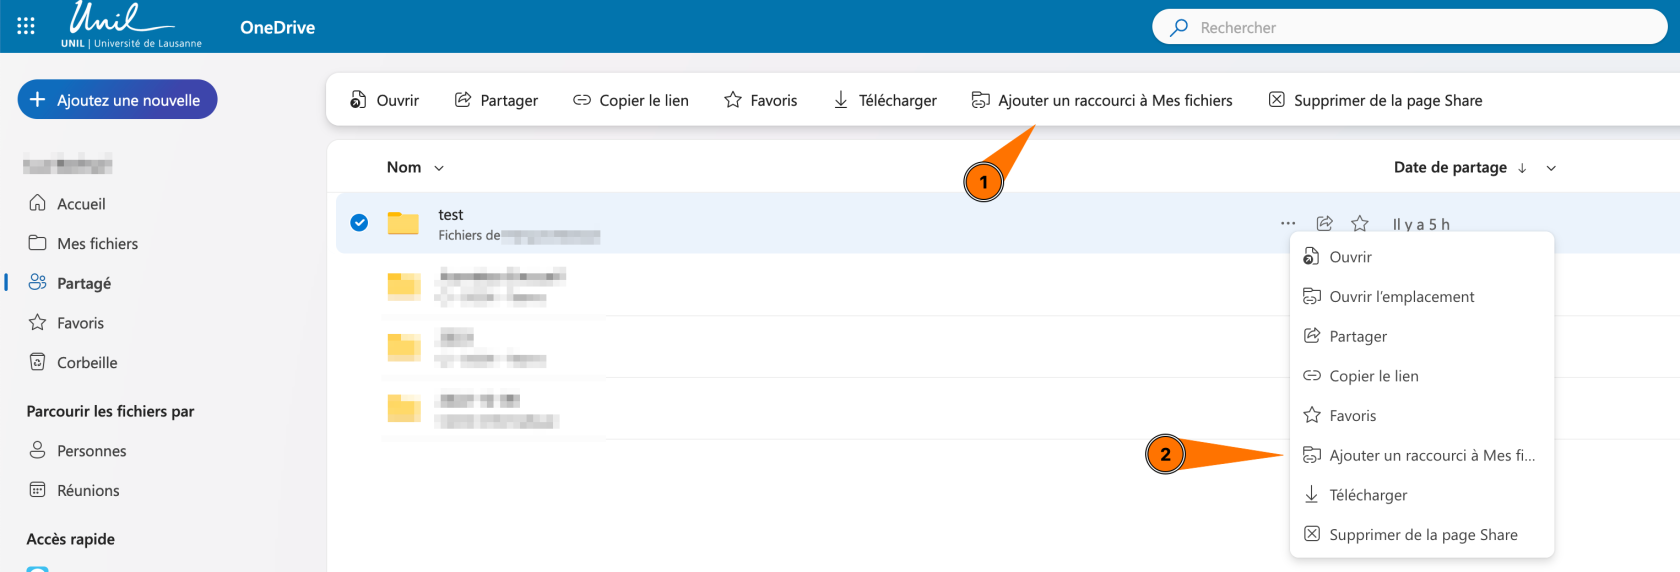
- You can see the folder in your OneDrive folder (1). You can distinguish it from a folder shared by you (2 and 3) or a folder to which only you have access (4). Folders and files added to "My files" are also synchronized in your OneDrive folder if you have installed the client on your computer.