
Validating a record
The voice in this video was generated by artificial intelligence.
Introduction
You will receive an email as soon as a record is available for validation. You can then access the platform to process it. To do so, simply follow the instructions below
Workspace
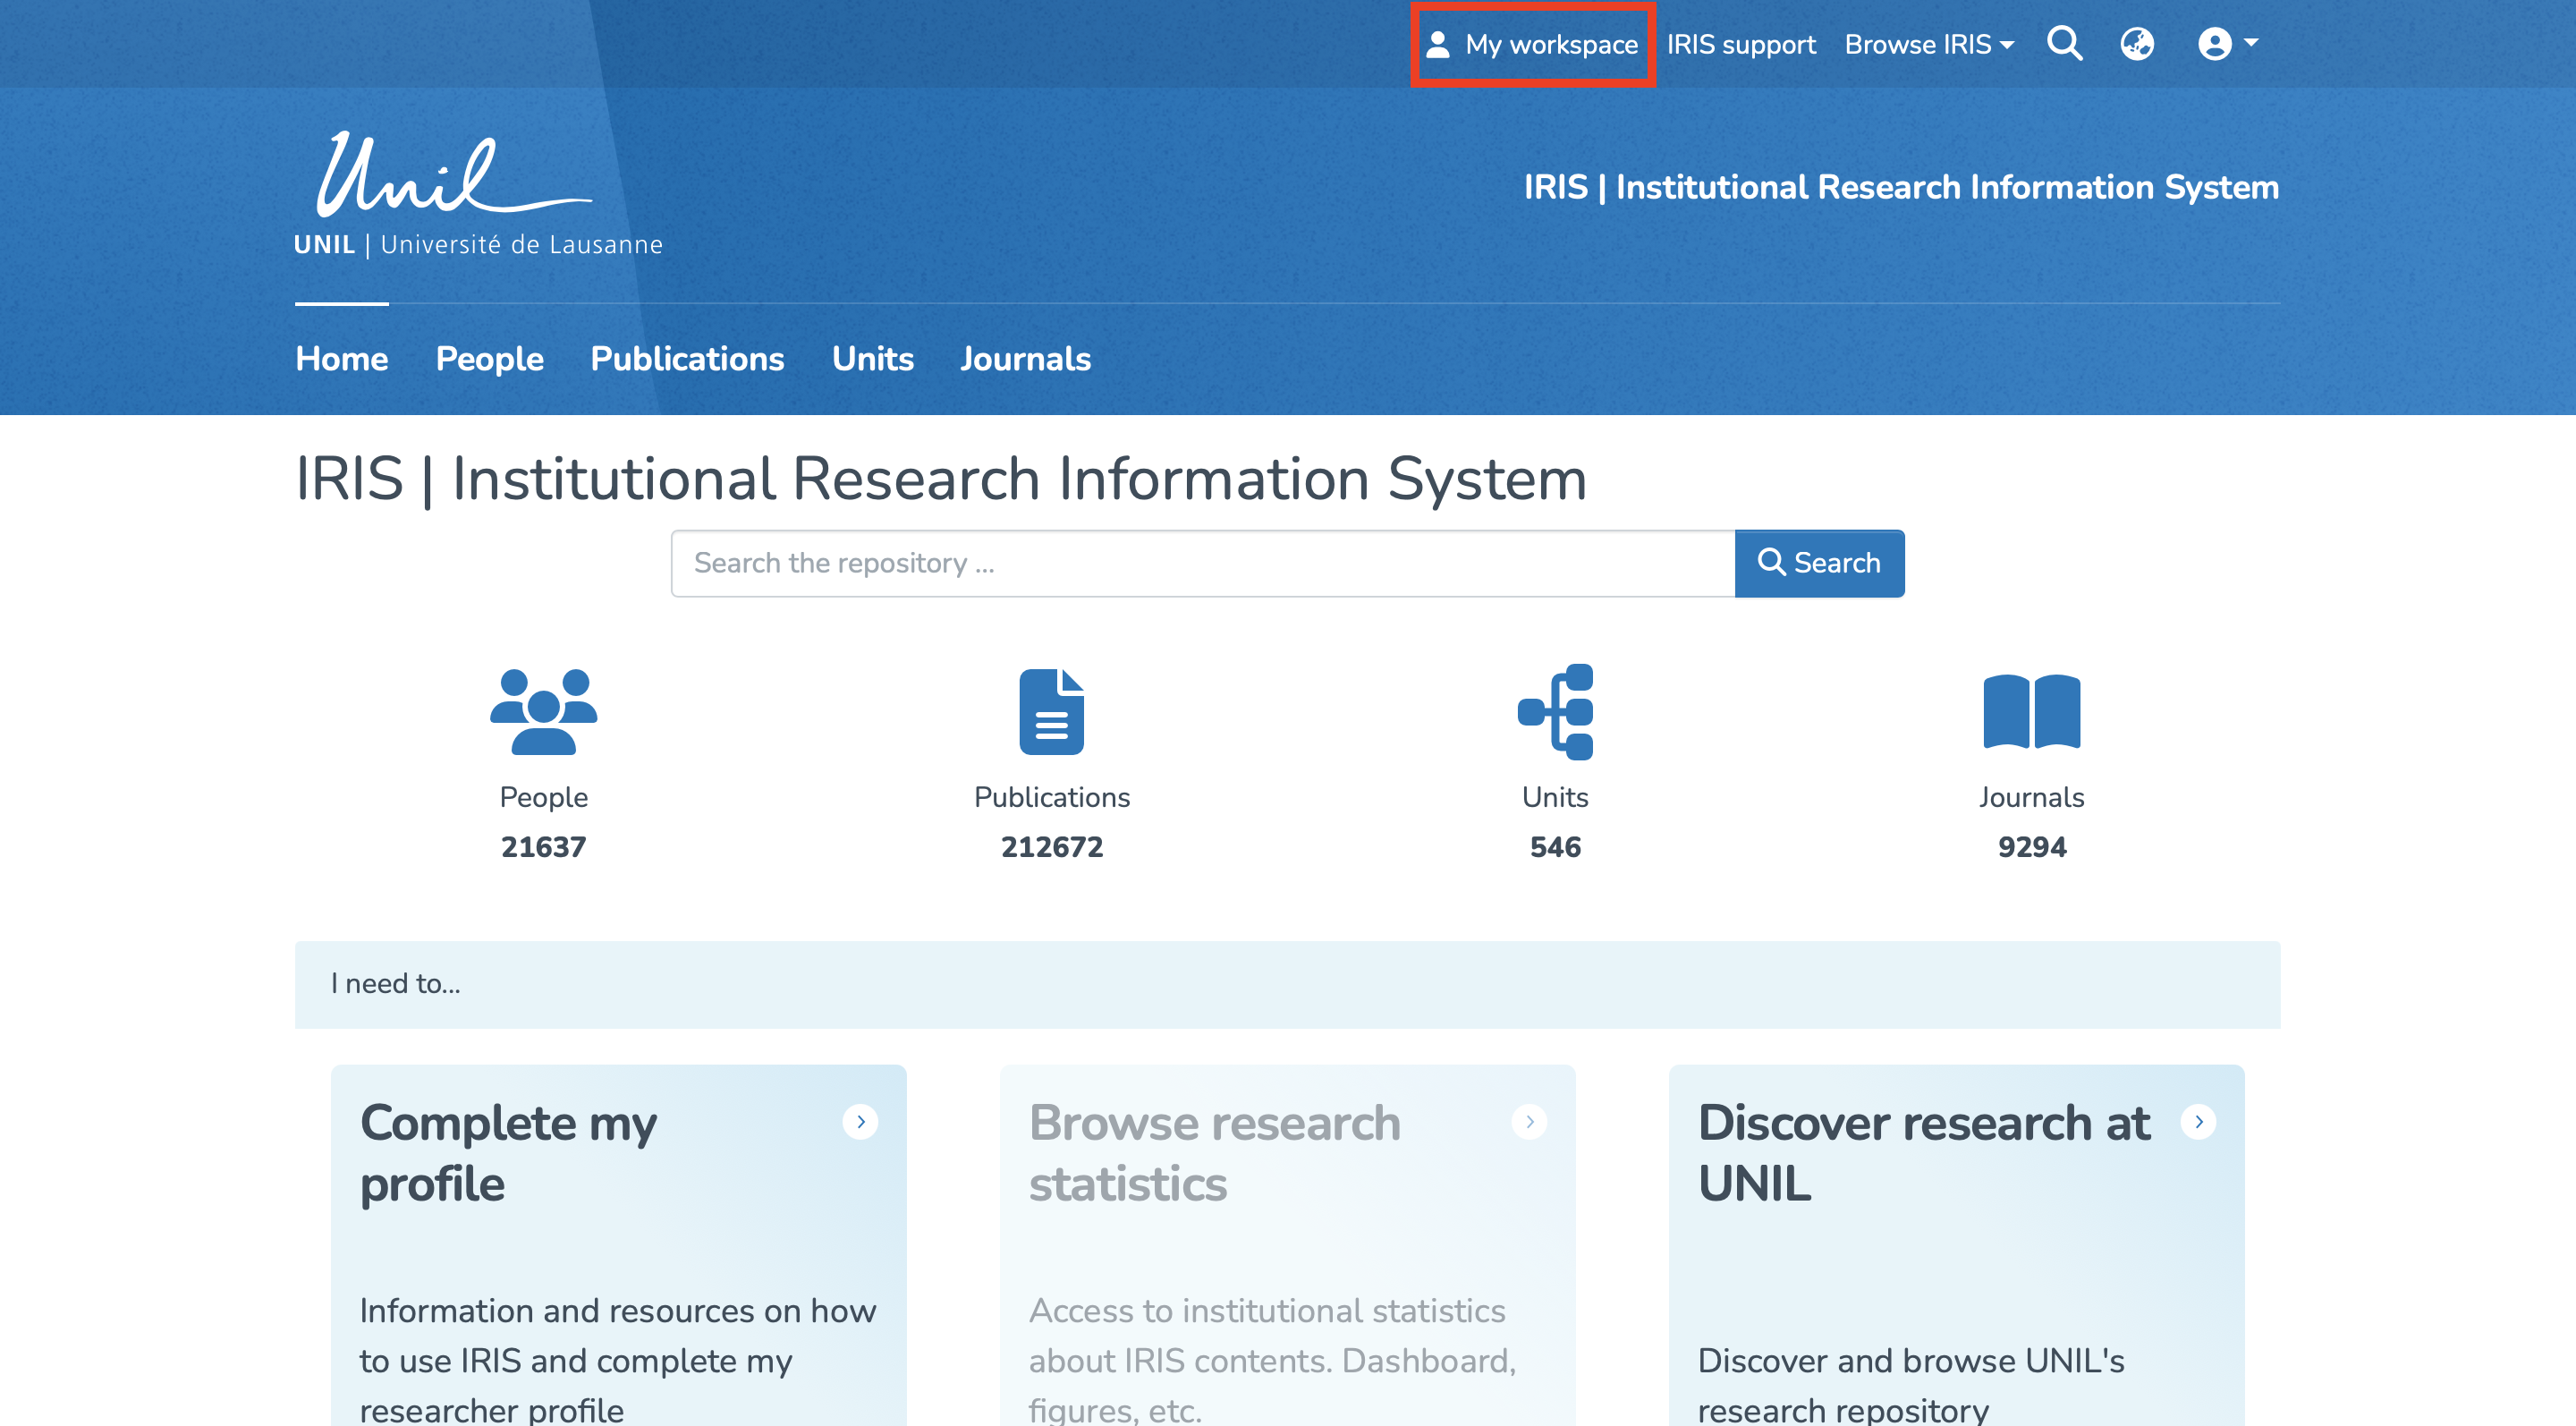
First, you will need to access your workspace by clicking on “My Workspace.”
Accessing Records to Validate
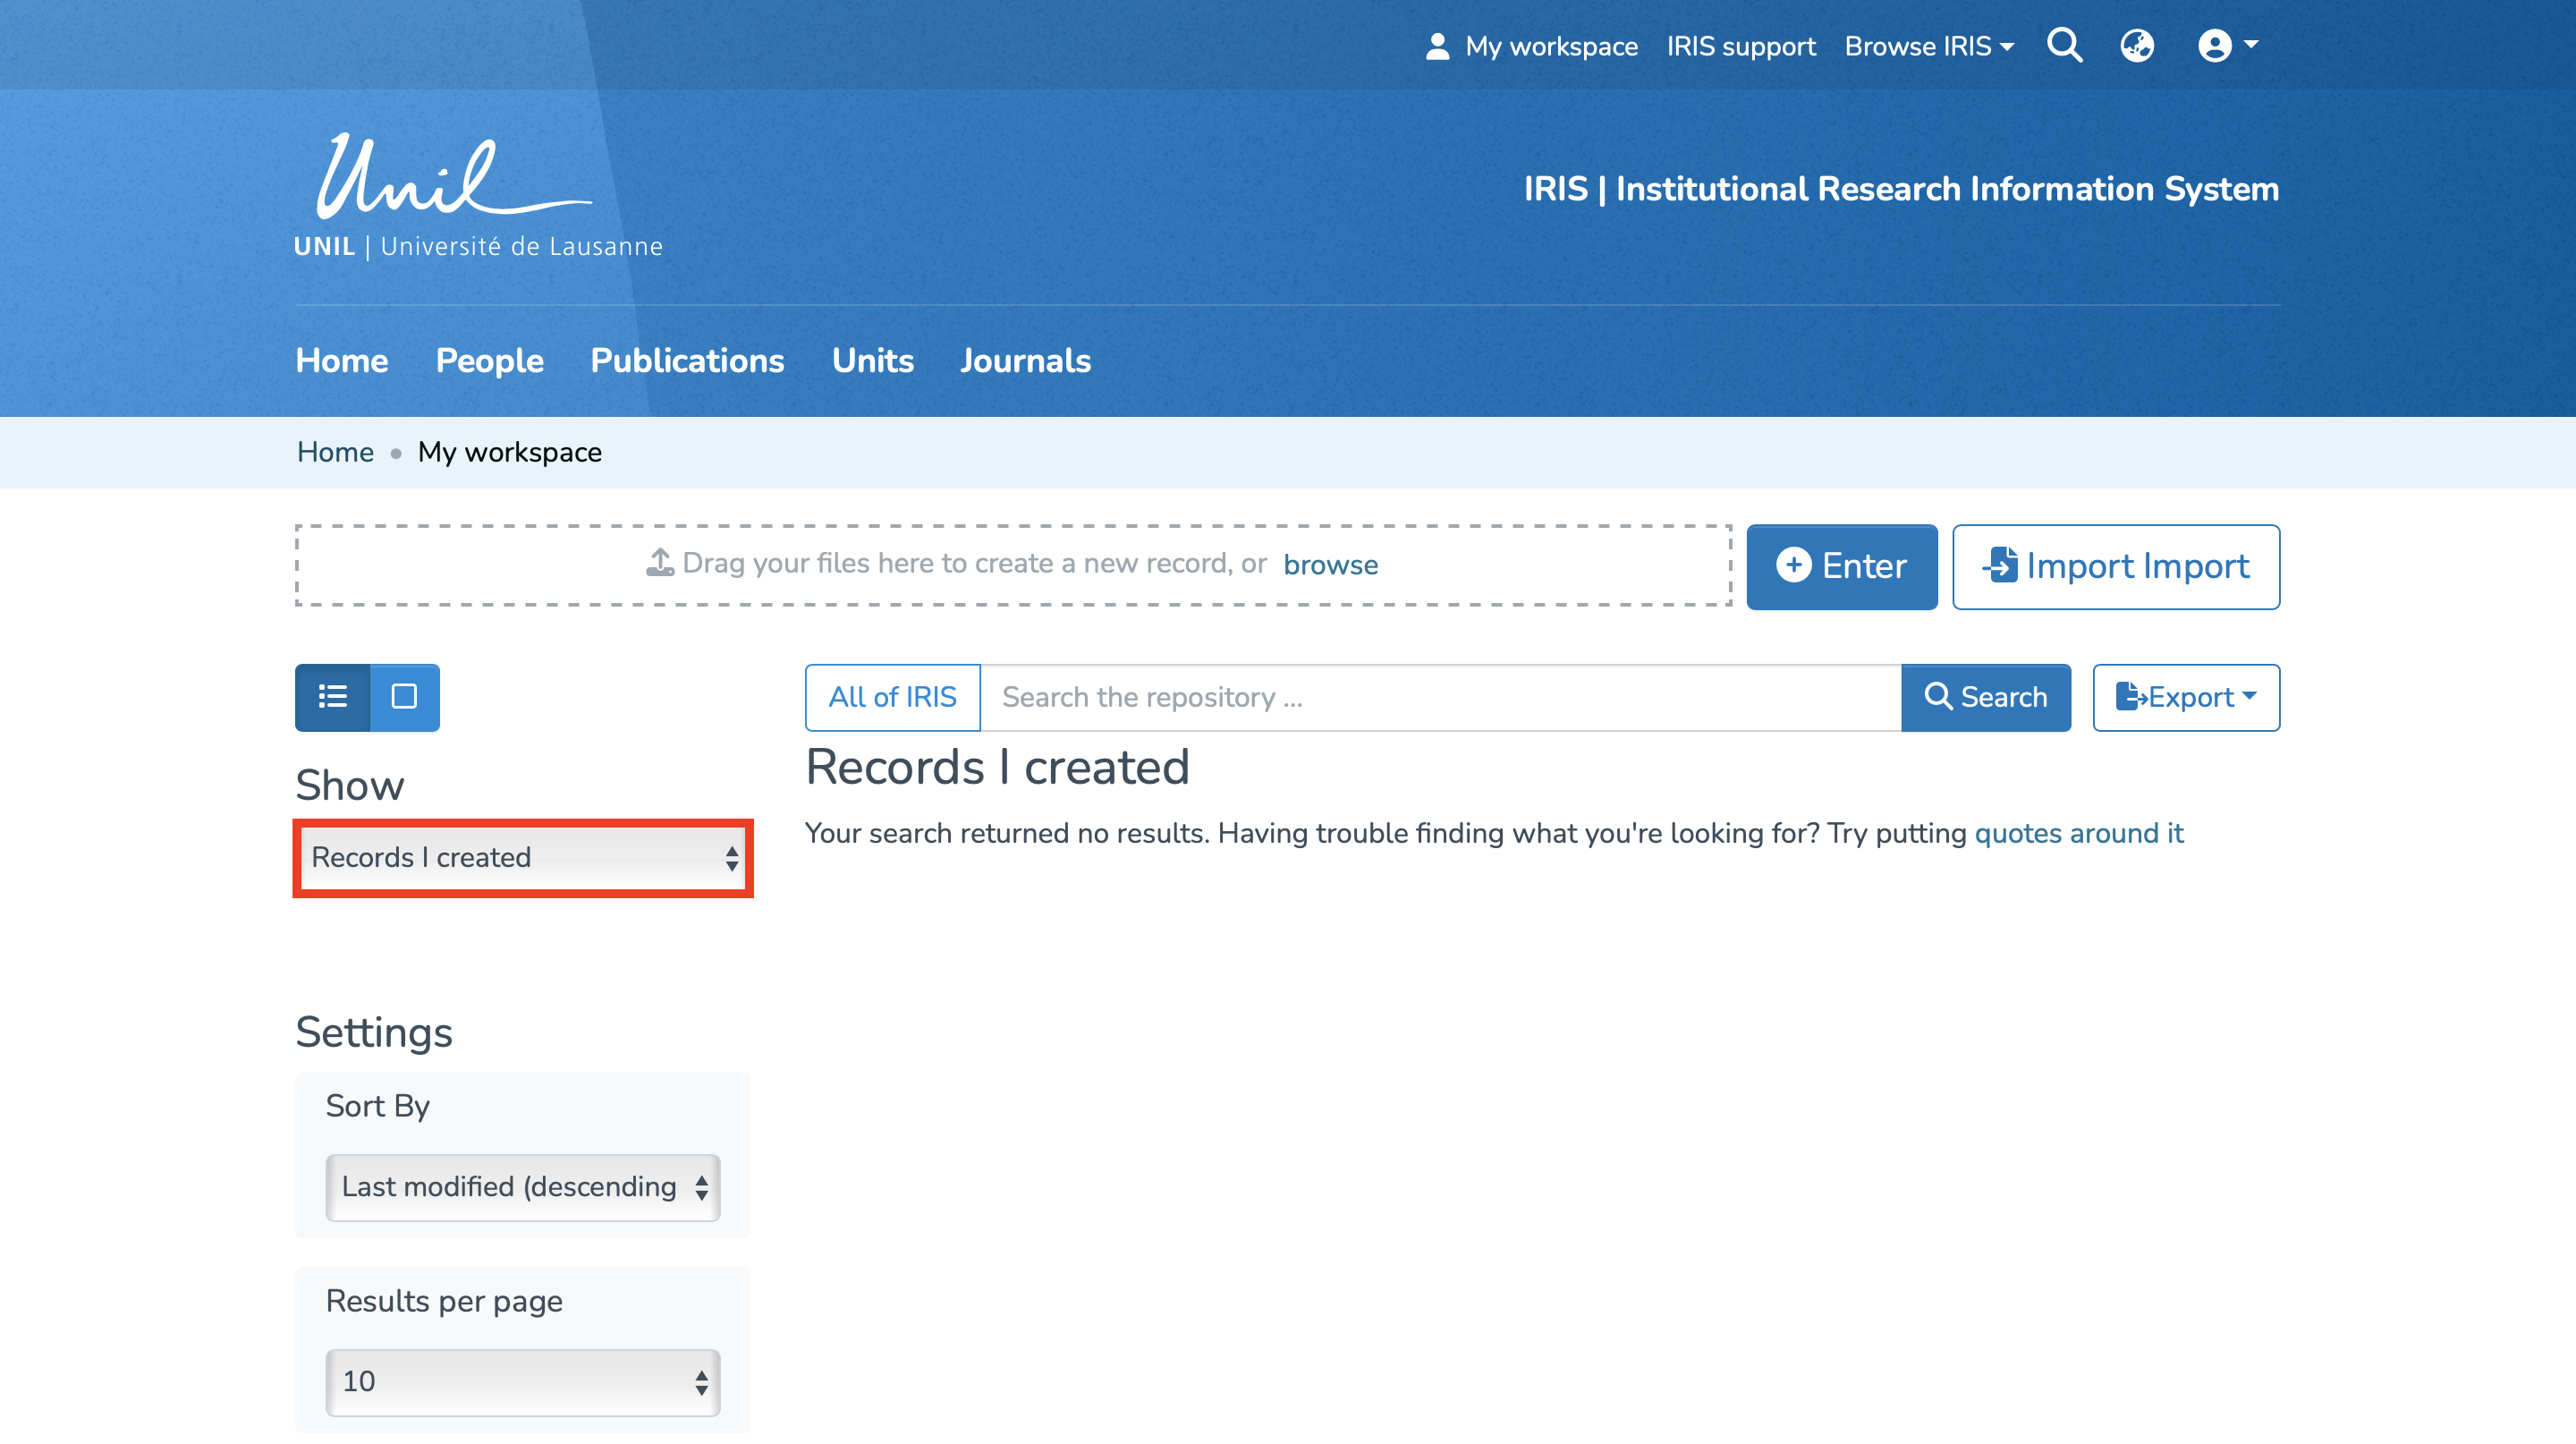
You will automatically be redirected to the page containing the records you have created. To access other records, click on the button highlighted in red.
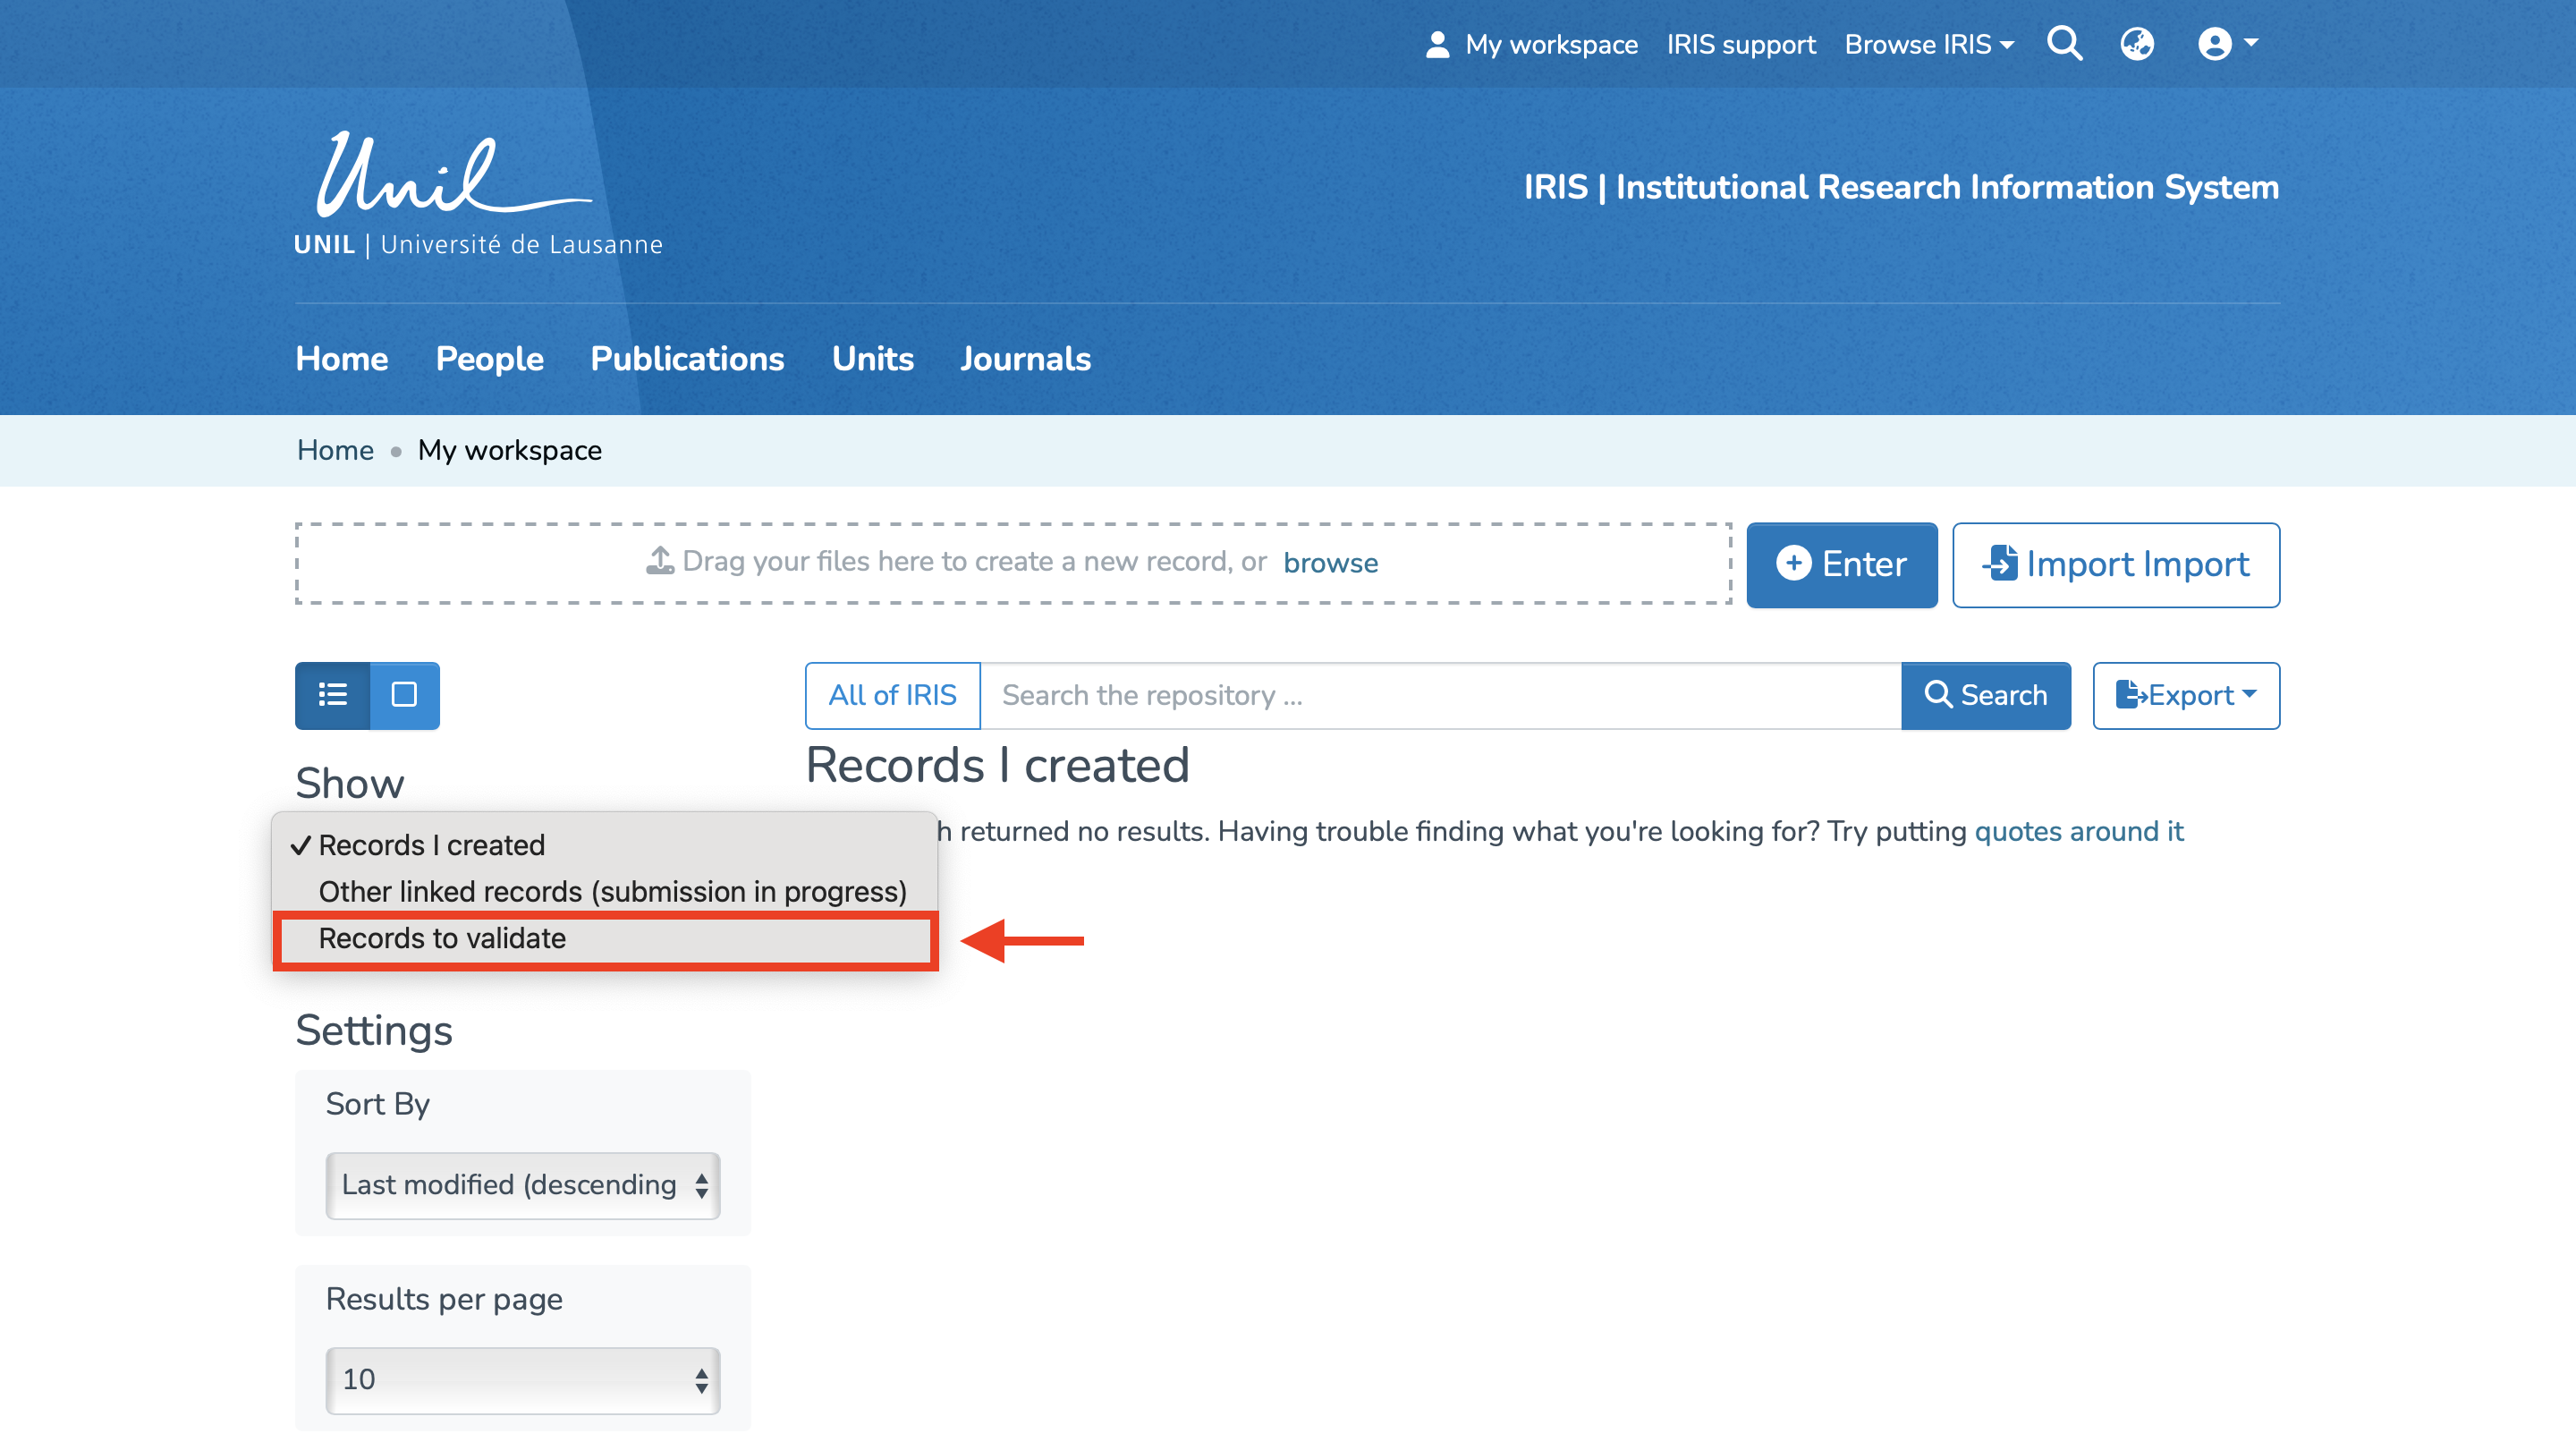
Once you have done this, a dropdown menu will appear with several types of records. Select “Records to Validate” to view those that require validation. The page will automatically refresh with the corresponding records.
Available Features
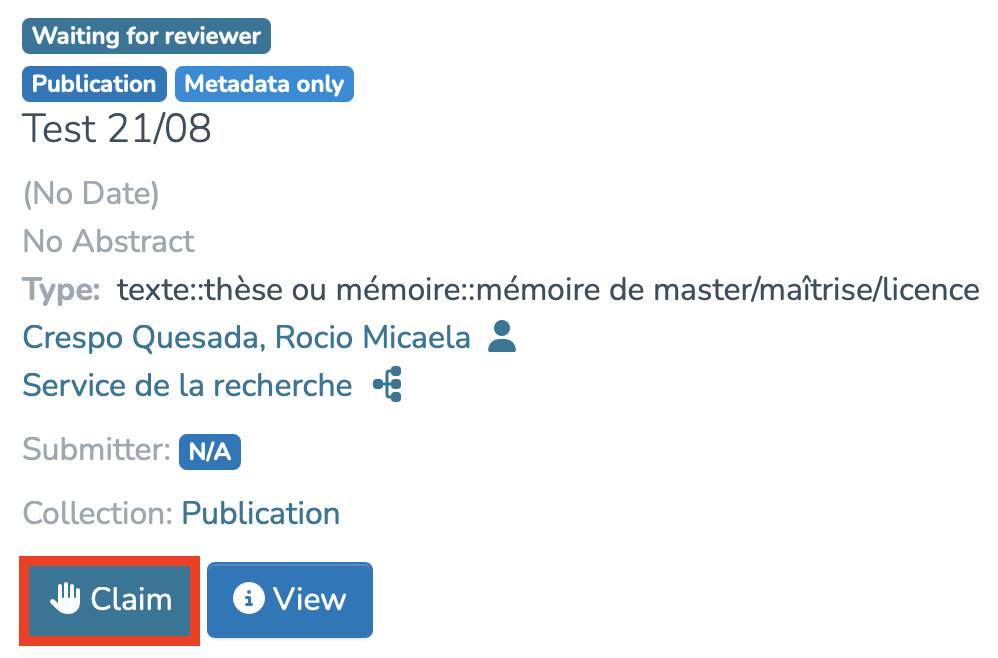
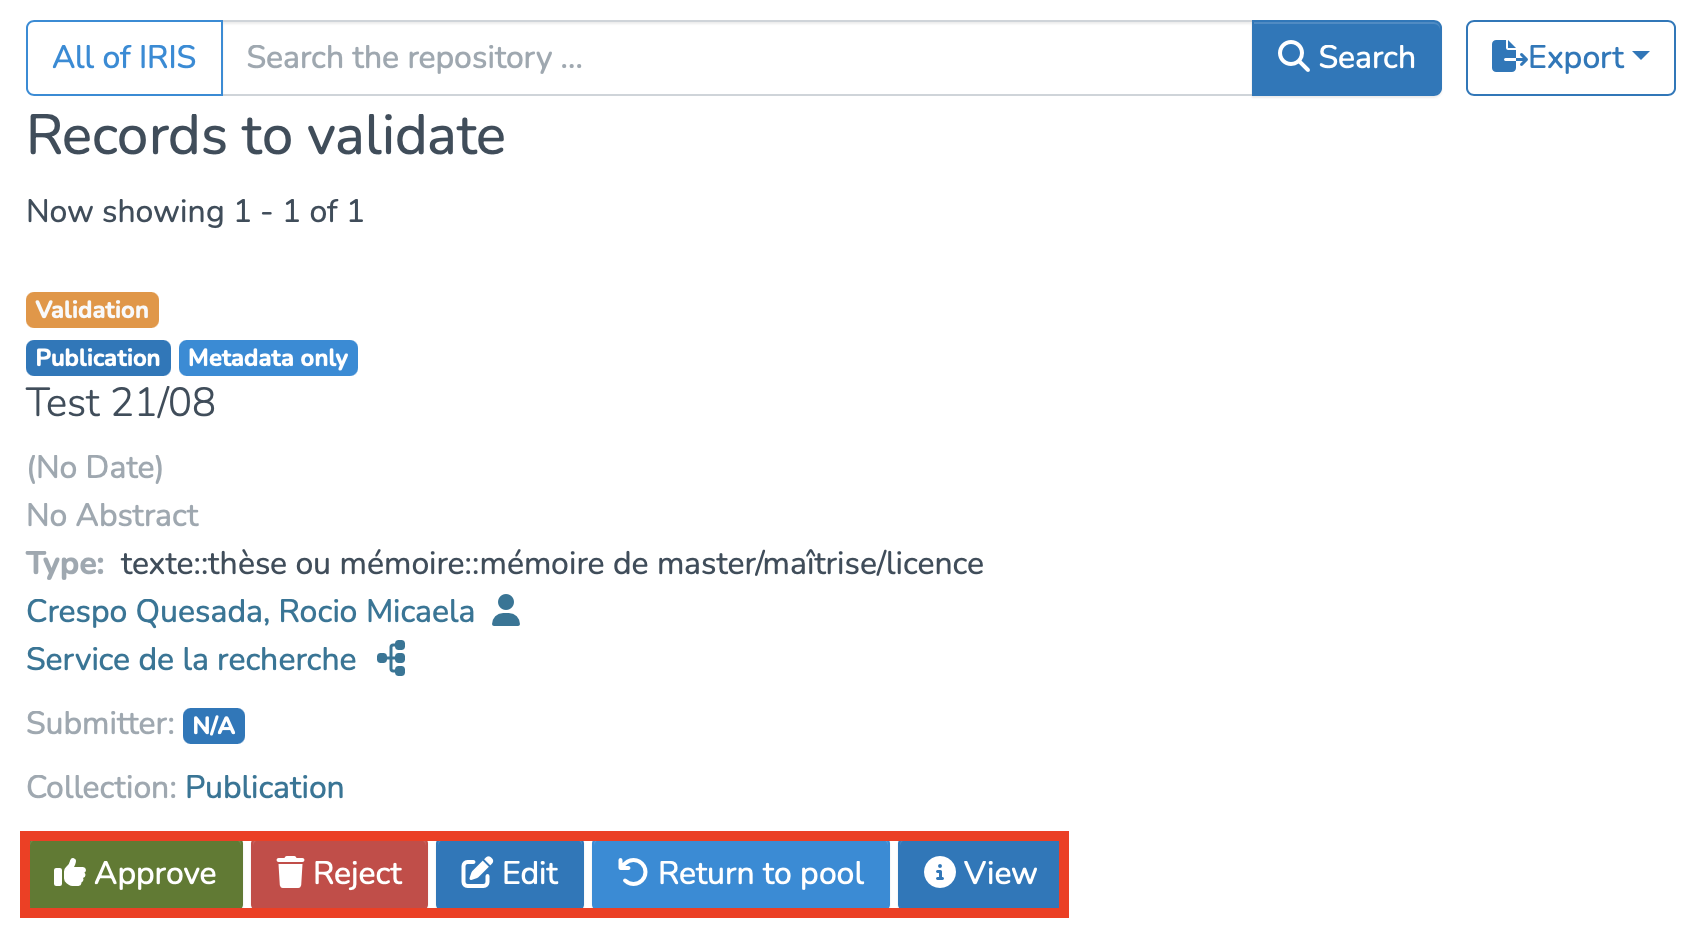
You are now on the page containing all the records you need to validate. To start the validation, first click on “Claim” under the relevant record.
You can then perform several actions by clicking on the following buttons:
-
Approve : If you have reviewed the item and it is suitable for inclusion in the collection.
-
Reject : If the reviewed item is not ready to be included in the collection. You will be asked to indicate the reason for the rejection and further edits the user should make before resubmission.
-
Edit : If you wish to modify the item’s metadata.
-
Return to pool : If you wish to return the task to the pool so that another user may perform the task
-
View : If you wish to display the item’s metadata.
Aucun commentaire à afficher
Aucun commentaire à afficher